
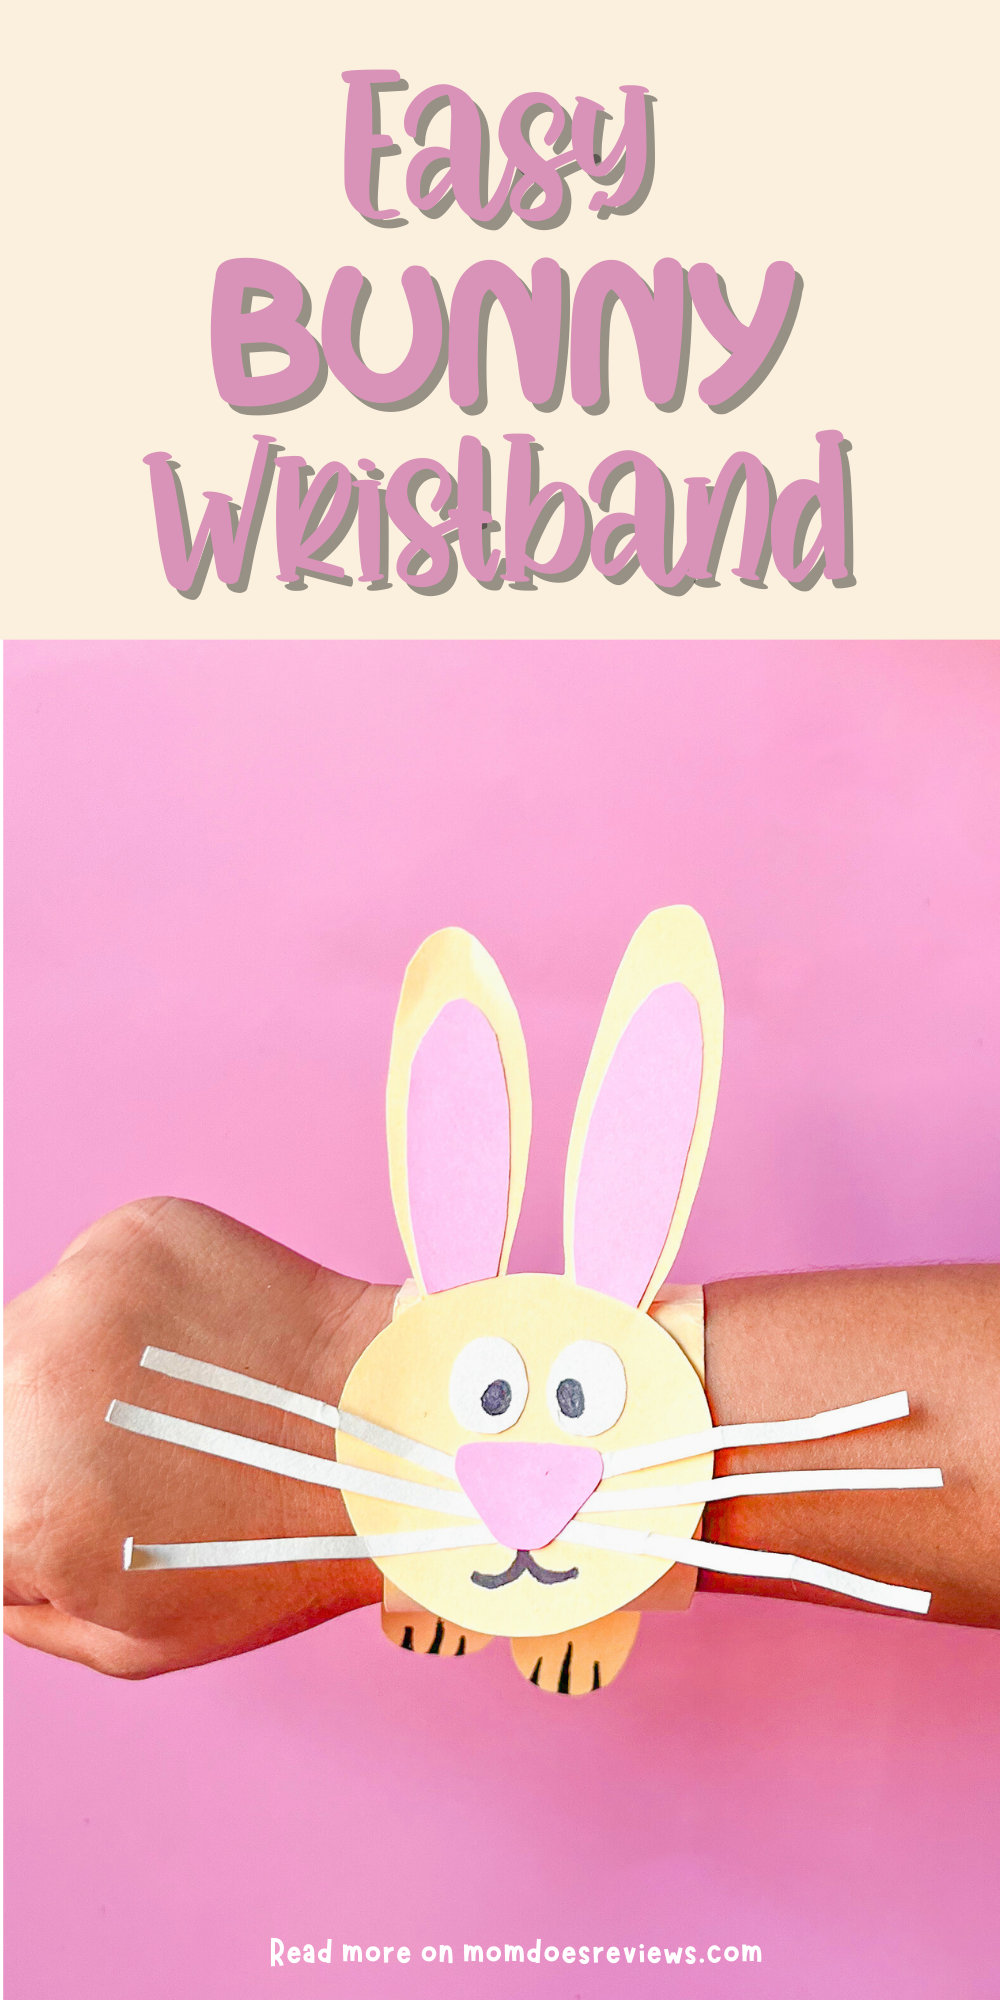
Adorable Bunny Wristband Craft for Kids
If you’re looking for a simple and adorable Easter activity for kids, this Bunny Wristband Craft is the perfect project. With just a few craft supplies like colored paper, scissors, and glue, kids can create their own cute bunny bracelet that they can proudly wear. It’s a fun way to combine creativity with hands-on crafting during the spring season.
This craft is great for encouraging kids to practice important skills while having fun. Cutting shapes, gluing pieces together, and decorating the bunny’s face all help build fine motor skills and creativity. Whether you use colored paper or print out a template for kids to color, this bunny wristband craft can easily be customized to suit different ages and abilities.
The best part is how quick and easy this craft is to make. In just a short amount of time, kids can create a cute bunny bracelet complete with paws, whiskers, and even a fluffy tail. It’s a great activity for Easter parties, classrooms, playdates, or a fun afternoon craft at home.
More Fun Easter Crafts:
If you’re looking for a simple and adorable Easter craft to make with the kids, this paper plate chick craft is the perfect activity. With just a few basic supplies—like a paper plate from the Dollar Store—you can transform everyday materials into a bright and cheerful Easter chick
What could be more fun than dying eggs in a fun, unique way? These Tissue Paper Dyed Easter Eggs are easy to do and they are absolutely beautiful!
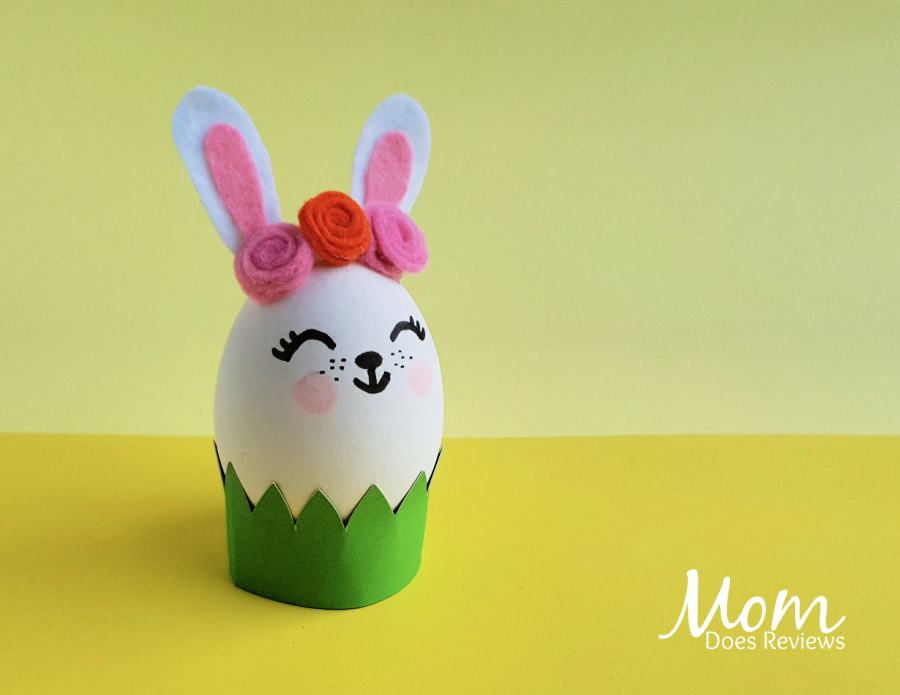
This Easter, kids can decorate their eggs like an Easter Bunny! To make this super cute Easter Egg Bunny, just gather a few supplies (felt, green cardstock paper, glue and a sharpie) and in less than 20 minutes, you have this fun craft!
✂️ Materials You’ll Need:
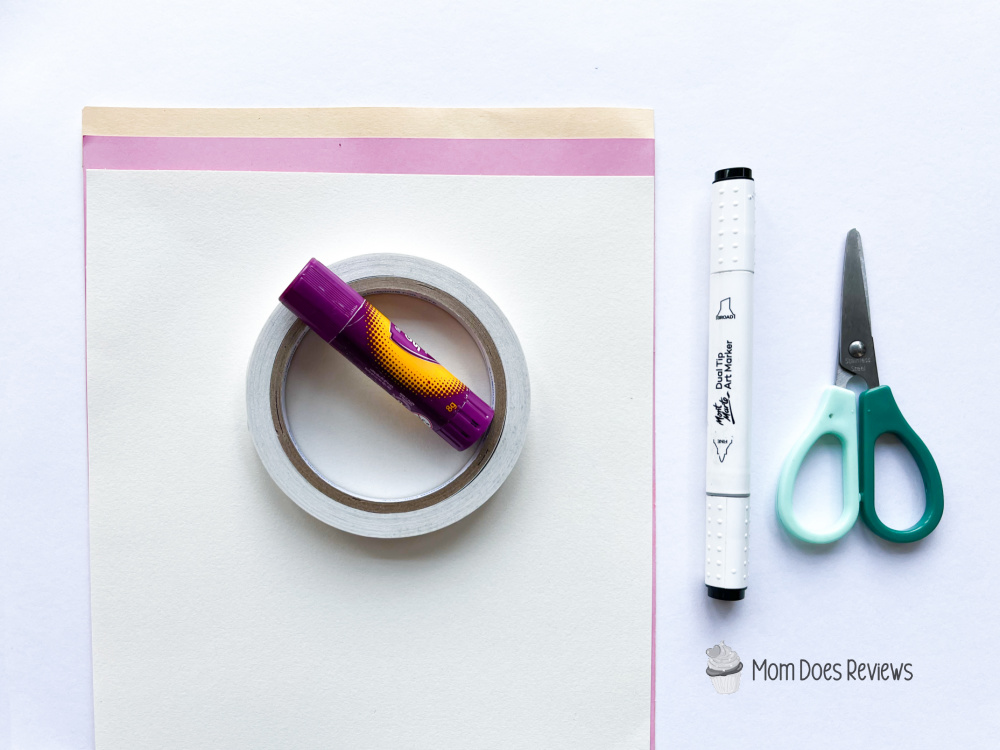
- Colored papers (we used yellow, pink and white) or the printed coloring file HERE
- Scissors
- Glue
- Double-sided tape
- Markers or crayons
- White circle foam or pompom (optional)
🪄 Directions:
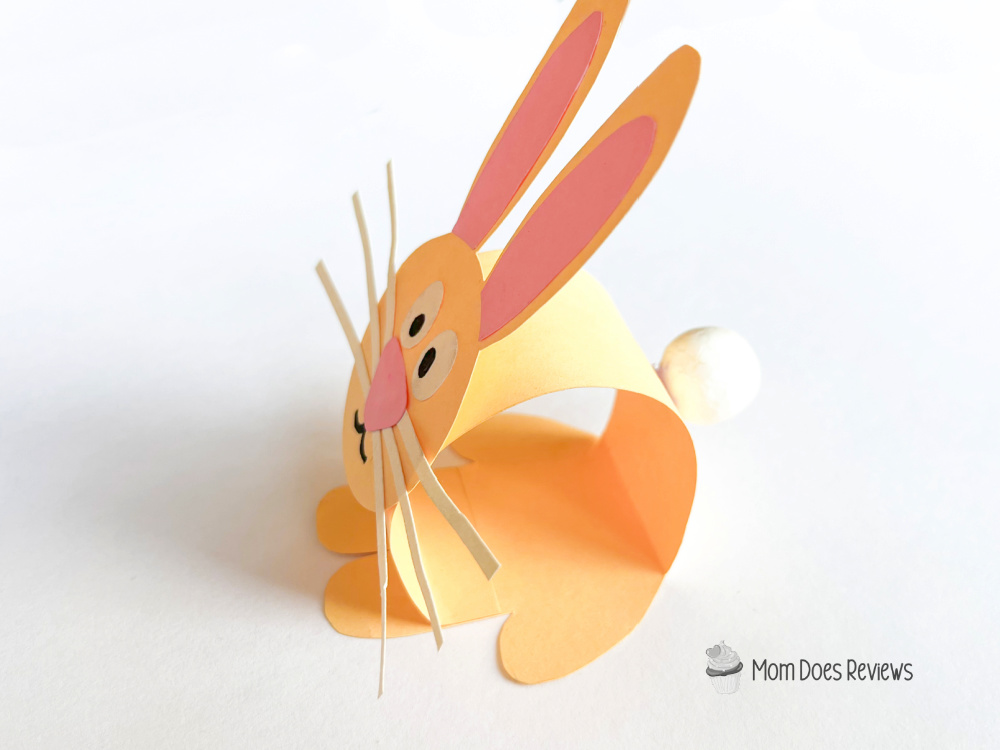
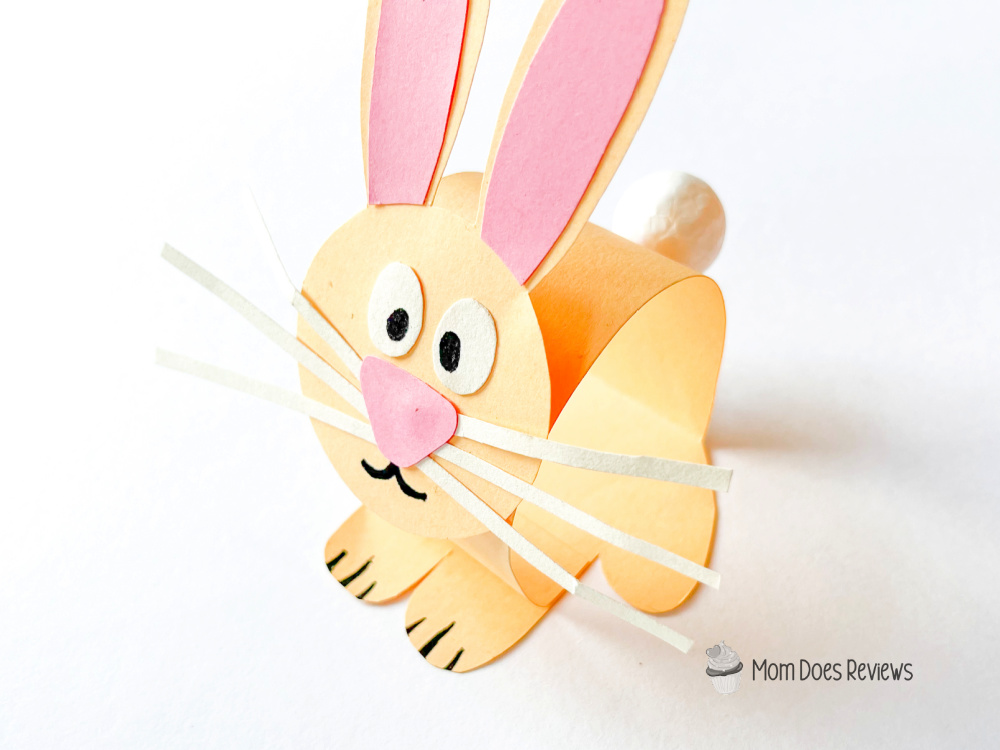
- Gather all the needed materials. Choose a light brown or beige color for the bunny’s body and pink for the ears and nose. You can also let kids color our template and then help them cut.
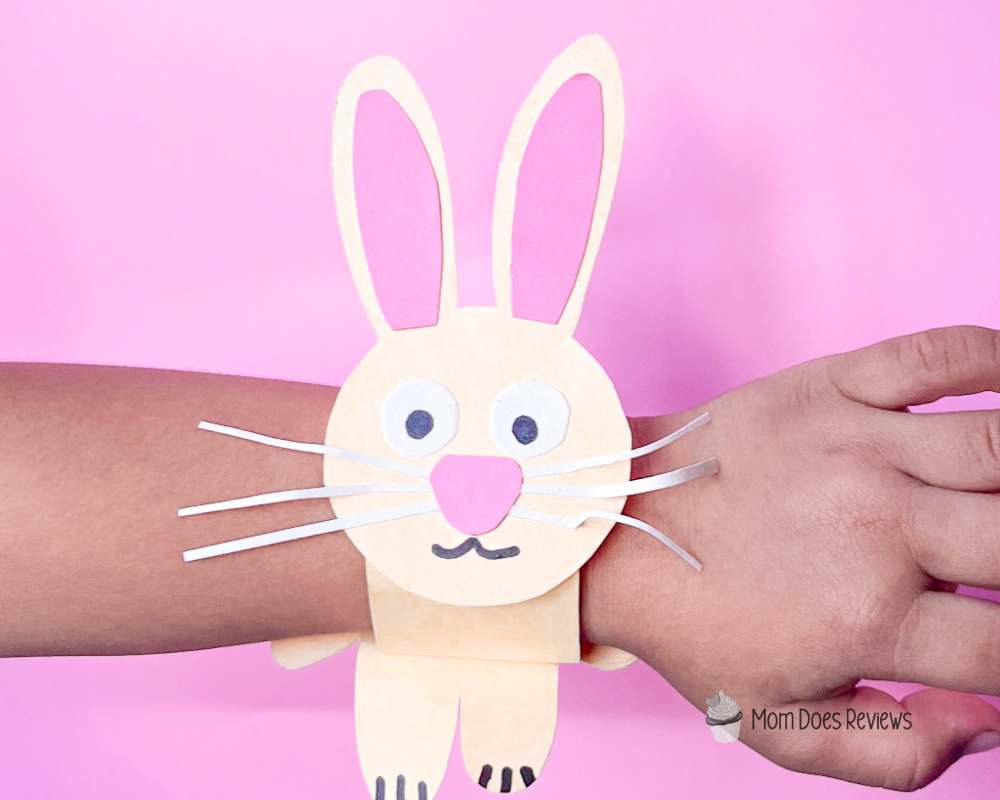
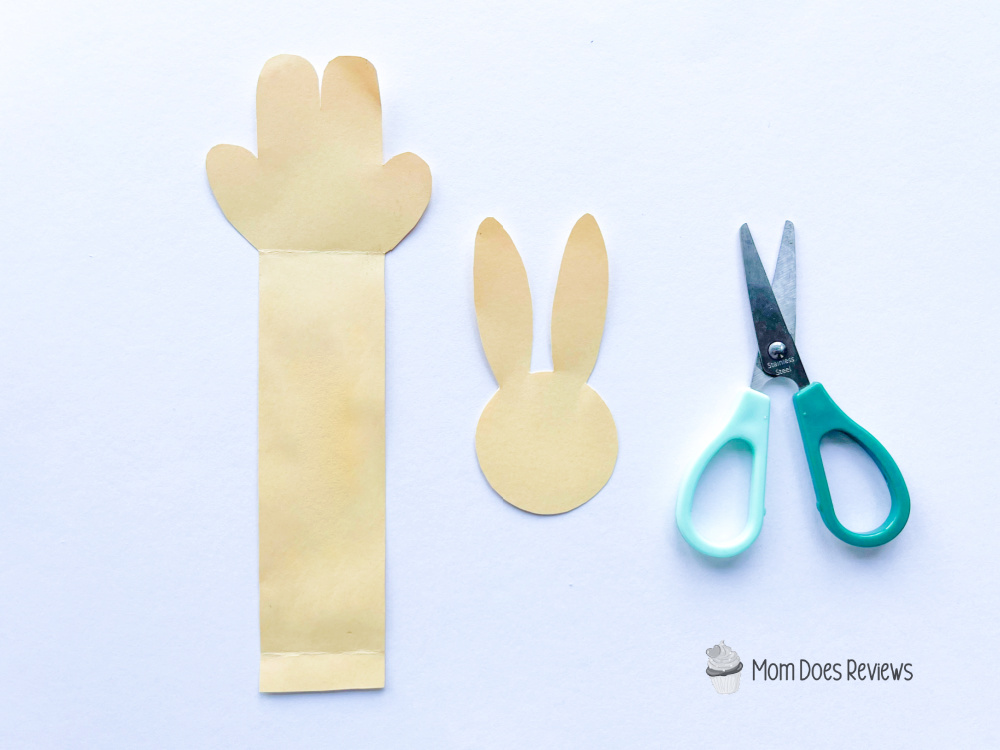
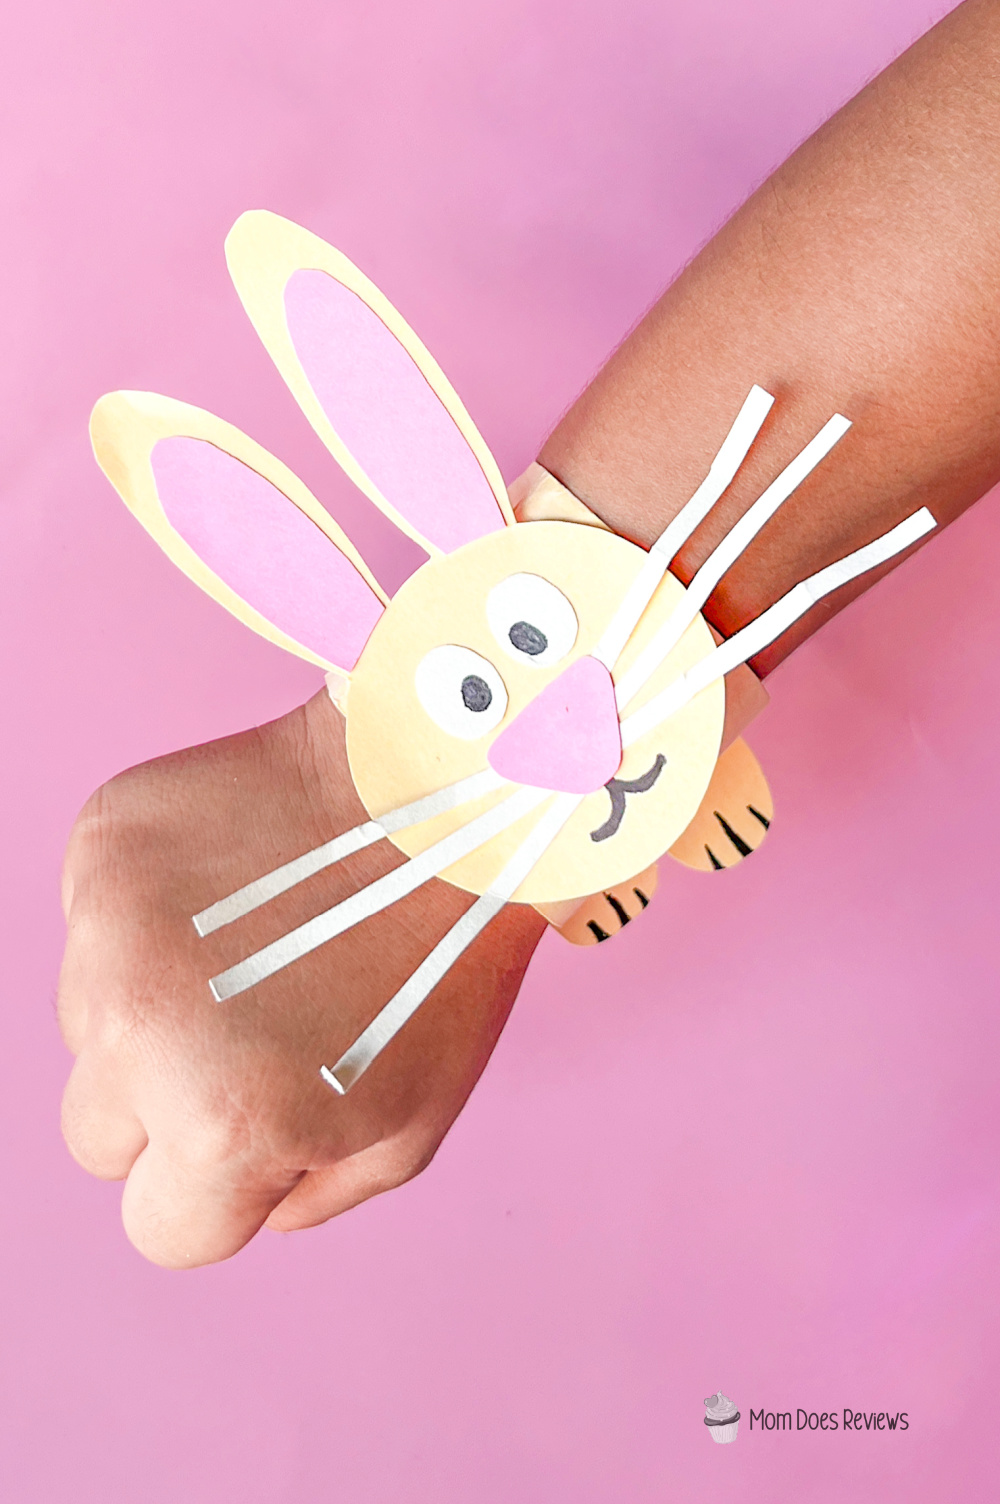
- Cut a long strip of paper for the wristband. It should be wide enough to fit comfortably around the wrist. Adjust the length depending on your kids’s wrist. At one end of the strip, cut out a bunny paw shape to resemble the front paws of a rabbit.
- Cut a circle for the bunny’s face with two oval-shaped ears.

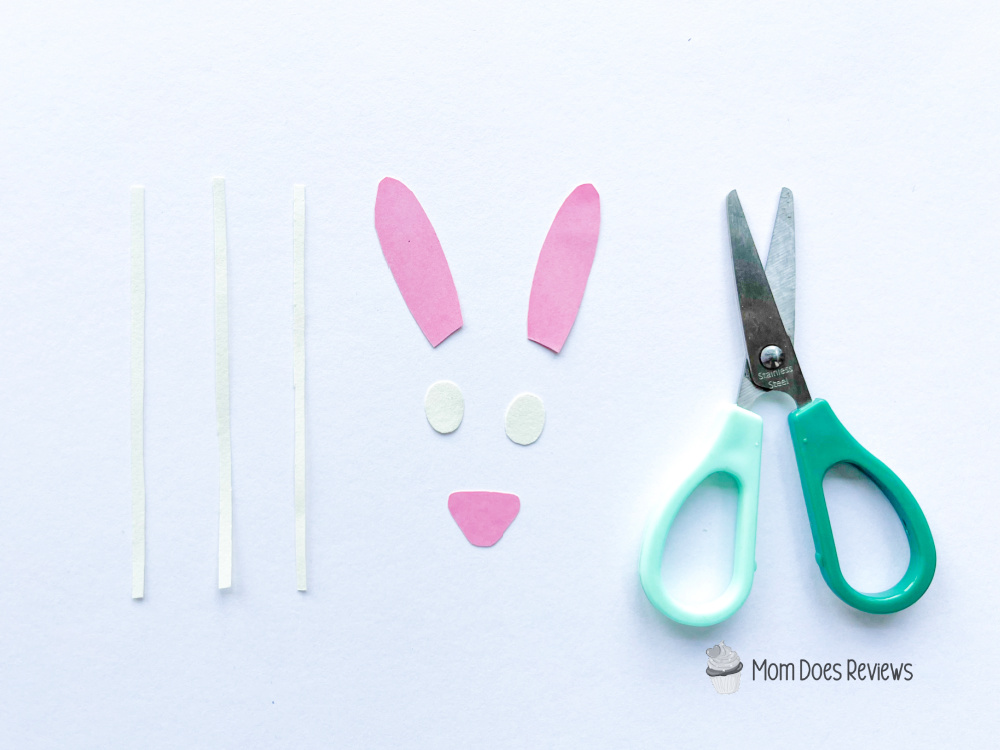
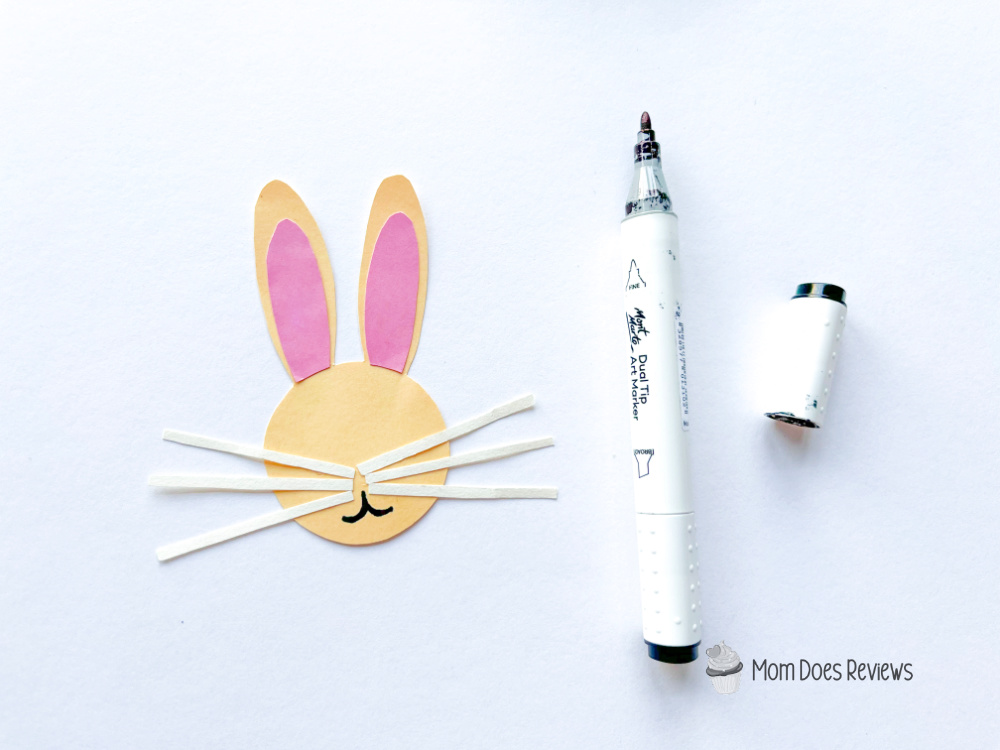
- Cut smaller pink ovals and glue them onto the ears. Cut two small white circles for the eyes and draw pupils using a black marker. Next, cut thin strips of white paper for the whiskers. And lastly, cut a small pink triangle for the nose.
- Glue the ears on top of the bunny’s ears and then attach whiskers to the face. Using a black marker, draw the mouth of the bunny with 2 curved lines.
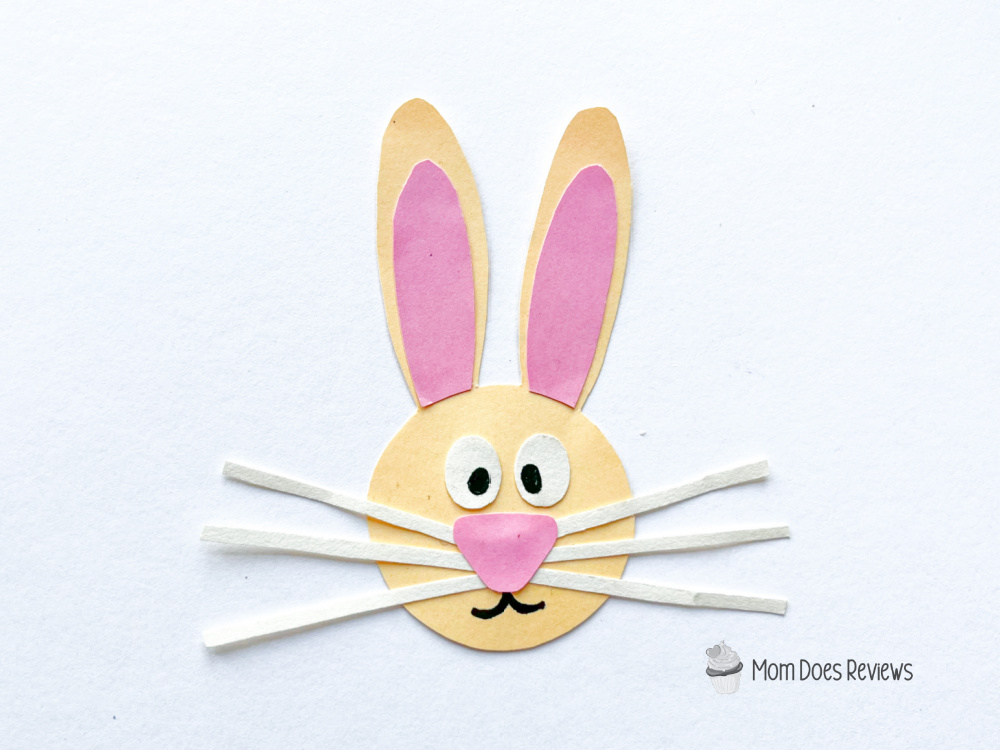
- Glue the eyes and the nose at the top of the whiskers.
- Glue the bunny’s face onto the wristband strip, ensuring it is securely attached. Using the marker, draw 3 lines on the bunny’s paws for more details.
- This is optional but you can also glue a small cotton ball at the other end of the wristband to create the bunny’s tail.
- Wrap the wristband around your kid’s wrist and secure it with the double-sided tape or a small Velcro dot. Now, your bunny wristband is ready to hop into Easter fun!
FAQs
What age group is this craft best for?
This bunny wristband craft works well for preschool and elementary-aged kids. Younger children may need help with cutting some of the shapes.
Can I use a printable template instead of colored paper?
Yes! A printable template works great and allows kids to color their bunny before cutting it out.
How do you secure the wristband?
You can use double-sided tape, a Velcro dot, or even a small piece of regular tape to secure the wristband around the child’s wrist.
Can I add extra decorations?
Absolutely! Kids can decorate their bunny wristband with stickers, glitter, or markers to make it even more colorful and unique.
How long does this craft take to make?
Most kids can complete this craft in about 20–30 minutes, making it perfect for quick holiday activities.
Print the Tutorial:

Bunny Wristband Craft
Make this adorable bunny wristband craft with kids using simple supplies like colored paper and glue. A fun and easy Easter craft kids can wear!
Materials
- - Colored papers (we used yellow, pink and white) or the printed coloring file we provided
- - Scissors
- - Glue
- - Double-sided tape
- - Markers or crayons
- - White circle foam or pompom (optional)
Instructions
- Gather all the needed materials. Choose a light brown or beige color for the bunny’s body and pink for the ears and nose. You can also let kids color our template and then help them cut.
- Cut a long strip of paper for the wristband. It should be wide enough to fit comfortably around the wrist. Adjust the length depending on your kids’s wrist. At one end of the strip, cut out a bunny paw shape to resemble the front paws of a rabbit.
- Cut a circle for the bunny’s face with two oval-shaped ears.
- Cut smaller pink ovals and glue them onto the ears. Cut two small white circles for the eyes and draw pupils using a black marker. Next, cut thin strips of white paper for the whiskers. And lastly, cut a small pink triangle for the nose.
- Glue the ears on top of the bunny’s ears and then attach whiskers onto the face. Using a black marker, draw the mouth of the bunny with 2 curved lines.
- Glue the eyes and the nose at the top of the whiskers.
- Glue the bunny’s face onto the wristband strip, ensuring it is securely attached. Using the marker, draw 3 lines on the bunny’s paws for more details.
- This is optional but you can also glue a small cotton ball at the other end of the wristband to create the bunny’s tail.
- Wrap the wristband around your kid’s wrist and secure it with the double-sided tape or a small Velcro dot. Now, your bunny wristband is ready to hop into Easter fun!
Pin it for Later!
Üsküdar Uygun Fiyatlı Su Kaçağı Tespiti Hem tespit hem de tamir hizmeti vermesi çok pratik. Ayrı firma aramakla uğraşmadık. https://clubedenapp.com//read-blog/108
I’m curious about the mechanics behind Sprunki Phase 8 GG TP. Is there a hidden combo? The visuals during the transition look sus, like there’s an easter egg. Love it!
The vibes in Sprunki Phase 8 GG TP are immaculate! The music is an absolute banger, and the gameplay feels so smooth. Can’t wait to see more from this creator!
Trying out Sprunki Phase 8 GG TP right now. That beat drop in the middle is fire! Love how the characters react to the rhythm. Definitely my new favorite phase.