
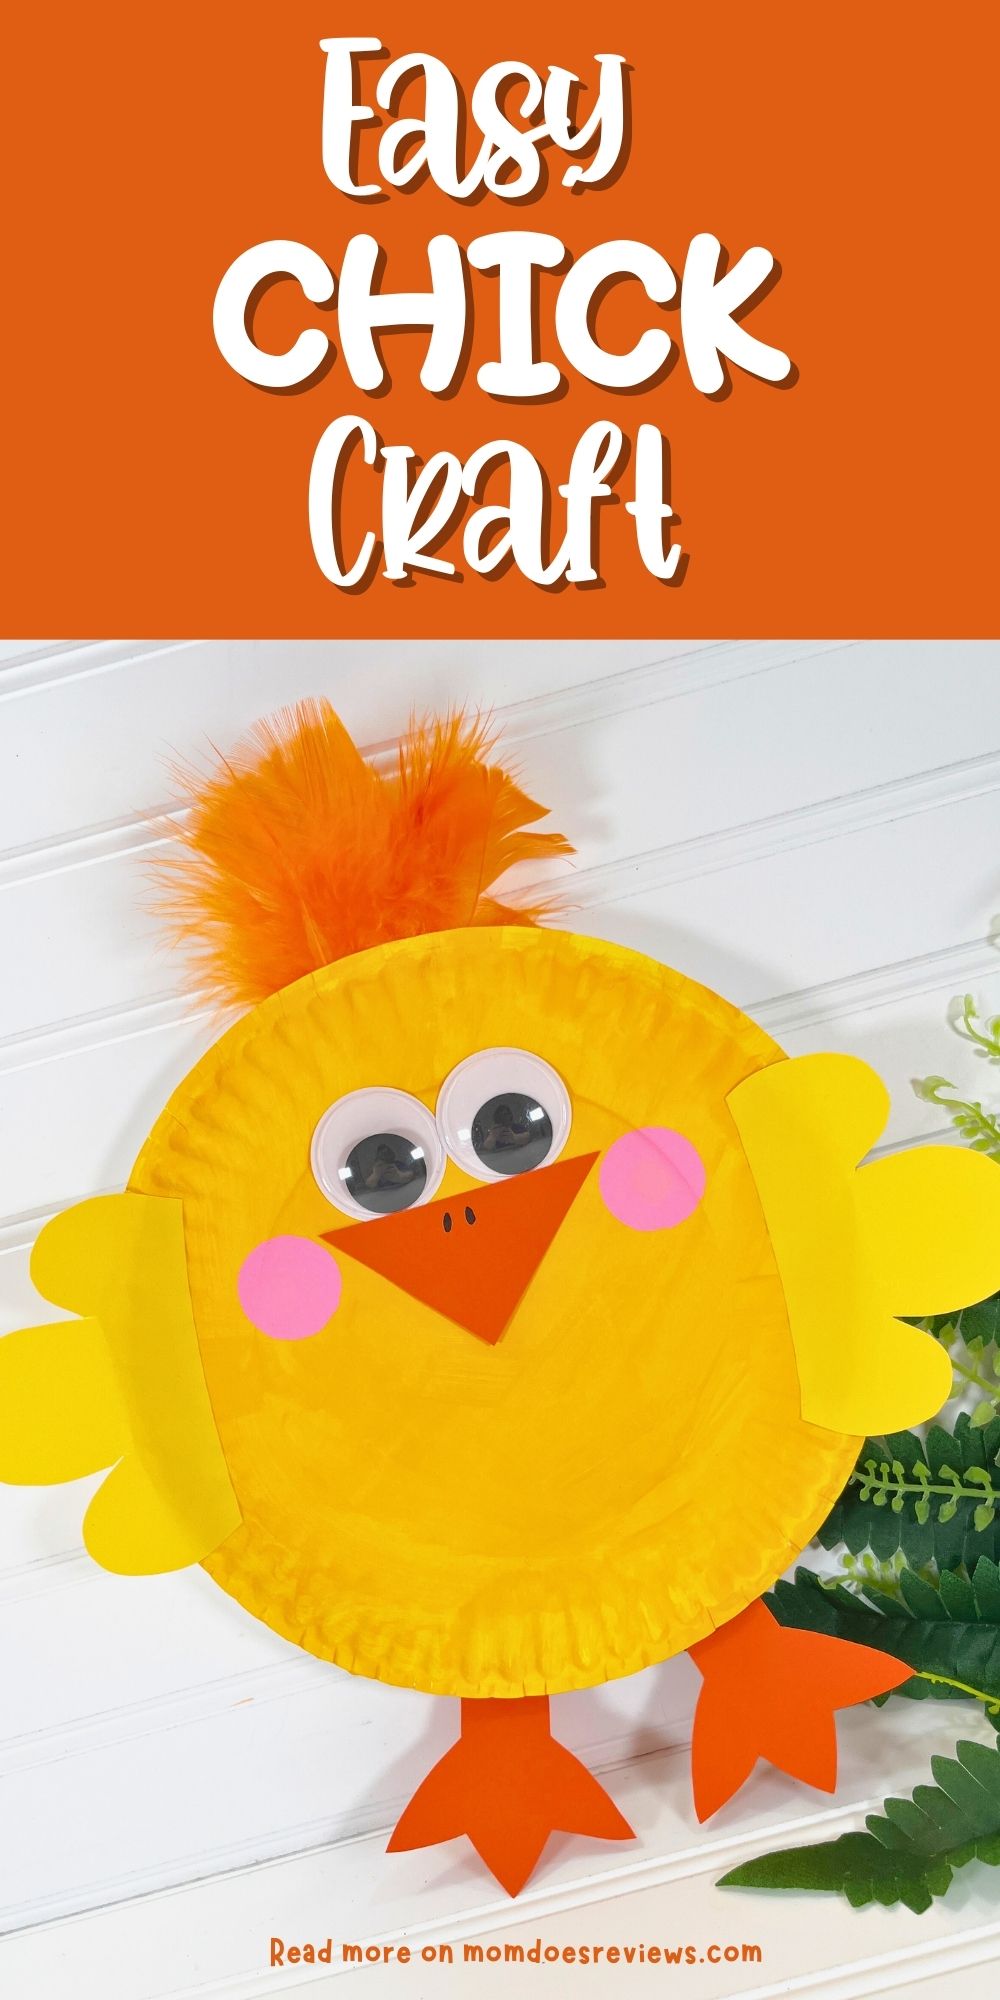
Adorable Paper Plate Chick Craft – A Fun Easter Craft for Kids
If you’re looking for a simple and adorable Easter craft to make with the kids, this paper plate chick craft is the perfect activity. With just a few basic supplies—like a paper plate from the Dollar Store—you can transform everyday materials into a bright and cheerful Easter chick. It’s a fun way to celebrate the season while encouraging creativity and imagination.
This paper plate chick craft is also a great hands-on learning activity. Kids can practice cutting, counting, and developing fine motor skills while putting their little chick together. The simple steps make it easy for younger children to follow along, while still being engaging enough to keep them excited about crafting.
Best of all, this Easter craft comes together quickly, making it perfect for busy afternoons, classroom activities, or holiday playdates. In about 30 minutes, kids can create their own adorable chick to display for Easter. It’s a cute and budget-friendly project that adds a little extra springtime fun to your day.
More Easter Fun:
Easter is right around the corner and the kids are getting excited for the Easter Bunny. This year, we wanted to be able to gift our family and friends a little something when we come together for the event. This Easter Bunny Jar Craft is easy to do and oh so cute! And, it is perfect for gifting to family and friends!

What could be more fun than dying eggs in a fun, unique way? These Tissue Paper Dyed Easter Eggs are easy to do and they are absolutely beautiful!
This Easter, kids can decorate their eggs like an Easter Bunny! To make this super cute Easter Egg Bunny, just gather a few supplies (felt, green cardstock paper, glue and a sharpie) and in less than 20 minutes, you have this fun craft!
Materials:
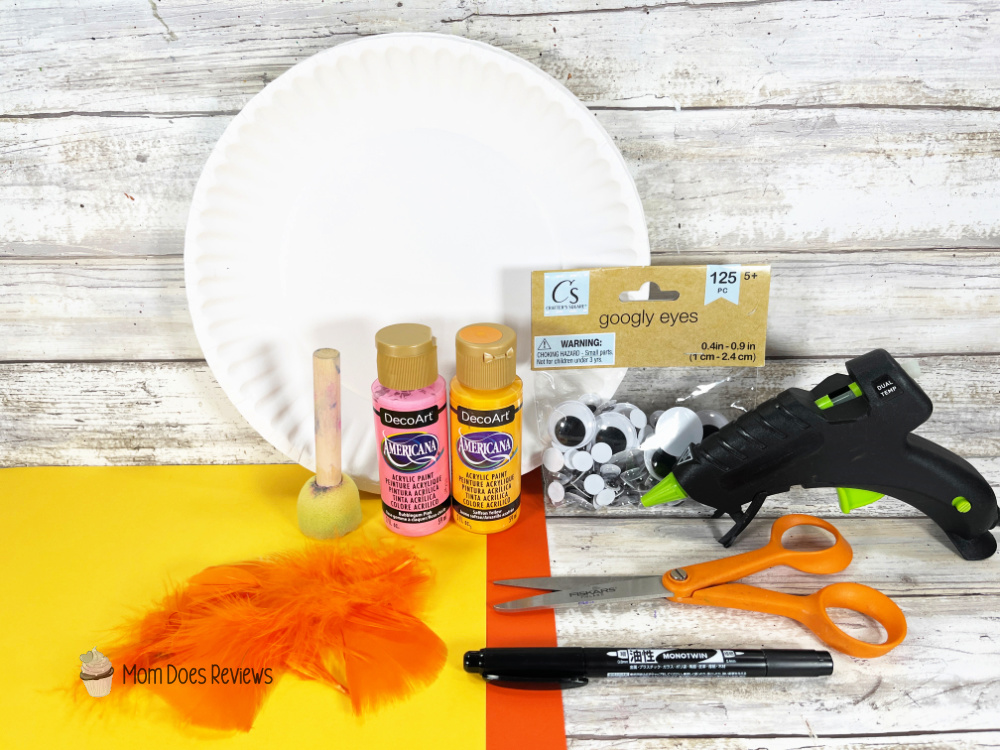
- Paper Plates – Dollar Store
- Acrylic Craft Paint – Bright Yellow, Pink
- Sponge Dauber – Dollar Store
- Wiggle Eyes – Dollar Store
- Feathers, Orange – Dollar Store
- Cardstock – Orange, Yellow
- Glue Gun and Glue Sticks
- Paintbrush
- Scissors
- Permanent Marker, Black
- Pencil
- PATTERN
Instructions:
- Gather all supplies. Basecoat the inside of the paper plate with yellow acrylic craft paint. Set aside to dry and apply a second coat, if necessary.

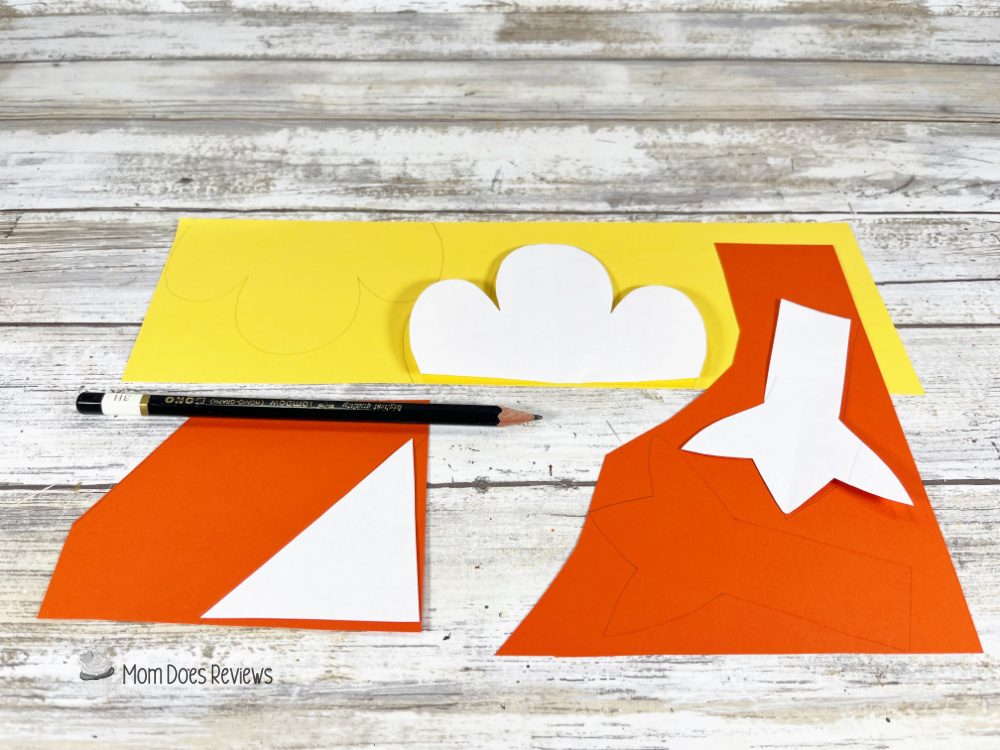
- Download and print the chick patterns, then cut them out with scissors. Trace the wings twice onto yellow cardstock, trace the beak once, and the feet twice onto orange cardstock with a pencil. You could also use colored craft foam or craft felt for this project.
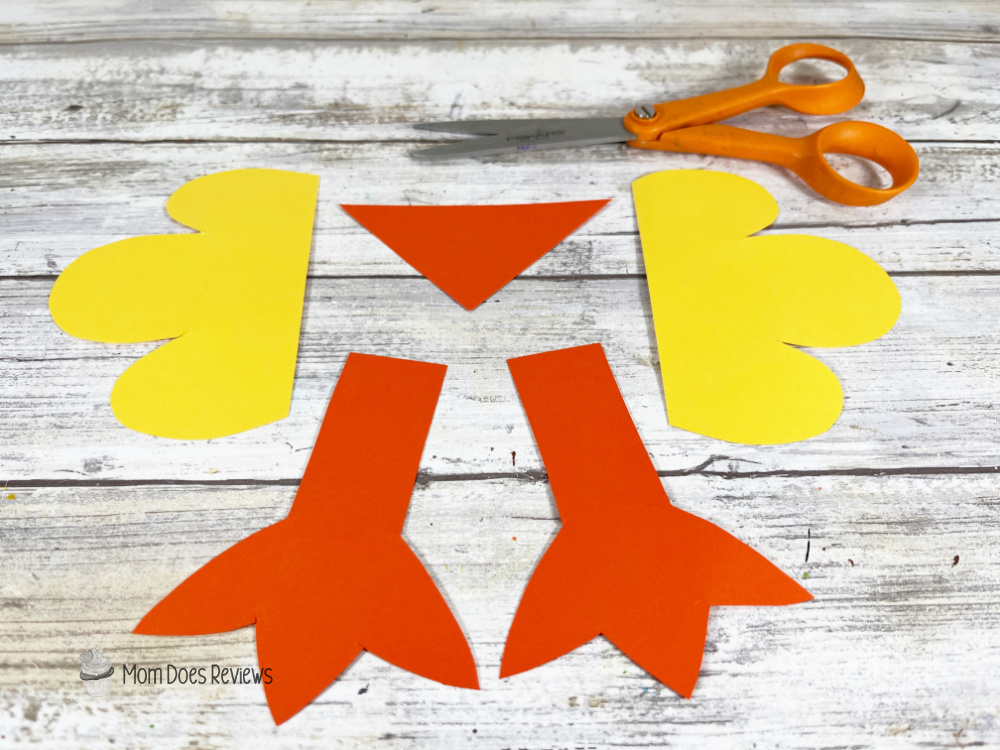
- Cut out the patterns with scissors, making sure to cut inside the traced lines for a clean, finished project.
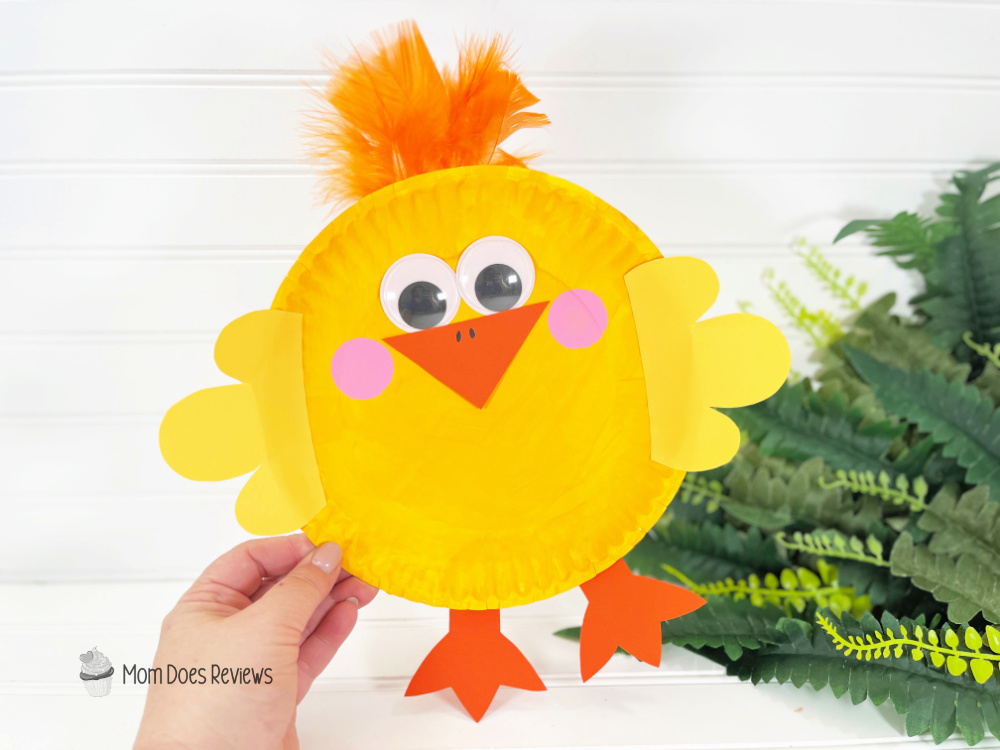
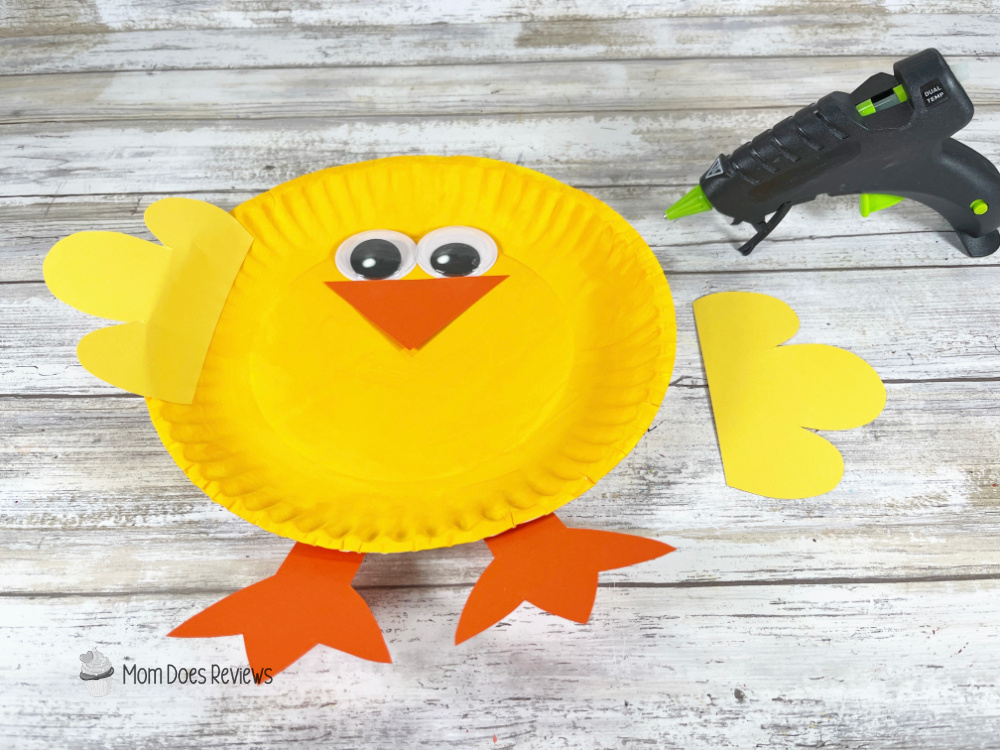
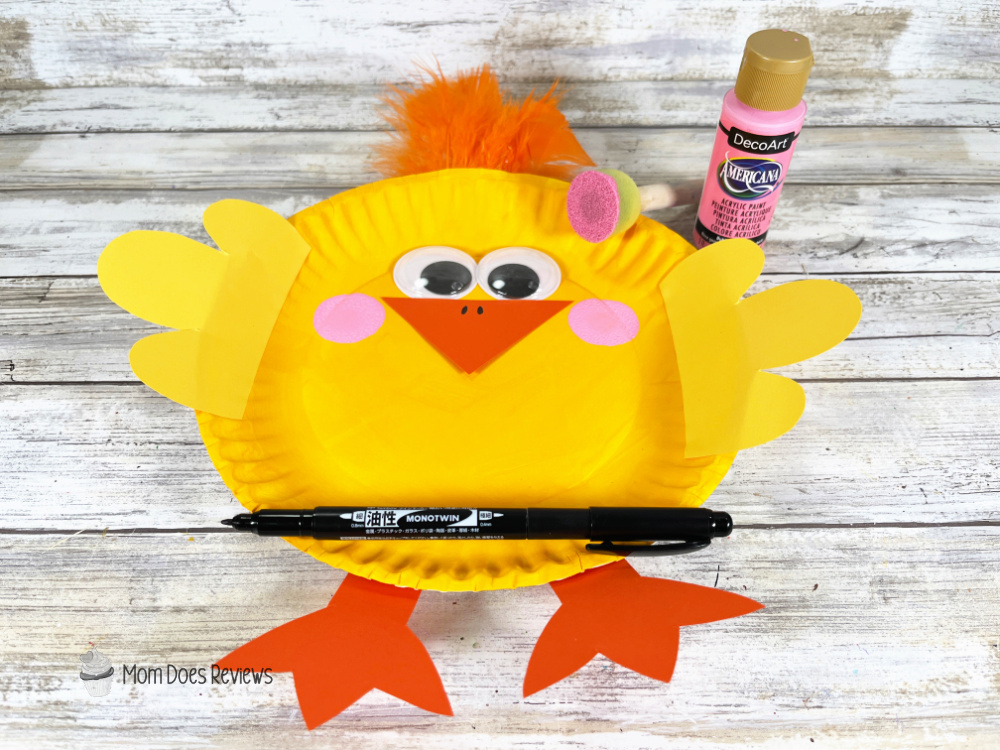
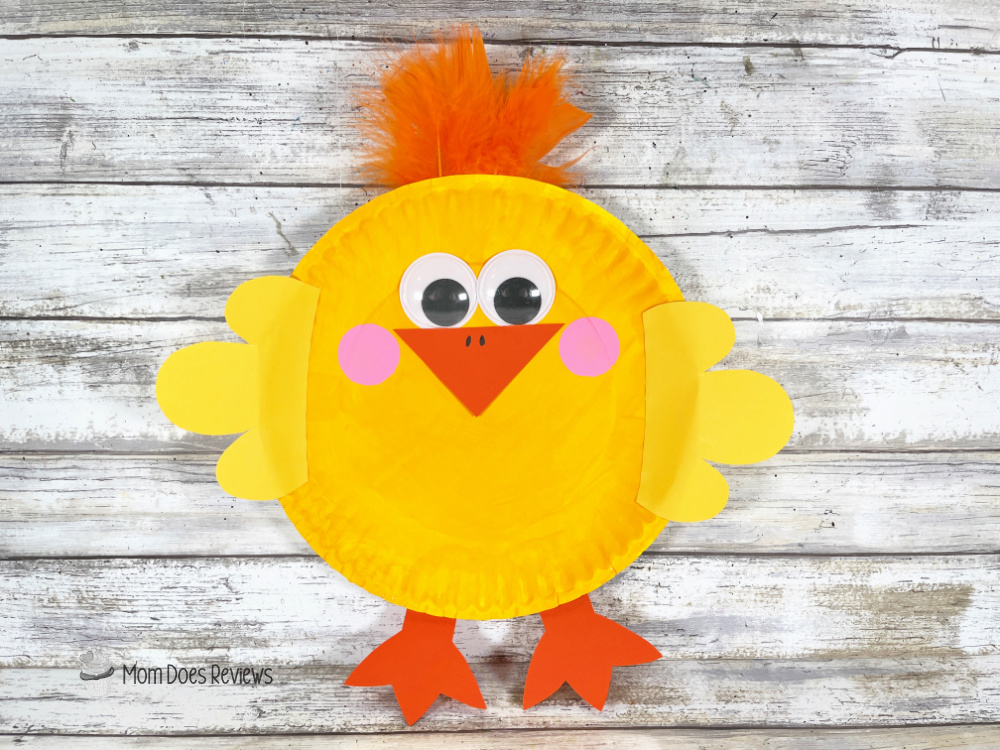
- Attach two wiggle eyes and the beak to the chick’s face with a glue gun and glue sticks. Glue the wings to the right and left sides of the chick, and the feet to the bottom. TIP: You can use liquid craft glue for this project, but you will have to wait for it to dry.
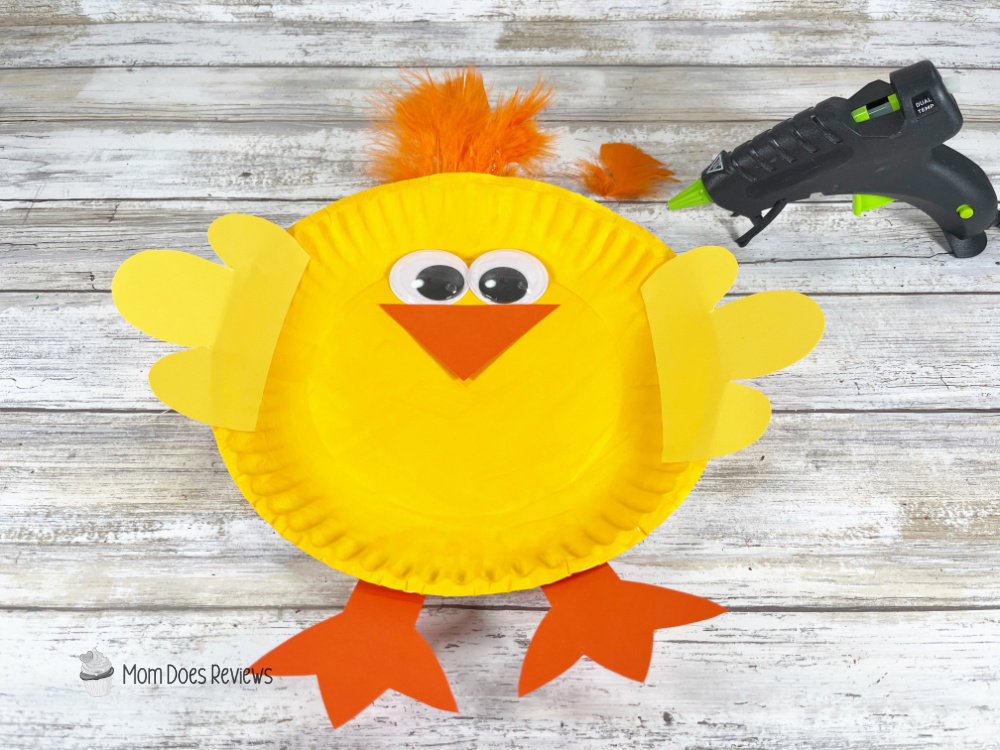
- Attach two to three orange feathers to the top center of the chick with a glue gun and glue sticks.
- Create cheeks by dipping a sponge dauber into pink acrylic craft paint and stamping on either side of the chick’s face. To finish, add two nostrils to the top of the beak with a black marker.
Print the tutorial:

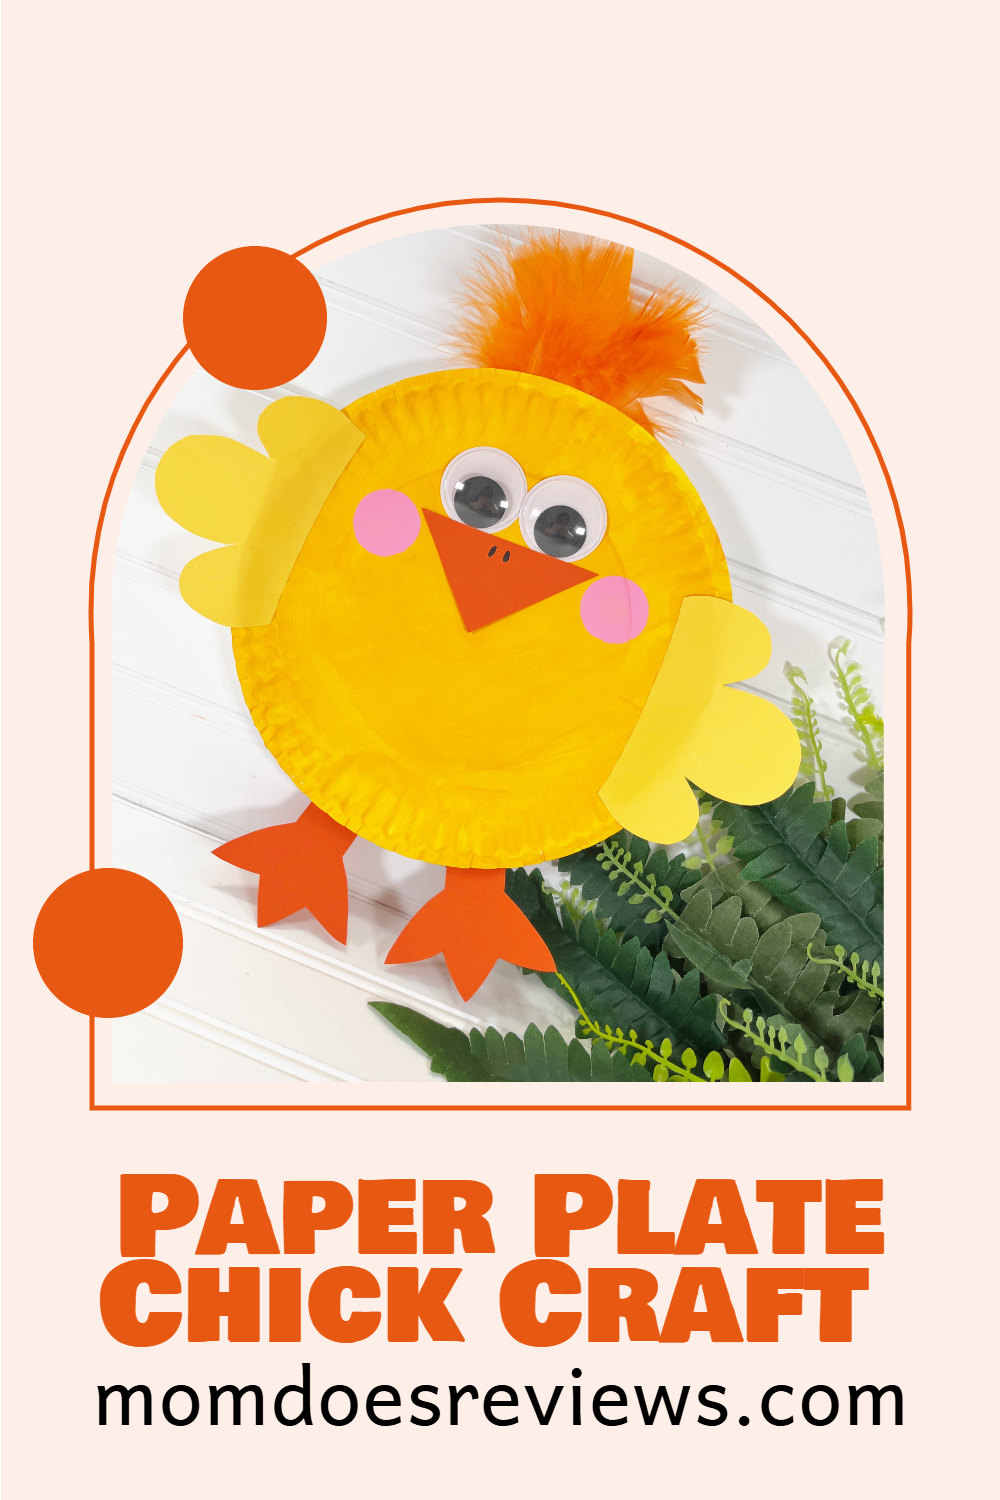
Paper Plate Chick Craft
A simple paper plate from the Dollar Store transforms into an adorable Chick just in time for Easter! This is a fun activity to keep the kiddos busy with cutting, counting and motor skills. Make this paper plate Chick kids craft in just about 30 minutes!
Materials
- Paper Plates – Dollar Store
- Acrylic Craft Paint – Bright Yellow, Pink
- Sponge Dauber – Dollar Store
- Wiggle Eyes – Dollar Store
- Feathers, Orange – Dollar Store
- Cardstock – Orange, Yellow
Tools
- Glue gun and glue sticks
- Paintbrush
- Scissors
- Permanent Marker, Black
- Pencil
Instructions
STEP ONE
Gather all supplies. Basecoat the inside of the paper plate with yellow acrylic craft paint. Set aside to dry and apply a second coat, if necessary.
STEP TWO
Download and print the chick patterns, then cut out with scissors. trace the wings twice onto yellow cardstock, trace the beak once and the feet twice onto orange cardstock with a pencil. You could also use colored craft foam or craft felt for this project.
STEP THREE
Cut out the patterns with scissors making sure to cut inside the traced lines for a clean, finished project.
STEP FOUR
Attach two wiggle eyes and the beak to the chick’s face with a glue gun and glue sticks. Glue the wings to the right and left sides of the chick, and the feet to the bottom. TIP: You can use liquid craft glue for this project, but you will have to wait for it to dry.
STEP FIVE
Attach two to three orange feathers to the top center of the chick with a glue gun and glue sticks.
STEP SIX
Create cheeks by dipping a sponge dauber into pink acrylic craft paint and stamping on either side of the chick’s face. To finish, add two nostrils to the top of the beak with a black marker.
Pin it for Later!
Üsküdar Tesisat Su Kaçağı Tespiti Kırmadan çözüm sağlandı. https://network.musicdiffusion.com/read-blog/15187