Decorative wreaths do not have to cost a fortune to be beautiful! This easy DIY Farmhouse Boxwood Wreath can be made for only $10! It uses simple, inexpensive supplies and is easy to make following the step-by-step instructions.

Have you seen the price of a simple wreath in the stores lately? Yikes!
Wreaths can cost a fortune but did you know you can make gorgeous wreaths for a little of nothing?
Yes, you can! As low as $10!!
Say what?!
With our simple supply list, you can create a fabulous wreath.
These wreaths are easy to make following the easy step-by-step instructions.
And, you can always embellish them any way you like making them perfect for any holiday season.
Looking for more fun and inexpensive wreaths to make?
If so, take a look at these fun and inexpensive wreaths:
Dollar Tree Bee Happy Wreath: This fun Dollar Tree Bee Happy Wreath Craft will put a smile on everyone’s face. Print the list of supplies and head to the Dollar Tree. This unique craft is worth the time and energy. I love the farmhouse decor look!
Winter Snowflake Wreath: This easy Winter Snowflake Wreath is great for the holidays or just for winter decor for your front door.
DIY Red Burlap Bow WreathDIY Red Burlap Bow Wreath: This DIY Red Burlap Bow Wreath is super easy to do and requires very few materials. In a matter of minutes, you can have a beautiful wreath for a little of nothing!
Now, let’s take a look at this easy-to-make Farmhouse Wreath!
DIY Farmhouse Boxwood Wreath
Supplies needed:
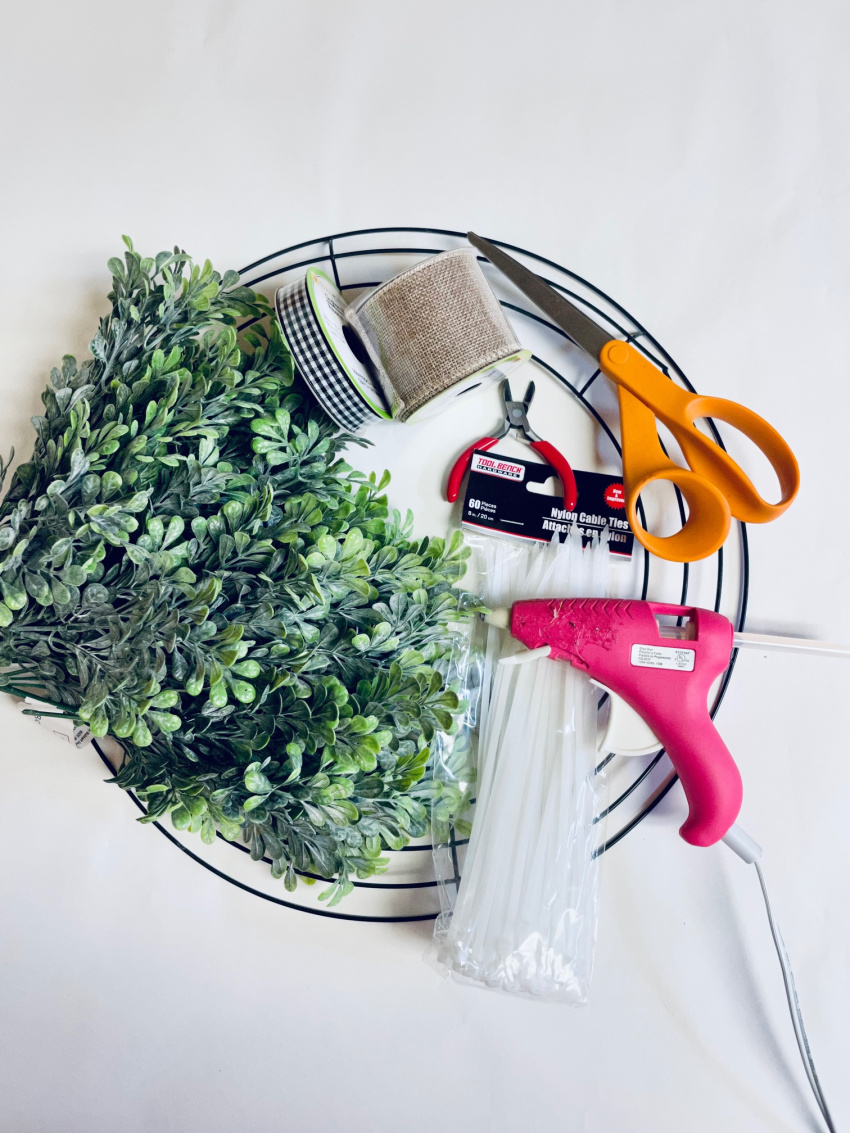

14 inch wire wreath form (mine was from Dollar Tree)
Burlap ribbon (Dollar Tree)
Black and white check ribbon (Dollar Tree)
8 Boxwood picks (Walmart $.98 each)
Zip ties (Mine were from dollar tree)
Hot Glue Gun
Wire Cutters
How to make this inexpensive Farmhouse Boxwood Wreath:
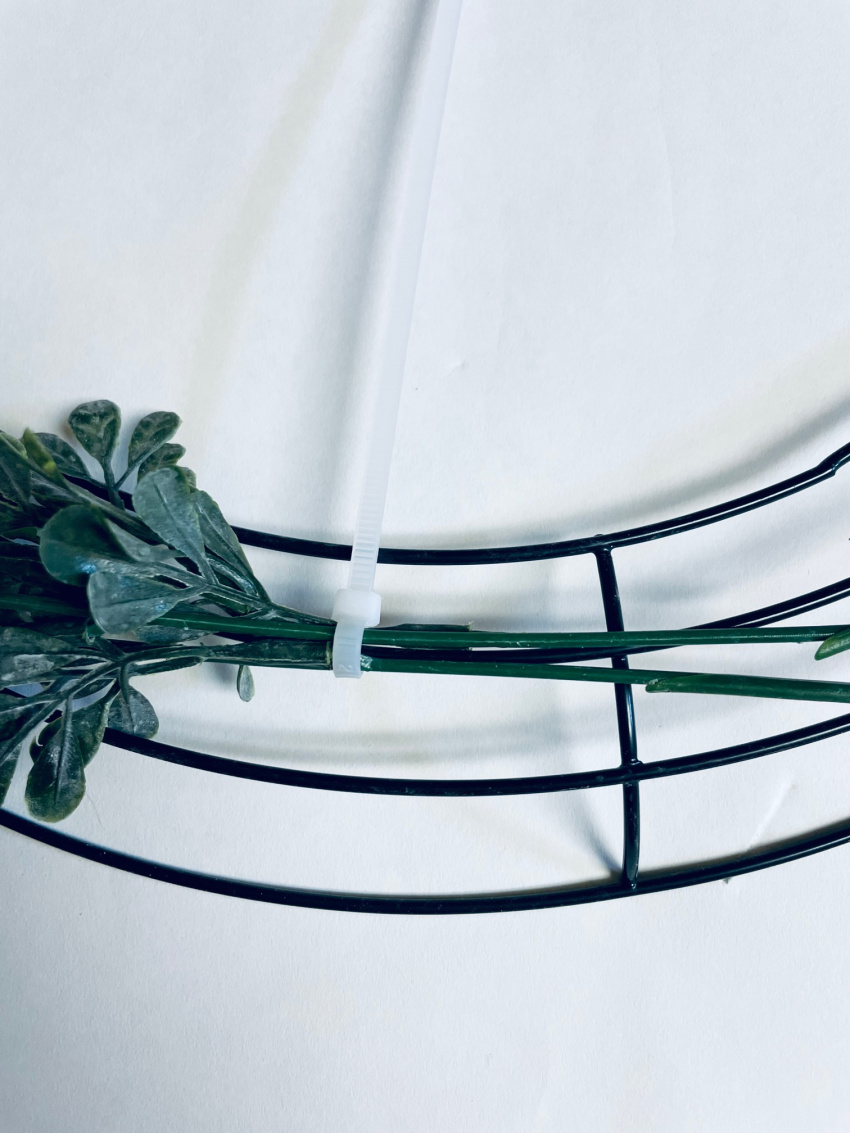
Using the wire cutters, start by cutting the stems of the boxwood. You want to leave a few inches of the stem so you have enough to be secured by the zipties
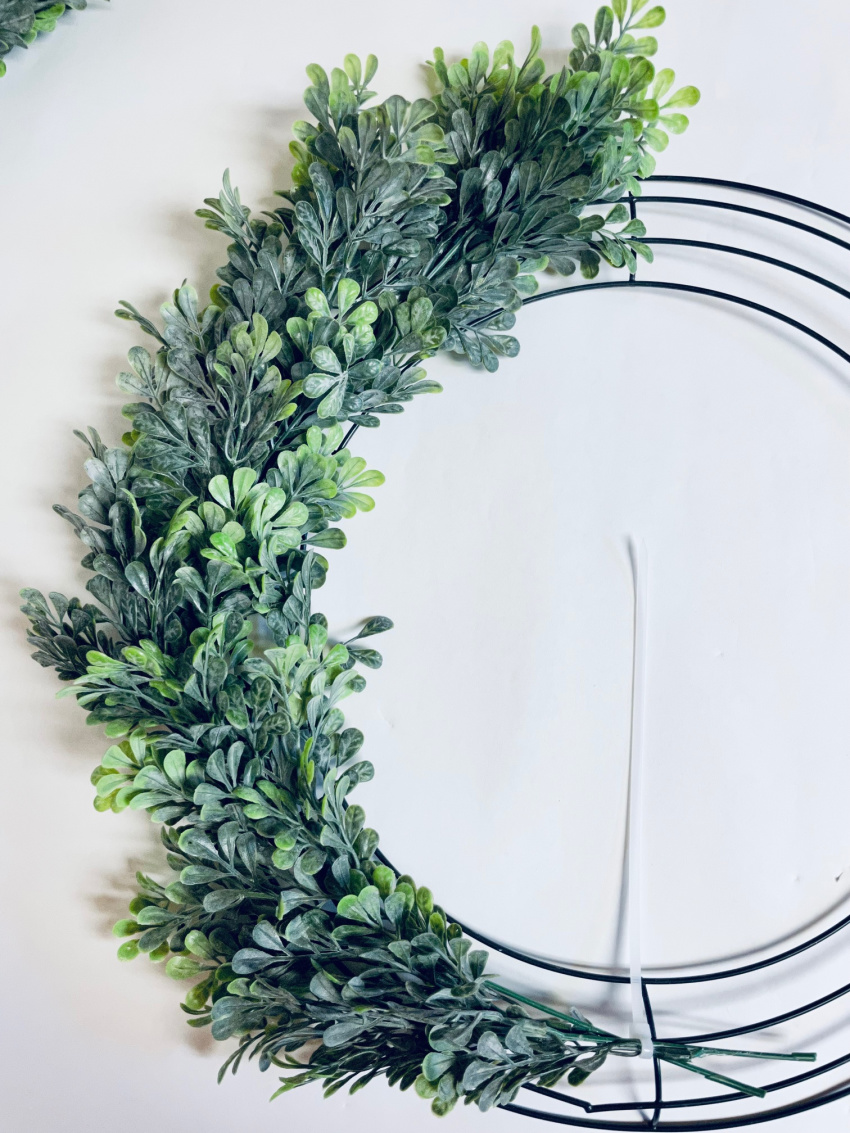

Take 2 of the stem pieces of zip tie them to the center of the wreath form. Fan the stems out a bit so that the boxwood covers the other wreath rings. Repeat this process around the entire wreath. Add pieces to fill in if you feel like there are open spaces. In a few spaces I zip tied the stems to the inner or outer ring of the wreath form.
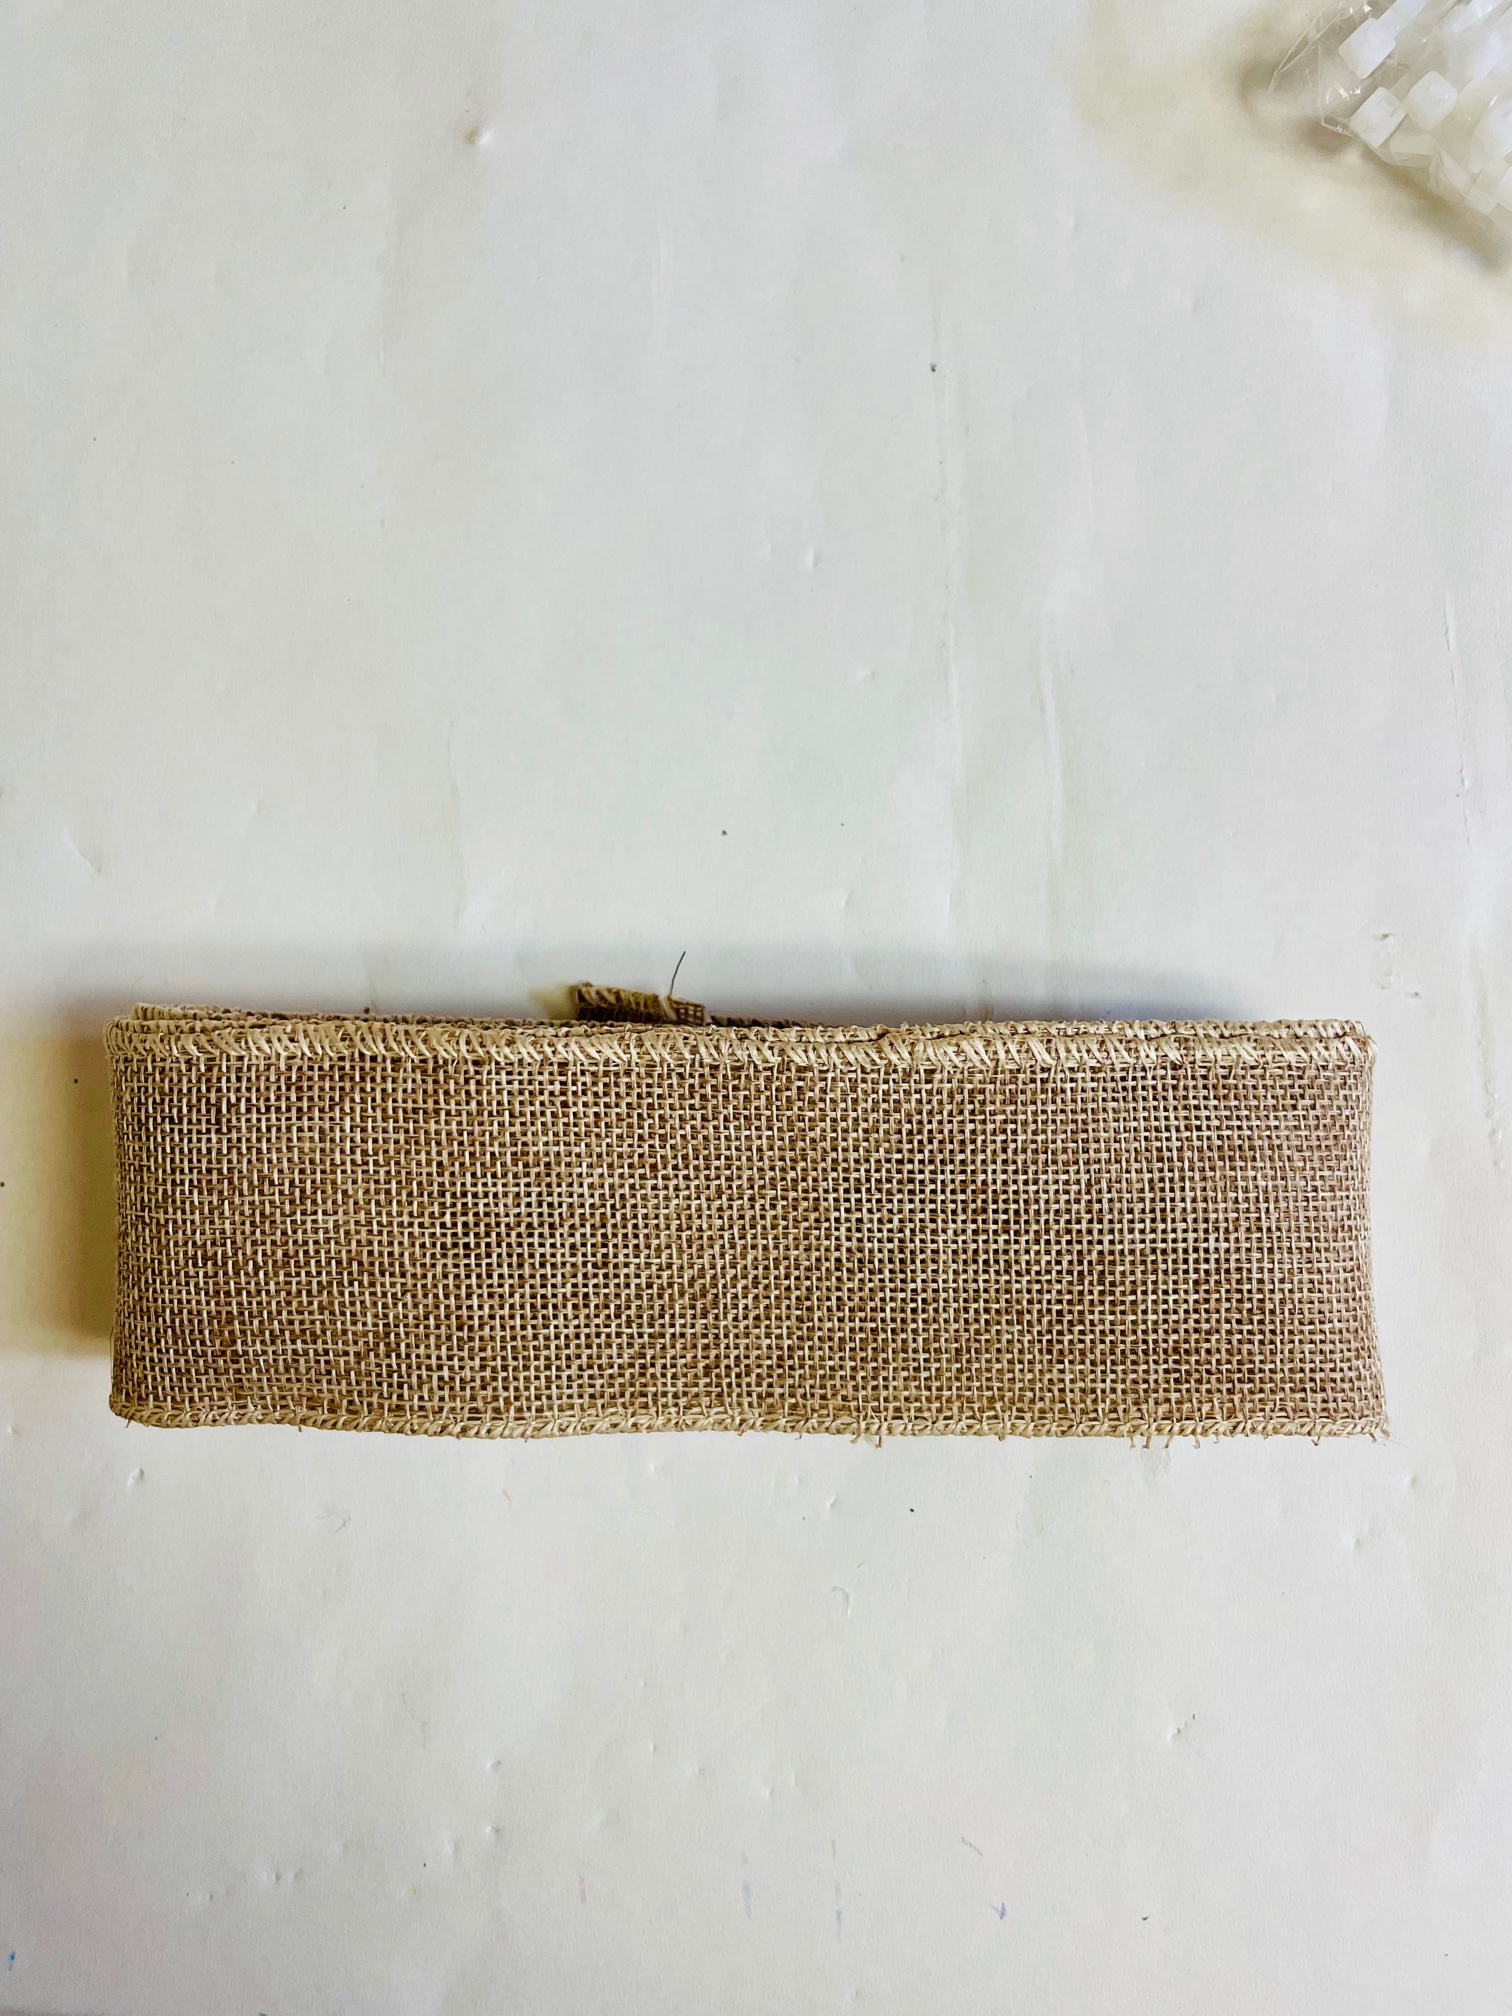
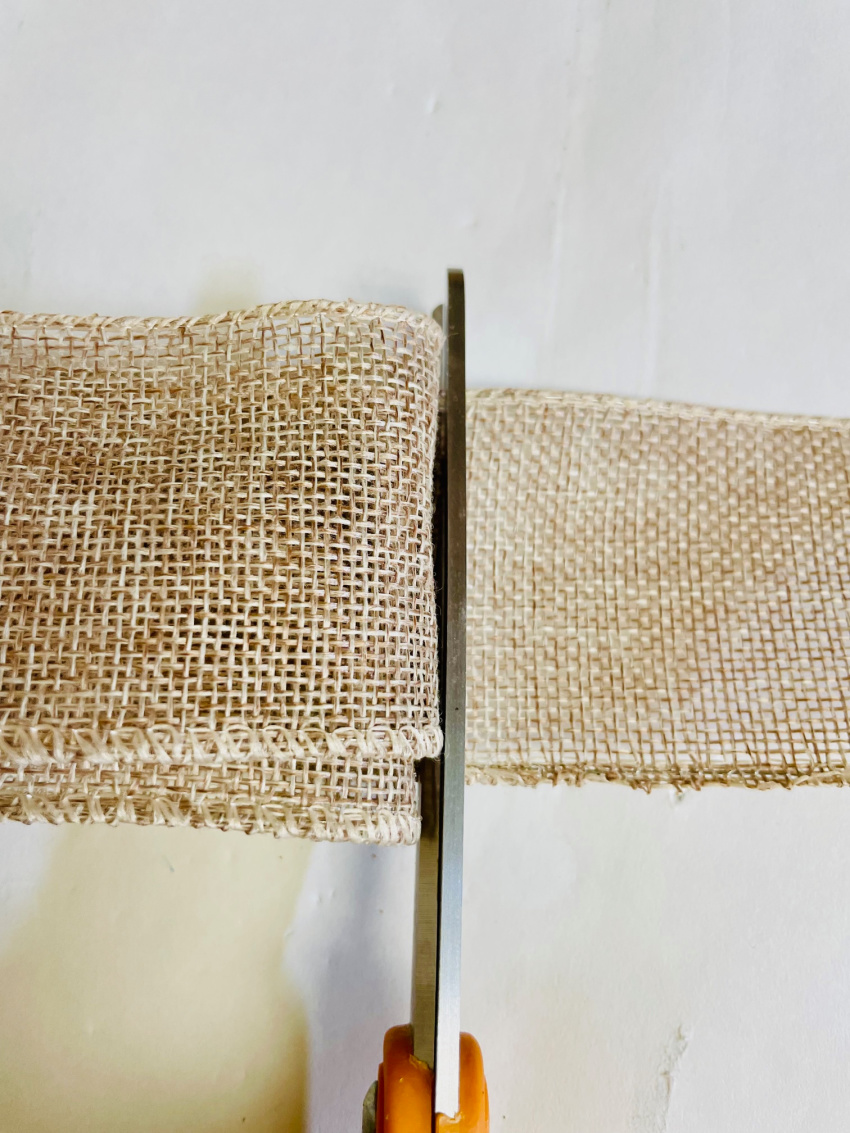
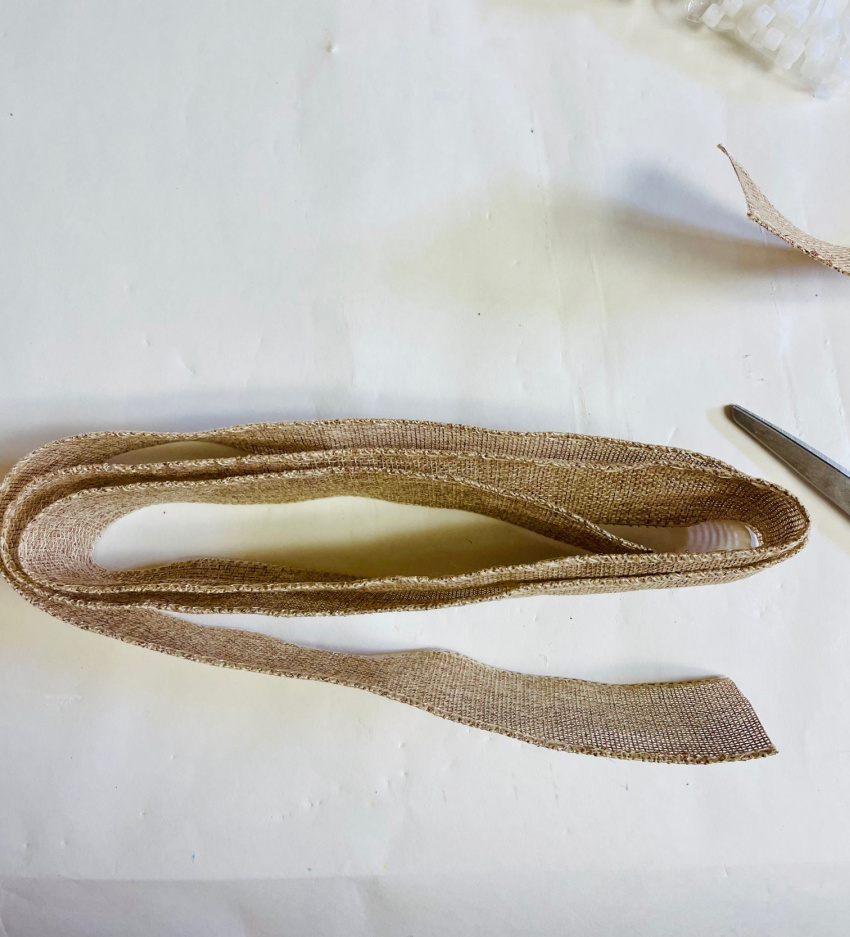
With the burlap ribbon. Take a 6 inch pieces and wrap it around itself 3 full times. Next cut a piece that is 10 inches long. Fold that pieces in the middle and place it on the backside of the folded burlap ribbon piece. (The backside would be the side with the ending piece you cut). Secure all of this with a zip tie in the center.

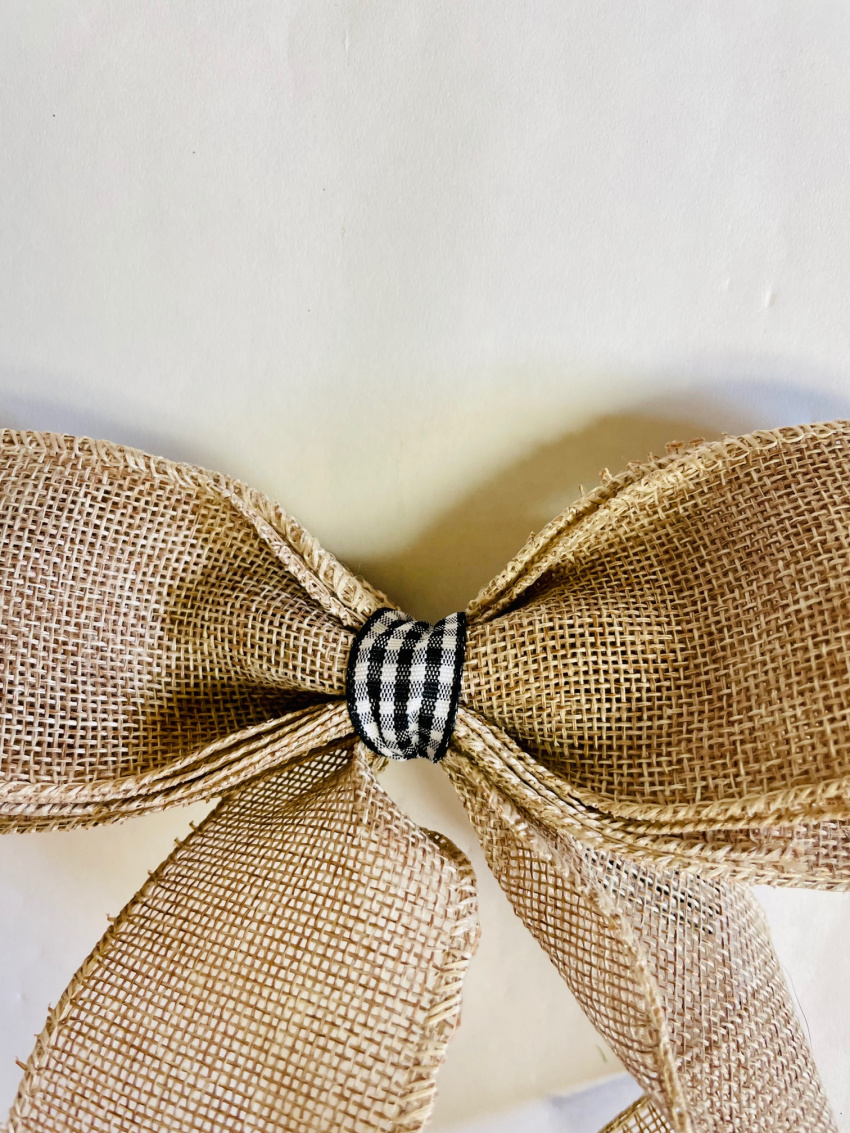
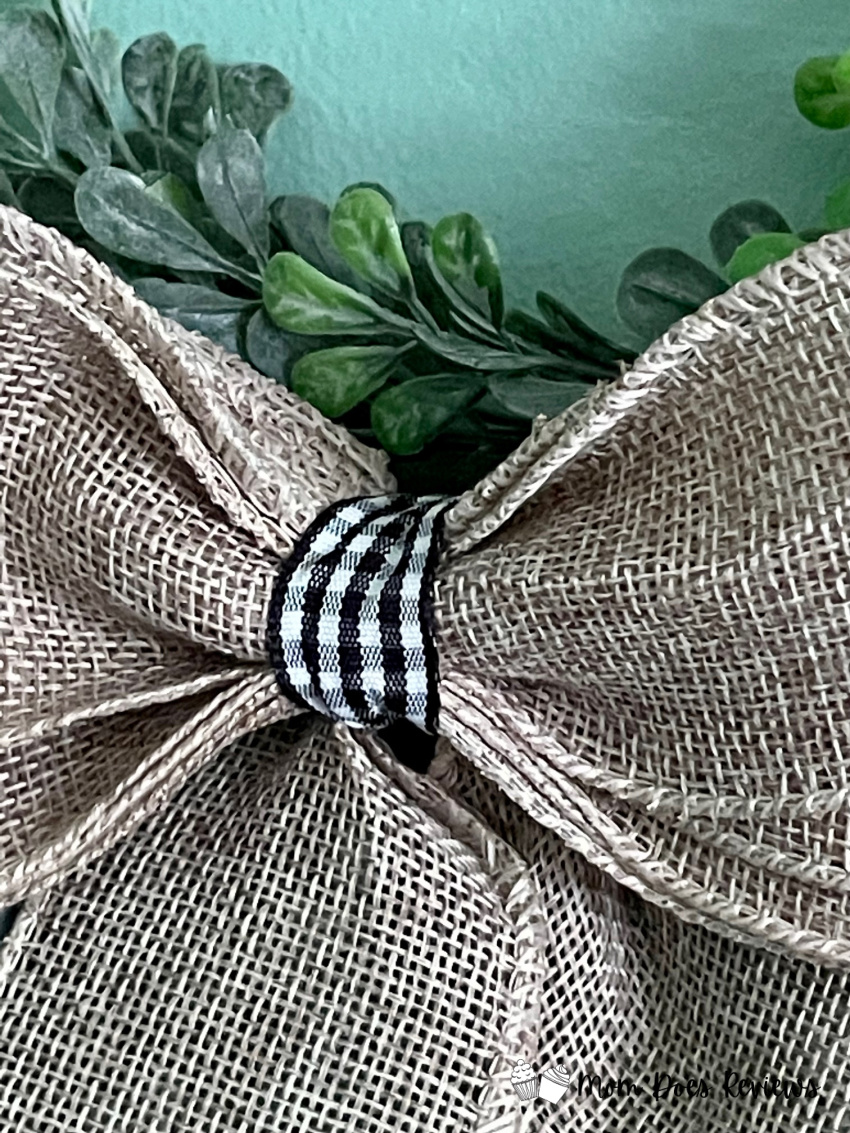
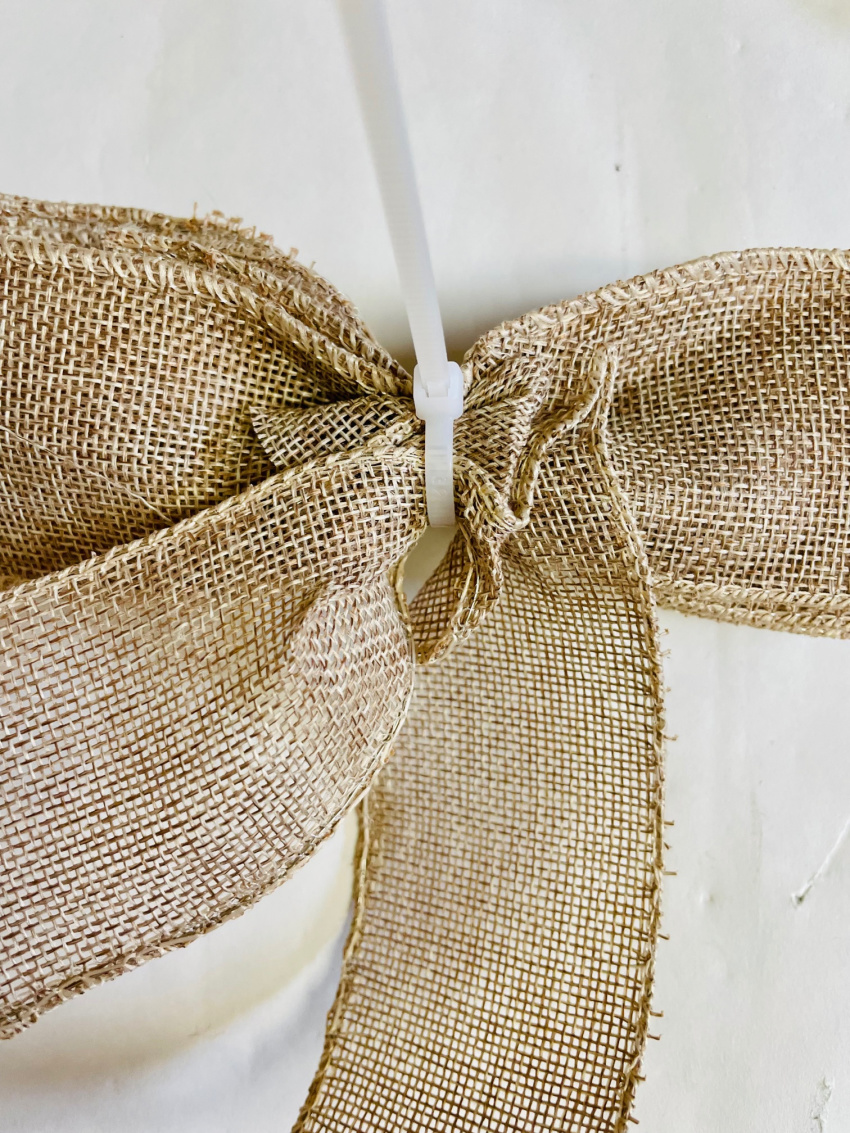
Cut a piece of the black and white checkered ribbon about 5 inches long and use it to cover the zip tie in the middle of the bow and tie it in the back. Slide a zip tie through the black and white ribbon in the back and use that to secure it to the wreath form.

Print the instructions for this fun DIY Farmhouse Boxwood Wreath!

Farmhouse Boxwood Wreath
Decorative wreaths do not have to cost a fortune to be beautiful! This easy DIY Farmhouse Boxwood Wreath can be made for only $10! It uses simple, inexpensive supplies and is easy to make following the step-by-step instructions.
Materials
- 14 inch wire wreath form (mine was from Dollar Tree)
- Burlap ribbon (Dollar Tree)
- Black and white check ribbon (Dollar Tree)
- 8 Boxwood picks (Walmart $.98 each)
- Zip ties (Mine were from dollar tree)
Tools
- Hot Glue Gun
- Wire Cutters
Instructions
- Using the wire cutters, start by cutting the stems of the boxwood. You want to leave a few inches of the stem so you have enough to be secured by the zipties
- Take 2 of the stem pieces of zip tie them to the center of the wreath form. Fan the stems out a bit so that the boxwood covers the other wreath rings. Repeat this process around the entire wreath. Add pieces to fill in if you feel like there are open spaces. In a few spaces I zip tied the stems to the inner or outer ring of the wreath form.
- With the burlap ribbon. Take a 6 inch pieces and wrap it around itself 3 full times. Next cut a piece that is 10 inches long. Fold that pieces in the middle and place it on the backside of the folded burlap ribbon piece. (The backside would be the side with the ending piece you cut). Secure all of this with a zip tie in the center.
- Cut a piece of the black and white checkered ribbon about 5 inches long and use it to cover the zip tie in the middle of the bow and tie it in the back. Slide a zip tie through the black and white ribbon in the back and use that to secure it to the wreath form.
Pin it for later!