
🍦 Crispy, Creamy Fried Ice Cream – A Fun Dessert You’ll Love!
If you’ve ever ordered fried ice cream at a restaurant and thought, “There’s no way I could make that at home,” think again! This recipe gives you all that irresistible crunch and creamy goodness — no deep frying required. With simple pantry ingredients and a few easy steps, you can create a dessert that looks (and tastes!) like something straight off a restaurant menu.

The secret? Instead of deep-frying the ice cream, you toast crushed Cornflakes in butter and cinnamon until golden brown and fragrant. Then, you roll your frozen ice cream balls in that crispy mixture for a sweet, crunchy coating that stays deliciously crisp against the creamy ice cream inside. It’s a fun dessert that feels fancy but is actually so simple — and the best part? You can make it ahead and keep it in the freezer until you’re ready to serve!
I still remember the first time I had fried ice cream at a little Mexican restaurant years ago — that warm, crunchy outside and the ice-cold, creamy center blew my mind. This easy, no-fry version captures that same magic at home with less mess and all the flavor. It’s a guaranteed crowd-pleaser, whether you’re serving it after Taco Tuesday, a dinner party, or just because you deserve a treat!
More Ice Cream Treats:
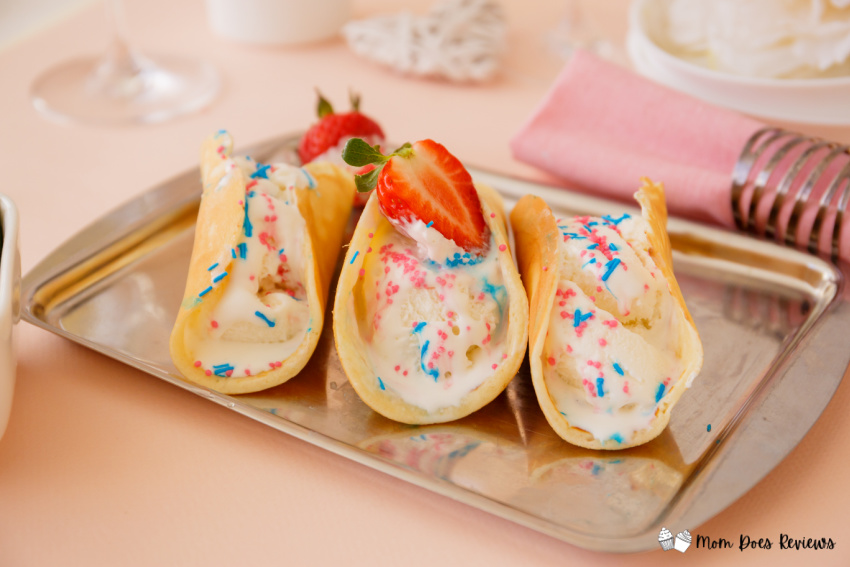
Your family is sure to love these fun, easy, and oh so delicious Ice Cream Tacos! They are enough to make your mouth water and are sure to be a huge hit! Most importantly, they are super easy to make using minimal ingredients.
This fun and easy dessert combines two of my favorite things- Brownies and Ice Cream! These Brownie Waffle Ice Cream Sandwiches have the added bonus of the waffle texture- perfect spots to be filled by creamy ice cream! Make them to your liking with your favorite ice cream flavor!
What’s better than homemade Chocolate Chip Cookies? How about Chocolate Chip Cookie Ice Cream Sandwiches! Pick any flavor ice cream to make them just like you want them! Get the kids to help- after all, they will want to eat them!
🧈 Ingredients You’ll Need:

- 4 cups vanilla ice cream
- 3 tablespoons butter
- 3 cups Cornflakes, crushed
- 1 teaspoon ground cinnamon
- 2 tablespoons granulated sugar
- Toppings: whipped cream, chocolate sauce, honey, cinnamon, maraschino cherries

👩🍳 Directions:
-
Shape the Ice Cream:
Scoop out 1 cup of ice cream and quickly form it into a ball using clean hands or latex gloves. Place it on a parchment-lined plate or baking sheet. Repeat with the remaining ice cream until you have 4 balls. Freeze until firm (about 1 hour).
-
Make the Crunchy Coating:
In a large skillet, melt butter over medium heat. Add crushed Cornflakes and cinnamon, stirring to coat evenly. Toast for 4–5 minutes, stirring often, until golden and fragrant. Remove from heat and let the mixture cool completely. -
Coat the Ice Cream:
Roll each frozen ice cream ball in the cooled Cornflake mixture, pressing gently so it sticks. Return them to the freezer until ready to serve. -
Serve and Enjoy:
When ready to serve, top each one with whipped cream, a drizzle of chocolate sauce or honey, a sprinkle of cinnamon, and a cherry on top. Serve immediately and enjoy that satisfying crunch!


🎉 When to Serve Fried Ice Cream:
This dessert is a showstopper for:
- Celebrations – Birthdays, anniversaries, or holidays
- Mexican-inspired dinners – The perfect sweet ending to taco or fajita night
- Family fun nights – Let everyone decorate their own ice cream ball with their favorite toppings
- Summer gatherings – Cool, creamy, and so refreshing!

This Fried Ice Cream recipe proves you don’t need a deep fryer to enjoy that irresistible crunch-meets-cream combination. It’s simple, satisfying, and fun to make — a perfect treat for kids, guests, or anyone who loves a little sweet surprise. Keep a few of these ready in the freezer, and you’ll always have a dessert that makes everyone smile! 🍨💫
💬 FAQs:
- Q: Can I make fried ice cream ahead of time?
Yes! Once coated in the Cornflake mixture, store the ice cream balls in an airtight container in the freezer for up to 3 days. Add toppings right before serving. - Q: Can I use a different cereal?
Definitely! Try Frosted Flakes, Rice Krispies, or even crushed graham crackers for a fun twist. - Q: How do I keep the ice cream from melting too fast?
Work quickly when forming the balls, and freeze them immediately. It also helps to chill your baking sheet beforehand! - Q: Can I make this recipe gluten-free?
Yes — just swap regular Cornflakes for a gluten-free cereal alternative.
Print the Recipe:

Fried Ice Cream Recipe
This easy Fried Ice Cream recipe has all the crunchy, creamy goodness you love — without the deep fryer! Made with vanilla ice cream, buttery Cornflakes, and warm cinnamon, it’s the perfect dessert for any occasion.
Ingredients
- • 4 cups vanilla ice cream
- • 3 tablespoons butter
- • 3 cups Cornflakes, crushed
- • 1 teaspoon ground cinnamon
- • 2 tablespoons granulated sugar
- • Toppings: whipped cream, chocolate sauce, honey, cinnamon, maraschino cherries
Instructions
1. Measure out 1 cup of the ice cream and form it into a ball with clean hands. Place on a parchment paper-lined plate or baking sheet, then repeat this process with the remaining ice cream to form 4 ice cream balls. Freeze the ice cream balls until firm.
2. In a large skillet, heat the butter over medium heat until melted. Add the crushed Cornflakes and ground cinnamon to the skillet and stir to coat with the melted butter. Pan fry the Cornflake mixture over medium-low heat for 4-5 minutes until golden brown, stirring often. Remove from the heat and cool completely to room temperature.
3. Roll the ice cream balls in the cooled Cornflake mixture to coat well. Return the ice cream balls to the freezer until you’re ready to serve.
4. Just before serving, top the fried ice cream with the toppings of your choice, such as chocolate sauce, honey, a dash of cinnamon, whipped cream, and a maraschino cherry.
Notes
·
The ice cream will melt quickly, so I recommend having the parchment paper-covered plate or baking sheet prepared and chilled before the ice cream balls are made so they can quickly be transferred to that plate/sheet and moved to the freezer before they melt too much.
Forming the ice cream balls in pretty uncomfortable, so it may be a good idea to suggest using latex gloves. I used my (very clean) hands, worked very quickly, and then ran them under warm water.
The ice cream balls do not need to be perfect. They can be pretty roughly shaped. It’s more important to work quickly so it doesn’t melt.
Pin it for Later!

