You will love making this cute Dollar Store Clothespin Pumpkin Wreath Craft! It is super easy to make following the step-by-step instructions, takes about 30 minutes, and just as the name implies, is inexpensive to make as the supplies come from the Dollar store!

Wreaths are a fun way to welcome the holidays and changing of the seasons and with Fall not far away, we are loving this cute Pumpkin Wreath!
It is perfect to dress the front door and bring a splash of Fall to our home.
This wreath craft is inexpensive to make but looks like you had to dig deep in the pocketbook for it! It is also super easy to make simply by following the step-by-step instructions.
And, if you love fun wreaths to decorate your door with be sure and take a look at these cute ones too!
Easy DIY Dollar Tree Farmhouse Rose Heart Wreath
This fun Dollar Tree Farmhouse Rose Heart Wreath is so easy to make and will look amazing adorning your front door! And, because all the supplies come from Dollar Tree it is super inexpensive to make even though it looks as though you paid mega dollars for it!
Dollar Tree Bee Happy Wreath
This fun Dollar Tree Bee Happy Wreath Craft will put a smile on everyone’s face. Print the list of supplies and head to the Dollar Tree. This unique craft is worth the time and energy. I love the farmhouse decor look!
Dollar Tree Teacher Appreciation Wreath
Teachers play a big role in our kids’ lives so during teacher appreciation week we like to do something special for them to show how much they truly are appreciated. This super cute DIY Dollar Tree Teacher Appreciation Wreath is perfect! It is super easy to make with only a few simple supplies from Dollar Tree and/or Hobby Lobby.
Easy Fall Wreath Craft for Kids
Fall is a favorite time of year for many of us. We love the changing of the leaves and the fun Fall decorations. This year, let the kids in on the decorating with this fun Fall Wreath Craft for Kids!
Now, let’s take a look at how easy this fun Clothespin Pumpkin Wreath craft is to make!
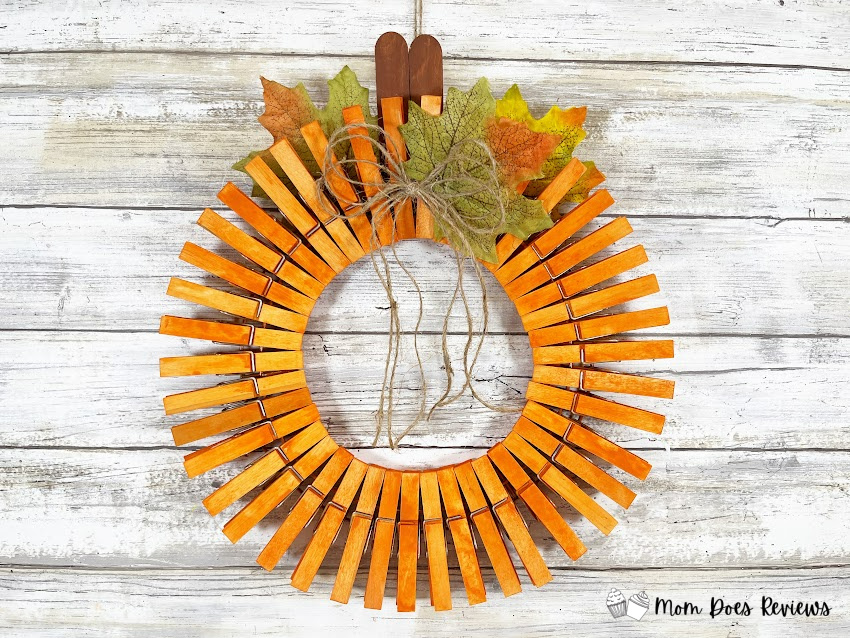
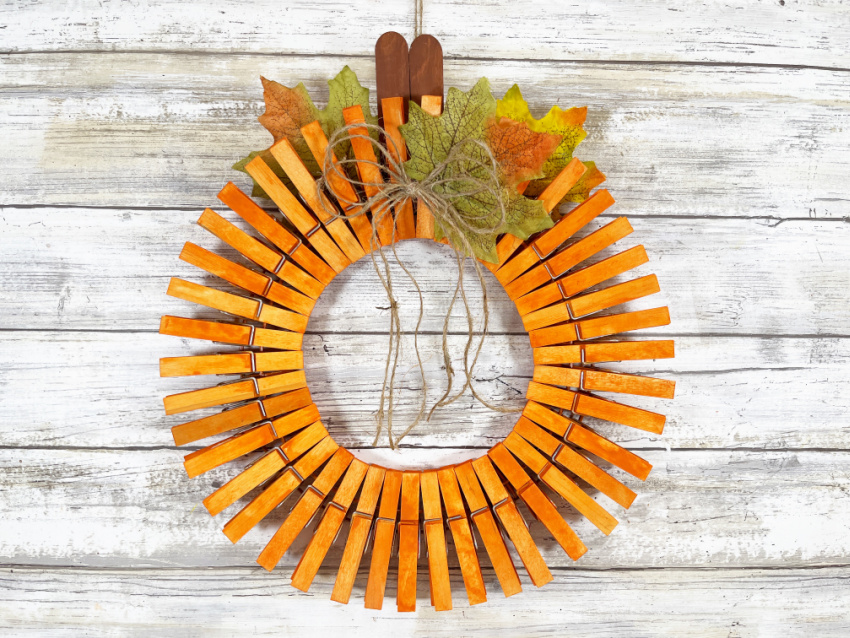
Dollar Store Clothespin Pumpkin Wreath Craft
Using simple supplies from the Dollar Store, create this quick and easy Clothespin Pumpkin Wreath in just about 30 minutes. The hardest part is waiting for the paint to dry! Perfect for any style of décor for your home.
Materials needed:
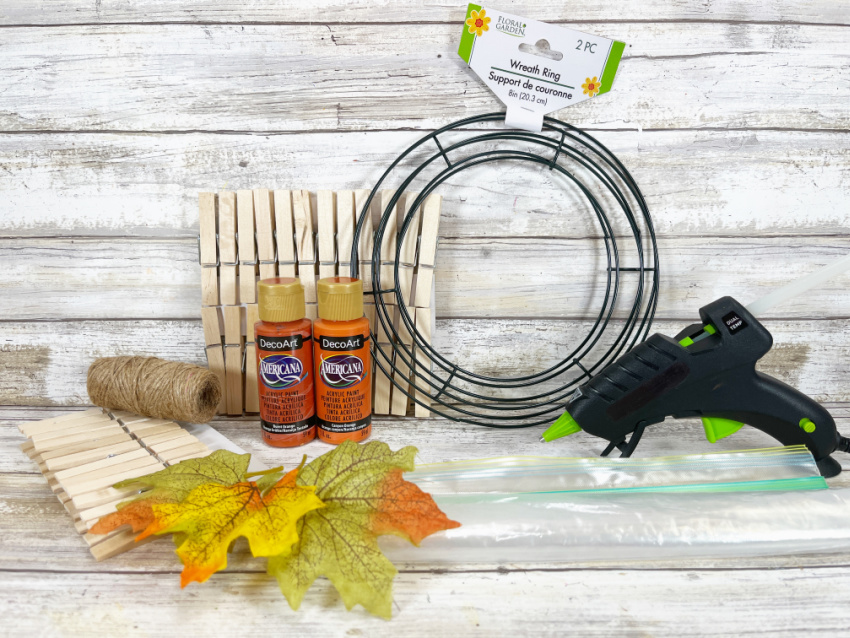
Full Size Clothespins, Wooden Spring-Style – Dollar Store
Wire Wreath Form, 8” – Dollar Store
Jumbo Craft Sticks, One – Dollar Store
Fall Leaf Bunch – Dollar Store
Natural Jute Twine – Dollar Store
Glue Gun and Glue Sticks – Dollar Store
Gallon Zipper Bag – Dollar Store
Cookie Sheet – Dollar Store
Aluminum Foil – Dollar Store
Acrylic Craft Paint – Burnt Orange, Dark Brown
Spray Paint – Burnt Orange
Paintbrush
Scissors
Ruler
How to make this cute Clothespin Pumpkin Wreath Craft:
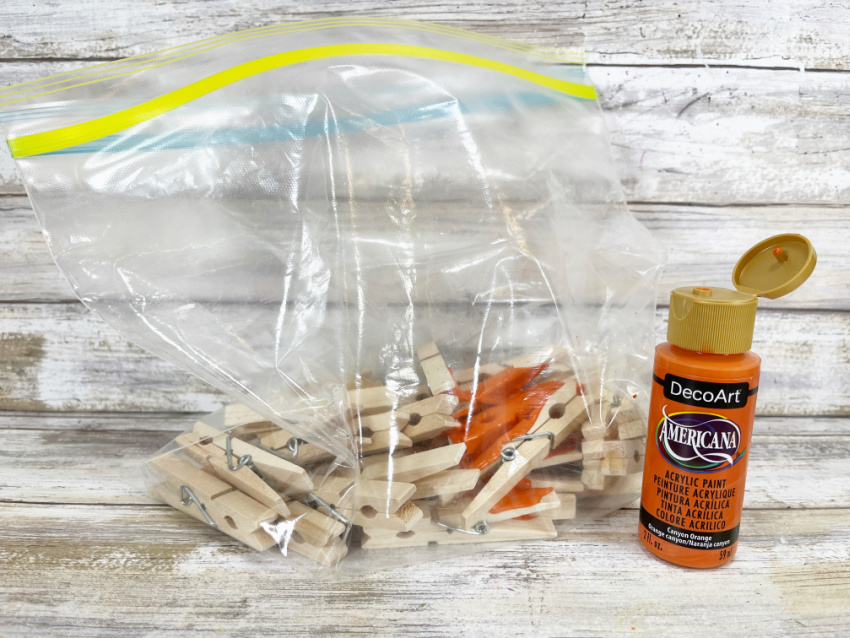
STEP ONE
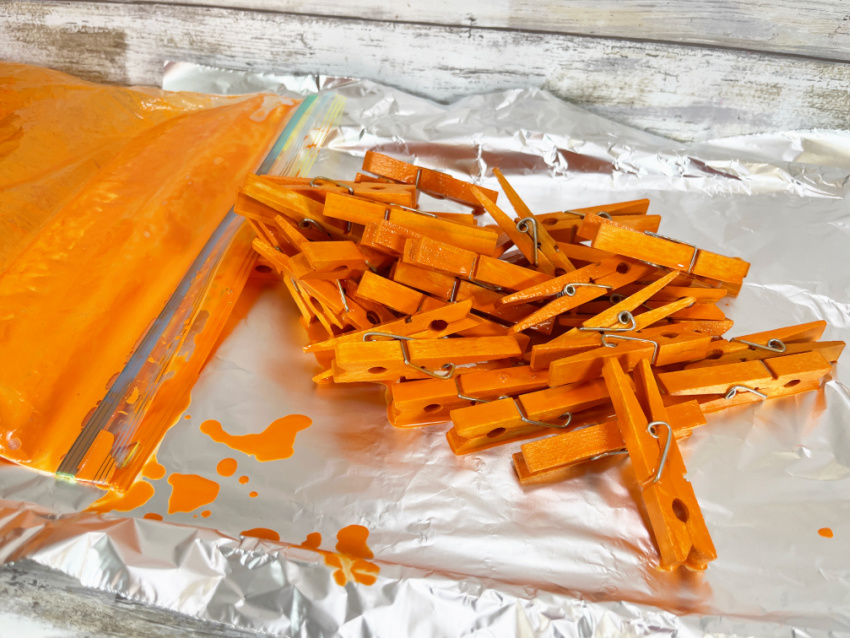
Gather all supplies. Full size wooden clothespins can be found in the laundry section of the Dollar Store. Place 42 wooden spring style clothespins in a gallon zipper bag, then add a half dollar size dollop of burnt orange acrylic craft paint, and two tablespoons of water.
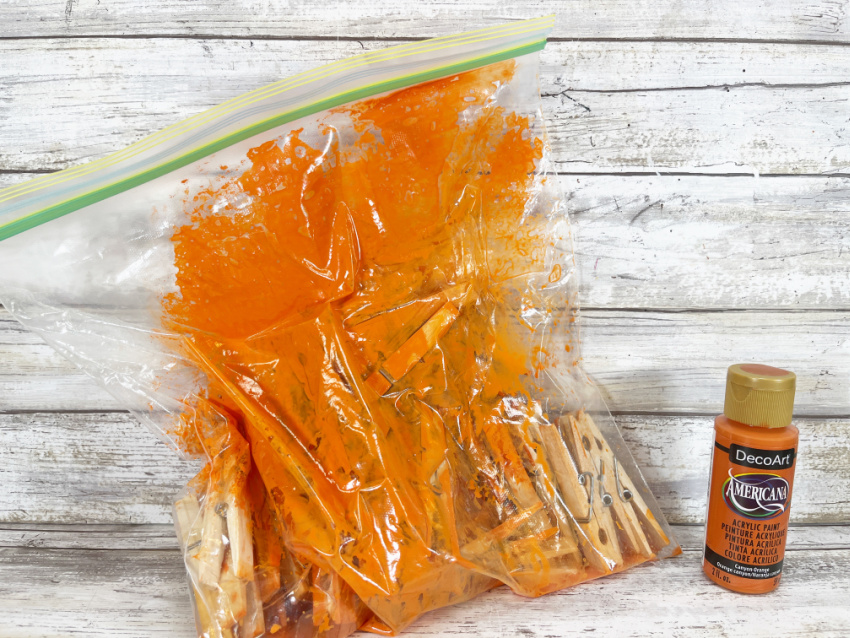
Zipper the bag closed and knead the clothespins in the bag until all are covered in the burnt orange acrylic craft paint. If working with kiddos, this step is perfect to do in the kitchen sink.
STEP TWO
Cover a cookie a sheet with aluminum foil, unzip the plastic bag, and turn out the painted clothespins onto the cookie sheet to dry.
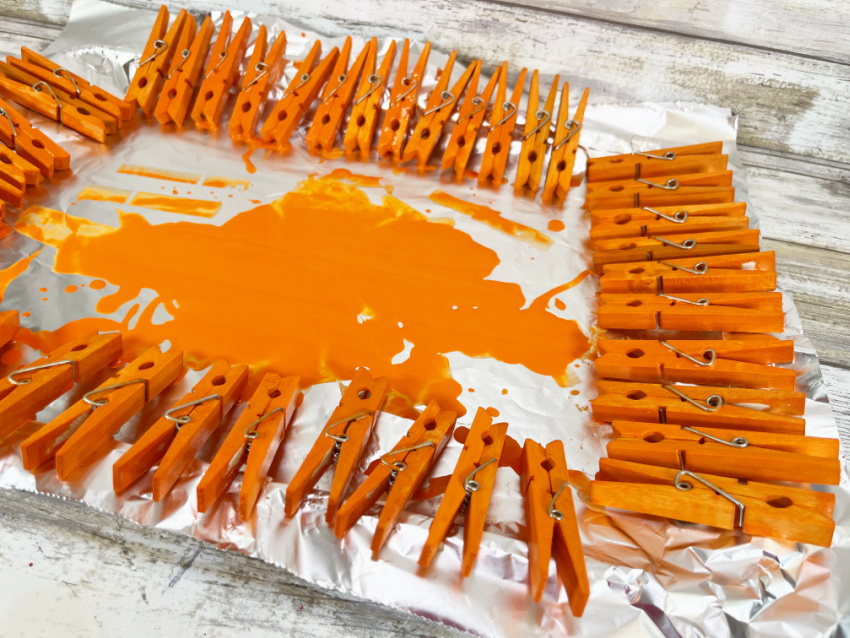
For faster drying time, prop the wooden clothespins around the edge of the cookie sheet. Turn the clothespins over, once the tops are dry.
STEP THREE
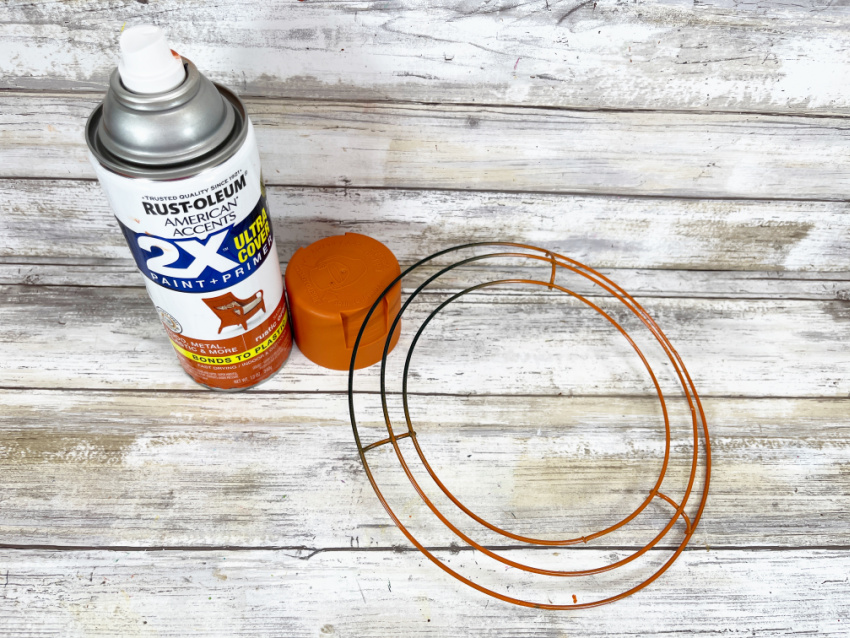
In a well-ventilated area, or outside cover the wire wreath form with burnt orange spray paint. Set aside to let dry. You can leave the wreath form green because only a small portion of the wire shows between the clothespins.
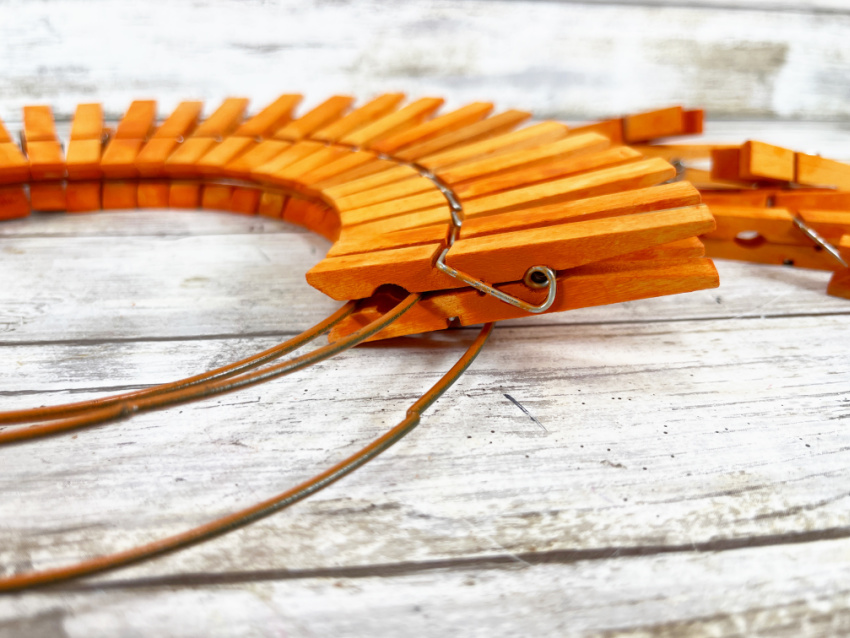
Clip the wooden clothespins around the two inner circles of the wreath form, using the outer ring as support, so they won’t wiggle around.
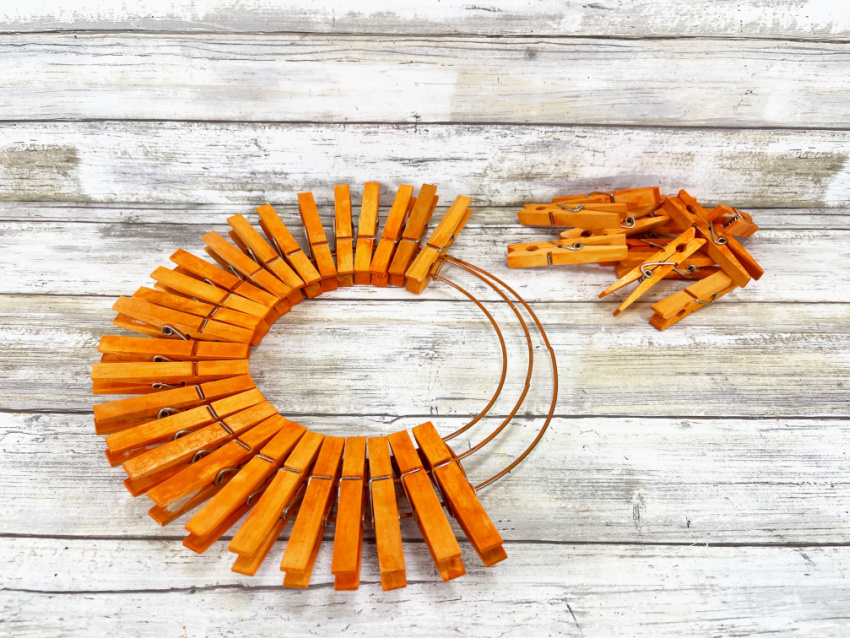
STEP FOUR
Continue to clip the orange painted wooden clothespins around the wreath form. Fitting 14 clothespins into each of the three sections of the wreath.
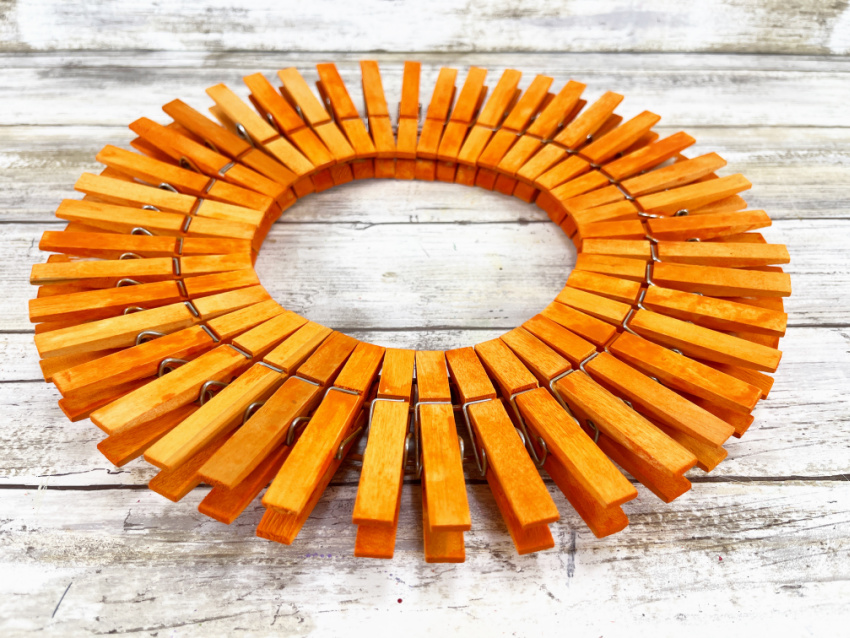
Once all of the clothespins are clipped on, space them equally around the wreath form. The clothespins can be secured with glue if hanging outside.
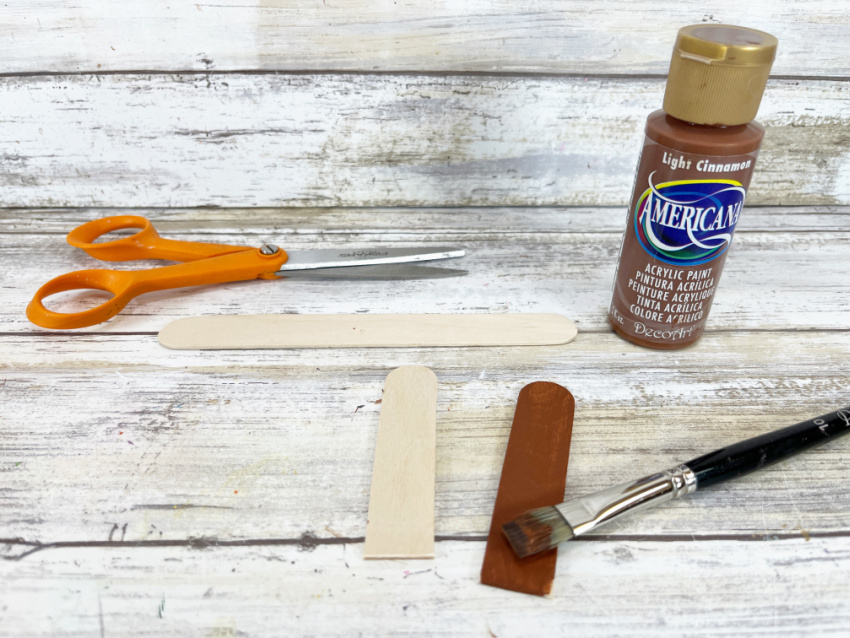
STEP FIVE
Cut one jumbo craft stick in half with scissors. Paint with dark brown acrylic craft paint. Set aside to dry and apply a second coat, if necessary.
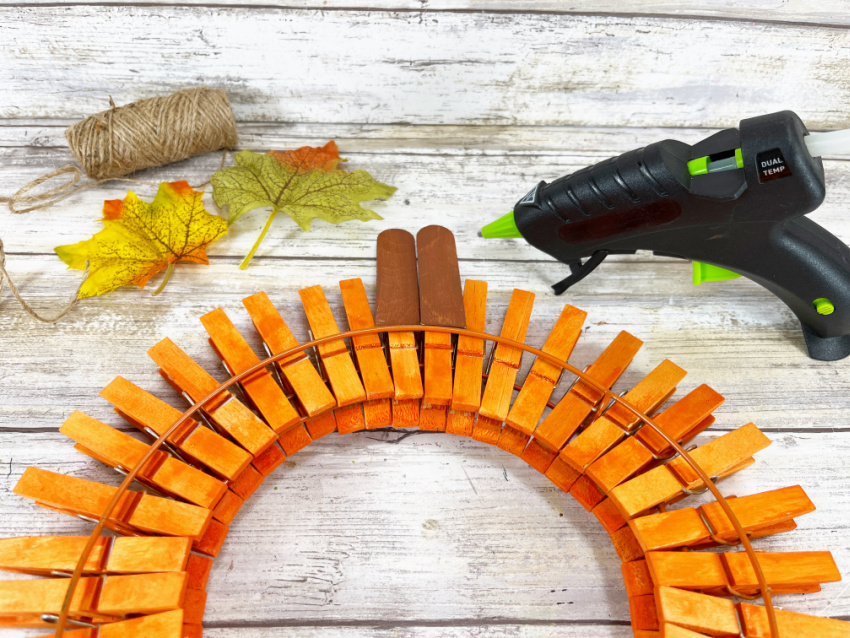
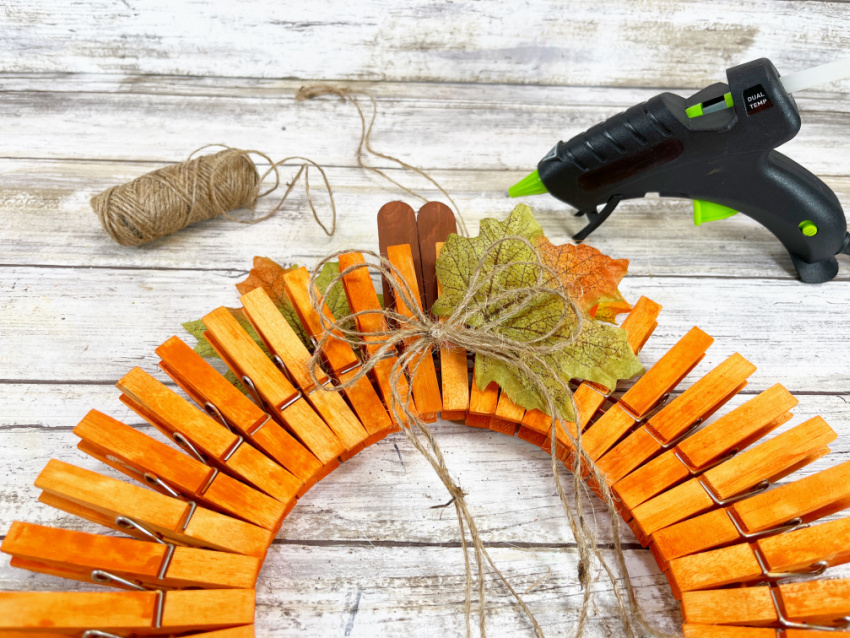
Attach the craft sticks to the top back of the wreath with a glue gun and glue sticks. Cut two or three leaves from a silk stem with scissors. Glue to the back and front of the wreath, near the stem. You can use liquid craft glue for this project, but you will have to wait for it to dry.
STEP SIX
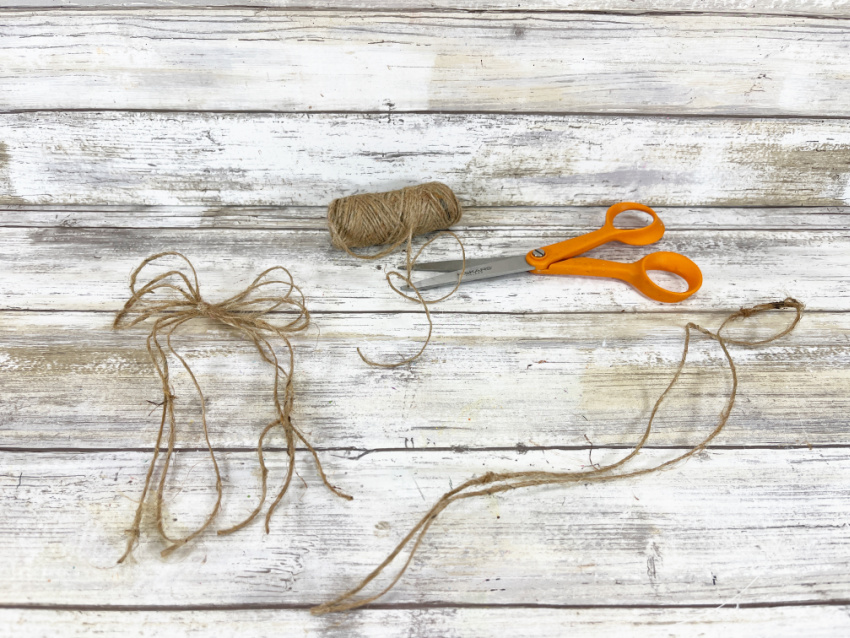
Measure and cut three 12” lengths of natural jute twine with scissors. Tie in a bow and secure at the top front of the wreath with a glue gun and glue sticks.
Print the instructions for this cute Dollar Store Pumpkin Wreath Craft!

Dollar Store Clothespin Pumpkin Wreath Craft
You will love making this cute Dollar Store Clothespin Pumpkin Wreath Craft! It is super easy to make following the step-by-step instructions, takes about 30 minutes, and just as the name implies, is inexpensive to make as the supplies come from the Dollar store!
Materials
- Full Size Clothespins, Wooden Spring-Style – Dollar Store
- Wire Wreath Form, 8” – Dollar Store
- Jumbo Craft Sticks, One – Dollar Store
- Fall Leaf Bunch – Dollar Store
- Natural Jute Twine – Dollar Store
- Glue Gun and Glue Sticks – Dollar Store
- Gallon Zipper Bag – Dollar Store
- Cookie Sheet – Dollar Store
Tools
- Aluminum Foil – Dollar Store
- Acrylic Craft Paint – Burnt Orange, Dark Brown
- Spray Paint – Burnt Orange
- Paintbrush
- Scissors
- Ruler
Instructions
- Gather all supplies. Full size wooden clothespins can be found in the laundry section of the Dollar Store. Place 42 wooden spring style clothespins in a gallon zipper bag, then add a half dollar size dollop of burnt orange acrylic craft paint, and two tablespoons of water.
Zipper the bag closed and knead the clothespins in the bag until all are covered in the burnt orange acrylic craft paint. If working with kiddos, this step is perfect to do in the kitchen sink. - Cover a cookie a sheet with aluminum foil, unzip the plastic bag, and turn out the painted clothespins onto the cookie sheet to dry.
For faster drying time, prop the wooden clothespins around the edge of the cookie sheet. Turn the clothespins over, once the tops are dry. - In a well-ventilated area, or outside cover the wire wreath form with burnt orange spray paint. Set aside to let dry. You can leave the wreath form green because only a small portion of the wire shows between the clothespins.
Clip the wooden clothespins around the two inner circles of the wreath form, using the outer ring as support, so they won’t wiggle around. - Continue to clip the orange painted wooden clothespins around the wreath form. Fitting 14 clothespins into each of the three sections of the wreath.
Once all of the clothespins are clipped on, space them equally around the wreath form. The clothespins can be secured with glue if hanging outside. - Cut one jumbo craft stick in half with scissors. Paint with dark brown acrylic craft paint. Set aside to dry and apply a second coat, if necessary.
Attach the craft sticks to the top back of the wreath with a glue gun and glue sticks. Cut two or three leaves from a silk stem with scissors. Glue to the back and front of the wreath, near the stem. You can use liquid craft glue for this project, but you will have to wait for it to dry. - Measure and cut three 12” lengths of natural jute twine with scissors. Tie in a bow and secure at the top front of the wreath with a glue gun and glue sticks.
Pin it for later!