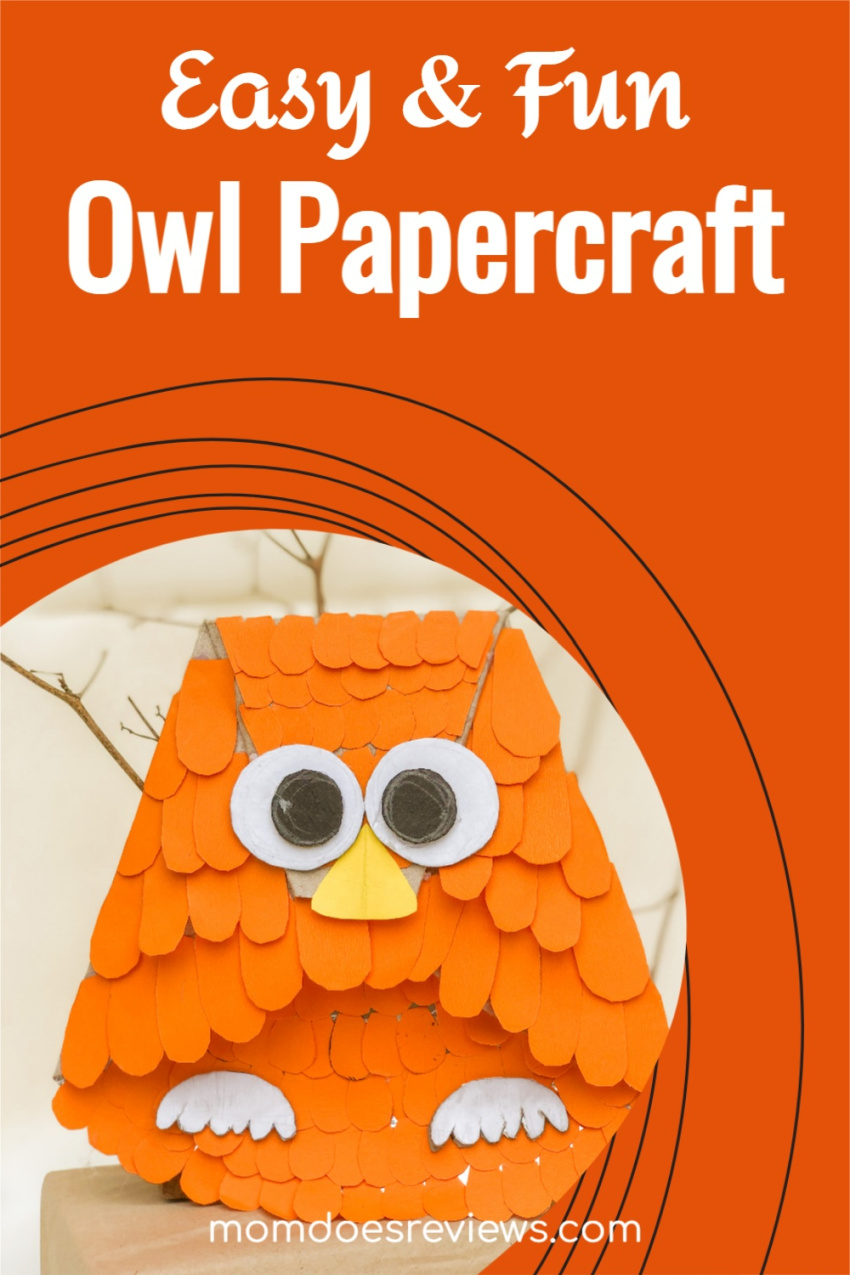
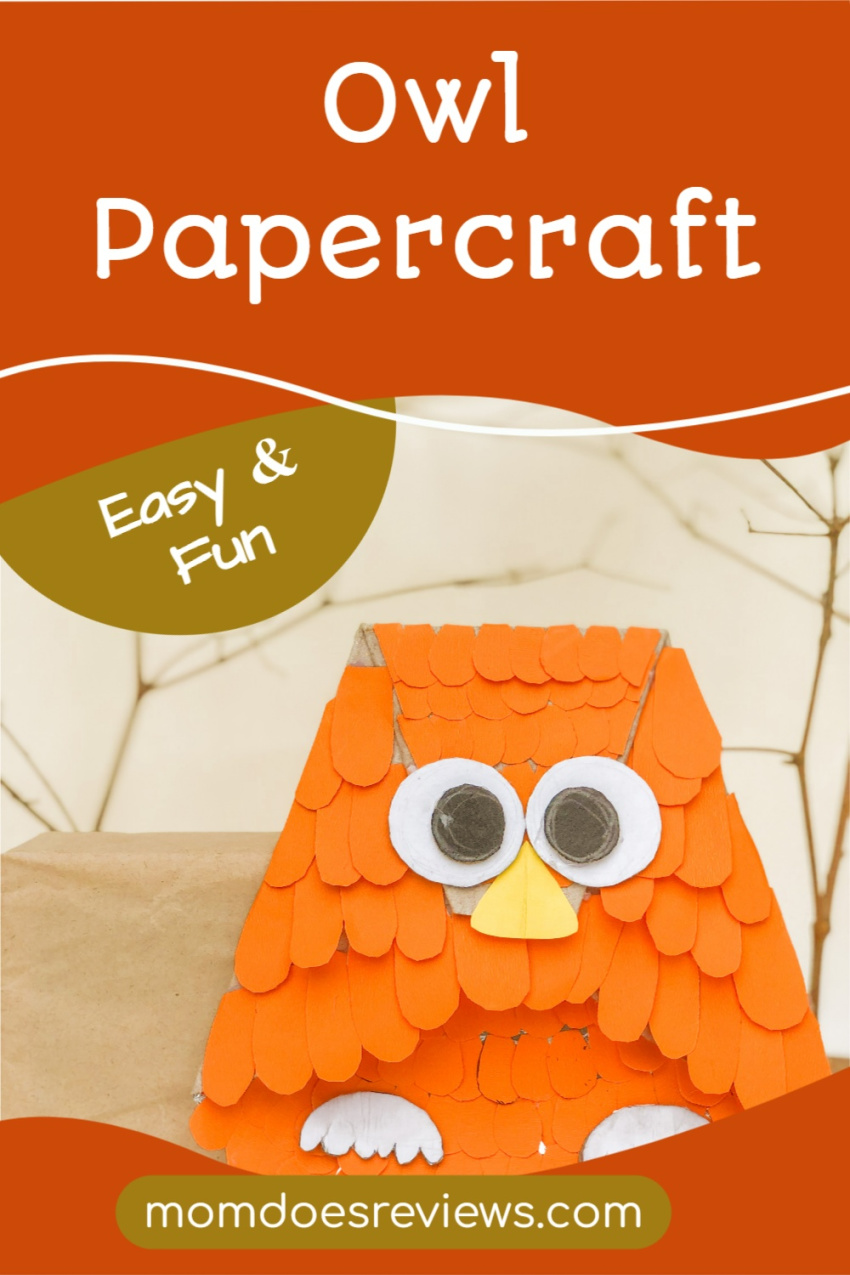
If your kids love paper crafts AND owls, then they will simply love this fun and easy Owl Papercraft! It is SO adorable, uses simple supplies, and has easy-to-follow step-by-step instructions.
Owls are a favorite of mine. They are so stinkin’ cute!
So, when you combine an adorable owl with a fun paper craft, you get a seriously must-make craft!
This easy papercraft uses minimal supplies you probably already have on hand and comes with easy-to-follow step-by-step instructions.
Before we take a look, be sure and take a look at these easy owl crafts too!
Colorful Toilet Paper Roll Owl Craft for Kids
Kids love toilet paper roll crafts and when you add in a cute owl, how can they resist the fun? This bright and colorful Toilet Paper Owl Craft is perfect for an afternoon or classroom activity. It uses common everyday supplies and comes with step-by-step instructions that are super easy to follow.
Toilet Paper Roll Owl Craft for Kids
If your kids love creating fun crafts, they will love this cute Toilet Paper Roll Owl Craft! It is SO adorable and super easy! Just print out the template and follow the easy step-by-step instructions! It’s the perfect craft to make for Valentine’s Day! If you have an owl-lover in your family, they will love one of these cute crafts!
Easy Owl Crayon Craft for Recycling Old Crayons
This Owl Crayon craft is super adorable AND a great way to recycle those old crayons I know you have! Don’t we all? Turning them into these cute owl crayons is super easy to do and the kids are sure to squeal in delight!
Quilled Owl Craft: A Fun Paper Quilling
Paper quilling is a fun crafting pastime for many and it’s no wonder! This super cute Quilled Owl Craft is easy to do with the step-by-step instructions and it is fun for adults and kids alike! And, who can resist a cute owl?!
Now, back to our cute owl paper craft! Let’s take a look at easy it is to make!
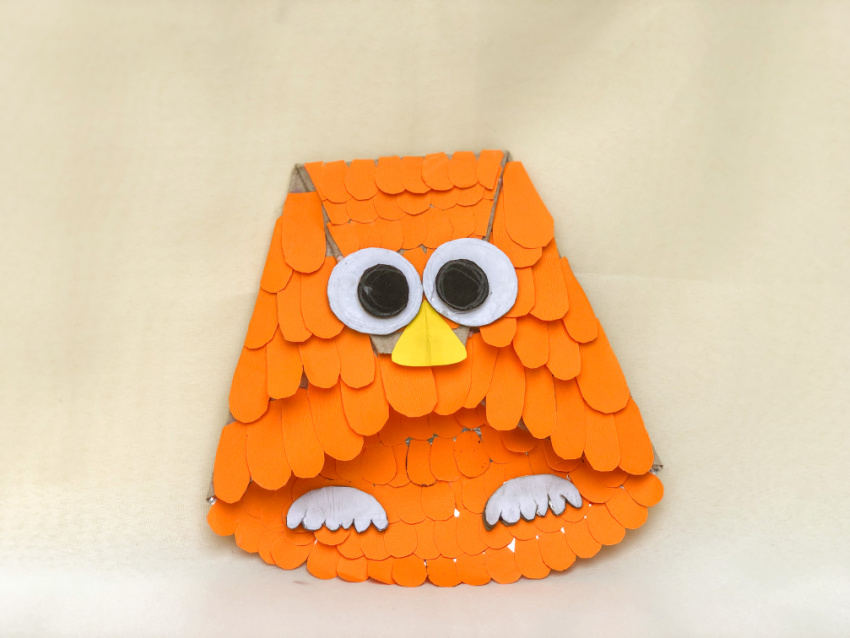
Easy & Fun Owl Papercraft
Materials needed:
Paper plate
Colored paper (orange & yellow)
Illustration board
Scissor
Glue gun & stick
How to make this cute Owl Papercraft:
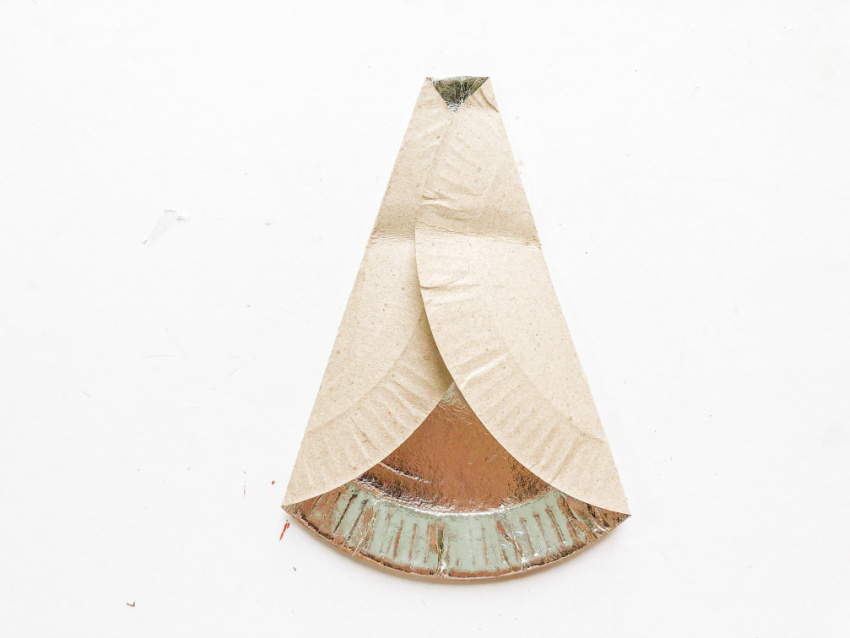
Step 1: Fold both sides of the paper plate in a slope position, looking like this (/ \).
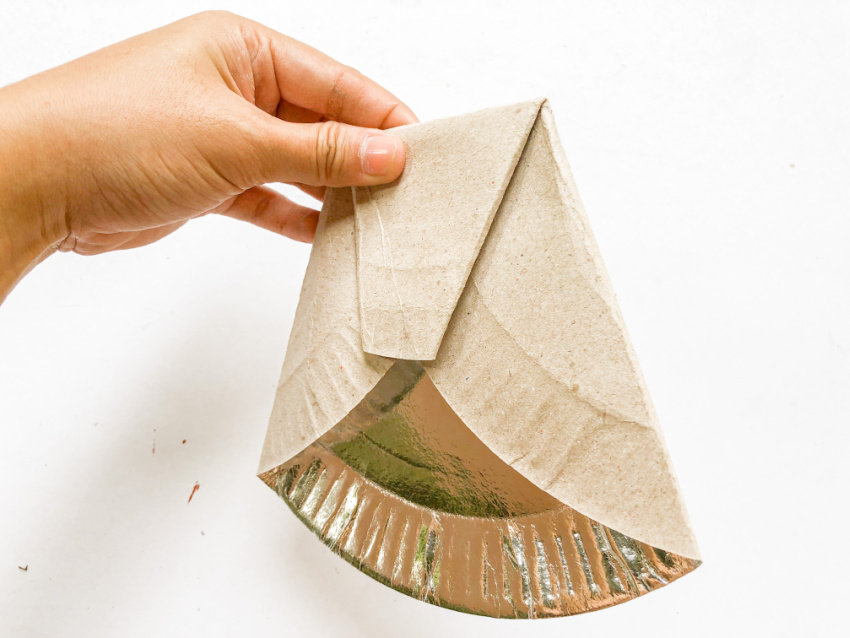
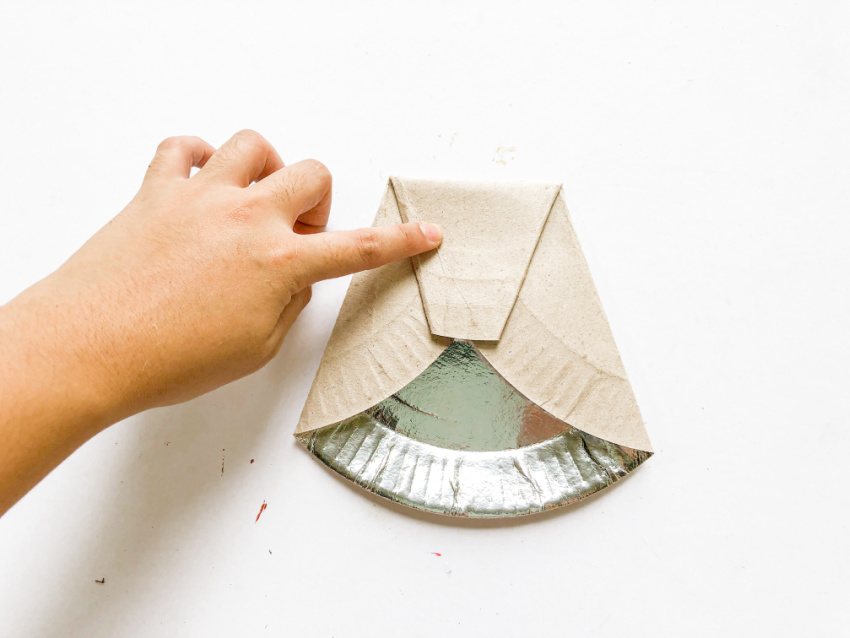
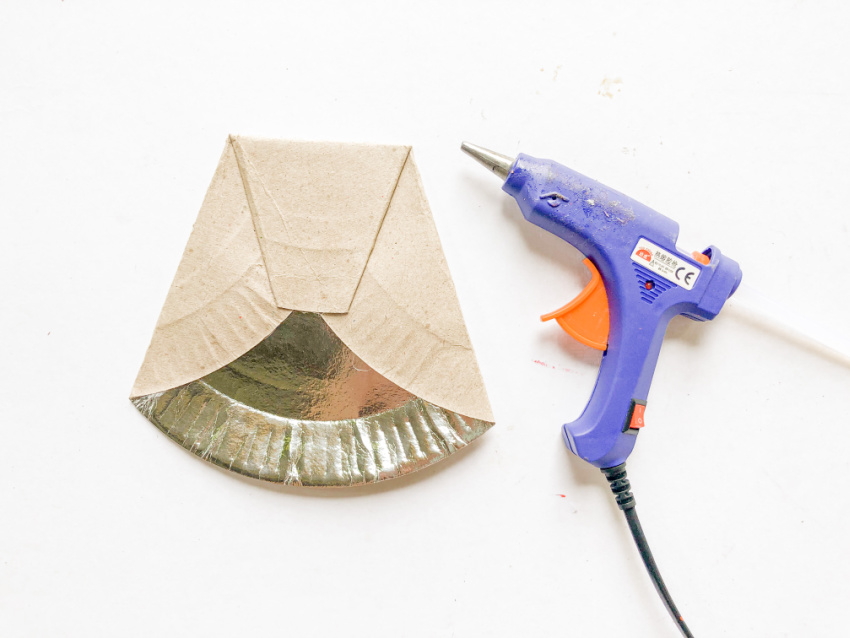
Step 2: Fold the upper part of the folded paper plate, and use the glue gun to paste them together.
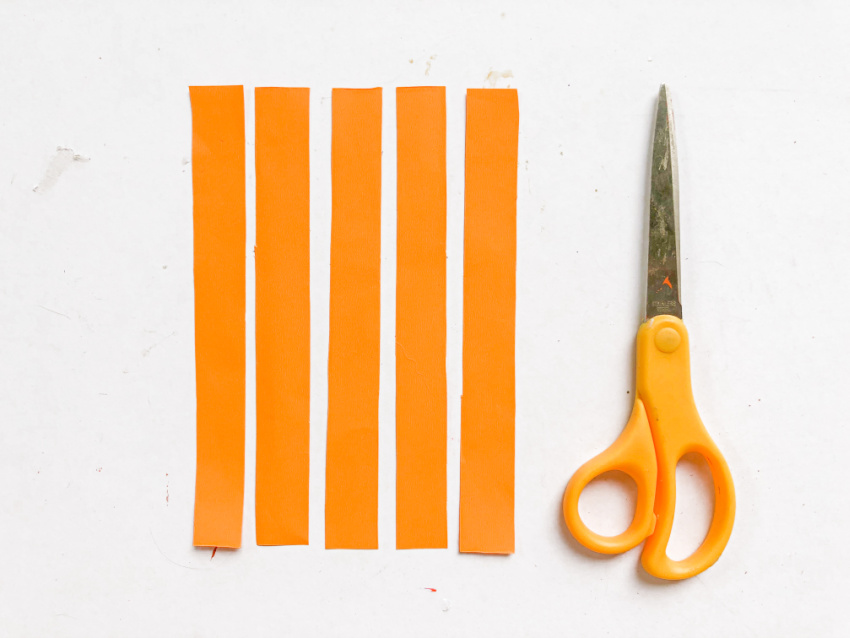
Step 3: Cut the orange-colored paper (15×2 cm) as much as you need.
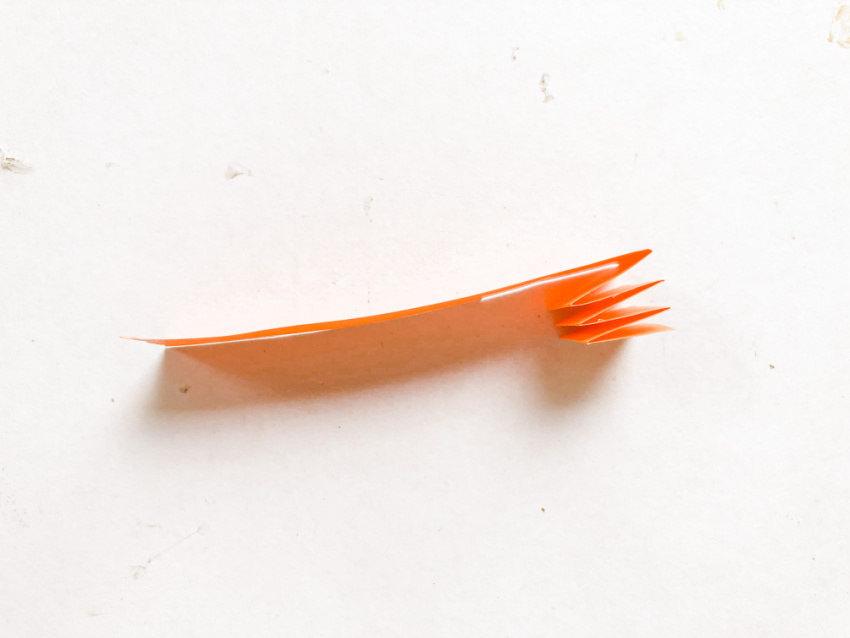
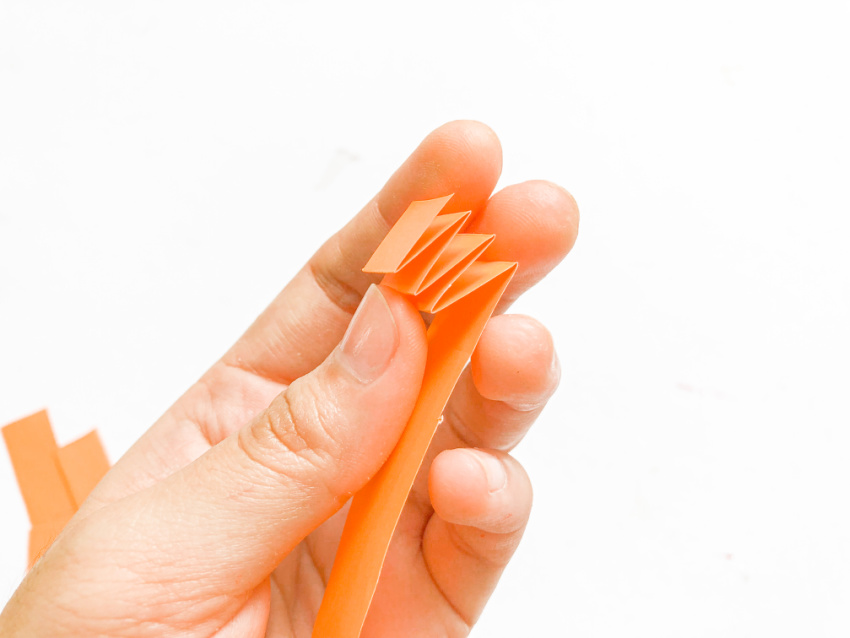
Step 4: Fold it every 1 cm until it is all folded.
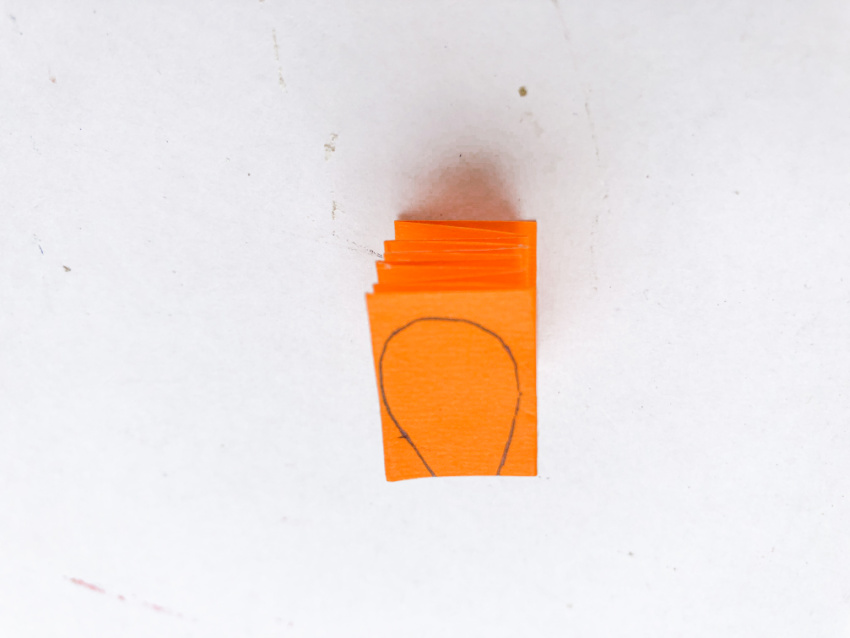

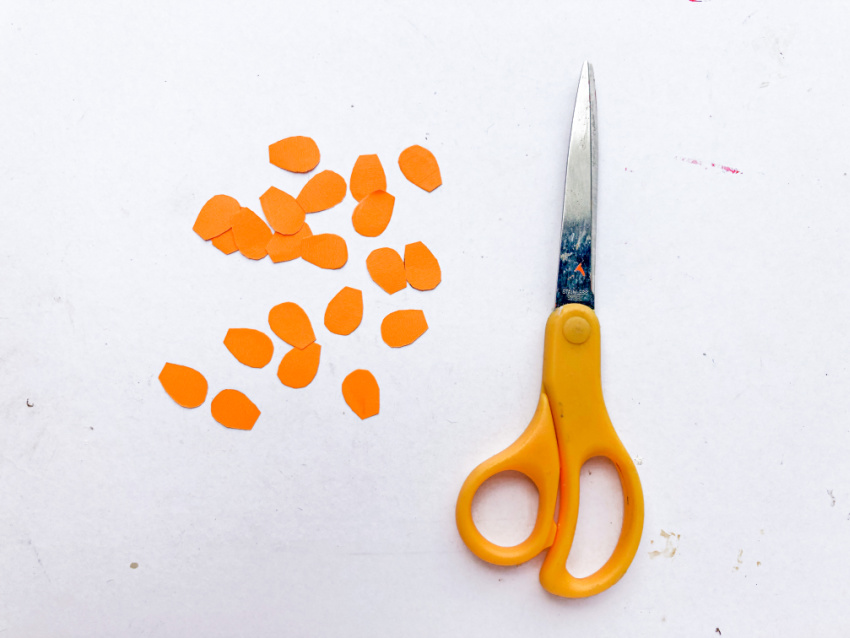
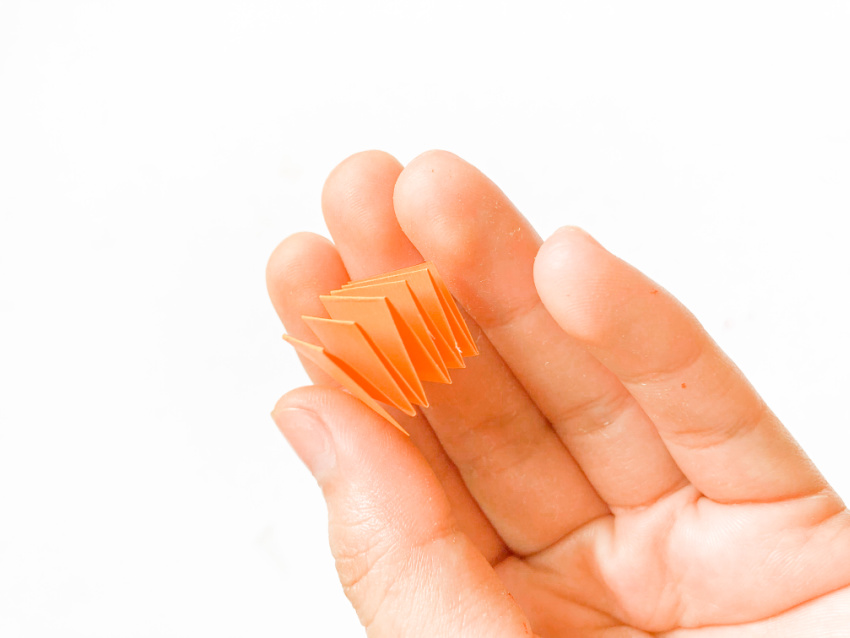
Step 5: Draw a small curve to it and cut, these will serve as little feathers.
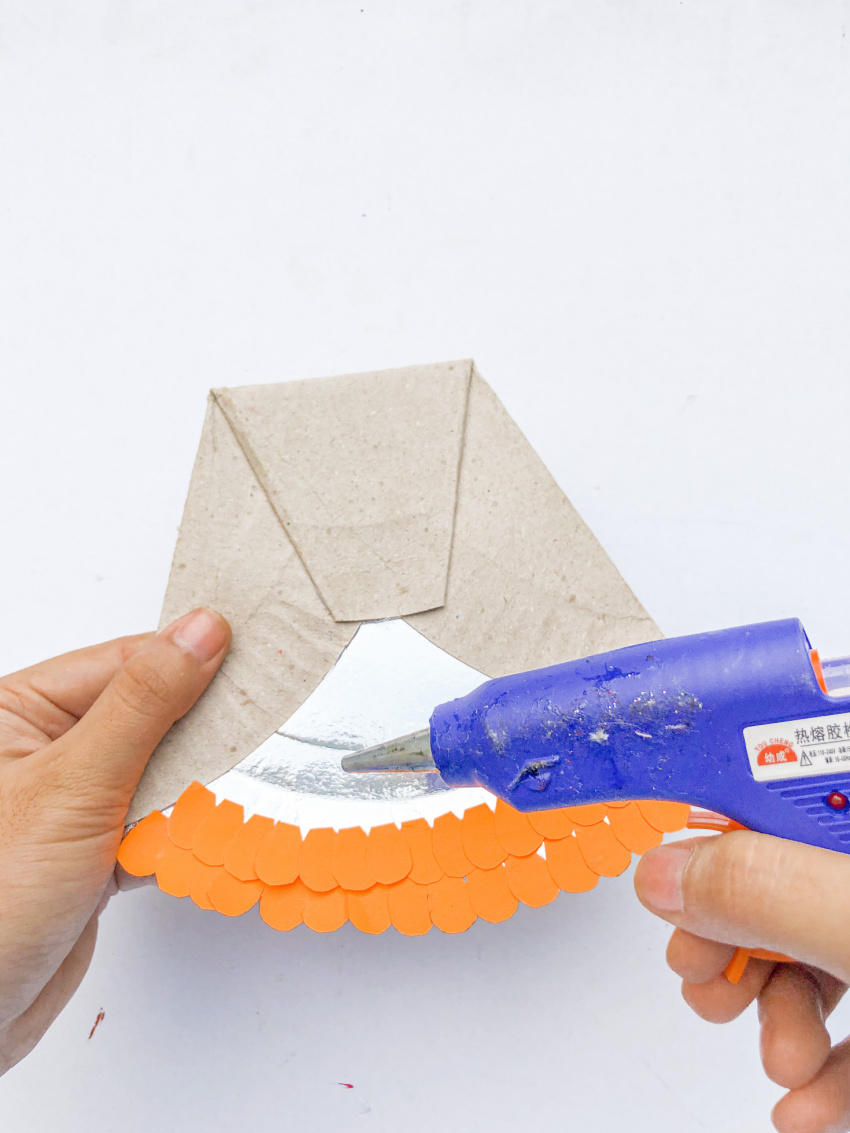
Step 6: Use the glue gun to paste these feathers into the shiny part of the folded paper plate and the head part. Start from the bottom to the top.
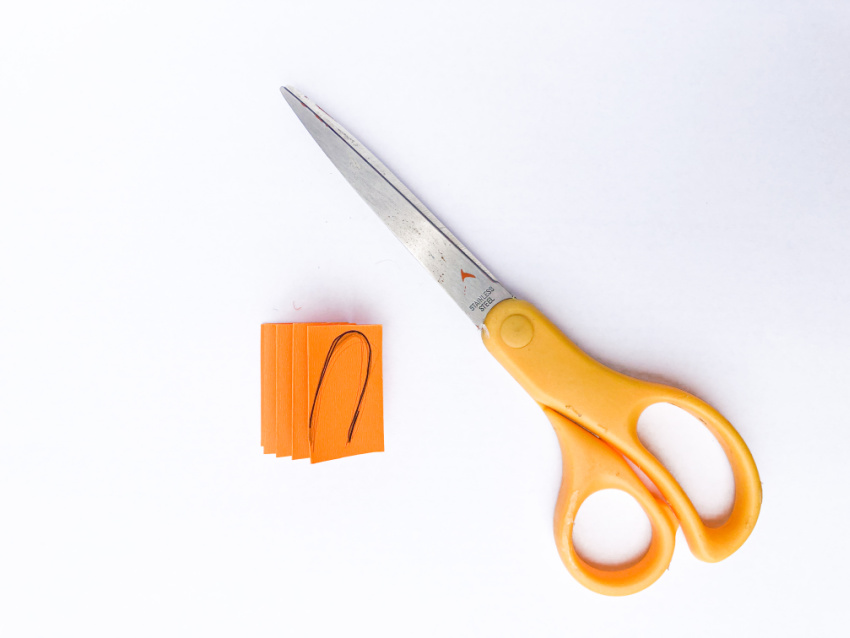
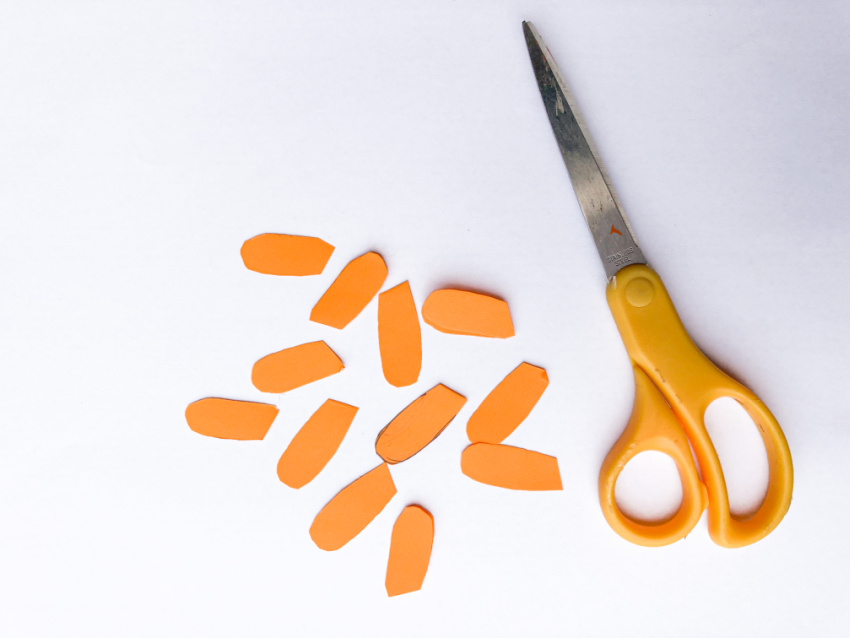
Step 7: Again, cut the orange-colored paper (15×4 cm) as much as you need.
Step 8: Fold it every 2 cm until it is all folded.
Step 9: Draw a bigger curve twice the size of the first curve into the folded colored paper and cut, these will also serve as feathers.
Step 10: Use the glue gun to paste these feathers to the left and right parts of the paper plate. Start from the bottom to the top.
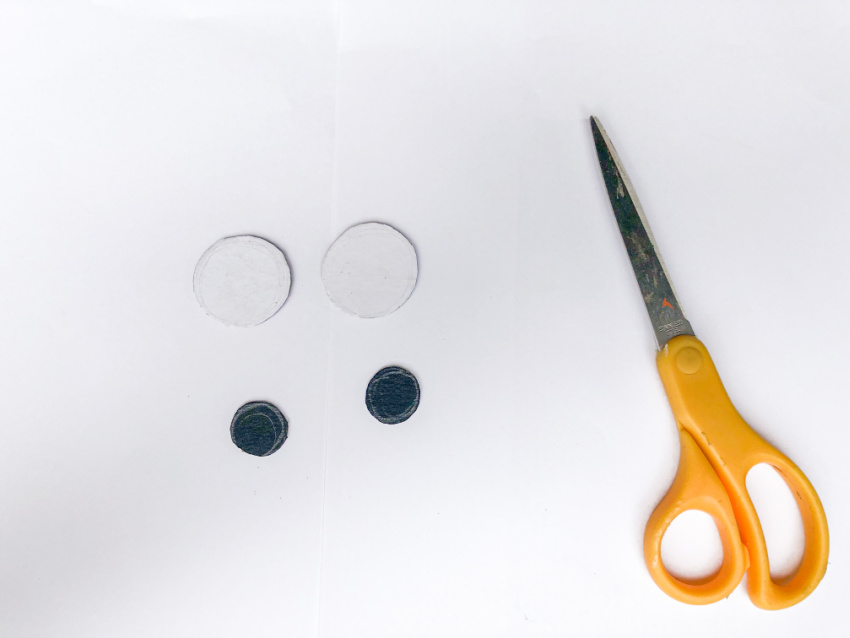
Step 11: Cut circles from the illustration board. (2) medium size, (2) small size.
Step 12: Paste it together creating a pair of eyes, then glue it into the complete product.
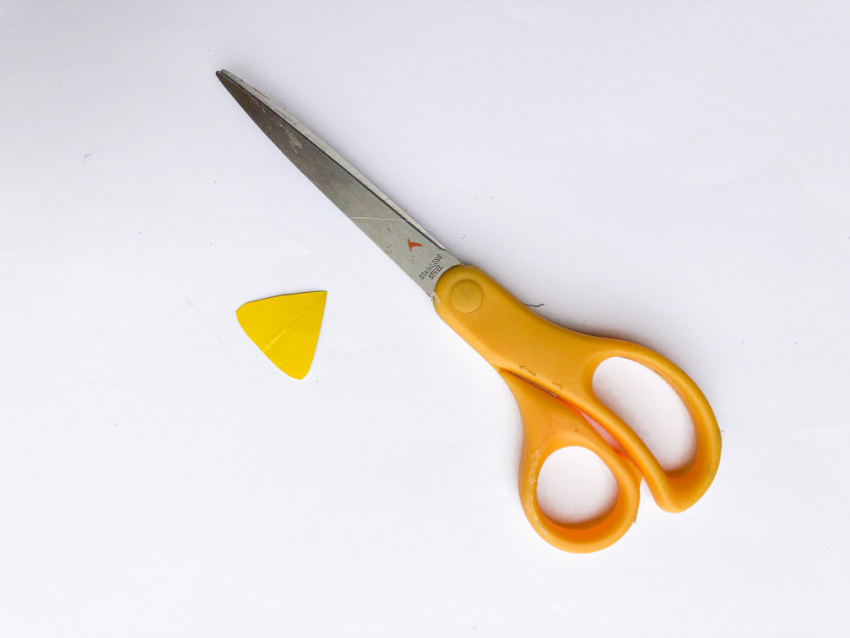
Step 13: Cut a small triangle from the yellow-colored paper, and paste it below the eyes.
Step 14: Cut (2) feet shaped from the illustration board and glue them to the bottom part of the product.
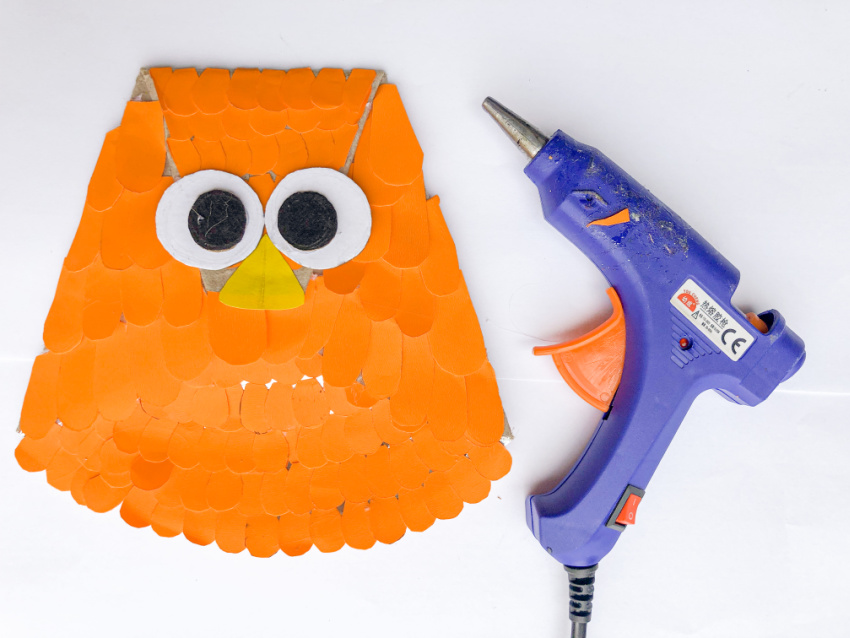
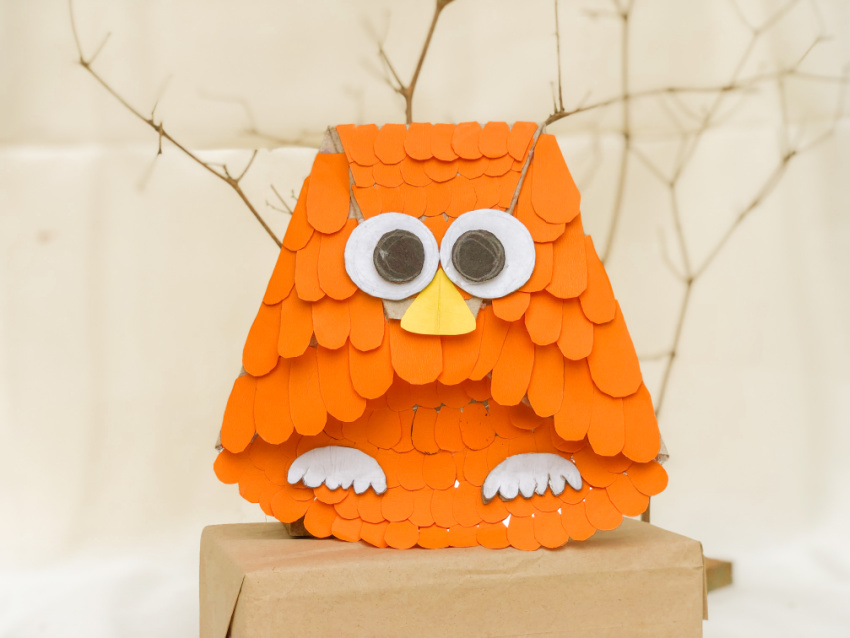
Step 15: There you have your OWL PAPERCRAFT, you did it!
TIPS:
1. Be careful when using the scissor and the glue gun.
2. Choose the proper materials to achieve the aspired outcome.
3. Let your creativity flow in your works!
4. You’re free to add designs you want.
Print the instructions for this easy Owl Papercraft!

Owl Papercraft
If your kids love paper crafts AND owls, then they will simply love this fun and easy Owl Papercraft! It is SO adorable, uses simple supplies, and has easy-to-follow step-by-step instructions.
Materials
- Paper plate
- Colored paper (orange & yellow)
- Illustration board
Tools
- Scissor
- Glue gun & stick
Instructions
- Fold both sides of the paper plate in a slope position, looking like this (/ \).
- Fold the upper part of the folded paper plate, and use the glue gun to paste them together.
- Cut the orange-colored paper (15×2 cm) as much as you need.
- Fold it every 1 cm until it is all folded.
- Draw a small curve to it and cut, these will serve as little feathers.
- Use the glue gun to paste these feathers into the shiny part of the folded paper plate and the head part. Start from the bottom to the top.
- Again, cut the orange-colored paper (15×4 cm) as much as you need.
- Fold it every 2 cm until it is all folded.
- Draw a bigger curve twice the size of the first curve into the folded colored paper and cut, these will also serve as feathers.
- Use the glue gun to paste these feathers to the left and right parts of the paper plate. Start from the bottom to the top.
- Cut circles from the illustration board. (2) medium size, (2) small size.
- Paste it together creating a pair of eyes, then glue it into the complete product.
- Cut a small triangle from the yellow-colored paper, and paste it below the eyes.
- Cut (2) feet shaped from the illustration board and glue them to the bottom part of the product.
- There you have your OWL PAPERCRAFT, you did it!
Notes
1. Be careful when using the scissor and the glue gun.
2. Choose the proper materials to achieve the aspired outcome.
3. Let your creativity flow in your works!
4. You’re free to add designs you want.
Pin it for later!