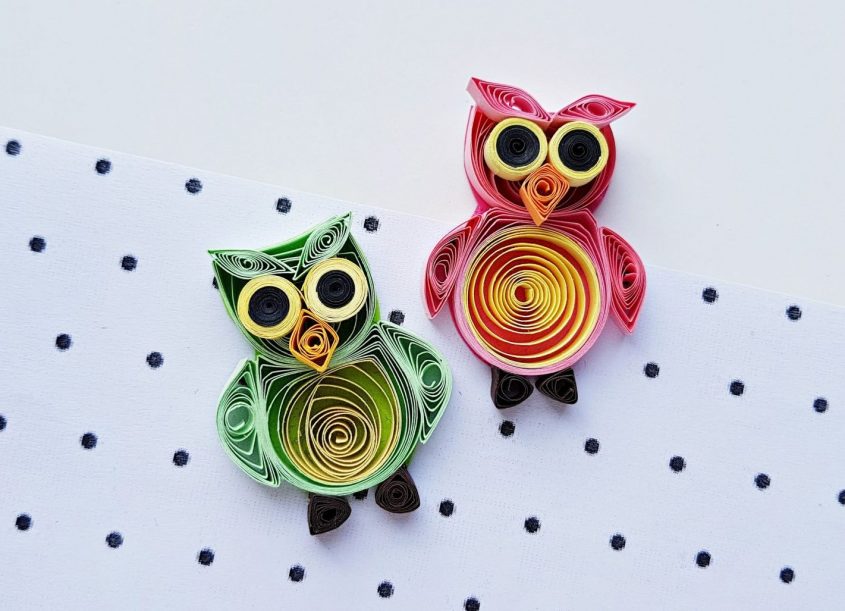
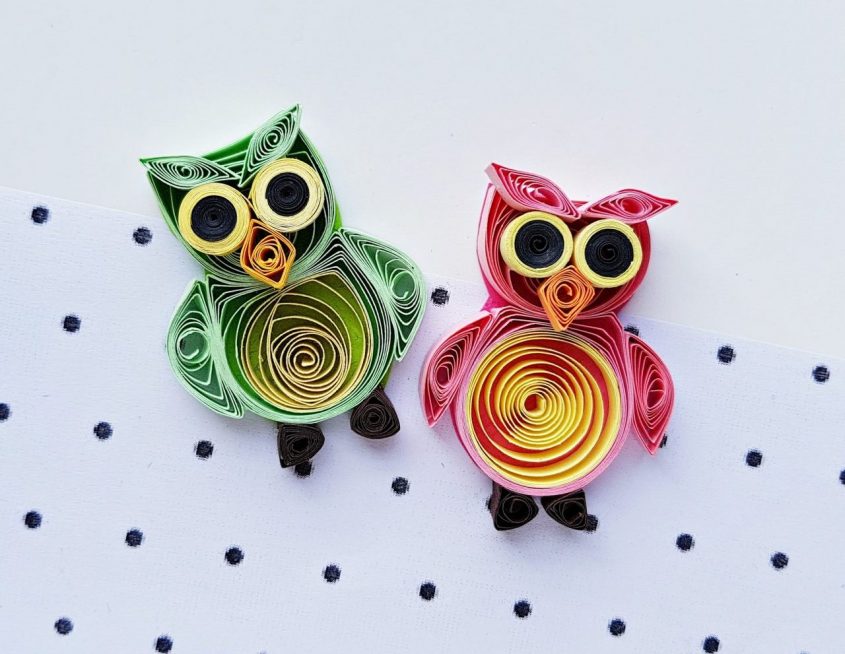
Paper quilling is a fun crafting pastime for many and it’s no wonder! This super cute Quilled Owl Craft is easy to do with the step-by-step instructions and it is fun for adults and kids alike! And, who can resist a cute owl?!
If you love quilling crafts, be sure and try these beautiful Quilled Hyacinth flowers or kids may like to try their hand at this fun Quilled Rainbox Art!
Supplies Needed
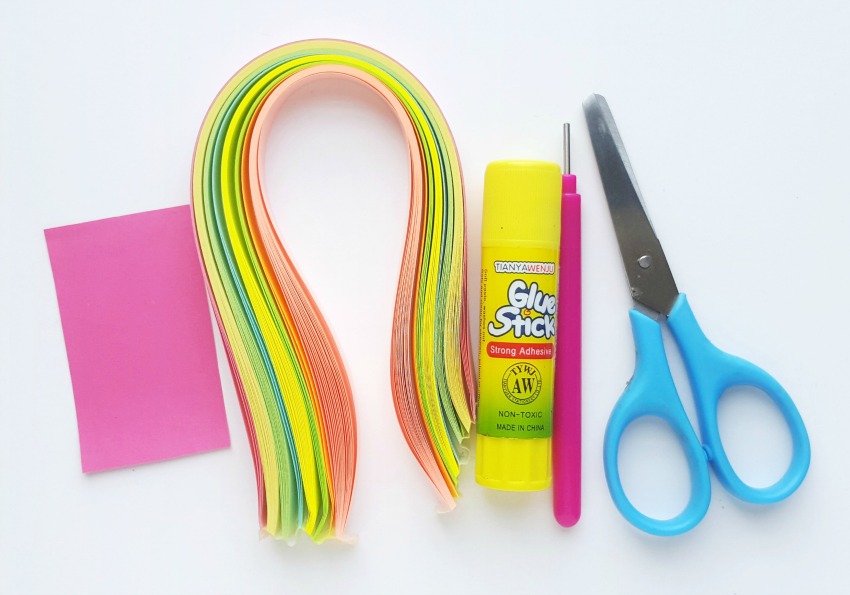
Paper quilling strips
Slotted quilling tool
Scissors
Craft glue
Colored craft paper
Instructions
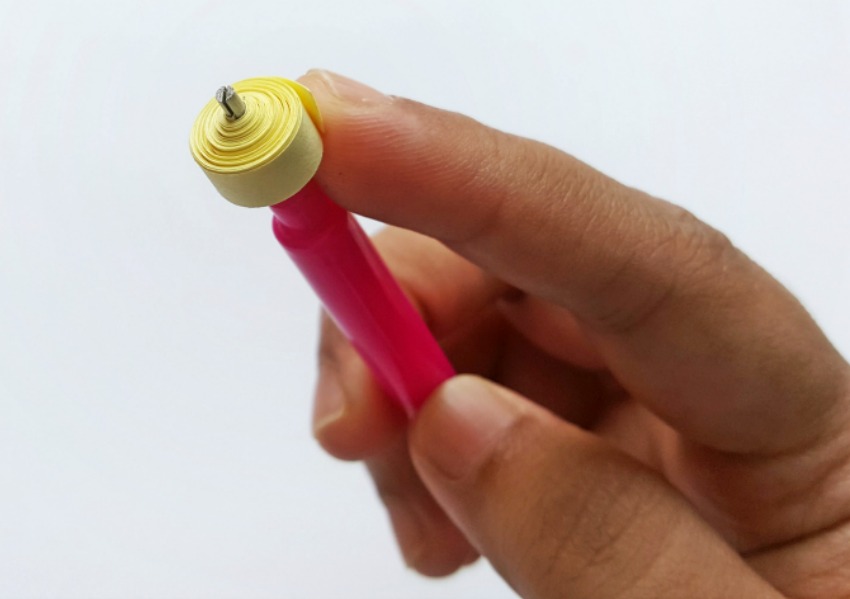
Select a color to get started. Take a 12 inches long quilling strip and coil it with the slotted quilling tool. Hold the quilled strip tightly inside the tool.
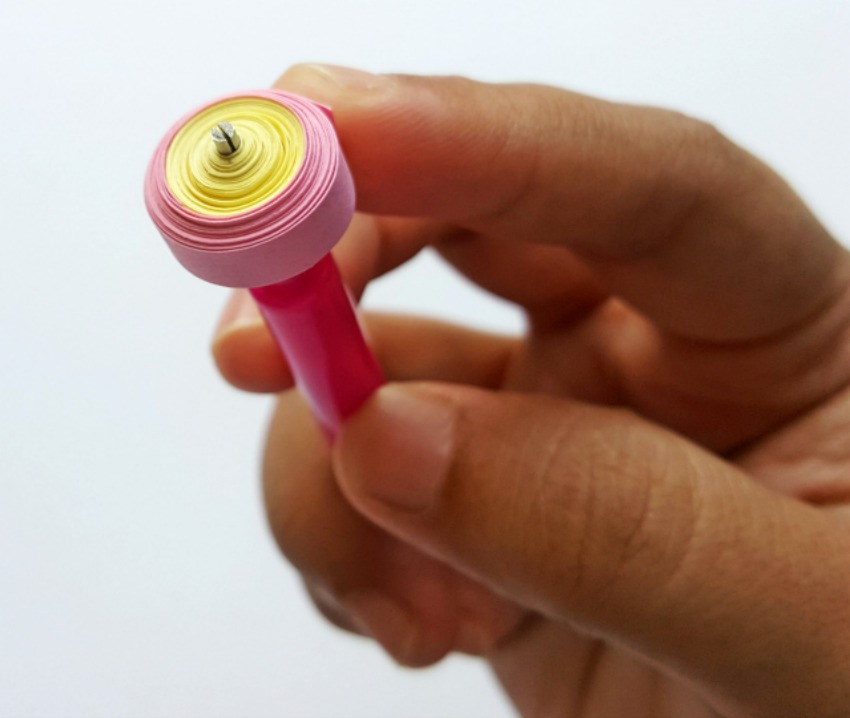
Take a different colored quilling strip (this one will be the main color of the owl). This strip should also be 12 inches long and stick its open end with the outer end of the previous coil. Coil the strip around the previous coil. Hold the joint coils firmly. Apply glue at the open end to secure the coil.
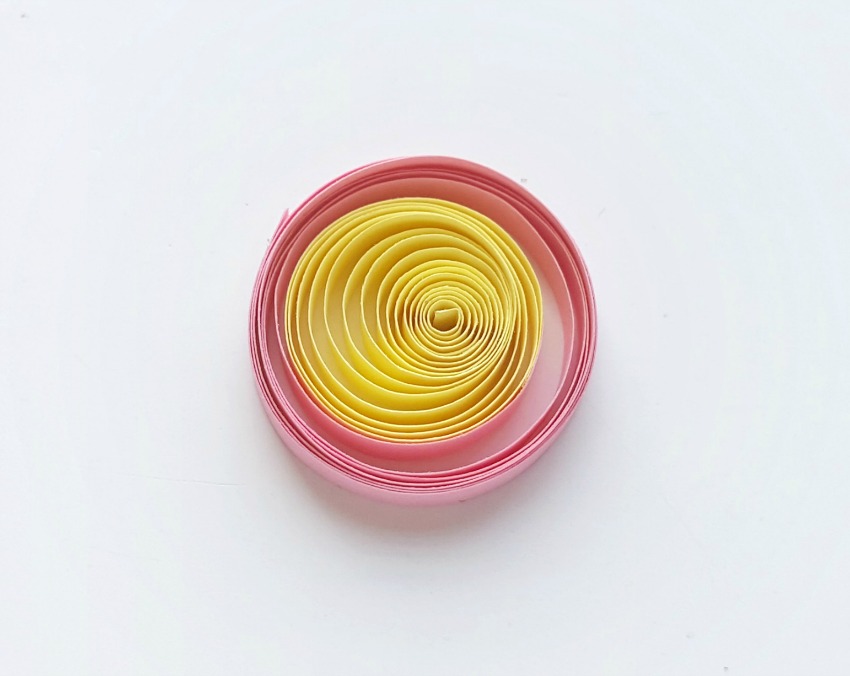
Carefully take the coils out of the tool and allow it to loosen up a bit freely.
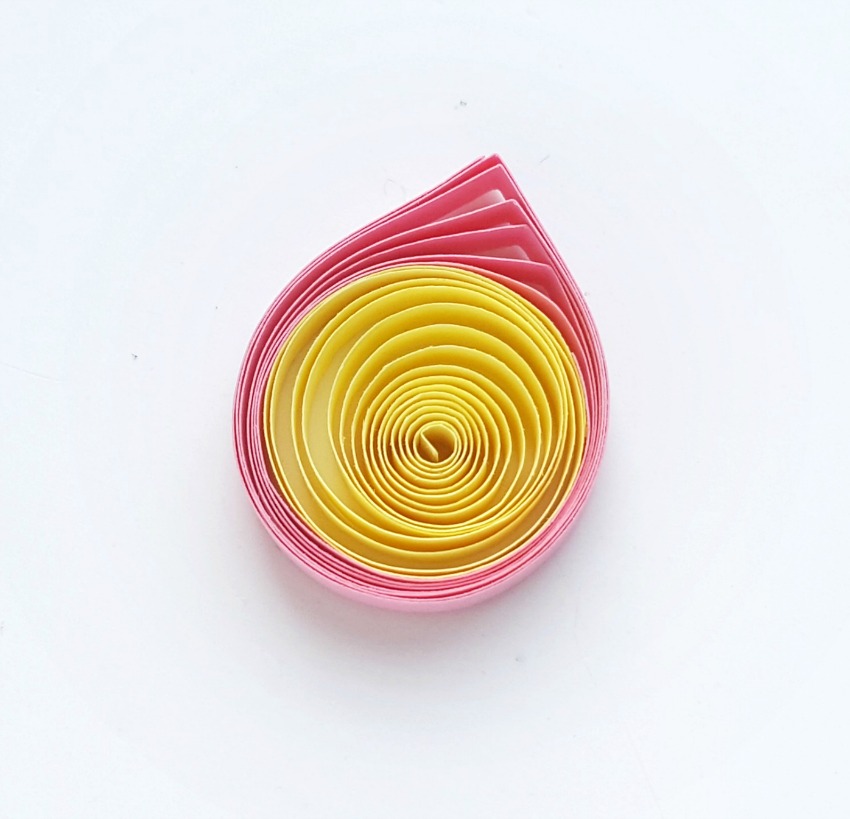
Press any one side of the loose coil to create a teardrop shape.
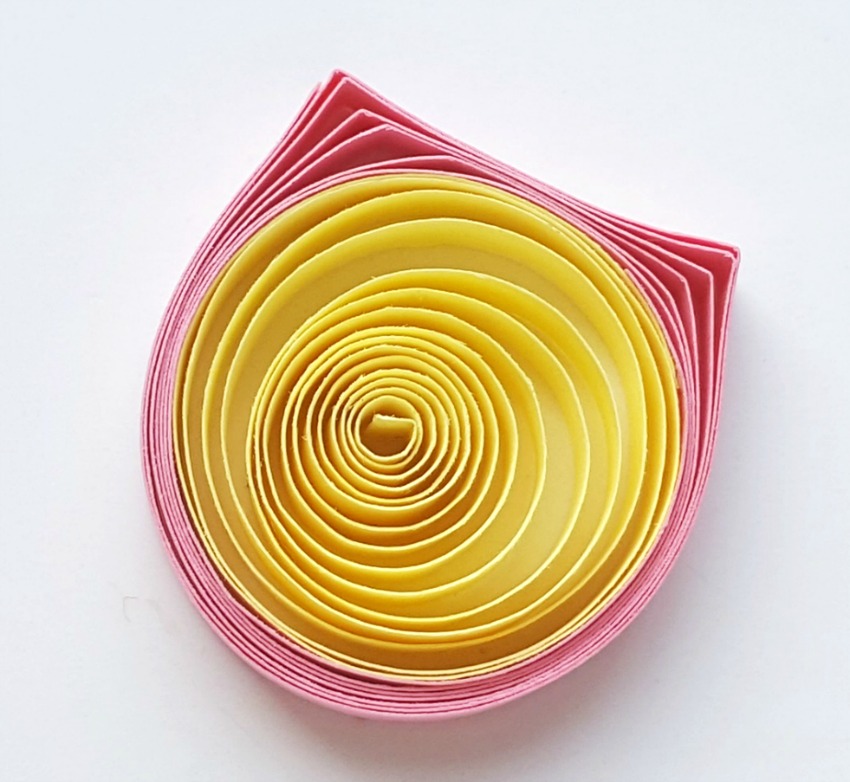
Keeping about a 2 cm gap with the first pressed point, press the teardrop shape again to form a bunny ear or shield shape. This is the body of the owl.
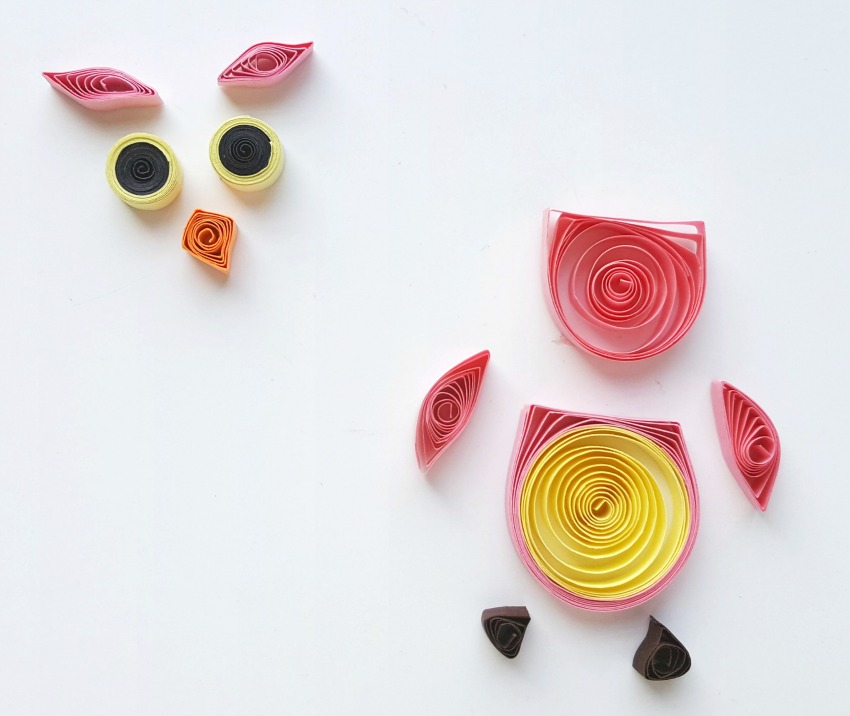
Use a 20 inches long quilling strip to create another shield or bunny ear shape. This shape should be relatively smaller than the first one; this will be the head of the owl. Use 8 inches long strips to create 2 quilled marquise shapes (the wings) and 2 curved marquise shapes (the eyebrow), 2 6 inches strips to create 2 triangles (legs) and one 6 inches strip to create a square (the beak). For the eyes, use a 12 inches long black strip to create a tight coil and then tightly coil a 10 inches long different colored strip around it. Similarly, make another one.
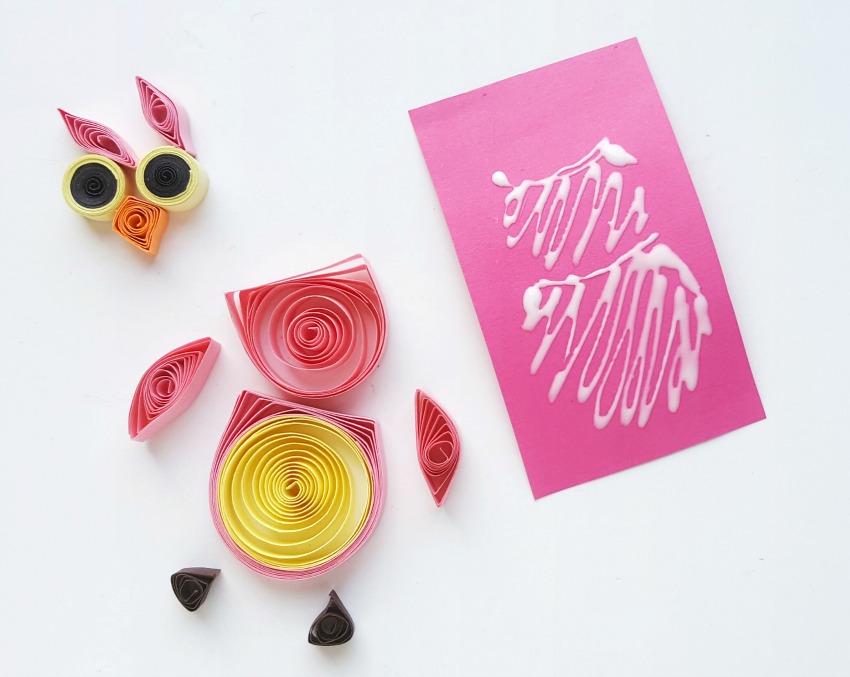
Take a colored craft paper and apply glue on it by tracing the whole shape of the owl (the body and head).
Place the quilled body and quilled head on the glued craft paper.
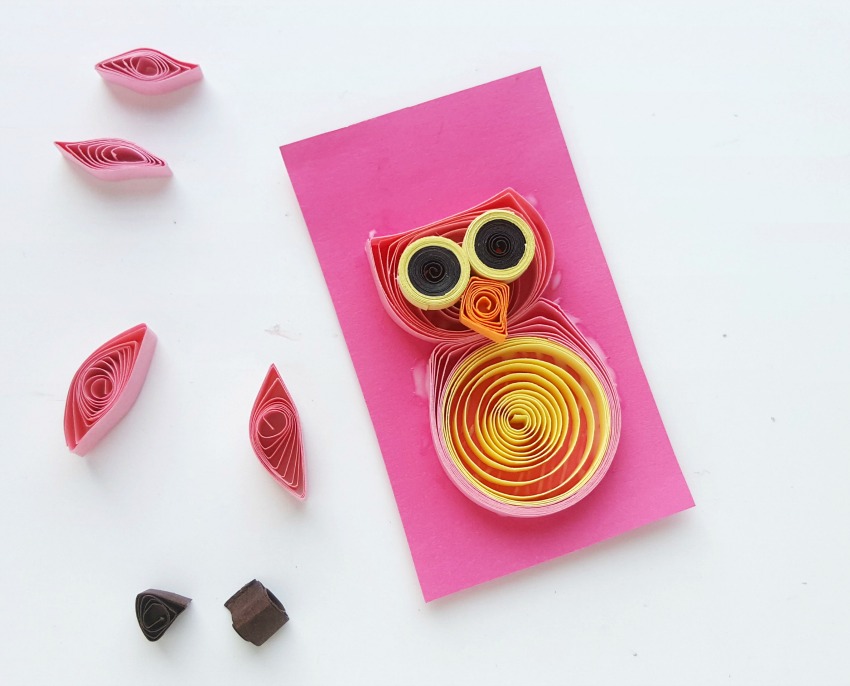
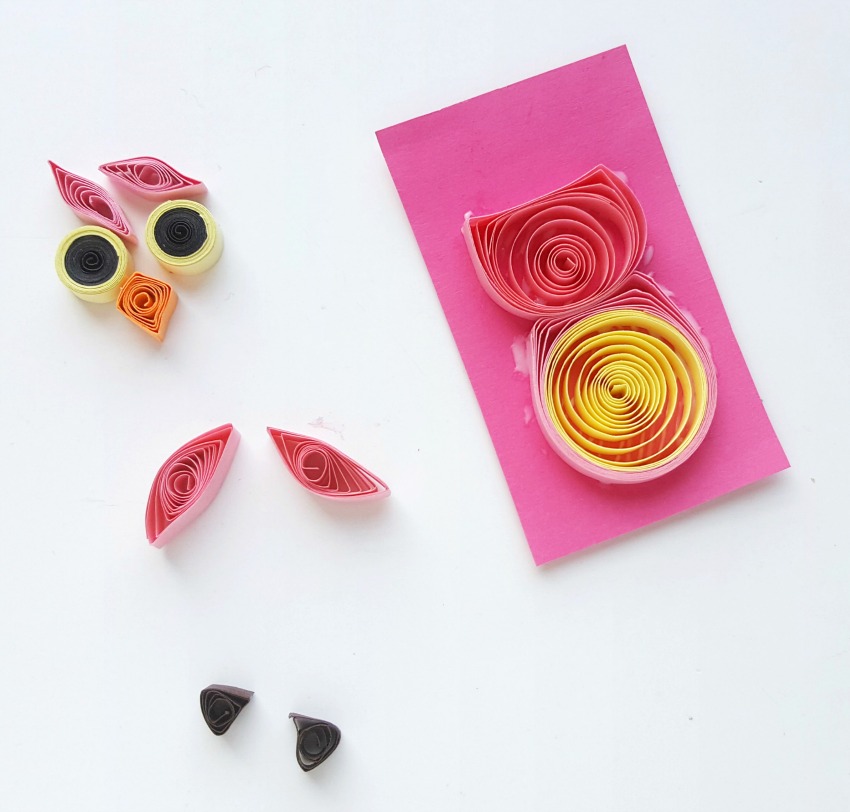
Stick the quilled eyes and quilled beak on the head part.
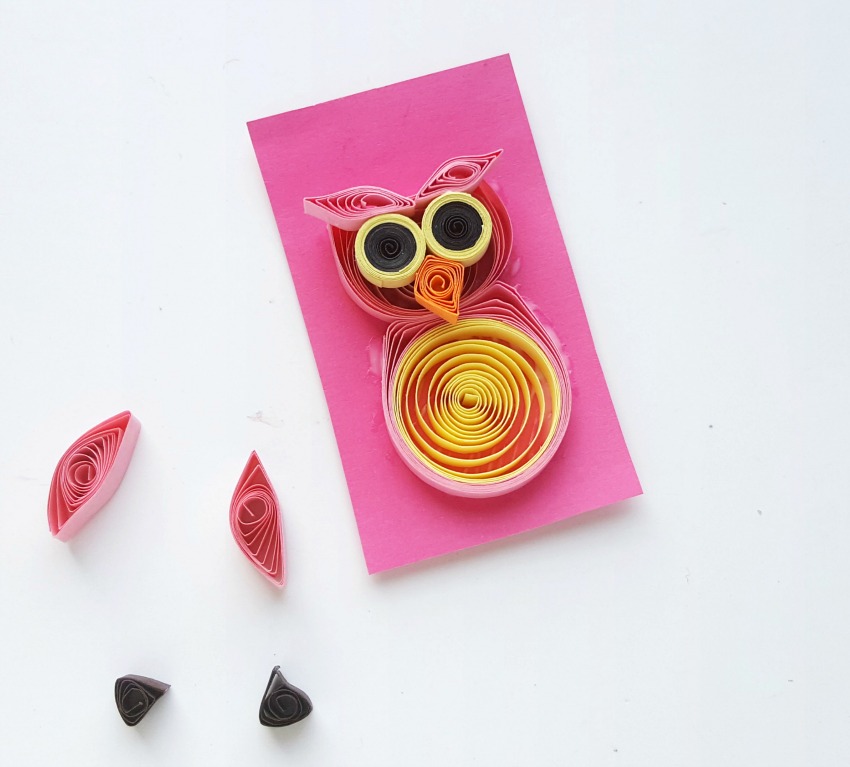
Stick the quilled curved marquise shapes above the eyes. Allow the glue to dry for a while.
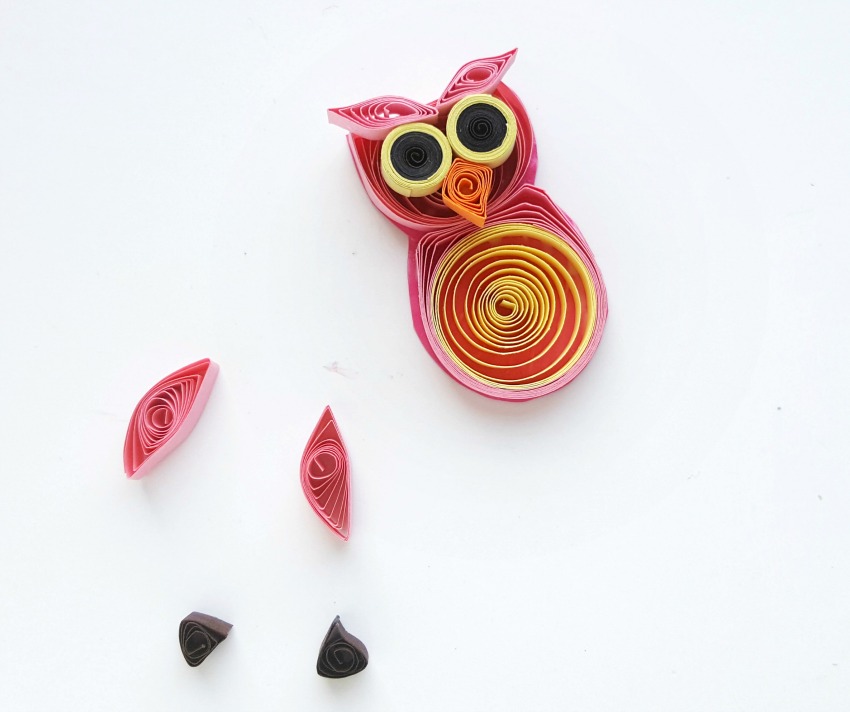
Use scissors to cut around the quilled parts (the body and the head). Carefully cut around the outer border of the quilled surface.
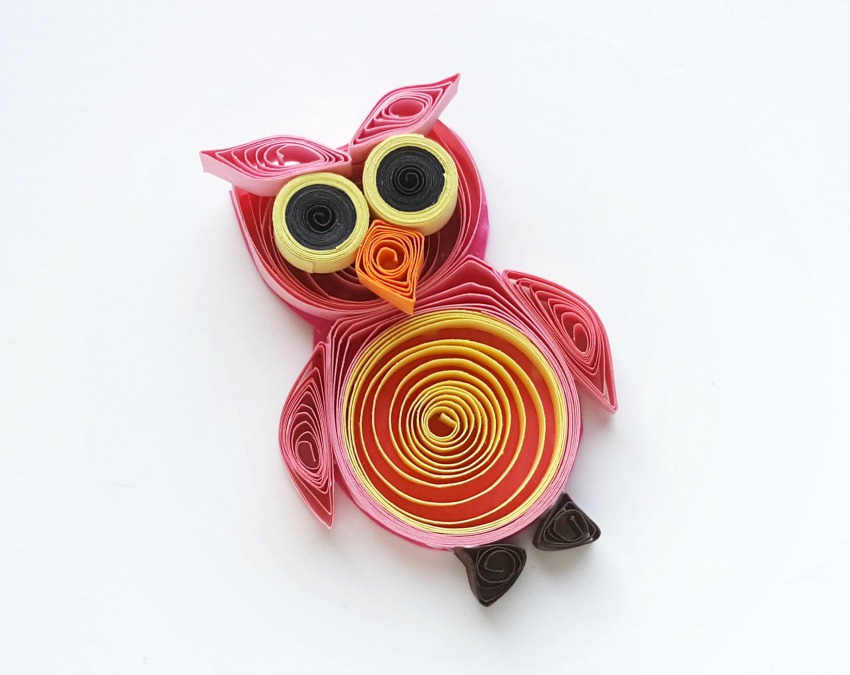
Attach the quilled legs and the quilled wings to complete the quilled owl.
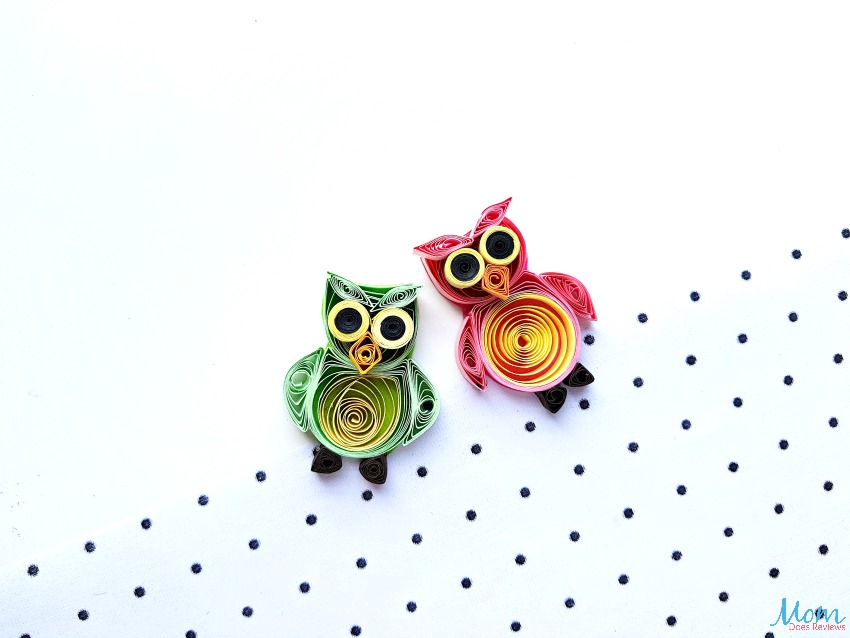
Let the glue dry.