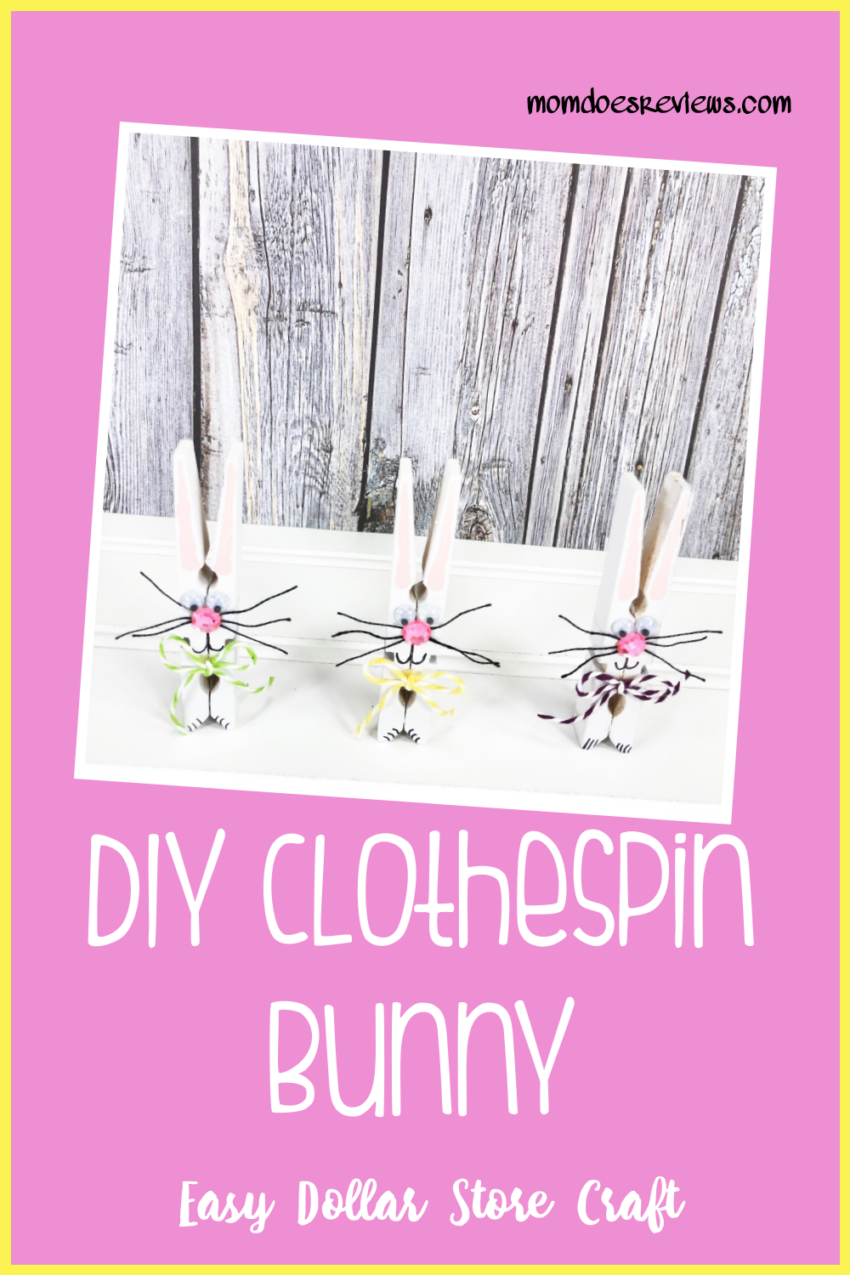
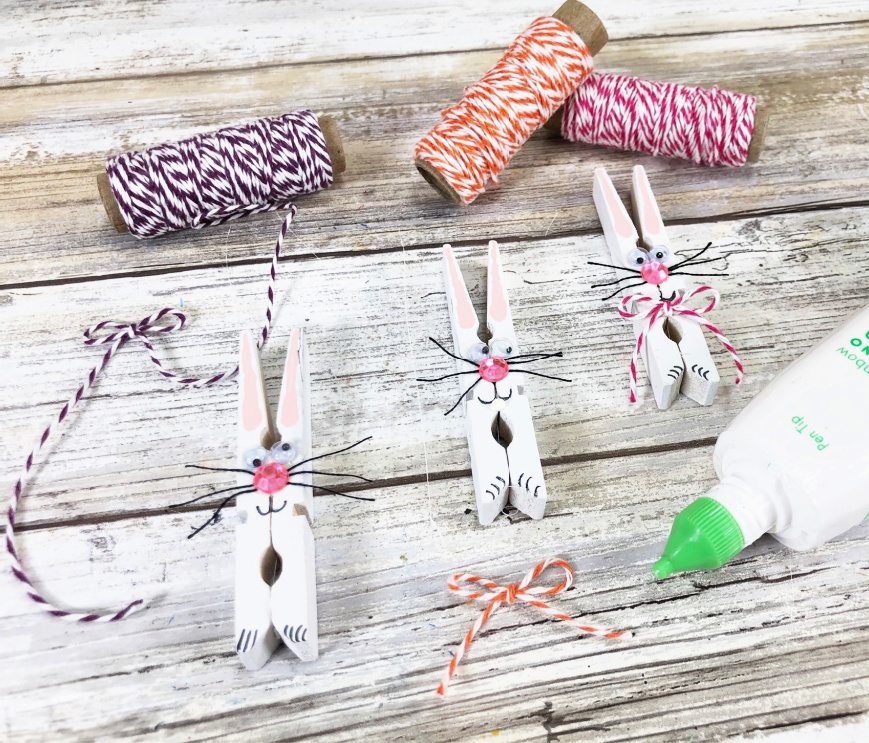
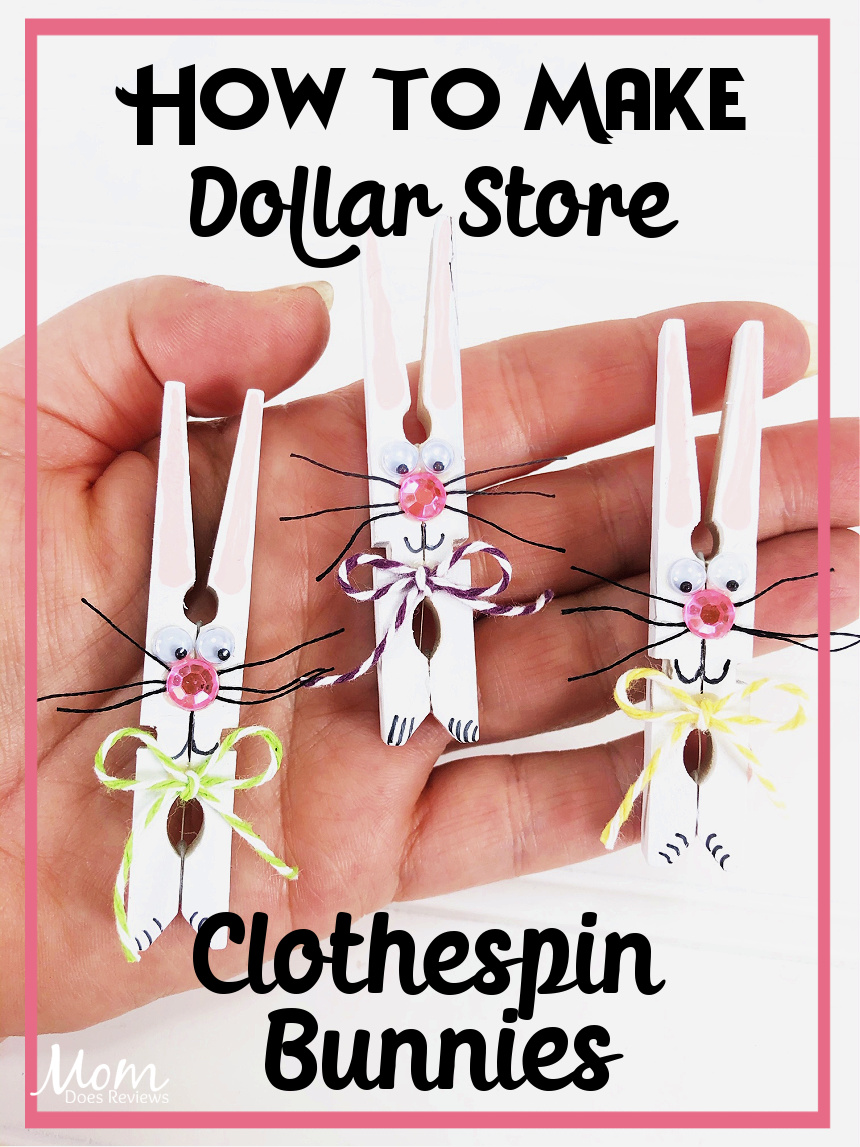
Wooden clothespins and simple supplies from the Dollar Store transform into the cutest Clothespin Bunny Craft with the sweetest face. These unique bunnies will put a smile on everyone’s face! My friend loved hers so much, we added a magnet on the back so she could keep in on her fridge all year long!
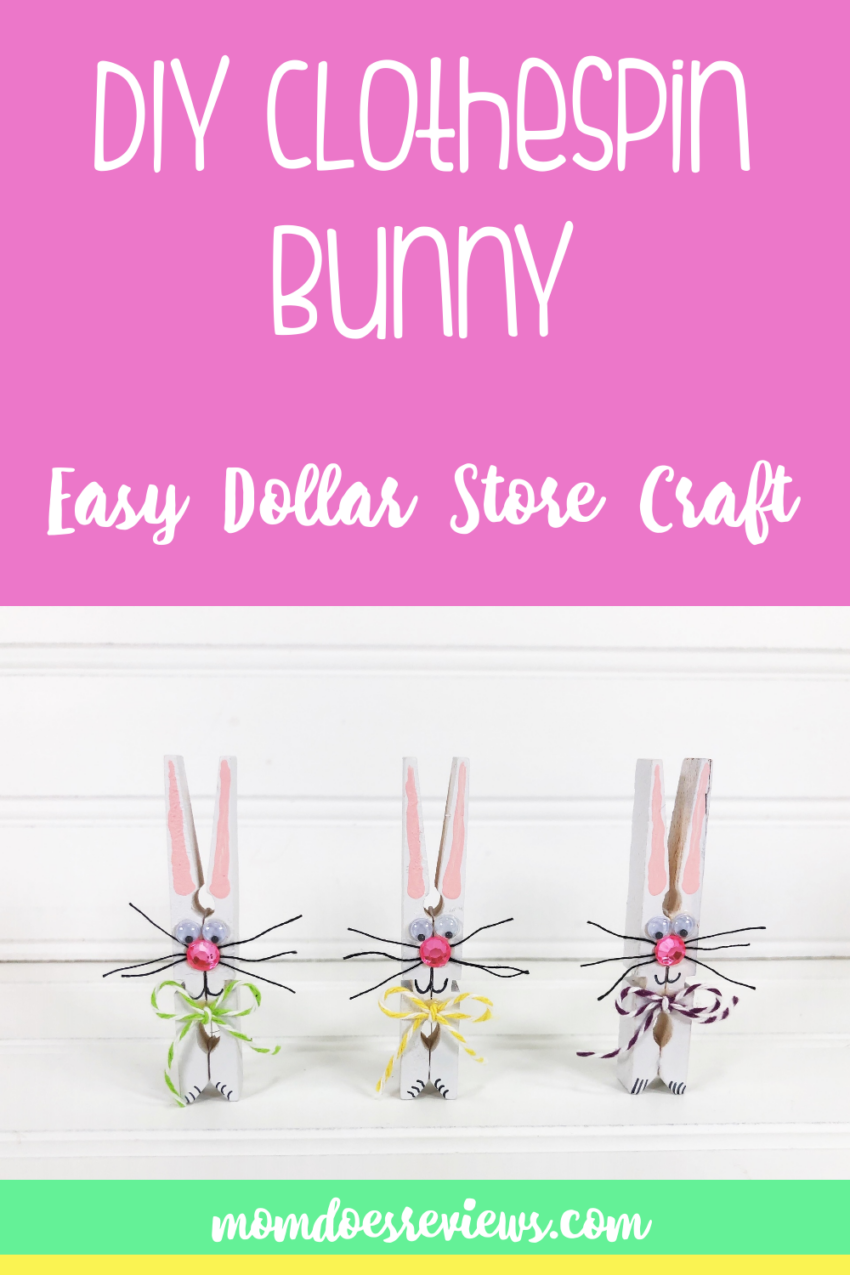
This quick and easy Dollar Store Clothespin Bunny Craft goes together in just about 30 minutes with limited supplies that you probably already have in your stash!
Want more Easter Crafts?
Clay Pot Carrot Craft: This bright and colorful Clay Pot Carrot Craft goes together quickly and easily with limited supplies. Hide some treats inside and drop off on your neighbor’s front porch.
Easter Bunny Egg Craft: This year, kids can decorate their eggs like an Easter Bunny! To make this super cute Easter Egg Bunny,
Bunny Jar Craft: Check out this Easter Bunny Jar Craft – it’s easy to do and oh so cute! And, it is perfect for gifting to family and friends!
Easy Bunny Butts: Make your own super cute and easy Dollar Store Bunny Butts with only 3 supplies. They look so cute in Easter Baskets
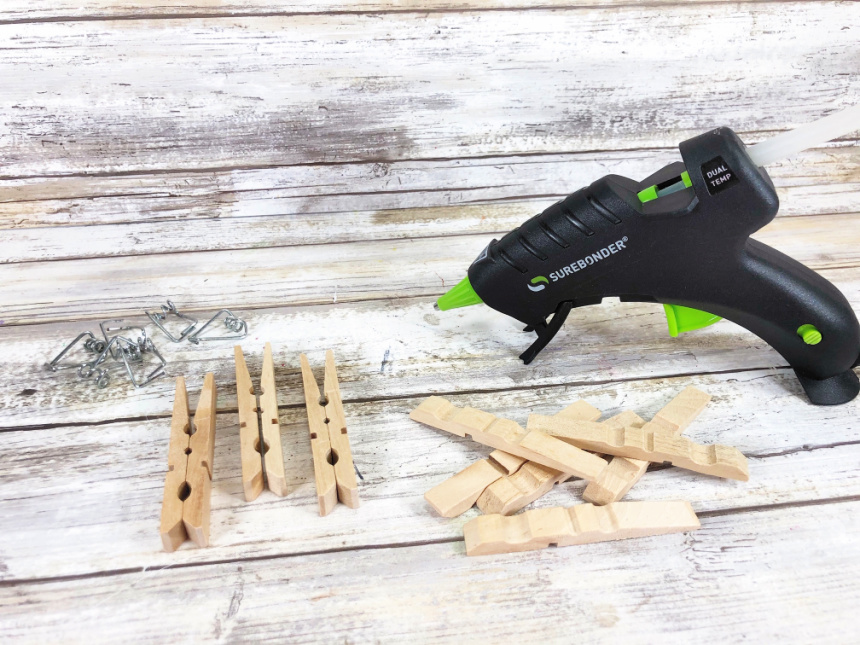
Materials needed for Clothespin Bunny Crafts:
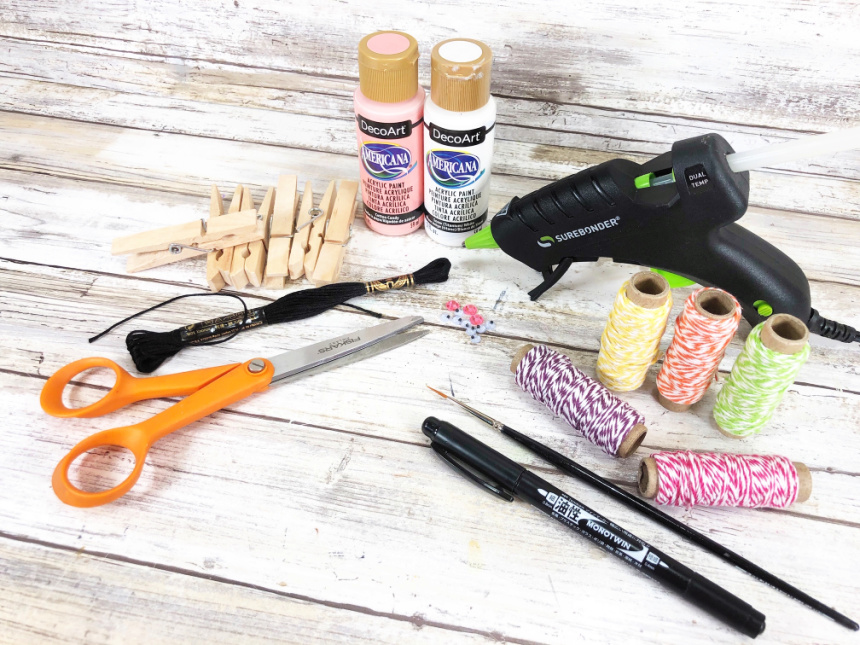
- Wooden Spring-Style Clothespins – Dollar Store
- Acrylic Craft Paint – White and Light Pink
- Liquid Glue with a Fine Tip Applicator
- Wiggle Eyes; Mini – Dollar Store
- Rhinestones; Pink – Dollar Store
- Baker’s Twine; Assorted Colors – Dollar Store
- Embroidery Floss; Black
Supplies needed for Clothespin Bunny Crafts:
- Paintbrush
- Low Temp Glue Gun and Glue Sticks
- Scissors
- Ruler
- Permanent Black Marker
Clothespin Bunny Craft Instructions:
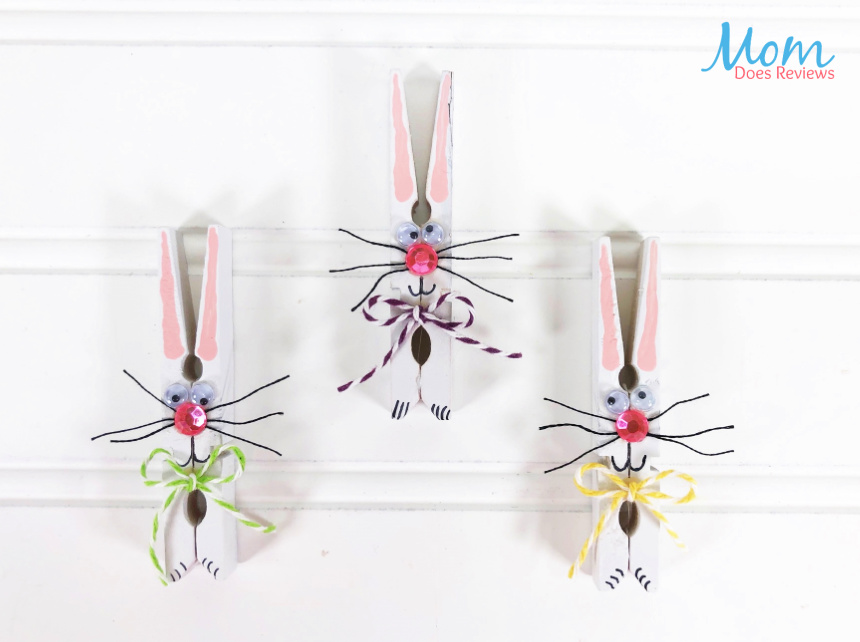
STEP ONE
Gather all materials and remove supplies from packaging. Remove metal springs from wooden clothespins and set aside. Attach two clothespin halves back together in the same configuration using a glue gun and glue sticks. Liquid craft glue can be used, but you will have to wait for it to dry.
STEP TWO
Basecoat the front, back and sides of the wooden clothespins with white acrylic craft paint. Let dry and apply a second coat, if necessary.

Using a small paintbrush, add the inside of the bunny ears with light pink acrylic craft paint.
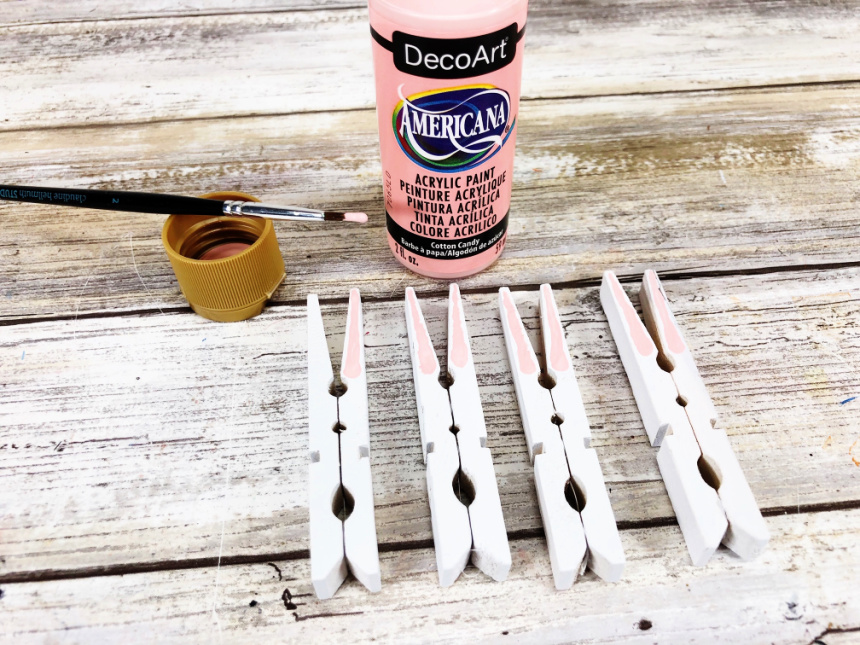
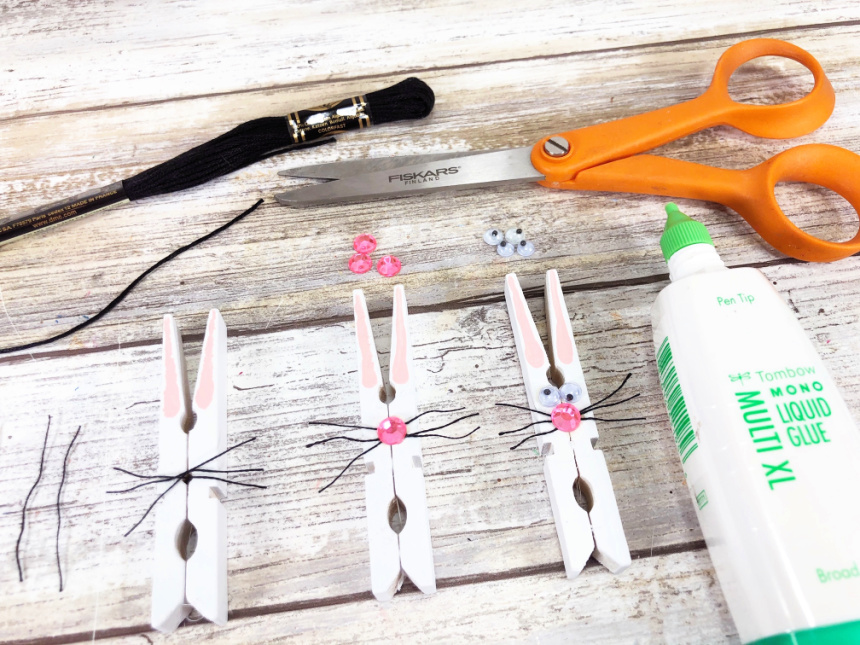
STEP THREE
Measure and cut one-inch sections of black embroidery floss. Separate the floss into six strands and place three onto the bunny’s face. Apply a small dot of liquid craft glue on the back of a pink rhinestone and attach over whiskers. Glue wiggle eyes above nose with liquid craft glue.
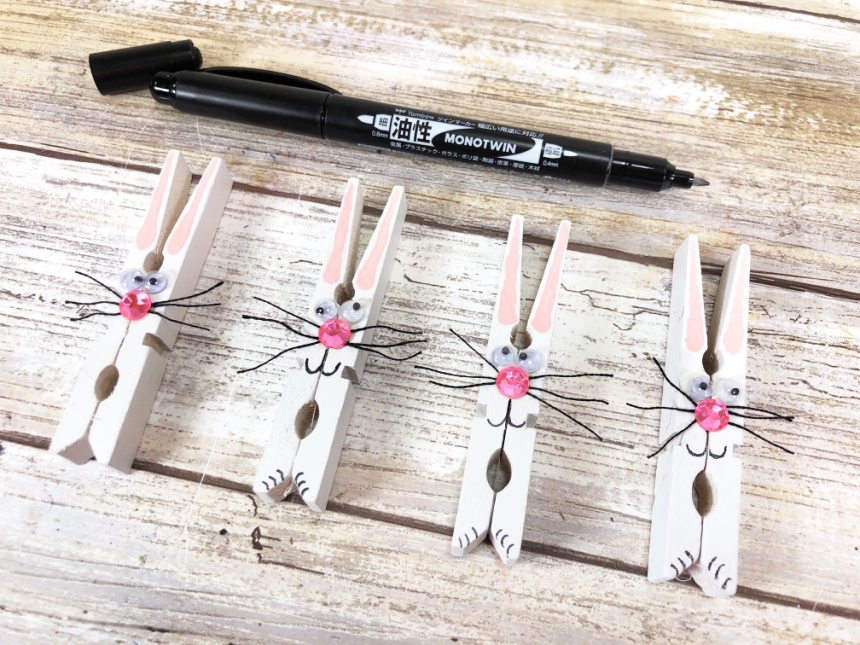
STEP FOUR
Draw a mouth and paws onto the clothespin bunny with the fine point tip of a permanent black marker, using the photo as a guide.
STEP FIVE
Tie a variety of colorful baker’s twine into small bows. Attach to the bunny under the mouth with a small dot of liquid craft glue.
STEP SIX
Let the glue dry and enjoy! I gave some to my mom. She loved them so much, she added magnets to the back and they live on her fridge!
Print the Tutorial:

Dollar Store Clothespin Bunny Craft
This quick and easy Dollar Store Clothespin Bunny Craft goes together in just about 30 minutes with limited supplies that you probably already have in your stash!
Materials
- Wooden Spring-Style Clothespins – Dollar Store
- Acrylic Craft Paint – White and Light Pink
- Liquid Glue with a Fine Tip Applicator
- Wiggle Eyes; Mini – Dollar Store
- Rhinestones; Pink – Dollar Store
- Baker’s Twine; Assorted Colors – Dollar Store
- Embroidery Floss; Black
Tools
- Paintbrush
- Low Temp Glue Gun and Glue Sticks
- Scissors
- Ruler
- Permanent Black Marker
Instructions
STEP ONE
Gather all materials and remove supplies from packaging. Remove metal springs from wooden clothespins and set aside. Attach two clothespin halves back together in the same configuration using a glue gun and glue sticks. Liquid craft glue can be used, but you will have to wait for it to dry.
STEP TWO
Basecoat the front, back and sides of the wooden clothespins with white acrylic craft paint. Let dry and apply a second coat, if necessary.
Using a small paintbrush, add the inside of the bunny ears with light pink acrylic craft paint.
STEP THREE
Measure and cut one-inch sections of black embroidery floss. Separate the floss into six strands and place three onto the bunny’s face. Apply a small dot of liquid craft glue on the back of a pink rhinestone and attach over whiskers. Glue wiggle eyes above nose with liquid craft glue.
STEP FOUR
Draw a mouth and paws onto the clothespin bunny with the fine point tip of a permanent black marker, using the photo as a guide.
STEP FIVE
Tie a variety of colorful baker’s twine into small bows. Attach to the bunny under the mouth with a small dot of liquid craft glue.
Pin for Later!