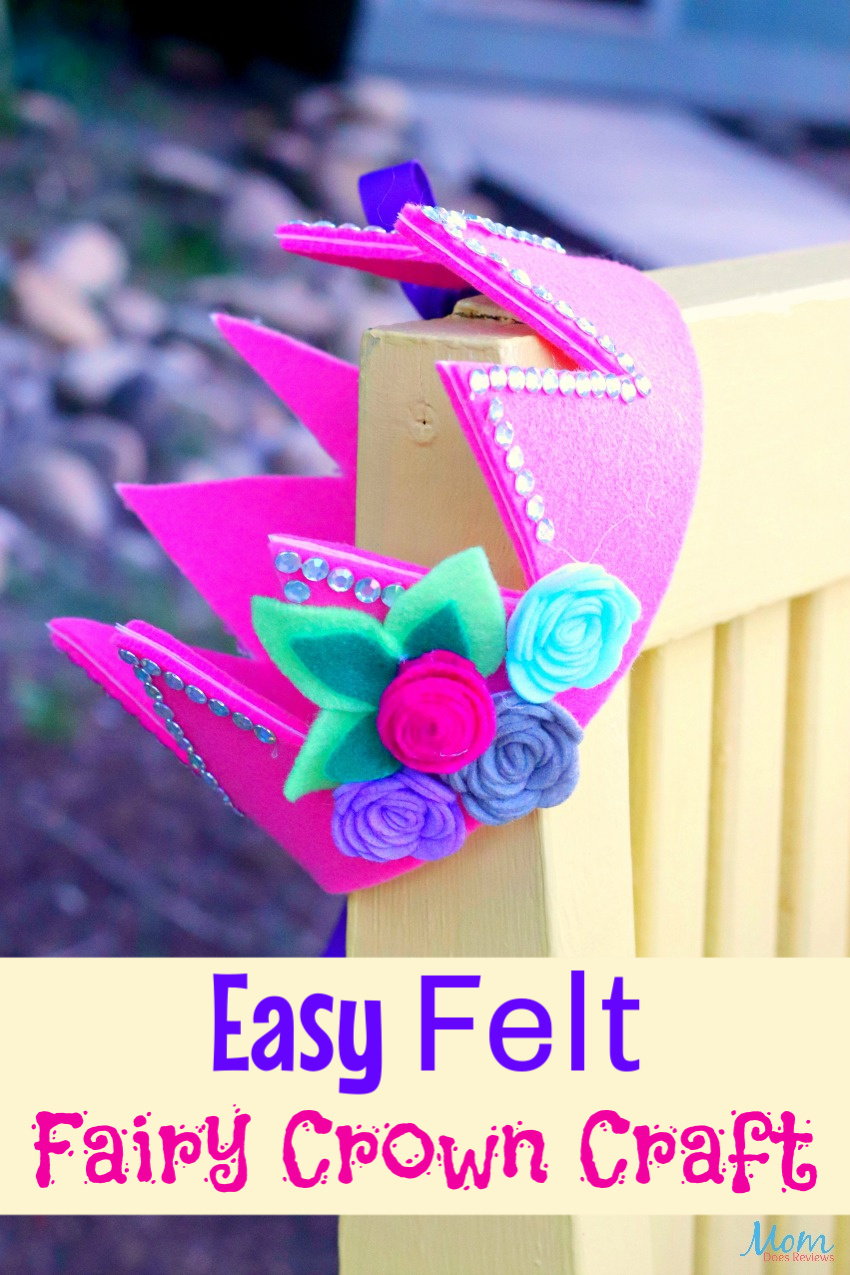
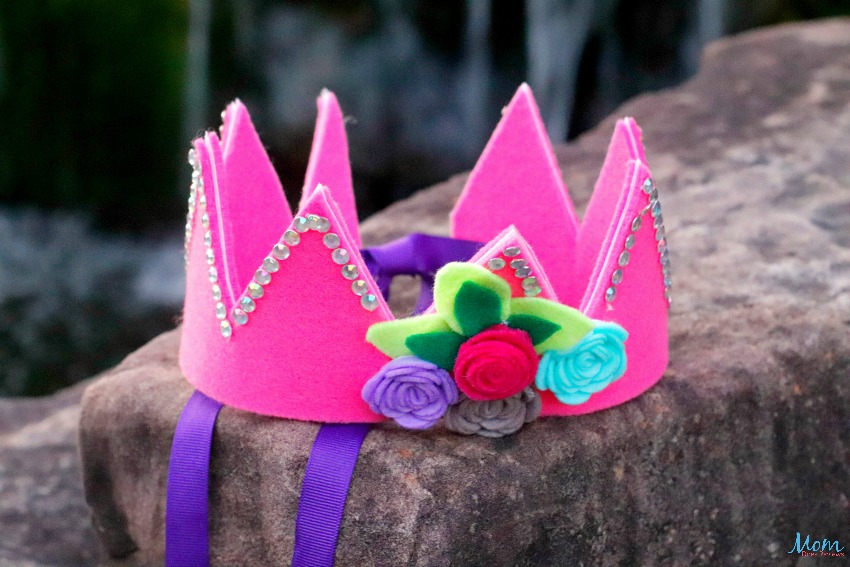
The kids will squeal in delight over this Felt Fairy Crown craft! This fun craft is easy to make by following the step-by-step instructions and turns out super adorable!
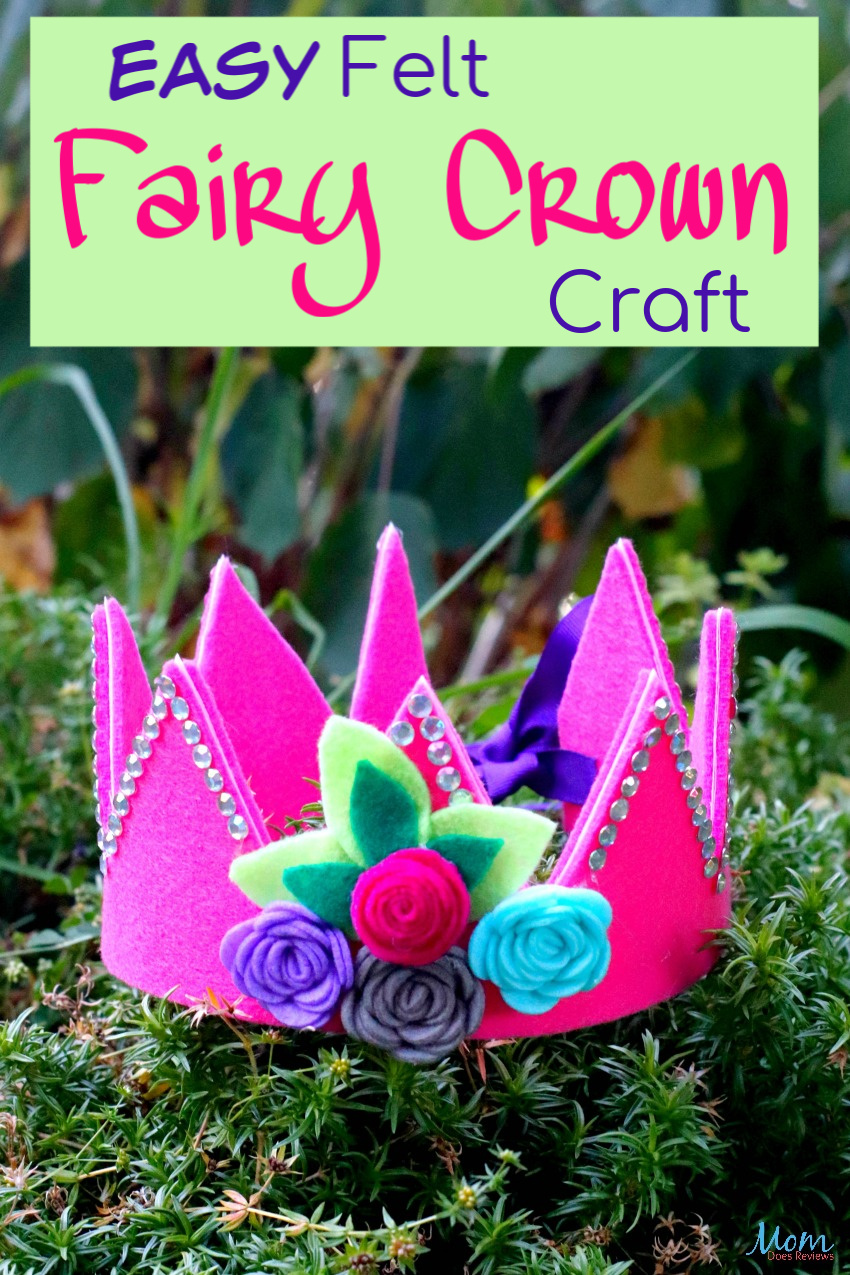
The kids will absolutely squeal in delight over the chance to make this fun Felt Fairy Crown craft! It is easy to make and oh so adorable. Simply gather your supplies, print out the template, and follow the easy step-by-step instructions below.
Older kids will be able to work independently but you will want to supervise and handle the glue gun for younger kids.
Looking for more magical crafts to make with your kids? Check out these 32 ADORABLE and Magical Unicorn Crafts you Just Have to Make!
If you love crafting with felt, then be sure and check out our fun DIY Felt Birdhouse Bookmarks! They are so cute and they may just encourage your kids to read so they can use their bookmark to mark their place!
Easy Felt Fairy Crown Craft
Supplies Needed:
1 fairy crown pdf template (Download here)
2 pieces of felt at least 28” long
Multi-pack of craft felt to make your own flowers
Stick on felt flowers
Stick on rhinestones
Medium-heavy weight fusible interfacing
Glue gun and glue sticks
Scissors
Ribbon
Ruler
2 pieces of felt at least 28” long
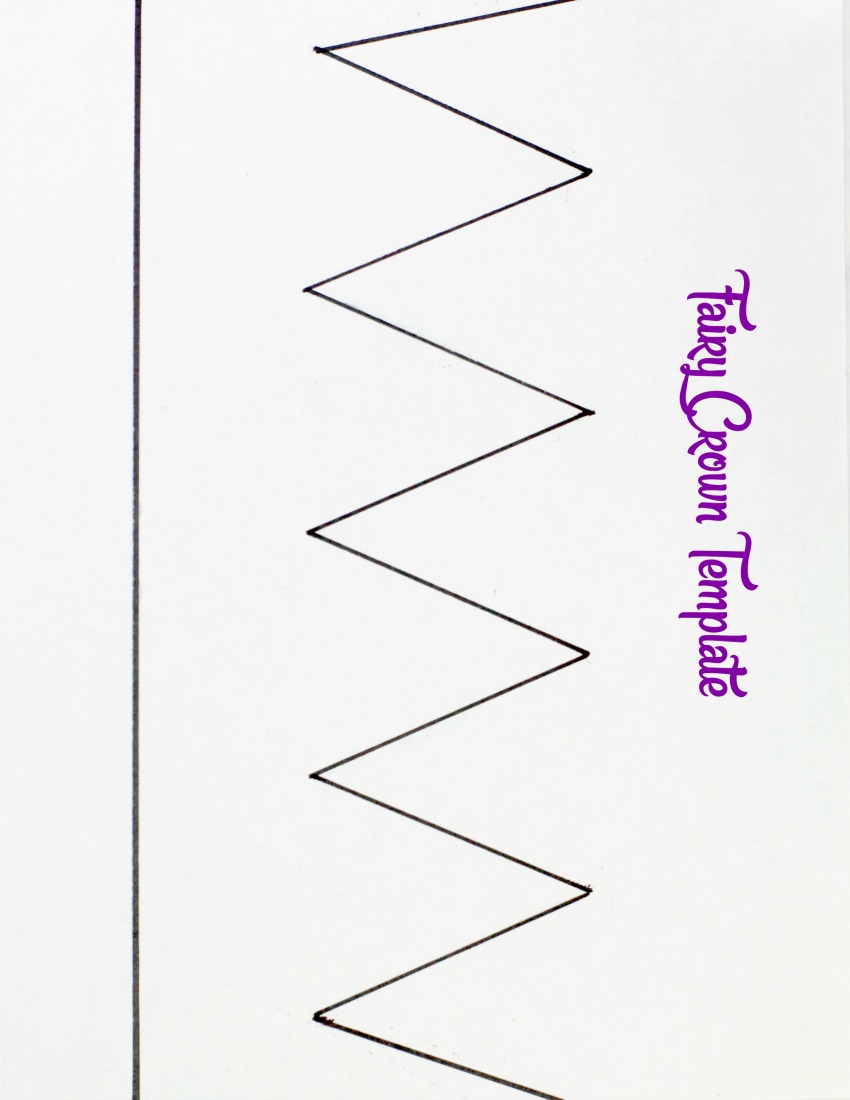
Print the Felt Fairy Crown Craft template HERE or by clicking on the image above.
How to make this cute Felt Fairy Crown Craft:
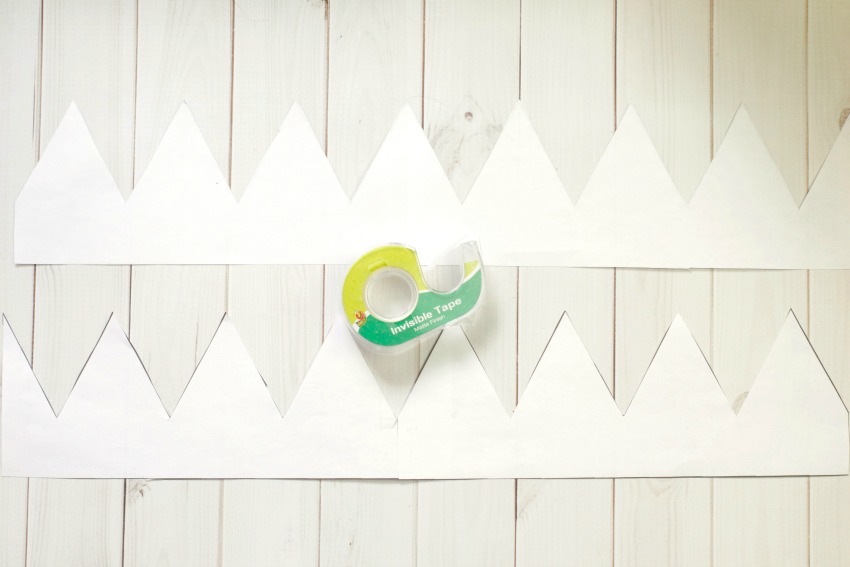
Step 1: Print 2 copies of your Felt Fairy Crown template and tape them together. Measure around your fairy princesses head and subtract 1”. This is the length you want the template for your crown. Cut your template to the size you need.

Step 2: Cut your two pieces of felt and two pieces of interfacing to the height and width of your finished template size. Iron the interfacing onto your felt.
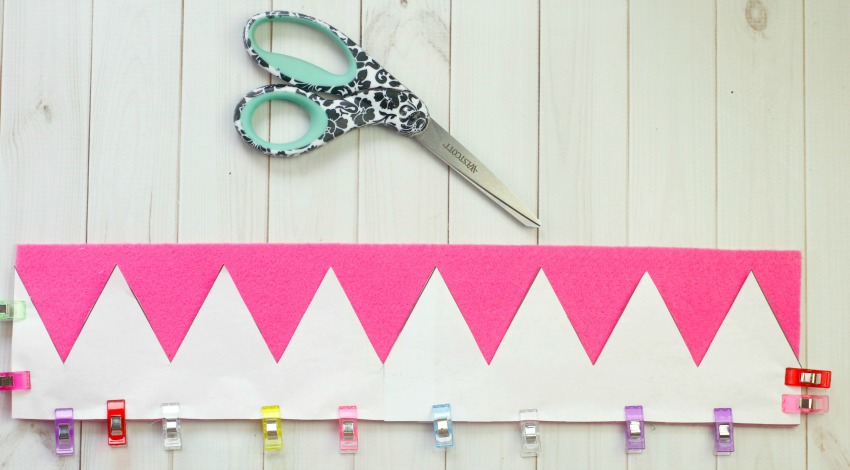
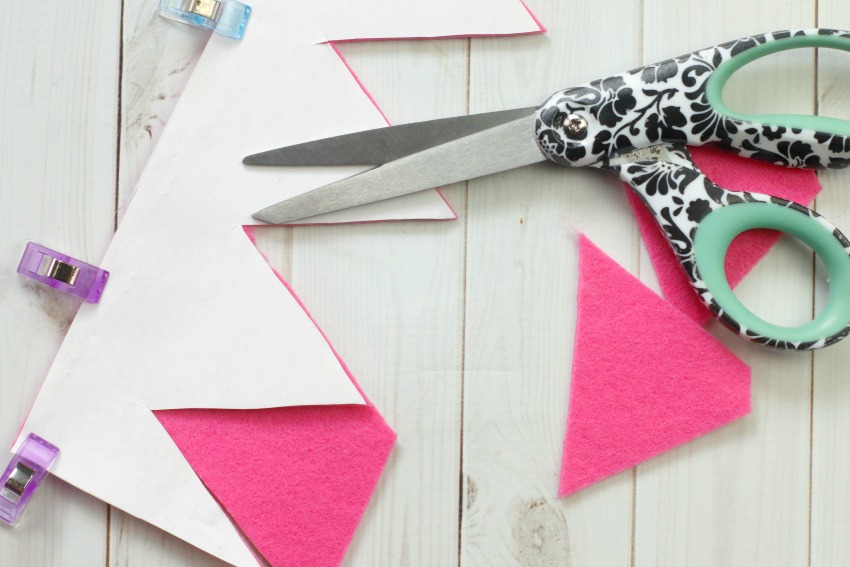
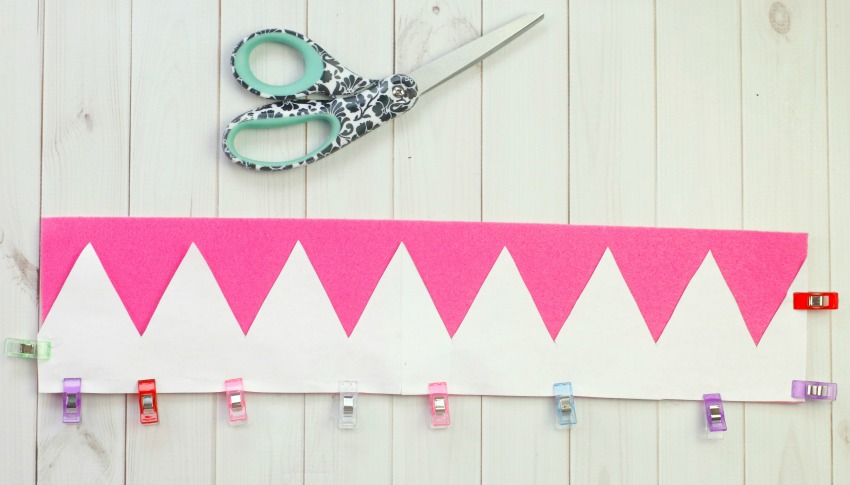
Steps 3-5: Lay one template onto one piece of felt, felt side up and clip or pin into place. And cut. Now flip the template to the other side and place it on the other piece of felt, felt side up and clip or pin into place. And cut.

Step 6: Using your hot glue gun, line up your two felt crown pieces, interfacing sides together, and secure together with glue. Leave a small opening in the middle on either side for the ribbon.
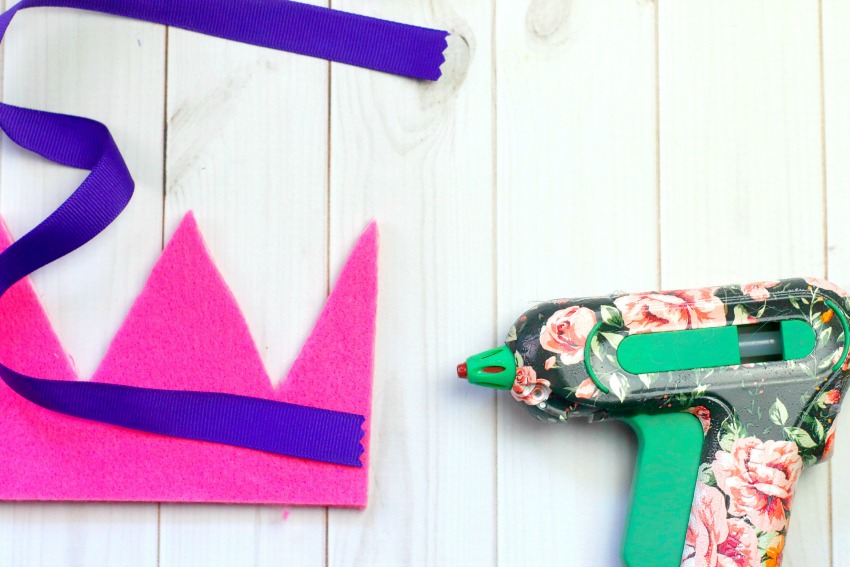
Step 7: Cut two lengths of ribbon for the ties. The length will depend purely on how long you and your fairy princess would like it to be 😊 Glue the ribbon on the sides of the crown, in between the layers, where you left the small opening. Be sure you close the opening and the ribbon is nice and secure, so it does not pull out when tied.
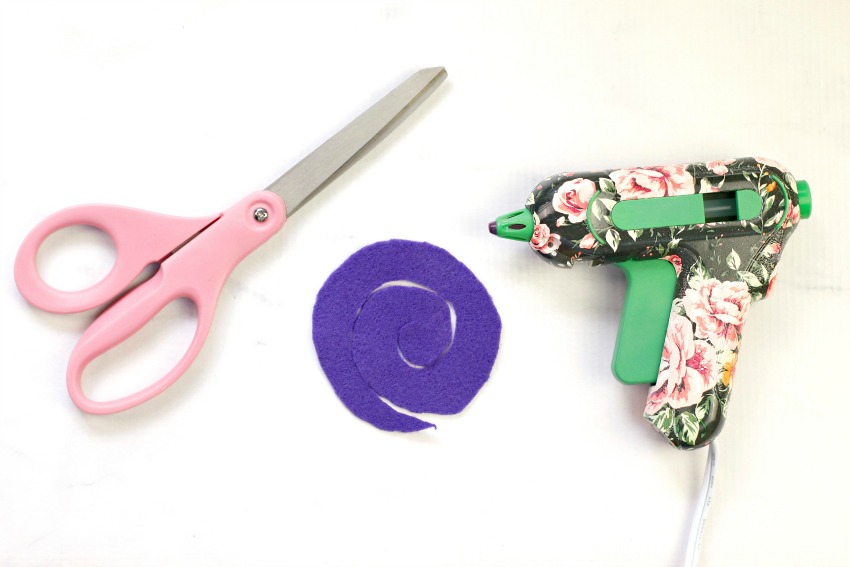
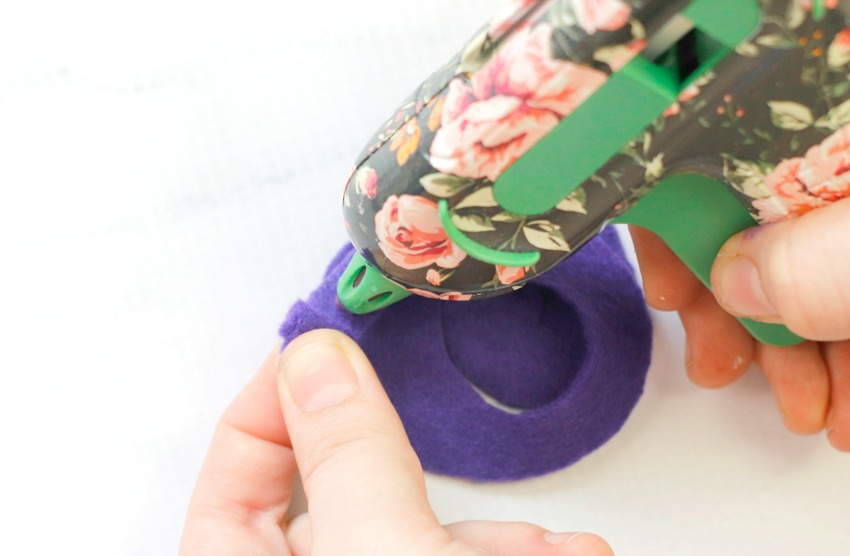
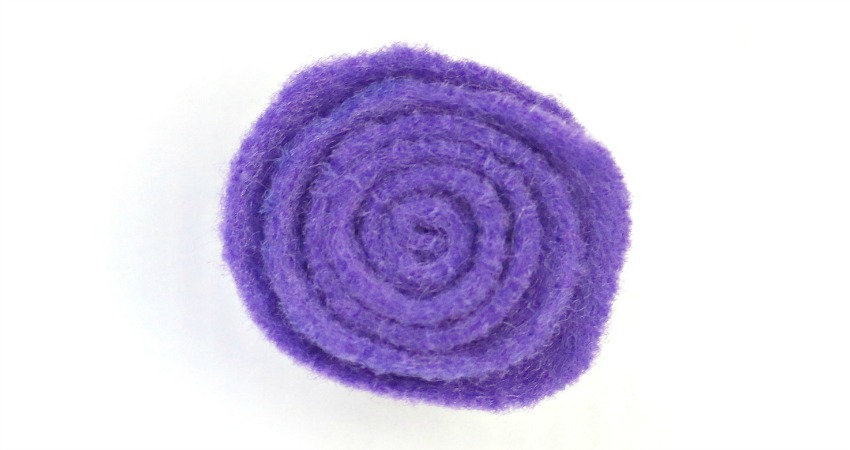
Step 8: To make the flower in the middle of the crown, you will cut out a circle about 5” in diameter. This does not have to be perfect by any means! Using your scissors, cut a coil pattern, again, does not have to be perfect! Using your glue gun, put a dot of glue on the small end and roll the felt towards the larger end, gluing regularly along the way. Be sure to secure the end well.
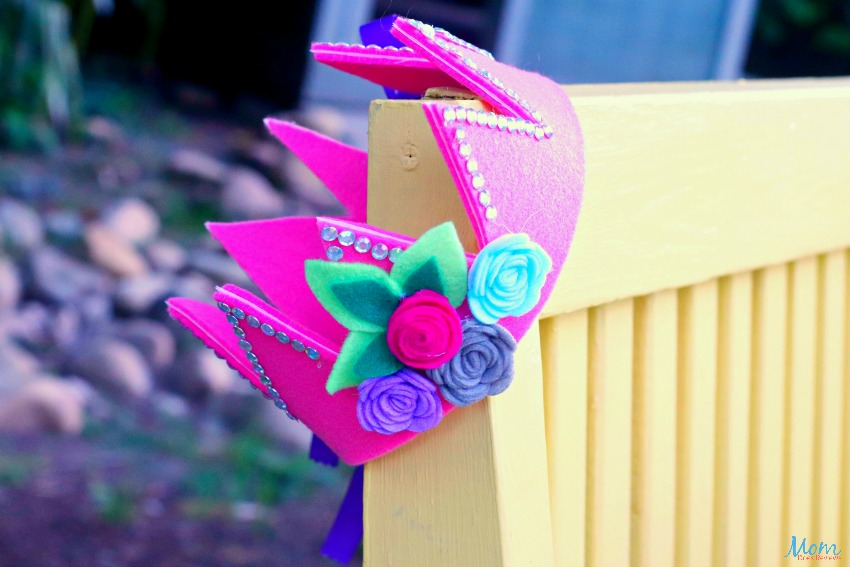
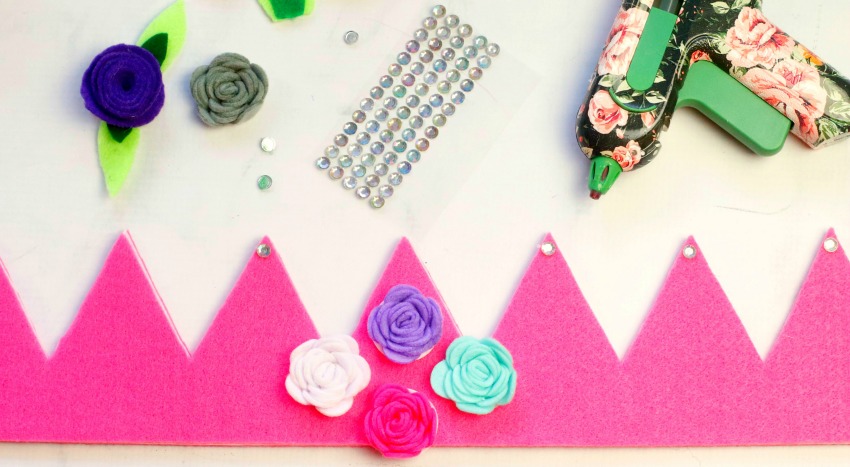
Step 8: Using your glue gun, have fun and decorate your felt fairy crown! Supervise the younger fairy princesses and let the older ones have a blast!
Print this cute Felt Fairy Crown Craft!

Super Cute & Easy Felt Fairy Crown Craft
The kids will squeal in delight over this Felt Fairy Crown craft! This fun craft is easy to make by following the step-by-step instructions and turns out super adorable!
Materials
- 1 fairy crown pdf template
- 2 pieces of felt at least 28” long
- Multi-pack of craft felt to make your own flowers
- Stick on felt flowers
- Stick on rhinestones
- Medium-heavy weight fusible interfacing
- Glue gun and glue sticks
- Scissors
- Ribbon
- Ruler
- Wonder sewing clips or pins
Instructions
Step 1: Print 2 copies of your Felt Fairy Crown template and tape them together. Measure around your fairy princesses head and subtract 1”. This is the length you want the template for your crown. Cut your template to the size you need.
Step 2: Cut your two pieces of felt and two pieces of interfacing to the height and width of your finished template size. Iron the interfacing onto your felt.
Steps 3-5: Lay one template onto one piece of felt, felt side up and clip or pin into place. And cut. Now flip the template to the other side and place it on the other piece of felt, felt side up and clip or pin into place. And cut.
Step 6: Using your hot glue gun, line up your two felt crown pieces, interfacing sides together, and secure together with glue. Leave a small opening in the middle on either side for the ribbon.
Step 7: Cut two lengths of ribbon for the ties. The length will depend purely on how long you and your fairy princess would like it to be 😊 Glue the ribbon on the sides of the crown, in between the layers, where you left the small opening. Be sure you close the opening and the ribbon is nice and secure, so it does not pull out when tied.
Step 8: To make the flower in the middle of the crown, you will cut out a circle about 5” in diameter. This does not have to be perfect by any means! Using your scissors, cut a coil pattern, again, does not have to be perfect! Using your glue gun, put a dot of glue on the small end and roll the felt towards the larger end, gluing regularly along the way. Be sure to secure the end well.
Step 8: Using your glue gun, have fun and decorate your felt fairy crown! Supervise the younger fairy princesses and let the older ones have a blast!
Pin it for later!