
Our son with Sensory Processing Disorder is in major tantrum stage and has quickly discovered that he has extreme dislike for taking a time out. Before our calming jars were made this is what time-out was like in my house:
Mom: You cannot do that. You have to go into time out. Please take a seat on the couch.
Son: Aghhhhhhhhhhhhhhhh!!!!!!! (Hulk face)
Mom: (Pick up child, place him on couch)
Son: (get down) “That’s it! I hate you!” (Mad pointing fingers guy)
Mom: (Pick up child, place him on couch, sit on edge of couch to make sure he stays).
Son: (Kicks mom)
Mom: (Sits on couch with legs on couch. Place child in lap. Bear hug style until he is calm)
Son: (mommy cuddle = calm)
Mom: (I got what I wanted… whew….I think)
While the bear hug is effective in calming him down, there are differences between the usual outburst and a full on tantrum. I need a less hands-on method for these situations.
We also decided to try two different bottle shapes. (He does prefer the smoothness of the round bottle.)
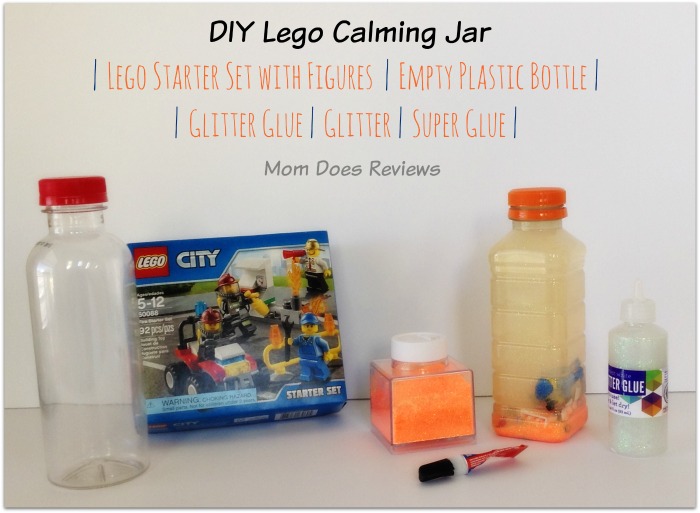
I have seen calming jars all over the place so we decided to give it a try. I took him with me to the store to pick out the glitter colors he wanted. He selected a bright orange glitter and since we couldn’t find an orange glitter glue selected iridescent glitter glue.
I wasn’t sure what to put inside of his calming jars in regards to toy. We searched and everything I found was priced equally as a small box of Legos so we opted to do just that. He selected a Lego City Fire Starter Set because it had several figures and a fire ATV. One Lego Starter Set provided enough Legos to make two Calming bottles AND he had the fire ATV and one figure leftover to play with.
DIY Lego Calming Jar

(*Next time I’ll edit out some of the shaking…)
Supplies:
- Empty Bottles
- Glitter Glue
- 1 Container Glitter
- Lego City Fire Starter Set
- Super Glue
- Food Coloring (optional)
- Extra Warm Water (not too hot but not mildly warm either)
Wash empty bottle(s), set aside. (When looking for bottles to use, pay special attention to the design and texture of the bottle.)
Build Lego Set and decide what portions will be used. In our first bottle we used one figure and miscellaneous Lego pieces. The second bottle was the two fireman figures and the plastic fire pieces. We kept one figure out to be played with using the vehicle.
Gather supplies, including water.
Pour 1/2 small container of glitter glue into bottle. Top with a generous supply of glitter (I used, approximately, 6 tbsp of extra fine glitter), pop in your Lego pieces, fill with water, replace lid and shake until all glue is dissolved and incorporated.
Afterward I’m done shaking, I remove the lid, wipe the lid and bottle rim dry and super glue (or hot glue) it closed. We do have little ones who think “Bottle = Drink”, I wanted to be sure the lid wasn’t removable.
DIY Lego Calming Jar Troubleshooting
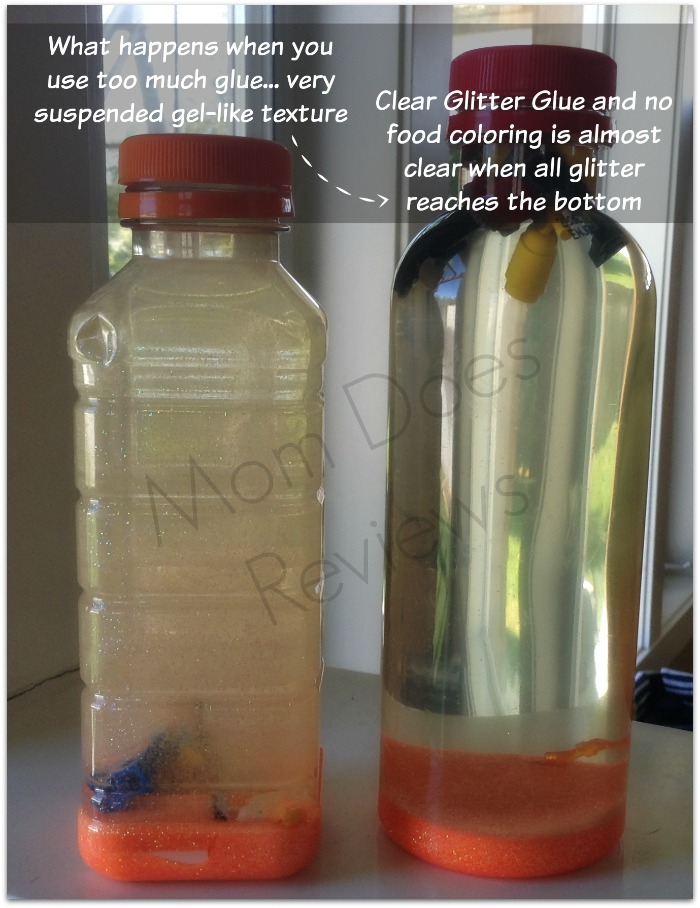
Less is More: My first jar I went a little crazy with the glitter glue and used an entire bottle of glow in the dark glitter glue for one calming jar. The square one (shown in the video and in the photo below), has a gel-like substance for the liquid now. It is even hard to see the figures because it is so thick. Take a look at the photo, this is after resting all night with no shaking. Do you see the difference between the two unshaken bottles?
To Dye or Not to Dye? Because my son requested a very fine vibrant orange glitter glue, I didn’t want to use food coloring to dye the water we used. My next project I will try using a light dye, like yellow – Stay tuned (smile).
Using the Calming Jar
Although the main purpose of our calming jar is for use during time out, my two littles do like them at bedtime and while eating too. What to do with your jar?
- Time how long it takes for the glitter to fall back to the bottom as a quick school project.
- Swirl the bottle upright to make “tornadoes”.
- Play “eye spy”. We do this by trying to locate the orange plastic fire pieces in a wave of orange glitter.