If you want the comfort of talking with your friends anytime and anywhere you want, then using Chatwing chat software would be a great idea to do so. It has a lot of features aside from its excellent chatting capabilities and it is Android and iOS friendly. All you need is a stable internet connection and you can start chatting with your friends wherever and whenever on your mobile phone.
Just follow these simple procedures and you can create your own Chatwing chatroom in no time.
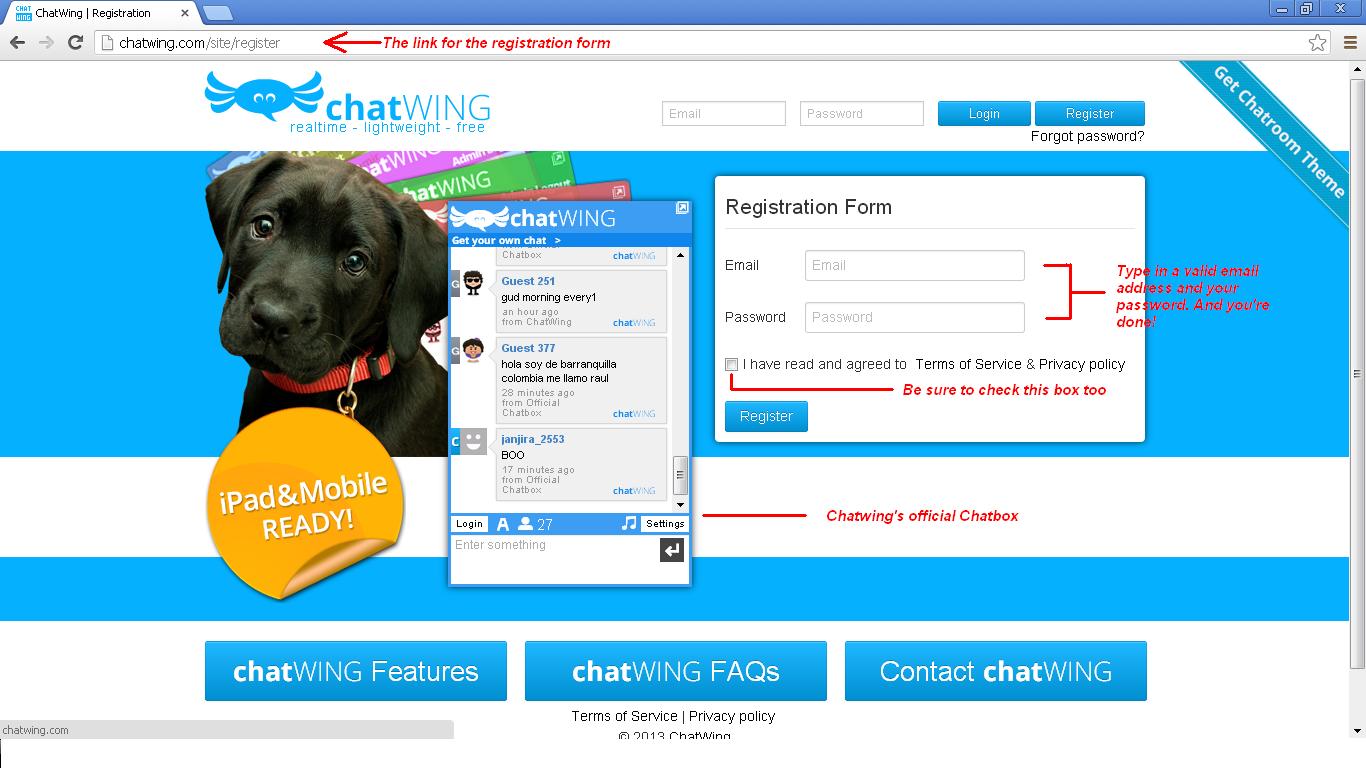
Register
First up, you need to visit Chatwing’s homepage and register an account. It’s definitely hassle-free though, since all you need is a valid email and a password to successfully make one. Just make sure to check all the two boxes below – the first one is necessary and the other one is for the next step.
Dashboard
Now it’s time to create a chatroom – you can do so here in the Dashboard page. If you checked the boxes on the registration form then there should be one chatbox there ready for use. There are three buttons adjacent to the chatbox name (Chatwing by default) and each one has its own purpose.
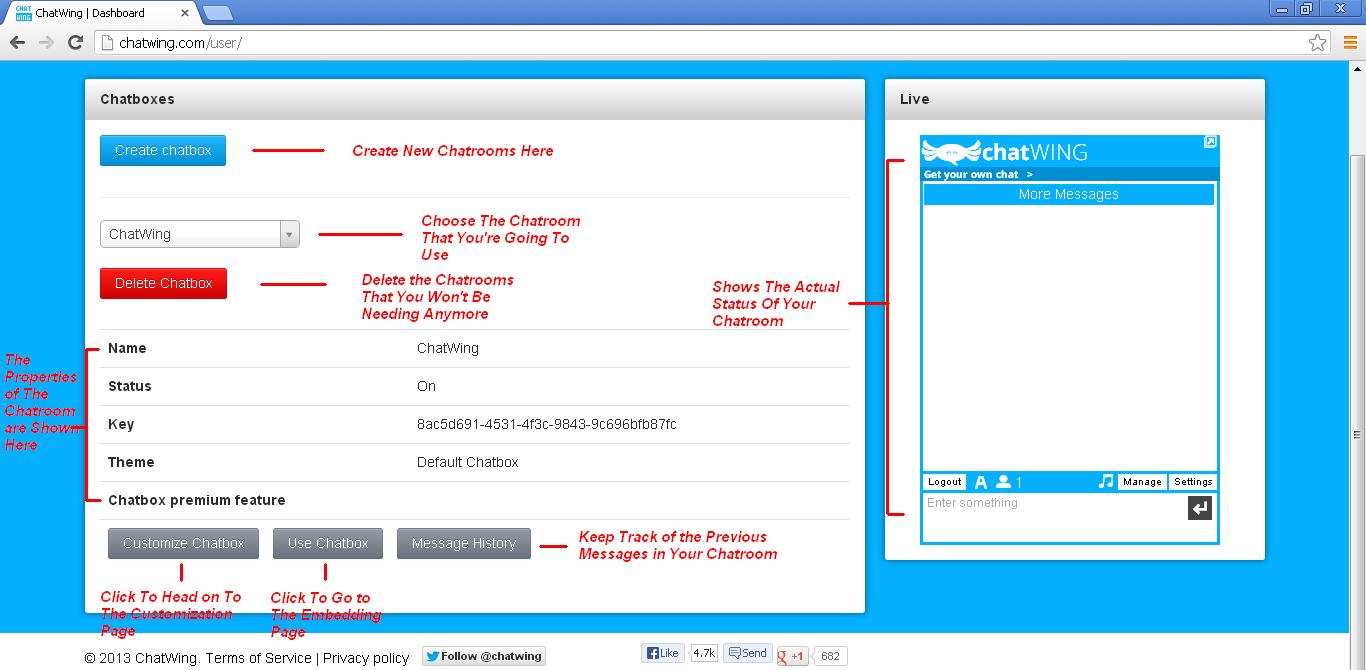
Here’s what they do.
- Pressing the View button will let you see the current form of the chatbox on your browser.
- Pressing the Customize button will queue your chatbox for modification and will redirect you into the Customization page.
- Pressing the Use button will skip the customization process and will redirect you to the embedding page.
For now, you need to customize your chatbox first so press the Customize button.
Customization
The Customization is the place where you can get your default chatbox a complete overhaul. Through the process which is separated into tabs, every nook and cranny of the chatbox can be changed according to your preferences. And you can set up most of Chatwing’s optional features here too. Using them will surely spice up the conversations between you and your friends.
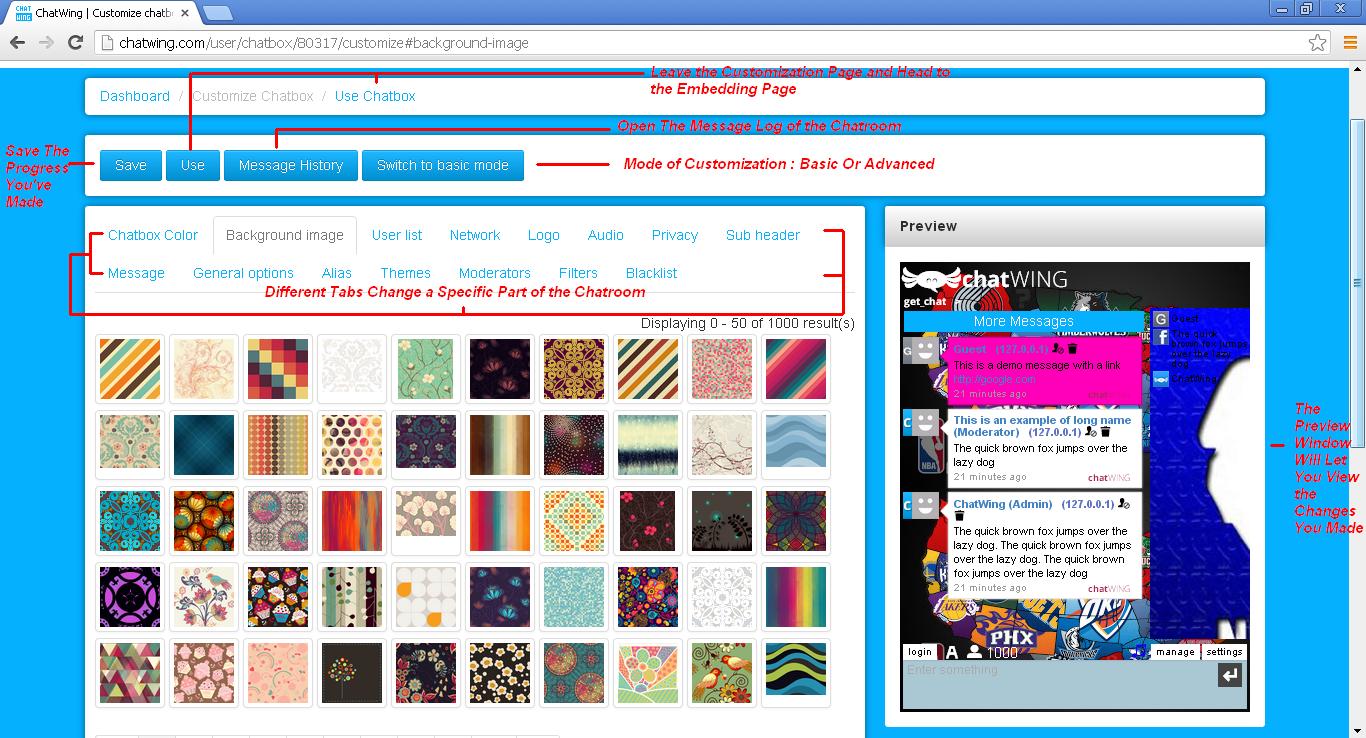
A simple note that you need to take into account – always press the Save button on each tab once you change its previous settings. This will implement the new changes that you have made.
Once you’re done customizing your chatbox, press the Use button found on top of the Customization panel.
Using the Chatbox
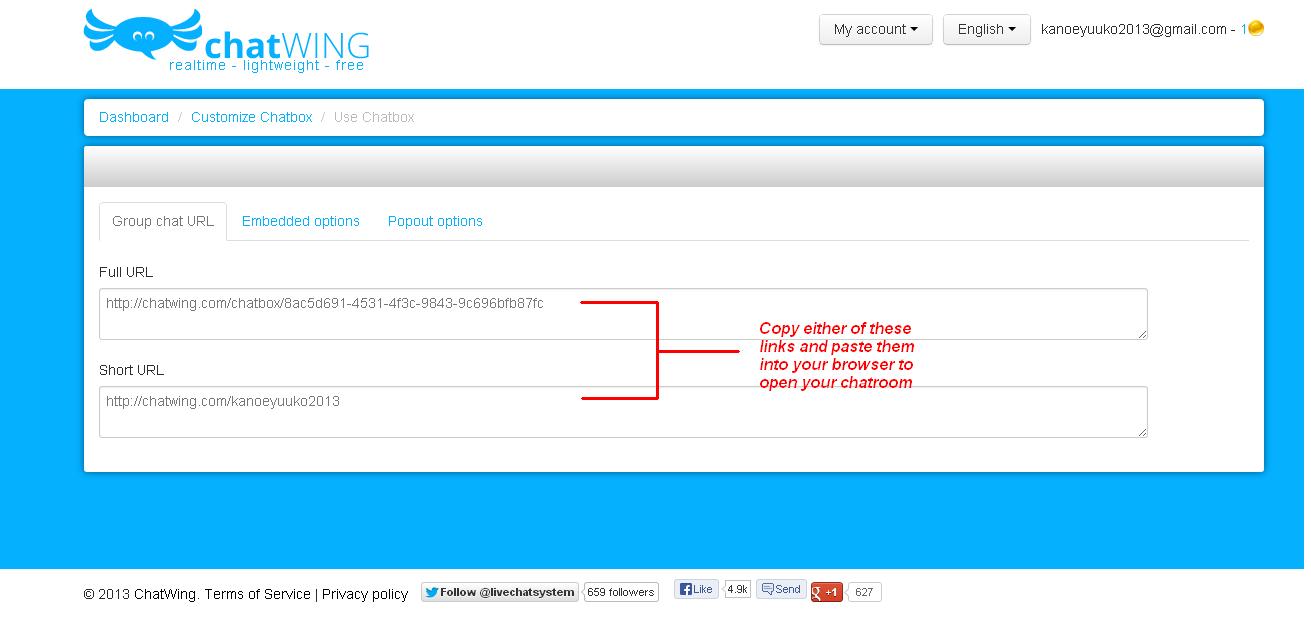
The next page is the Embedding page. This is where you’ll choose how you’re going to utilize the chatbox that you have now. If you’re a site owner, you can either pick Embedded Options or Popout Options. But if you just want to make use of the chatroom you’ve created, then pick Group Chat URL.
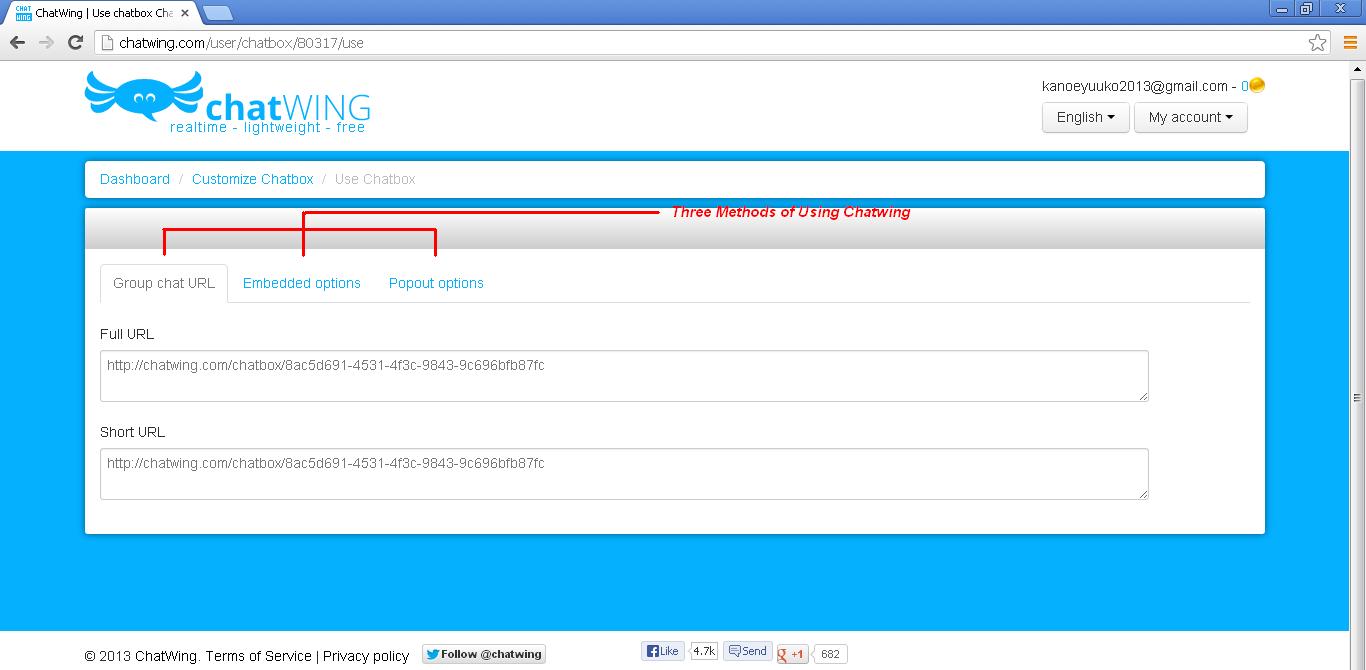
In the Group Chat URL tab, you can see the URL for your chatbox. There are two URLs there – the real one and the Vanity URL or the alias. If you have previously set up the alias feature on the Customization page, then its better to use the Vanity URL as it is very easy to memorize. Either way, you need to copy those links and access them on your web browser. Just like the View button on the Dashboard page, you can get access of your chatroom once again on your browser page – but this time, with the modifications and all.
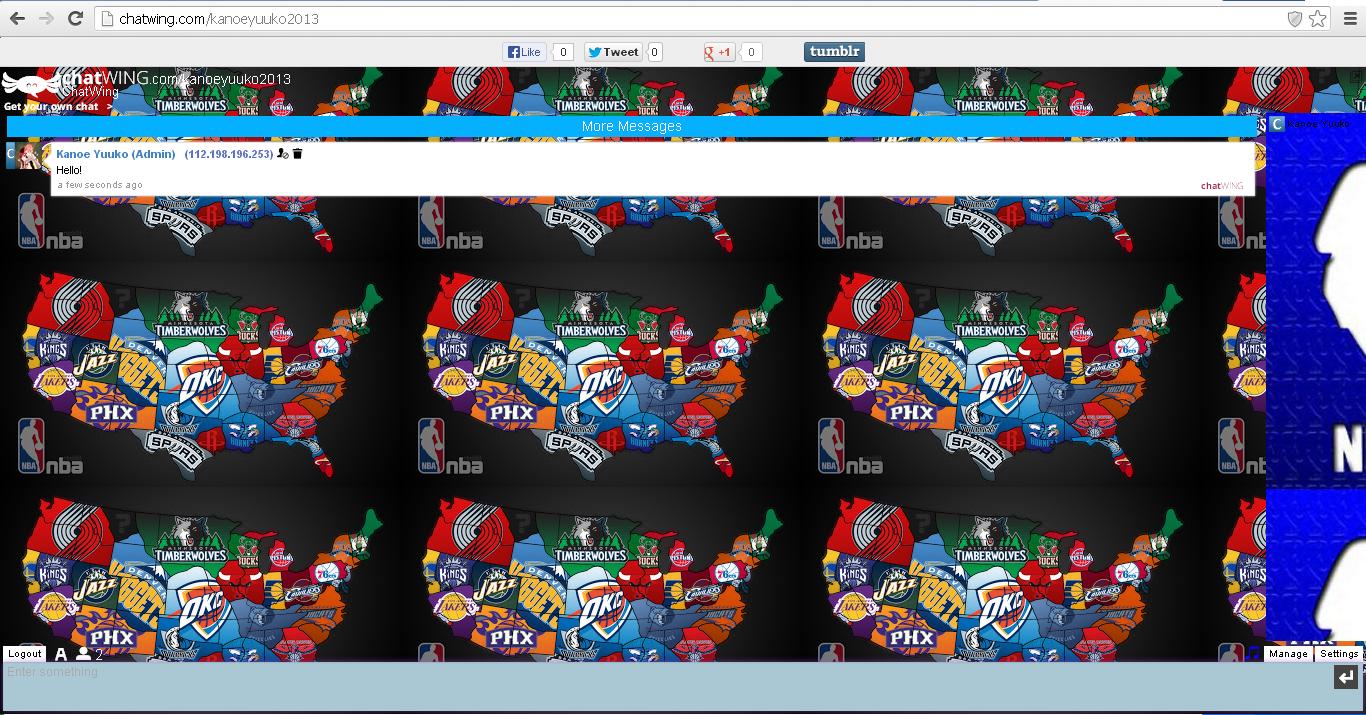
By sharing the links to your friends, they can easily access the chatroom you’ve created. Logging in is very easy as it will only require them to use their social networking accounts like Facebook and Twitter. And depending on you, the chatroom can be open for everyone or be a private one reserved only for your friends. You can manage it easily – cleaning mass messages and kicking out nuisances can be done with just one click.
This chat software is one of the most efficient chatting tools you can find on the net. And it’s constantly being improved to provide better services for its users. Lastly, you can get Chatwing for free.