AC Not Turning On: What to Check First
When your AC unit fails to activate, the initial step involves systematically checking the most common and easily accessible components. Many issues can be traced back to simple power interruptions or incorrect settings. Our approach prioritizes these quick checks before delving into more complex diagnostics.
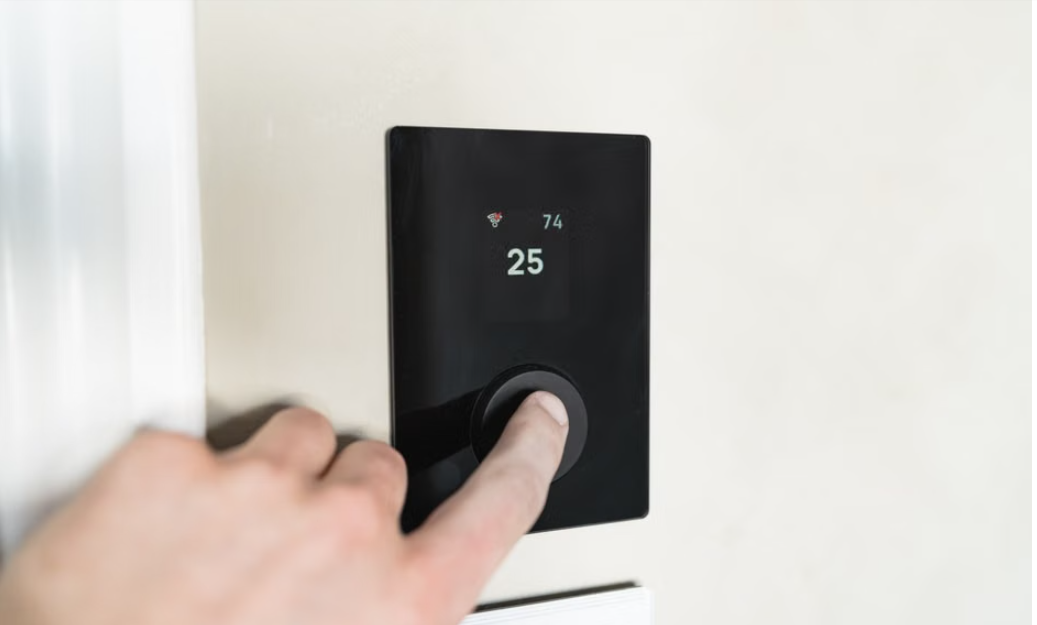
Checking Thermostat Settings and Battery Power
The thermostat is the control center of your cooling system, and often, the simplest oversight here can prevent your AC from turning on. First, ensure your thermostat is set to “Cool” mode, not “Heat,” “Fan Only,” or “Off.” It’s a common mistake, especially when transitioning from cooler weather. Next, verify that the setpoint temperature is at least 3-5 degrees Fahrenheit below the current room temperature. If the setpoint is too high, the system won’t receive the signal to activate.
Thermostat batteries are another frequent culprit. Even if the display is working, low batteries might not provide enough power for the thermostat to send a strong signal to the air handler or outdoor unit. We recommend replacing thermostat batteries annually, typically with AA cells located behind the faceplate, regardless of whether the display appears functional. Some thermostats also have a built-in compressor delay protection, a safety feature that prevents the compressor from short-cycling. If you’ve just adjusted settings, wait 3 to 5 minutes to see if the system kicks in. This delay protects the compressor from damage due to rapid on-off cycles.
Inspecting Main Circuit Breakers and Shutoff Switches
Electrical power is fundamental to your AC’s operation. A tripped circuit breaker is one of the most common reasons an AC unit won’t turn on. Your central AC system typically has two dedicated circuit breakers: one for the indoor air handler or furnace and another for the outdoor condenser unit.
To check the main electrical panel, locate the breakers labeled for your AC or furnace. If a breaker is in the “Off” position, or halfway between “On” and “Off,” it has likely tripped. To reset it safely, firmly push the breaker completely to the “Off” position, then immediately back to the “On” position. If the breaker trips again shortly after resetting, do not attempt to reset it repeatedly. This indicates a more serious electrical issue that requires professional attention, as continuous tripping can pose a fire hazard.
Beyond the main panel, also check for local shutoff switches. There’s usually an indoor air handler switch located near the furnace or air handler unit, often resembling a light switch. Ensure this is in the “On” position. Similarly, the outdoor condenser unit will have a separate disconnect box nearby, which houses a pull-out block or a switch. This must also be engaged to supply power to the outdoor unit.
Essential Component Checks for Homeowners
Once you’ve confirmed basic thermostat and electrical panel settings, our next focus shifts to other critical components that homeowners can safely inspect. These often involve safety mechanisms designed to prevent damage to the system or your home.

A common issue that can prevent your AC from turning on is an airflow blockage or the activation of a safety shutoff mechanism. A dirty air filter, for instance, can severely restrict airflow, forcing the system to work harder and potentially leading to freezing or overheating, which can trigger safety mechanisms. We always recommend inspecting your air filter for excessive dirt or discoloration and replacing it if light cannot pass through it. This simple, affordable step can prevent more significant problems.
Examining Condensate Float Switches and Drain Lines
The condensate drain line is crucial for removing moisture collected by your AC system. As the AC cools your home, it also dehumidifies the air, producing condensation that drains away. If this line becomes clogged with algae, mold, or debris, water can back up into the drain pan. Many systems are equipped with a float switch, a safety device located in the drain pan or along the drain line. When water levels rise too high, this float switch trips, cutting power to the AC unit to prevent an overflow and potential water damage to your home.
To check this, locate the indoor air handler unit. The condensate drain pan is typically underneath it, and the drain line is usually a PVC pipe extending from the unit. Look for standing water in the pan. If the float switch has tripped, you’ll see it elevated by the water. You can often clear a minor clog by carefully pouring a cup of distilled white vinegar into the cleanout access of the drain line. For more stubborn clogs, a wet/dry vacuum can be used at the outdoor drain outlet to suction out the blockage. Once the water drains and the float switch resets, your AC should be able to turn back on.
Checking Outdoor Disconnect Boxes and Fuses
In addition to the circuit breaker at your main electrical panel, the outdoor condenser unit has its own disconnect box, typically mounted on the wall near the unit. This box contains either a pull-out block or a heavy-duty switch that acts as a local power cutoff. Ensure this block is fully inserted or the switch is in the “On” position. Sometimes, these boxes also contain cartridge-style fuses. If these fuses are blown, they will prevent power from reaching the outdoor unit. Visually inspect them for any signs of breakage or discoloration. Replacing these fuses requires caution, as they carry high voltage.
Furthermore, many indoor air handler control boards feature a low-voltage 3-amp blade fuse, similar to those found in automobiles. This fuse protects the thermostat’s 24-volt control circuit. If this fuse blows, often due to a short circuit (perhaps during thermostat installation if power wasn’t completely turned off), the AC won’t receive the signal to start. To check this, you’ll need to turn off power to the indoor unit at the main electrical panel, open the air handler access panel, and locate the control board. The fuse will be a small, colored blade fuse. If the filament inside is broken, the fuse is blown and needs to be replaced with an identical amperage rating.
Selecting Affordable HVAC and Electrical Services for Complex Issues
While many initial troubleshooting steps are within a homeowner’s grasp, there comes a point where professional expertise becomes essential. This is particularly true when dealing with high-voltage electrical components or sealed refrigerant systems. Attempting repairs beyond basic checks can be dangerous and may cause further damage to your system.
Professional HVAC technicians possess specialized diagnostic tools and training to safely identify and resolve complex issues. They understand the intricate electrical schematics and mechanical operations of your unit. When it comes to electrical safety, especially with the high voltages involved in AC systems, a trained professional is indispensable. Capacitors, for example, can store a dangerous electrical charge even after power is disconnected, posing a significant shock hazard.
Identifying When You Need Affordable HVAC and Electrical Services
If you’ve completed all the basic checks—thermostat, breakers, disconnects, air filter, and condensate drain—and your AC still won’t turn on, it’s time to call a professional. Several problems require specialized tools and knowledge:
- Failed Start Capacitor: If your outdoor unit hums but doesn’t start, or tries to start and then quickly shuts off (short-cycling), a failed start capacitor is a likely culprit. This component provides the necessary electrical boost to get the compressor and outdoor fan motor running. While the part itself is relatively inexpensive, replacing it involves handling high-voltage components and should only be done by a qualified technician.
- Electrical Contactor Issues: The contactor is an electrical switch that allows high voltage to flow to the compressor and outdoor fan motor when the thermostat calls for cooling. If the contactor is stuck, pitted, or failed, the outdoor unit won’t receive power. Diagnosing and replacing a contactor requires electrical expertise.
- Refrigerant Leaks: If your AC runs but blows warm air, or if you notice ice on the refrigerant lines, it could indicate a refrigerant leak. Refrigerant is a regulated substance, and only EPA-certified technicians are legally allowed to handle it.
- Blower Motor Problems: If the outdoor unit runs but no air comes from your indoor vents, the issue might be with the indoor blower motor or its capacitor.
Any situation involving buzzing noises, burning smells, or repeated circuit breaker trips warrants an immediate call to a professional. These are signs of potentially dangerous electrical or mechanical failures.
Maintaining System Efficiency with Affordable HVAC and Electrical Services
Beyond emergency repairs, regular, routine maintenance is key to preventing future breakdowns and ensuring your AC system operates at peak efficiency. Scheduling annual seasonal tune-ups with a qualified HVAC technician can significantly extend the lifespan of your unit and help you avoid unexpected failures.
During a tune-up, a technician will inspect and clean critical components, check refrigerant levels, test electrical connections, and assess the overall health of your system. This proactive approach can identify potential issues before they escalate into major, costly repairs. For instance, a technician can test the capacity of your start capacitor, ensuring it’s not on the verge of failure, or clear minor clogs in the condensate line before they cause a flood.
Regular maintenance helps recover lost cooling efficiency, which can translate into noticeable savings on your energy bills. A well-maintained system doesn’t have to work as hard to cool your home, leading to lower energy consumption. Investing in preventative care is a smart strategy for homeowners seeking to maximize their system’s performance and minimize unexpected repair costs, ensuring your home remains comfortable and your HVAC system operates as an energy-efficient HVAC and electrical asset.
Frequently Asked Questions
What is the first thing to check when an AC won’t turn on?
When your AC unit fails to activate, the very first steps involve verifying your thermostat settings and confirming the power supply. Ensure the thermostat is set to “Cool” mode and the desired temperature is below the current room temperature. If your thermostat uses batteries, replace them, even if the display seems functional. Next, check the main electrical panel for any tripped circuit breakers labeled for your AC or furnace. Finally, take a quick look at your air filter; a severely clogged filter can sometimes trigger safety mechanisms that prevent the unit from starting.
How do I reset a tripped AC circuit breaker safely?
To safely reset a tripped AC circuit breaker, first, locate your home’s main electrical panel. Identify the breaker responsible for your air conditioner or furnace. If it’s in the “Off” position or halfway between “On” and “Off,” it has tripped. To reset it, firmly push the breaker completely to the “Off” position, then immediately push it back to the “On” position. It’s crucial to only attempt this once. If the breaker trips again shortly after resetting, it indicates an underlying electrical problem or a fault within the AC unit that requires immediate attention from a qualified electrician or HVAC technician. Repeatedly resetting a tripping breaker can be dangerous.
When should I stop troubleshooting and call an HVAC technician?
You should stop troubleshooting and call a professional HVAC technician if, after performing the basic checks (thermostat, breakers, disconnects, air filter, condensate drain), your AC still doesn’t turn on. Specifically, discontinue DIY efforts if you encounter any high-voltage components, such as the outdoor unit’s capacitor, which can store a dangerous electrical charge even after power is disconnected. Also, if you notice any burning smells, hear unusual buzzing or grinding noises, or if a circuit breaker trips repeatedly after being reset, these are strong indicators of serious issues that require immediate professional intervention to prevent further damage or safety hazards.
Conclusion
When your AC unit refuses to turn on, a systematic diagnostic checklist can often help you identify and resolve common issues without immediate professional help. By methodically checking your thermostat settings and batteries, inspecting main circuit breakers and local shutoff switches, and examining condensate float switches and outdoor disconnect boxes, you can address many of the typical culprits. A clean air filter and a clear condensate drain are simple, proactive measures that can prevent many problems.
However, recognizing the limits of DIY troubleshooting is equally important. When faced with complex electrical components like capacitors or contactors, or if you encounter signs of a significant malfunction such as burning smells or persistent breaker trips, it’s always best to call a qualified HVAC technician. Prioritizing safety and knowing when to seek expert assistance will ensure your system is properly diagnosed and repaired, maintaining your home’s comfort and your peace of mind. Proactive maintenance and timely, qualified service support are key to keeping your cooling system running efficiently for years to come.

Really impressed with the interface here. Everything loads fast and the payouts are smooth. Definitely my new favorite spot! Check out pkcvpro91