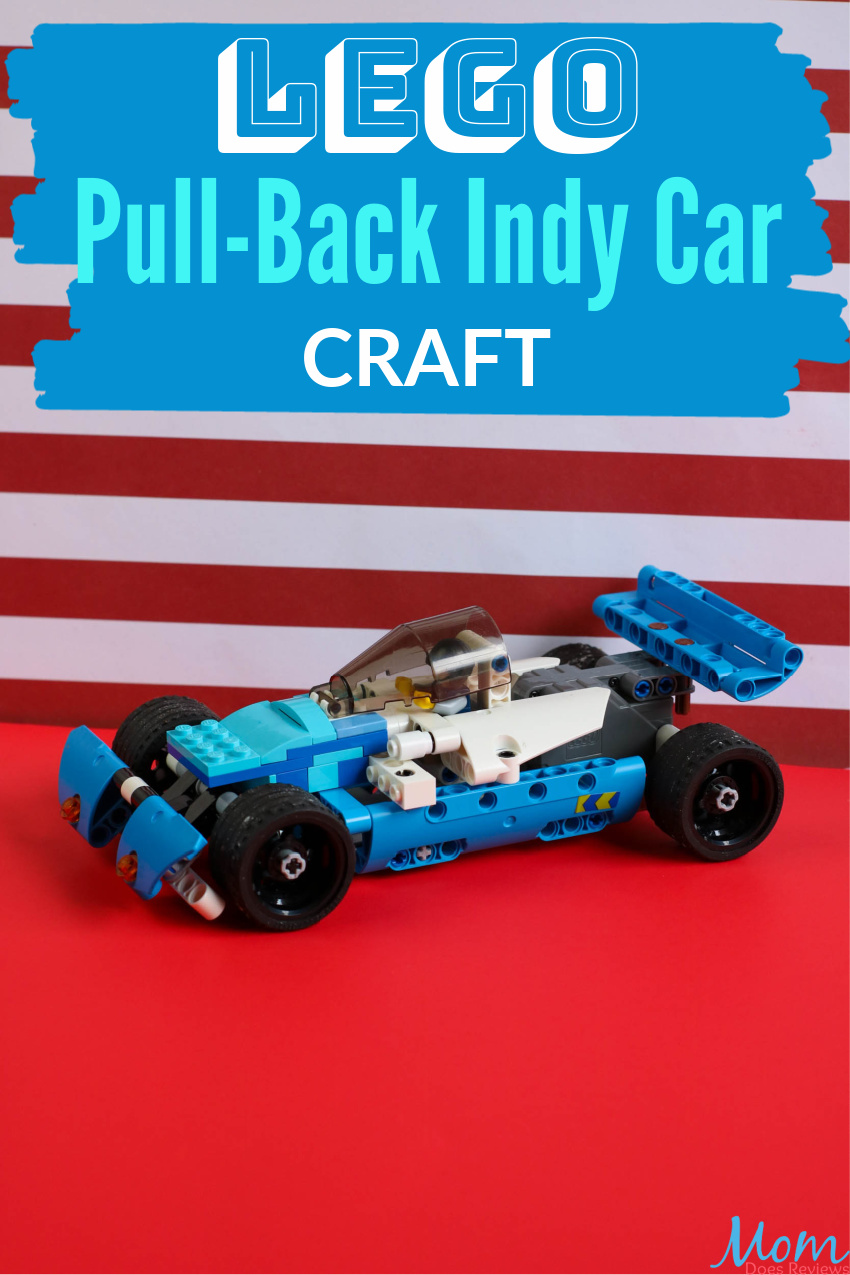
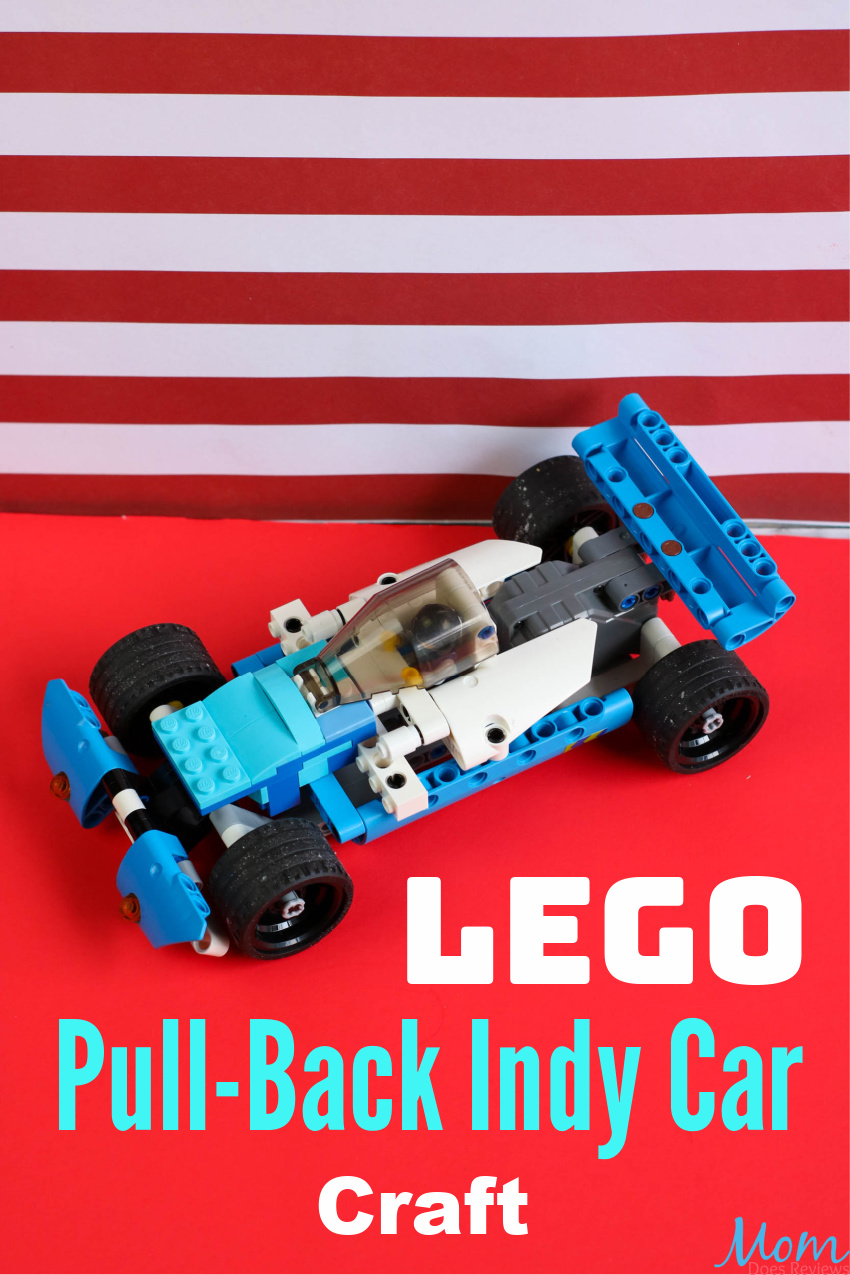
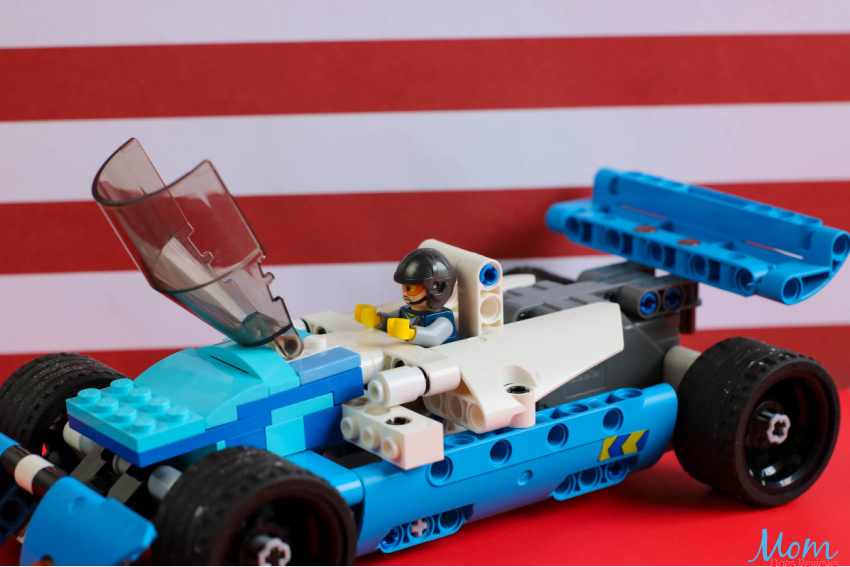
If your kids love LEGOs, then they are sure to love this fun LEGO Pull-Back Indy Car Craft! Just follow the step-by-step instructions to make this fun action-packed car!
LEGOs are always fun and when combined with a fun craft, way cool – right? This fun craft is sure to be a hit with the kids.
This fun craft comes with easy step-by-step instructions however please note it is geared toward older kids. Heck! Even parents will have fun with this one 🙂
Want another fun LEGO craft? Then be sure and check out our DIY LEGO Brick Boxes Tutorial! It is an easy craft that is fun to do AND makes a great gift wrapping idea, kids room storage solutions and/or birthday party goodie boxes.
LEGO crafts can be addicting, right? Well, if you want even more, then be sure and take a look at these fun LEGO Crafts to do with Your Kids!
LEGO Pull-Back Indy Car Craft
This project begins with the LEGO Technic Police Pursuit 42091 Building Kit.
You will also need:
2 LEGO Technic white angle beams, included with the set
1 white LEGO Technic 1×10 brick
Black connector pegs, included with the set
Blue connector pegs, included with the set
White tube covers, included with the set
2 bowed Technic plates, included with the set
1 white LEGO Technic 1×7 brick, included with the set
2 white LEGO Technic 1×3 bricks, included with the set
2 white LEGO Technic round bricks, included with the set
Blue cross axles, included with the set
LEGO cockpit shield
1 blue 1×4 plate
2 blue 4×4 plates
1 blue 2×4 brick with bow
2 blue 2×4 plates
1 blue 2×8 brick
2 blue 1×4 bricks
1 blue 1×4 brick with knobs
2 blue 1×2 tiles
2 blue 2×2 tiles
1 blue 1×1 tile
1 1×1 plate with holder
1 1×2 plate with vertical grip
1 blue 1x4x2 plate with bow
How to make this fun LEGO Pull-Back Indy Car:
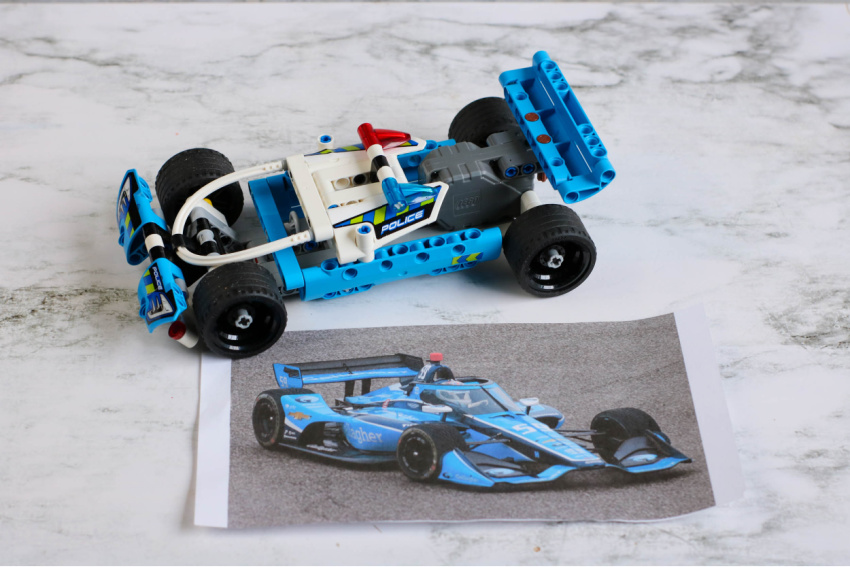
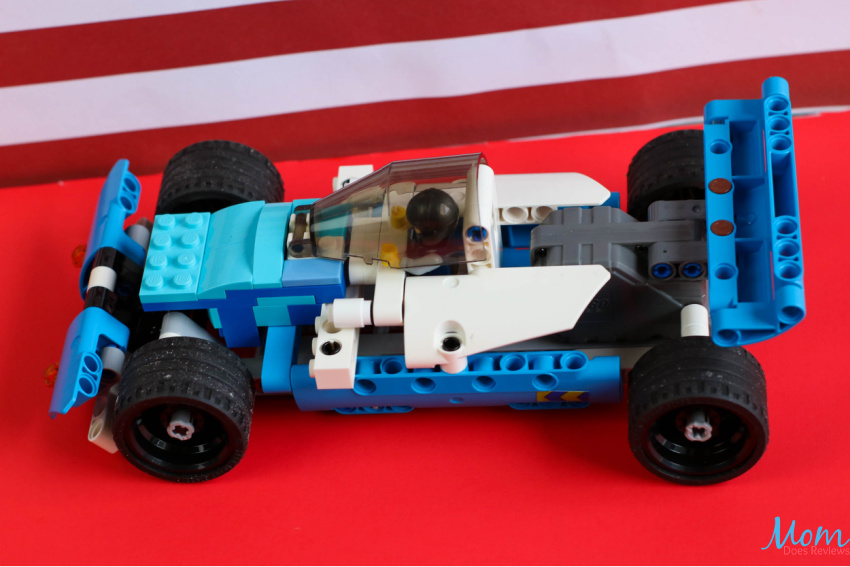
1. Build the pull back LEGO Technic Police Pursuit car but do not add the stickers. Remove the white framework from the top of the car.
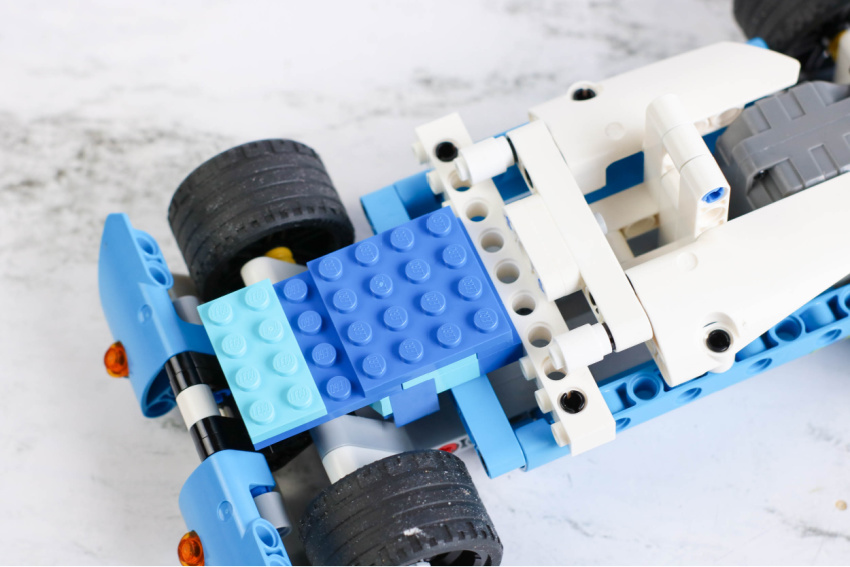
2. Construct the seating area using the angle beams, black connector pegs, white tube covers, and blue connector pegs. Snap the seat into the car. (See pictures.)
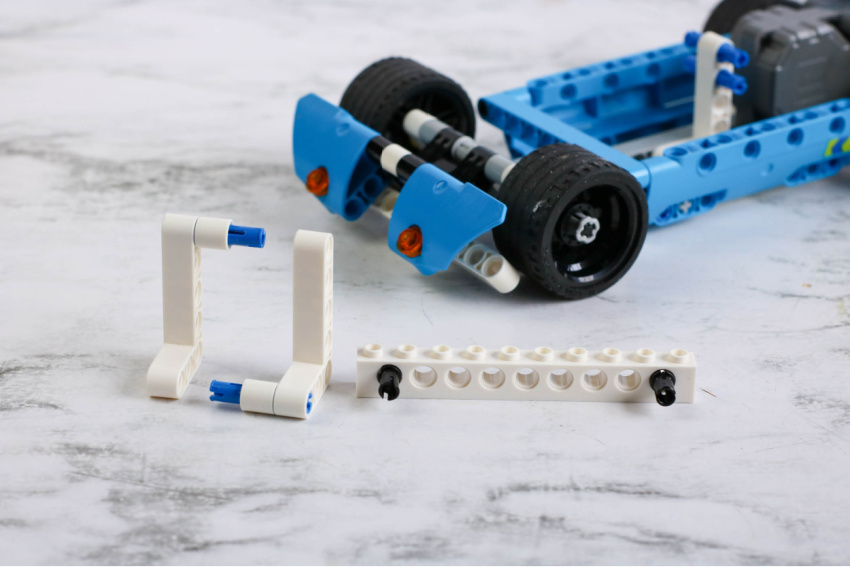
3. Place the 1×10 technic brick across the car using two black connector pegs to attach it to the car’s frame.
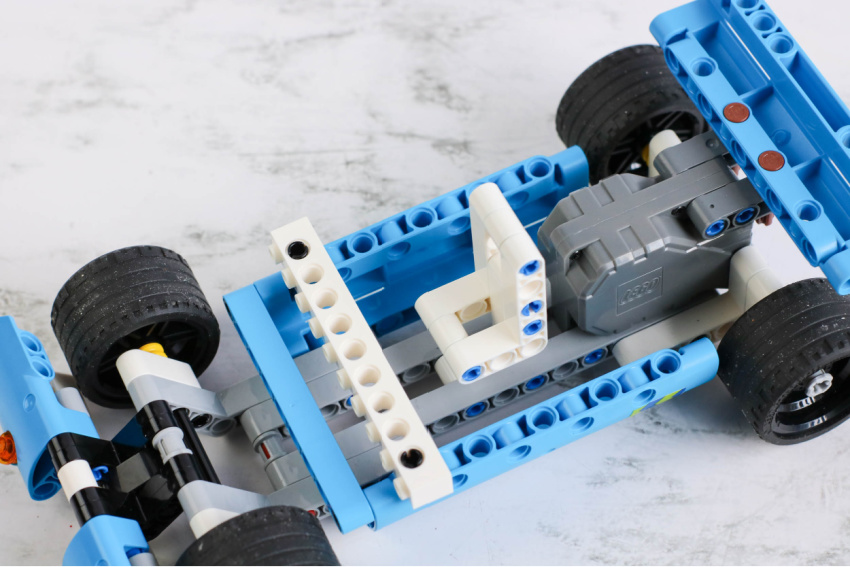
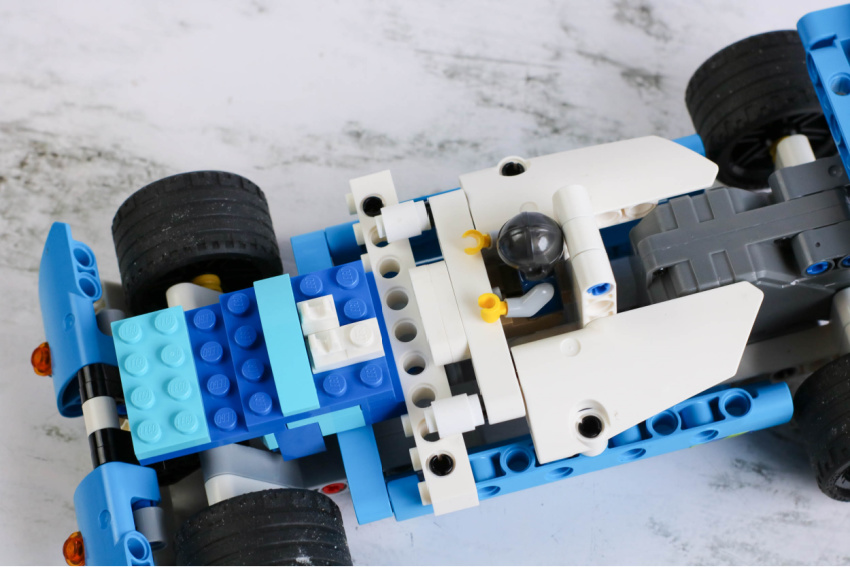
4. Reconfigure the bowed Technic plates with the blue cross axles, white Technic 1×3 bricks, white round bricks, and black connector pegs to create the cover for the vehicle seating area. (See picture.)
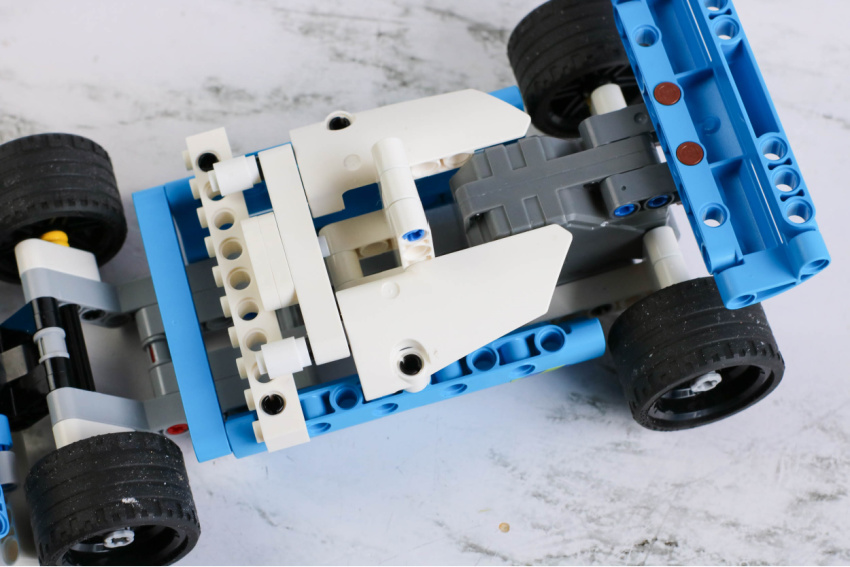
5. Create the front hood cover by building onto the 2×4 brick with knobs. Attach the front hood cover to the frame of the car using the brick with knobs.
6. Where the hood snaps into the frame, attach the plate with vertical grip and plate with holder. Snap the cockpit cover into the grips.
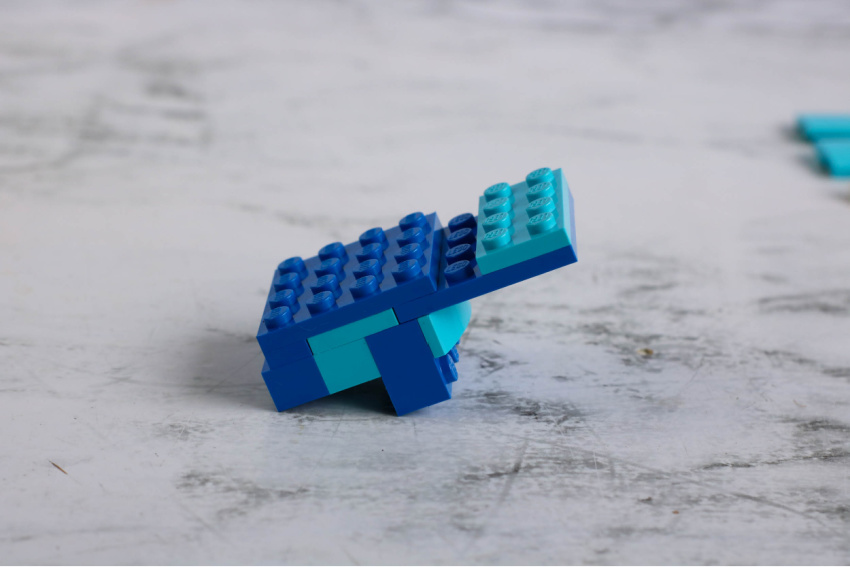
7. Cover the hood with the blue tiles.
Print this fun LEGO Indy Car craft!

LEGO Pull-Back Indy Car Craft
If your kids love LEGOs, then they are sure to love this fun LEGO Pull-Back Indy Car Craft! Just follow the step-by-step instructions to make this fun action-packed car!
Materials
- This project begins with the LEGO Technic Police Pursuit 42091 Building Kit.
- 2 LEGO Technic white angle beams, included with the set
- 1 white LEGO Technic 1x10 brick
- Black connector pegs, included with the set
- Blue connector pegs, included with the set
- White tube covers, included with the set
- 2 bowed Technic plates, included with the set
- 1 white LEGO Technic 1x7 brick, included with the set
- 2 white LEGO Technic 1x3 bricks, included with the set
- 2 white LEGO Technic round bricks, included with the set
- Blue cross axles, included with the set
- LEGO cockpit shield
- 1 blue 1x4 plate
- 2 blue 4x4 plates
- 1 blue 2x4 brick with bow
- 2 blue 2x4 plates
- 1 blue 2x8 brick
- 2 blue 1x4 bricks
- 1 blue 1x4 brick with knobs
- 2 blue 1x2 tiles
- 2 blue 2x2 tiles
- 1 blue 1x1 tile
- 1 1x1 plate with holder
- 1 1x2 plate with vertical grip
- 1 blue 1x4x2 plate with bow
Instructions
1. Build the pull back LEGO Technic Police Pursuit car but do not add the stickers. Remove the white framework from the top of the car.
2. Construct the seating area using the angle beams, black connector pegs, white tube covers, and blue connector pegs. Snap the seat into the car. (See pictures.)
3. Place the 1x10 technic brick across the car using two black connector pegs to attach it to the car’s frame. (See picture.)
4. Reconfigure the bowed Technic plates with the blue cross axles, white Technic 1x3 bricks, white round bricks, and black connector pegs to create the cover for the vehicle seating area. (See picture.)
5. Create the front hood cover by building onto the 2x4 brick with knobs. Attach the front hood cover to the frame of the car using the brick with knobs.
6. Where the hood snaps into the frame, attach the plate with vertical grip and plate with holder. Snap the cockpit cover into the grips.
7. Cover the hood with the blue tiles.
Pin it for later!