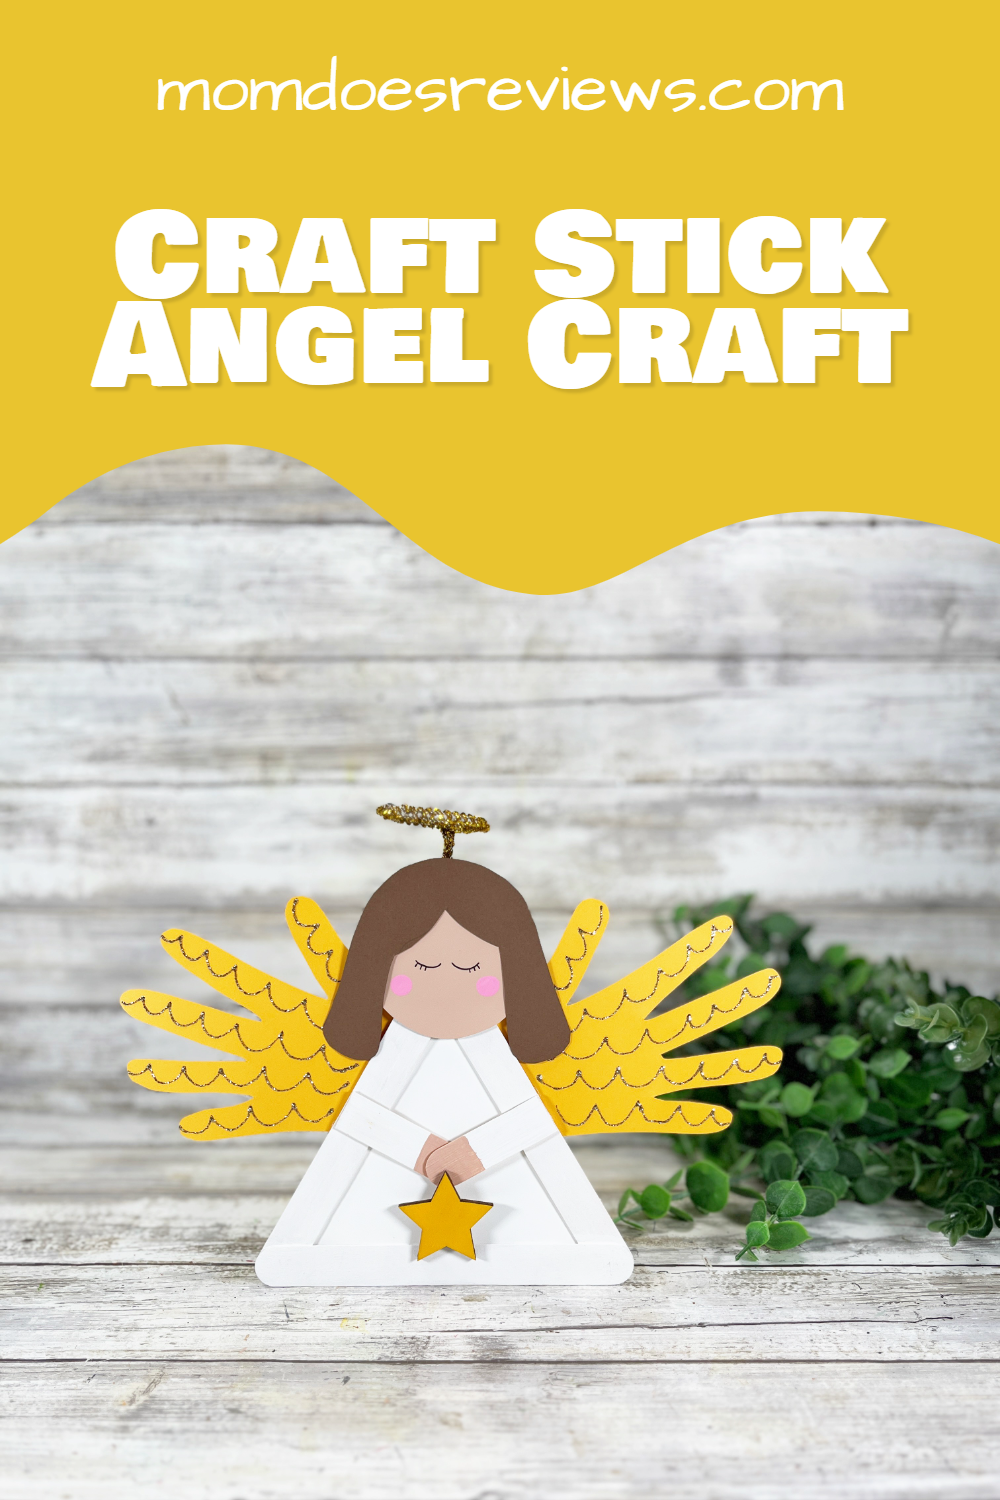
🎄 Craft Stick Angel – A Sweet and Simple Dollar Store Christmas Craft for Kids
There’s something extra special about handmade holiday decorations — especially when they’re made with a little glue, glitter, and love. 💕 This Craft Stick Angel is a simple, heartwarming project you can make with the kiddos in just 30 minutes using supplies from the Dollar Store! It’s the perfect way to add a touch of homemade charm to your Christmas décor while making memories that will last long after the holidays are over.
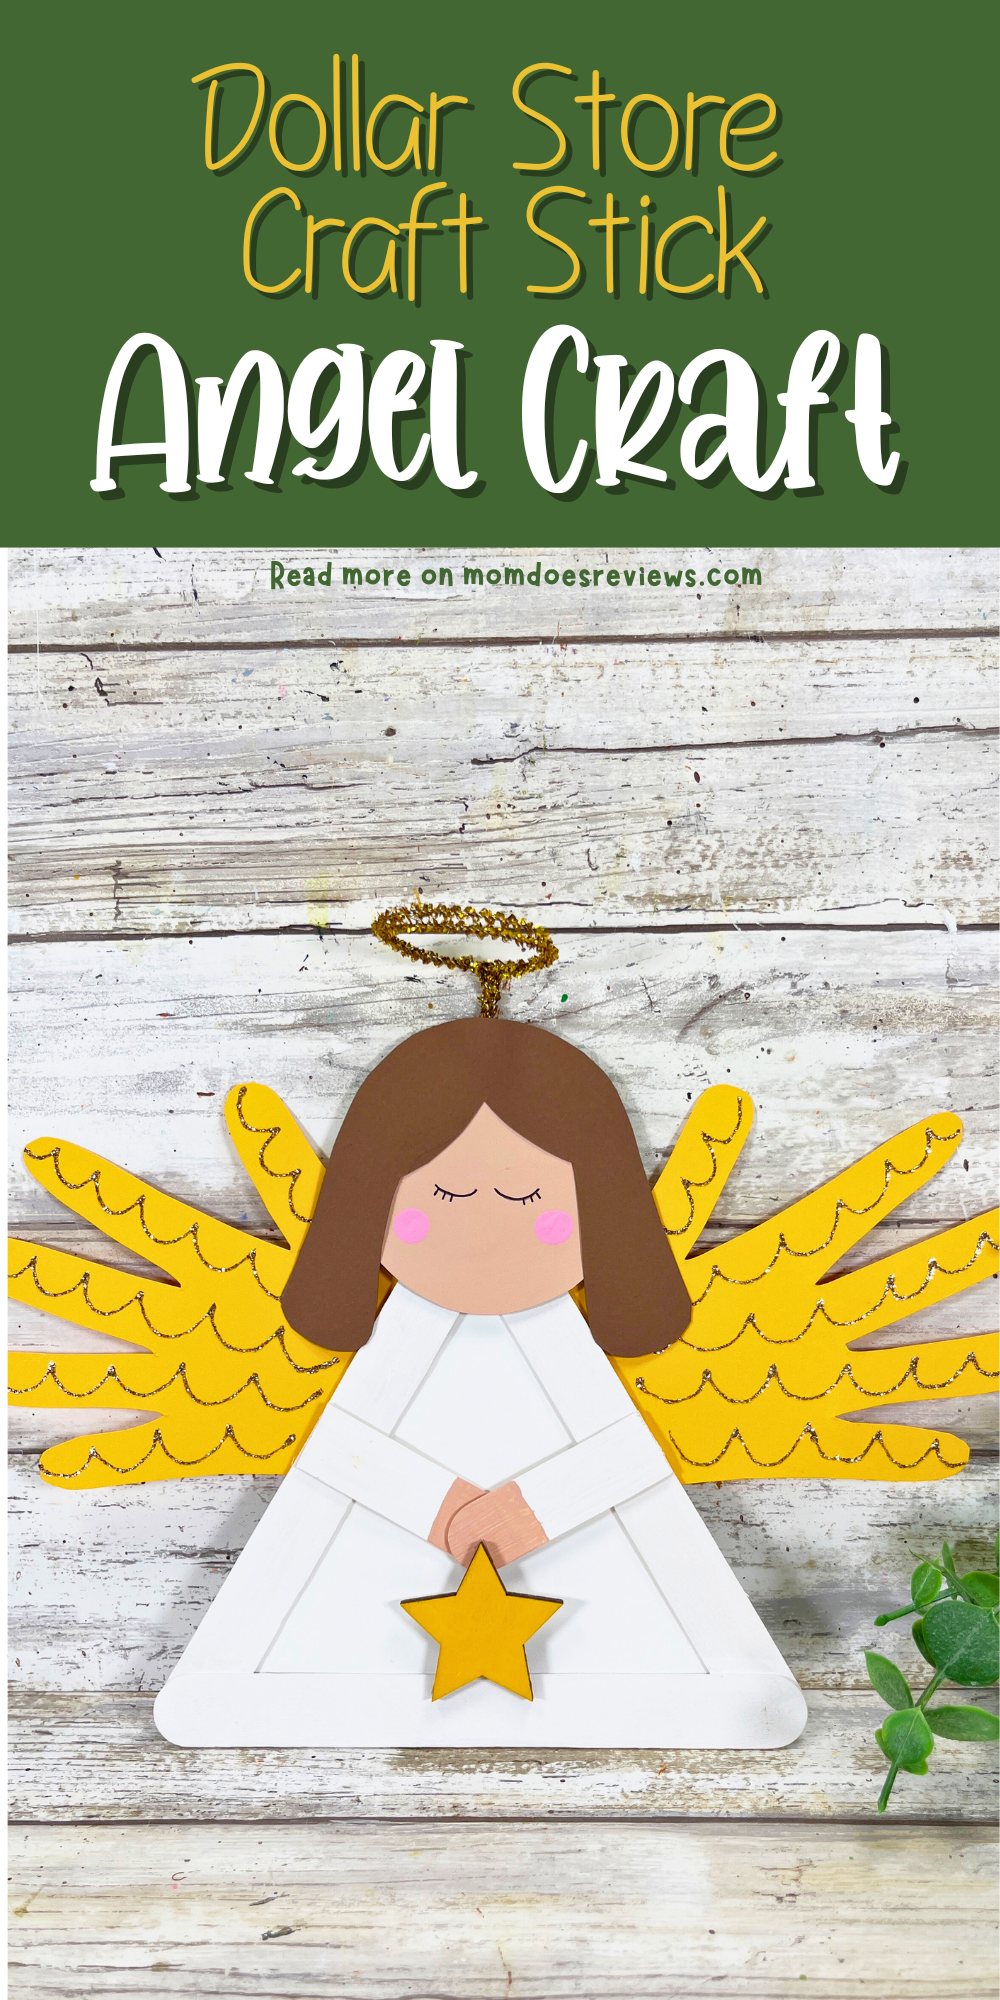
This craft is both fun and meaningful. With just a few craft sticks, some paint, and a sprinkle of creativity, you’ll create a sweet little angel that looks right at home on the Christmas tree or mantle. You can even personalize each one with names or messages for a special keepsake. Kids love how easy and quick it is to make — and adults love how beautiful the finished angels look! ✨
Whether you’re crafting at home with your children, making decorations for a classroom party, or looking for a simple project for your Sunday school group, this Craft Stick Angel fits the bill. It’s budget-friendly, beginner-friendly, and full of festive spirit. Plus, it’s a wonderful way to remind little ones what the holiday season is truly about — love, joy, and togetherness. ❤️
Materials Needed:
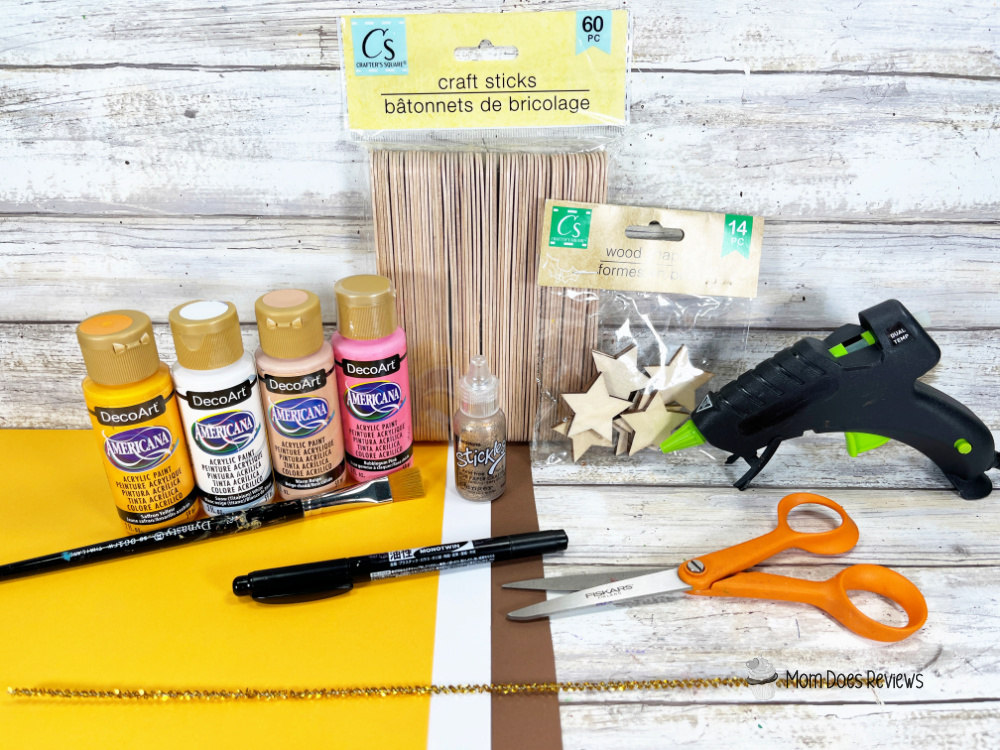
- Craft Sticks, Jumbo – Dollar Store
- Chenille Stem, Gold Tinsel – Dollar Store
- Glue Gun and Glue Sticks – Dollar Store
- Glitter Glue, Gold – Dollar Store
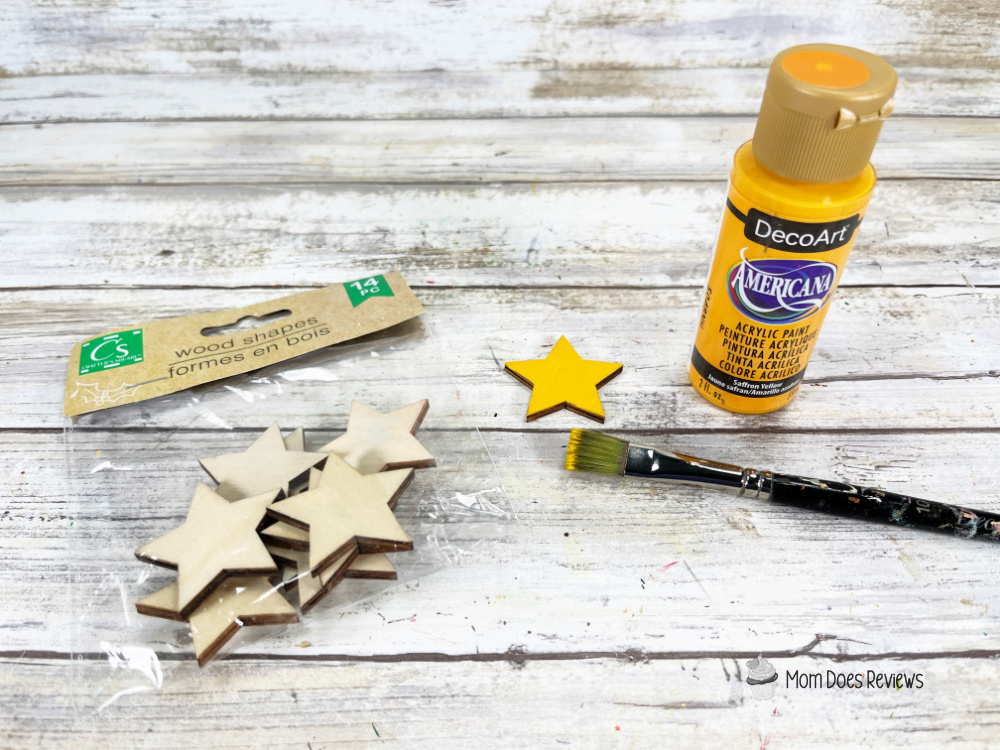
- Wooden Stars – Dollar Store
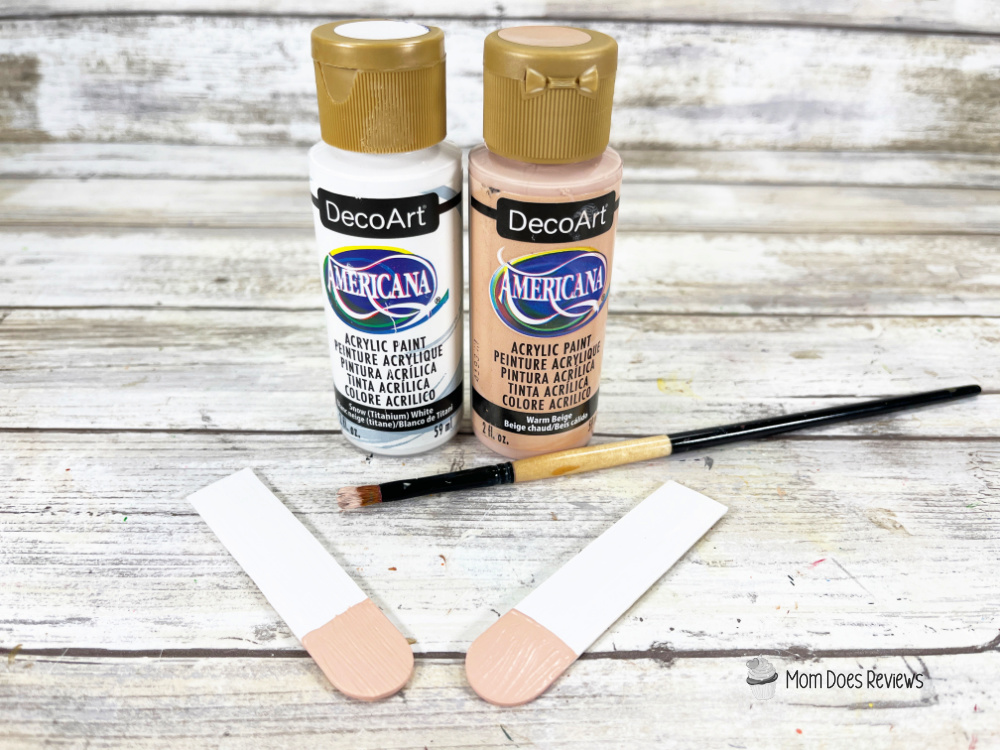
- Acrylic Craft Paint – Flesh tone color of choice, Pink, White, Yellow
- Cardstock – White, Gold, Flesh tone, Brown
- Scissors
- Paintbrush
- Marker, Black – Dollar Store
- Pencil with a new eraser
- PRINT THE PATTERNS
Instructions:
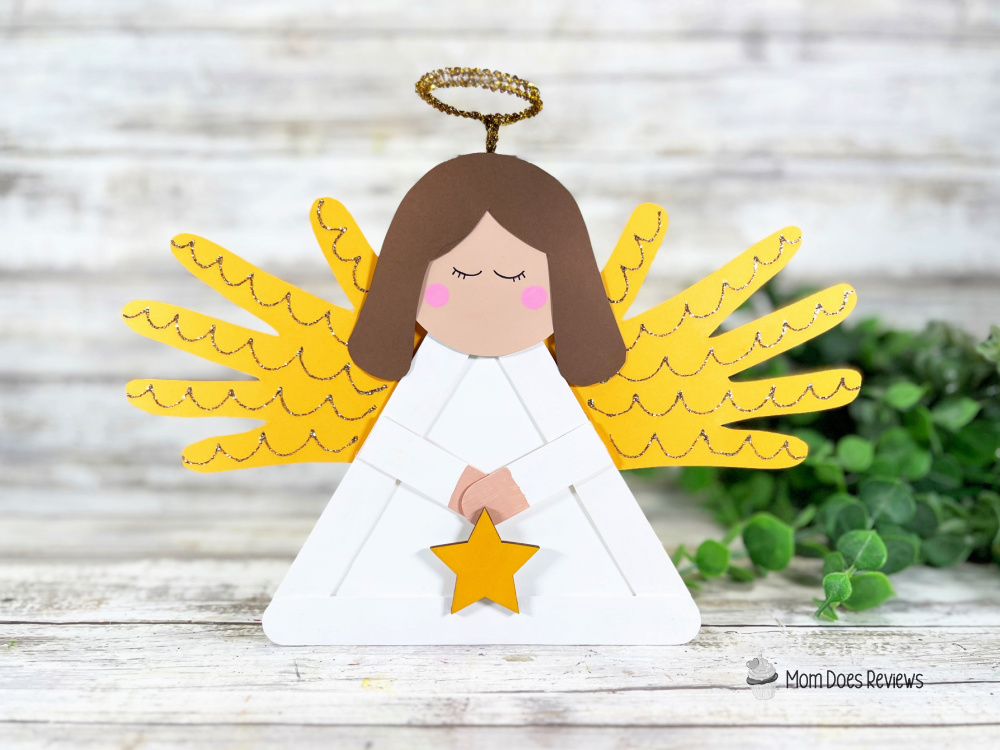
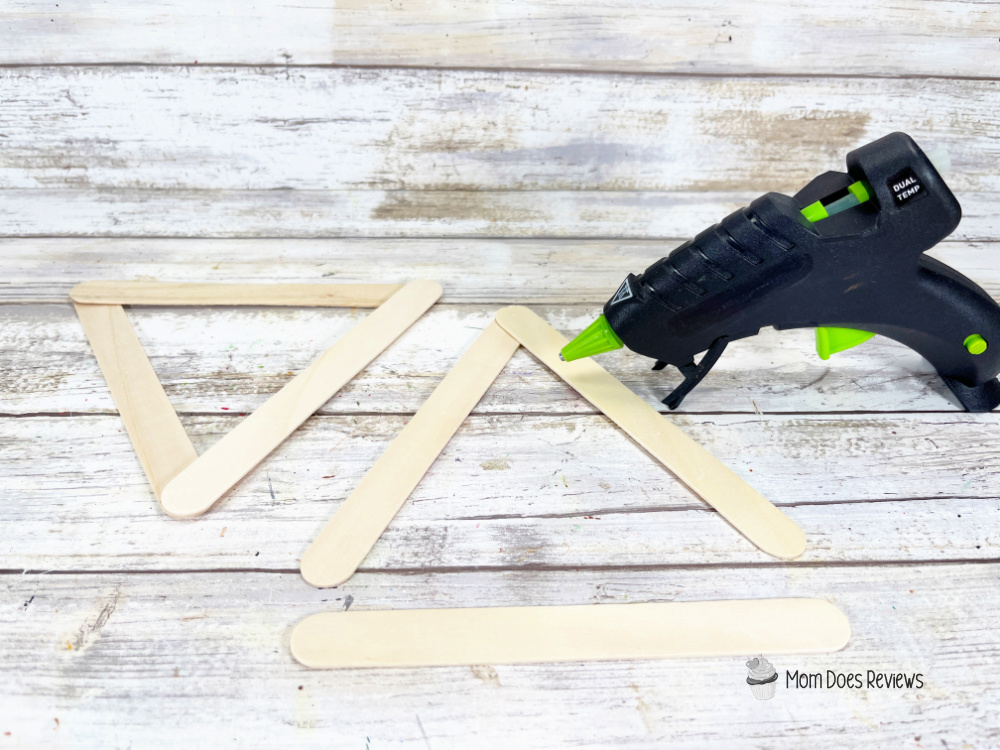
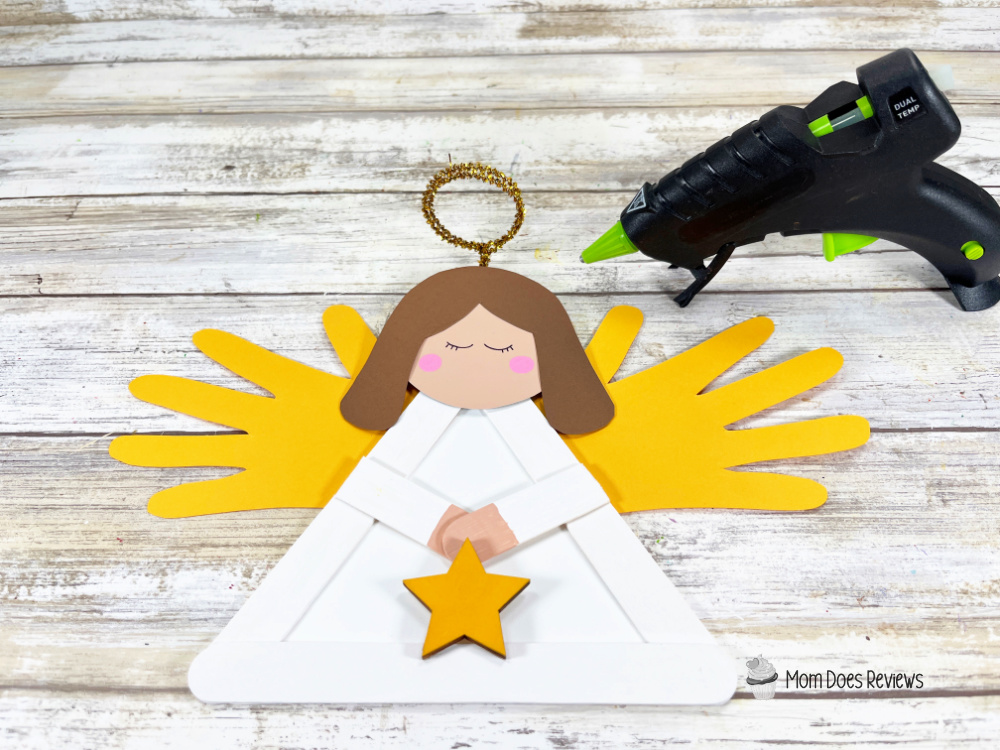
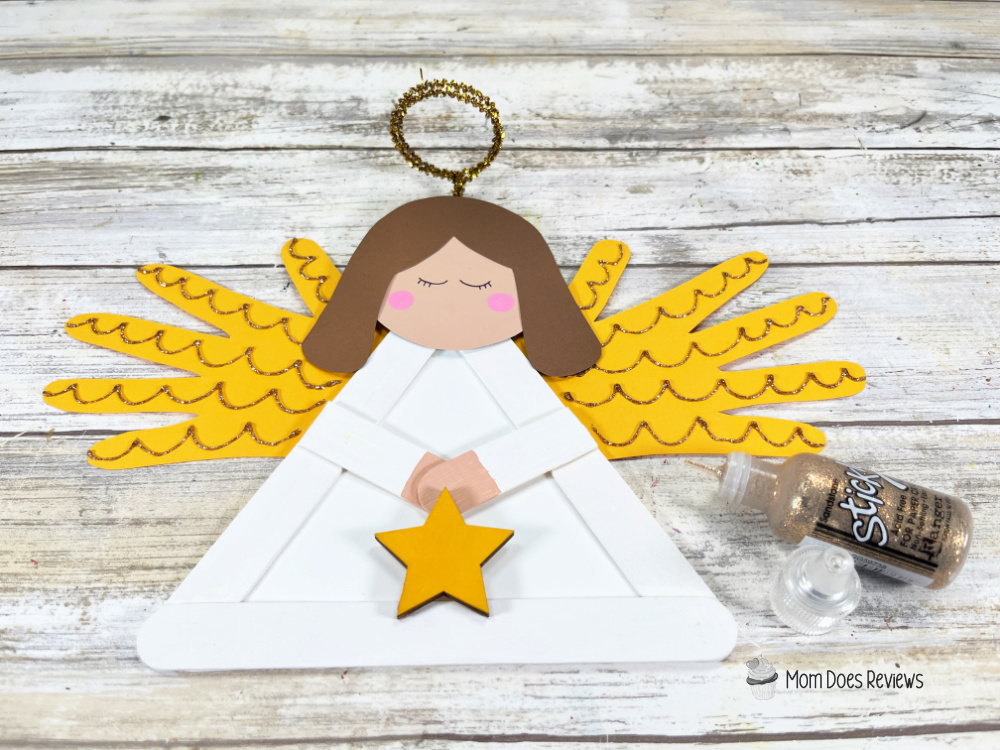
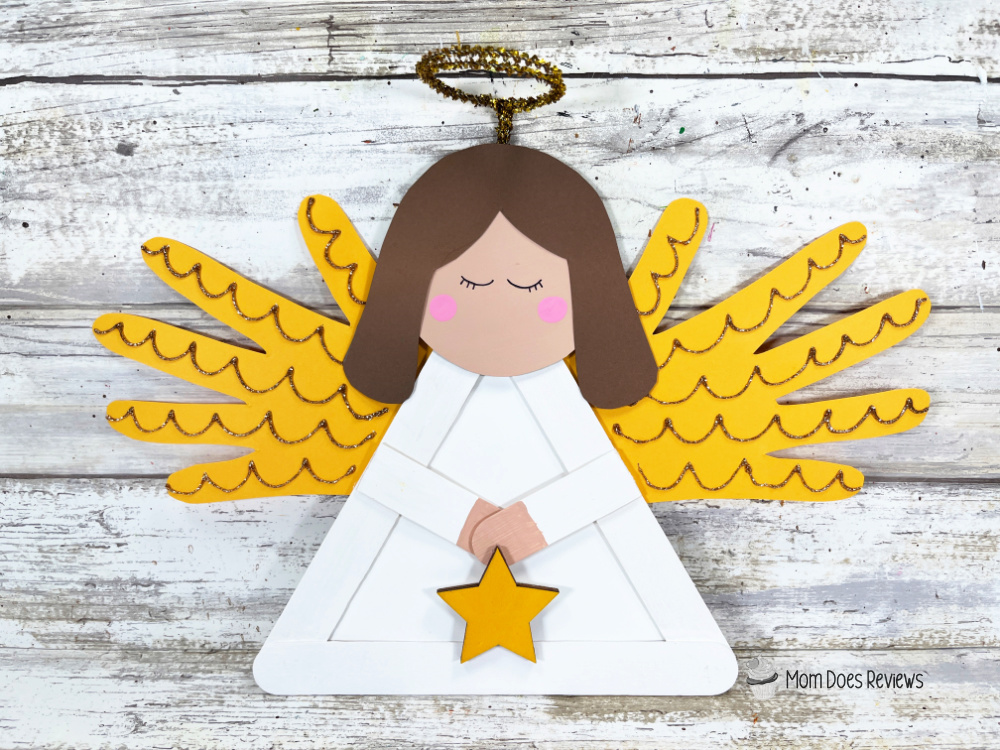
- Gather all supplies. To create the angel body, create a triangle with three jumbo craft sticks on your work surface, and secure at the corners with a glue gun and glue sticks. TIP: You can use liquid craft glue for this project, but you will have to wait for it to dry.

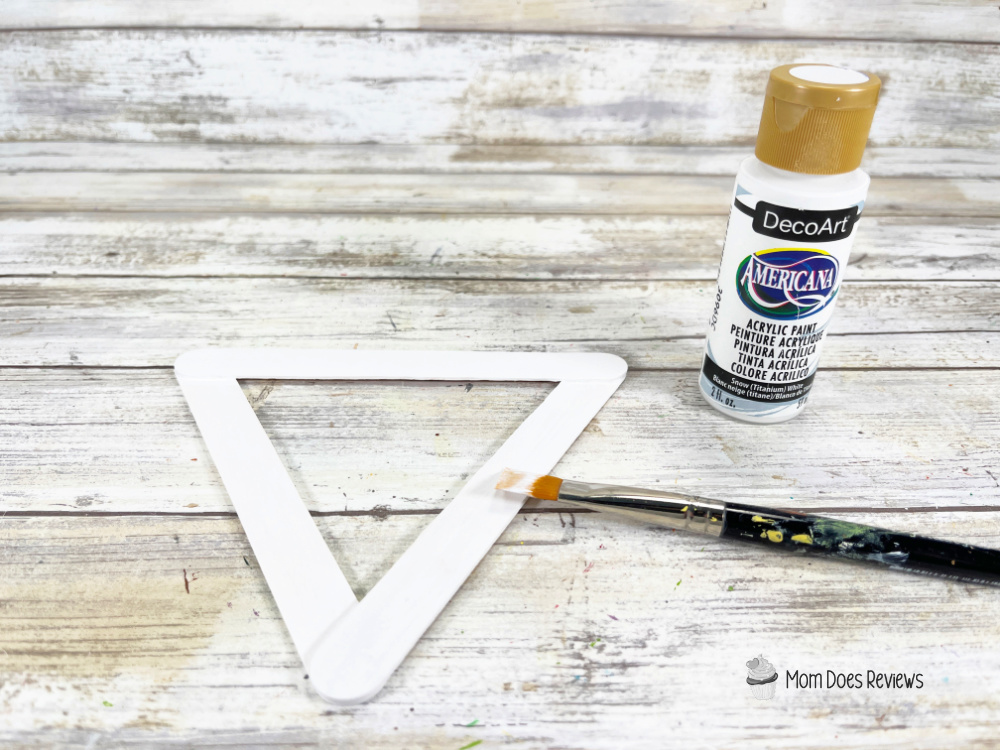
- Basecoat the angel with white acrylic craft paint. Let dry, and apply a second coat, if necessary.
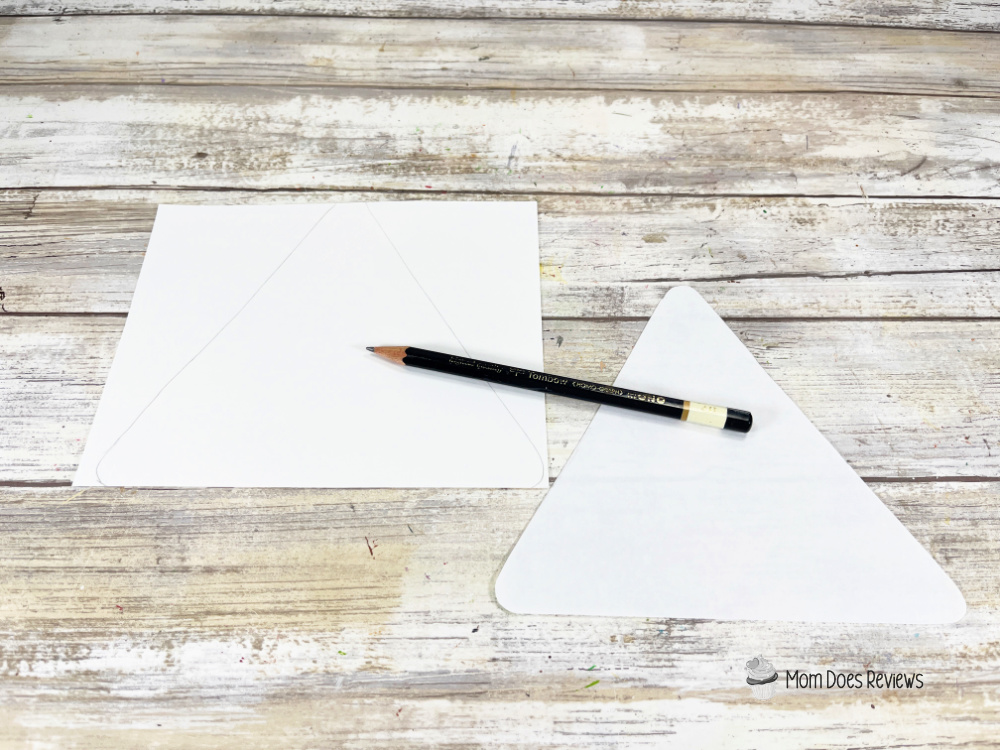
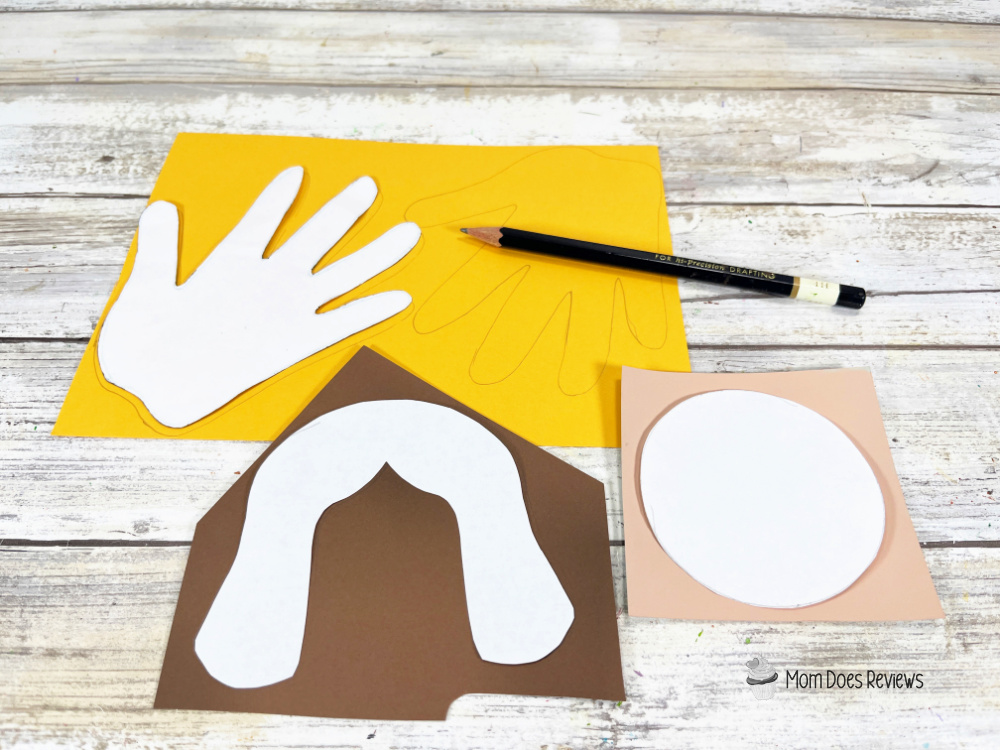
- Download, print, and cut out the angel patterns. Trace the angel body pattern onto white cardstock with a pencil.
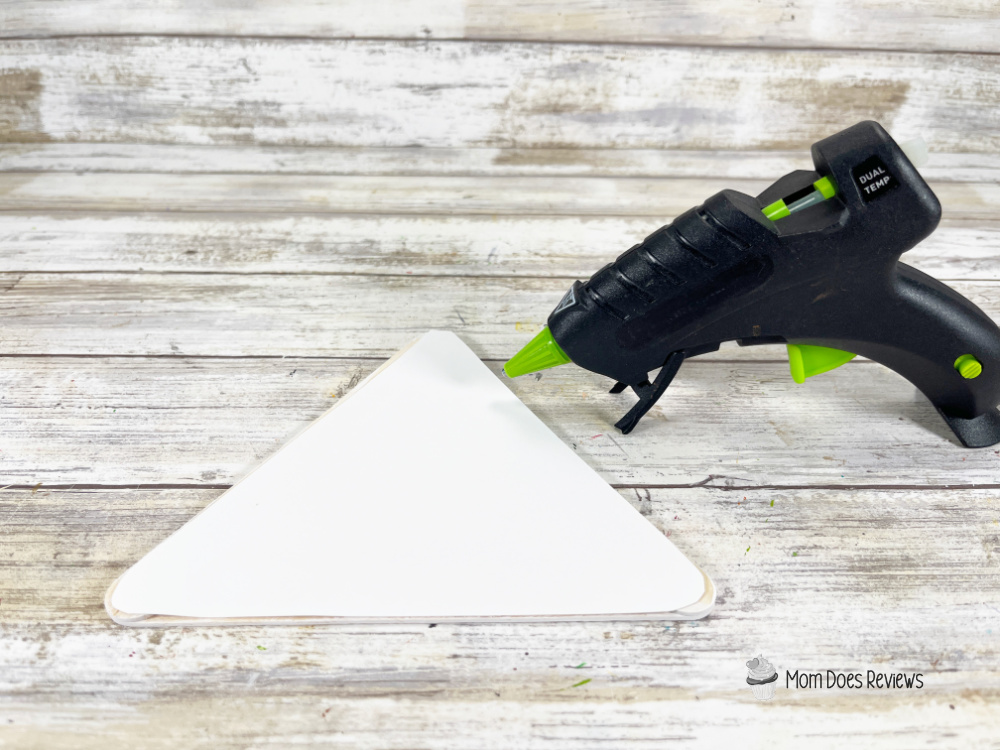
- Cut out the angel body pattern with scissors, making sure to cut inside the traced lines for a clean, finished project.
- Glue the white cardstock onto the back of the craft stick triangle.
- Cut a jumbo craft stick in half. Basecoat the angel arms with white acrylic craft paint, and the angel hands with flesh tone color of choice acrylic craft paint. Let dry, and apply a second coat, if necessary.
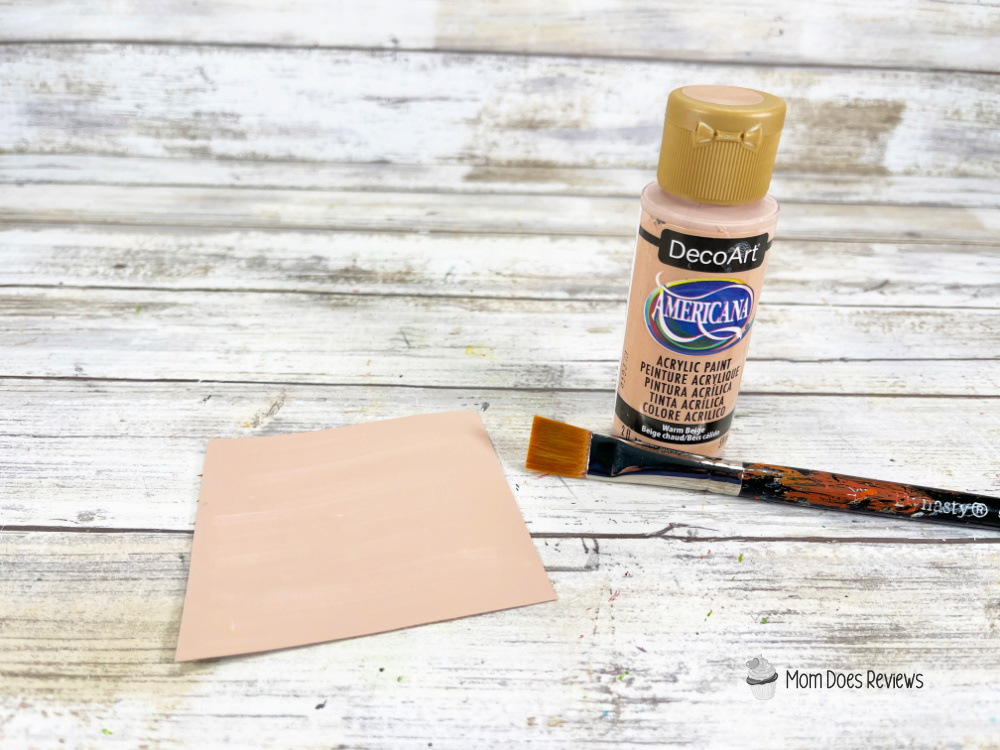
- If you do not have cardstock to match the flesh tone color of your choice, paint white cardstock with acrylic craft paint.
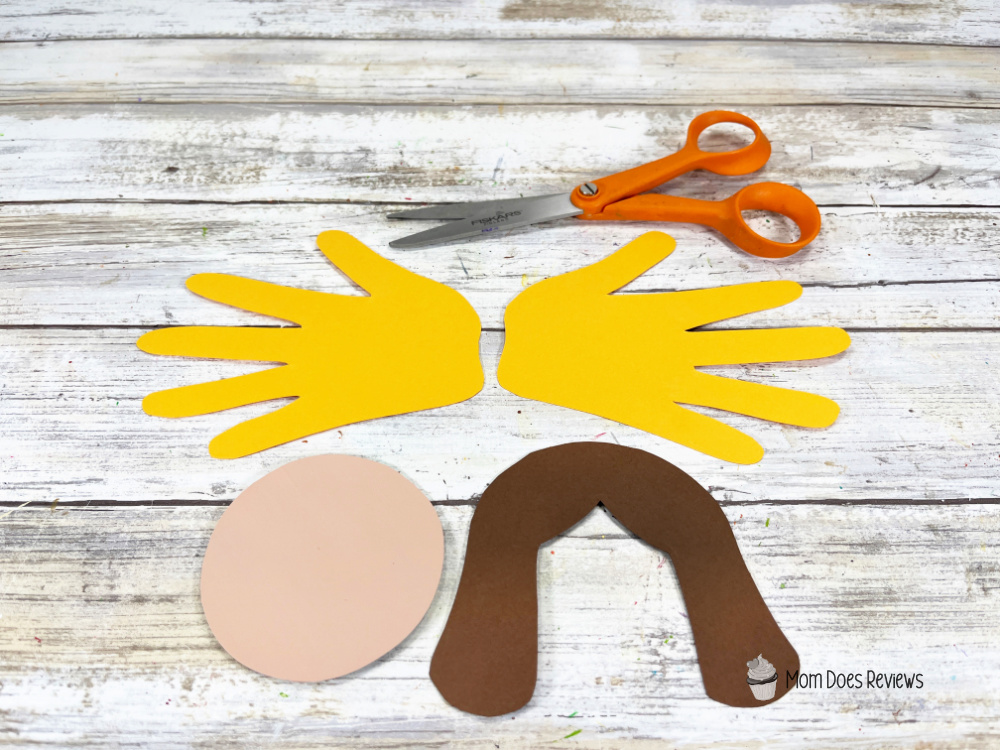
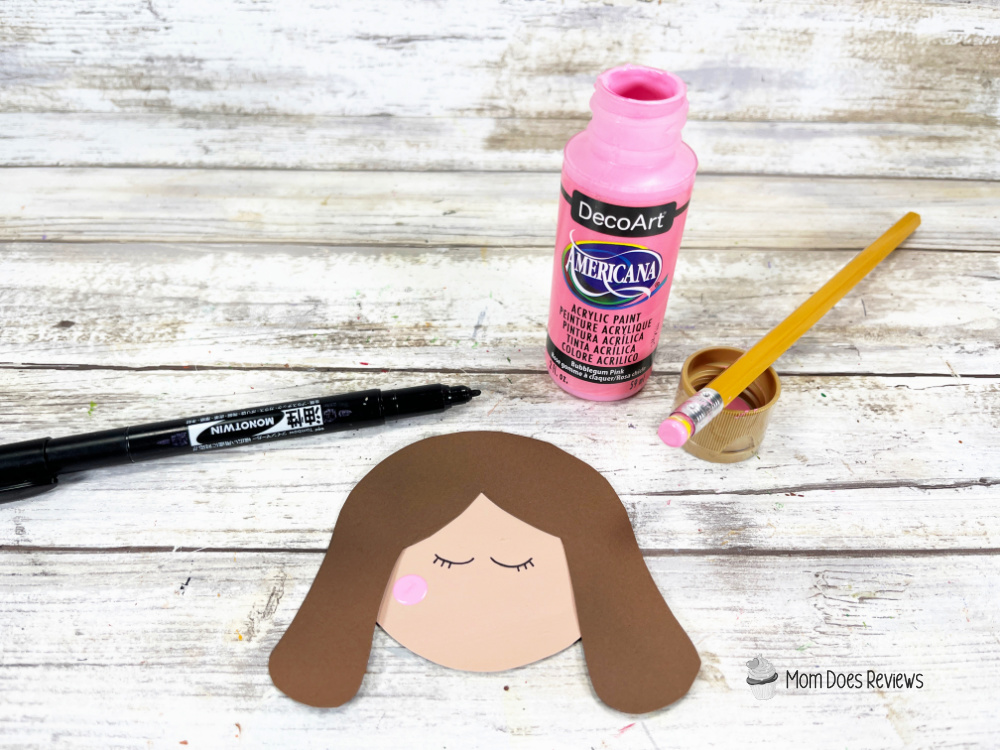
- Trace the angel head onto flesh tone color of choice cardstock, trace hair onto brown cardstock, and trace angel wings twice onto gold cardstock with a pencil. TIP: Trace your child’s hand for the angel wings.
- Cut out all angel patterns with scissors, making sure to cut inside the traced lines for a clean, finished project.
- Attach the hair to the head with a glue gun and glue sticks. Draw half-circle-shaped closed eyes on the angel’s face with a black marker. Create cheeks by dipping a new pencil eraser into pink acrylic craft paint and stamping on either side of the face.
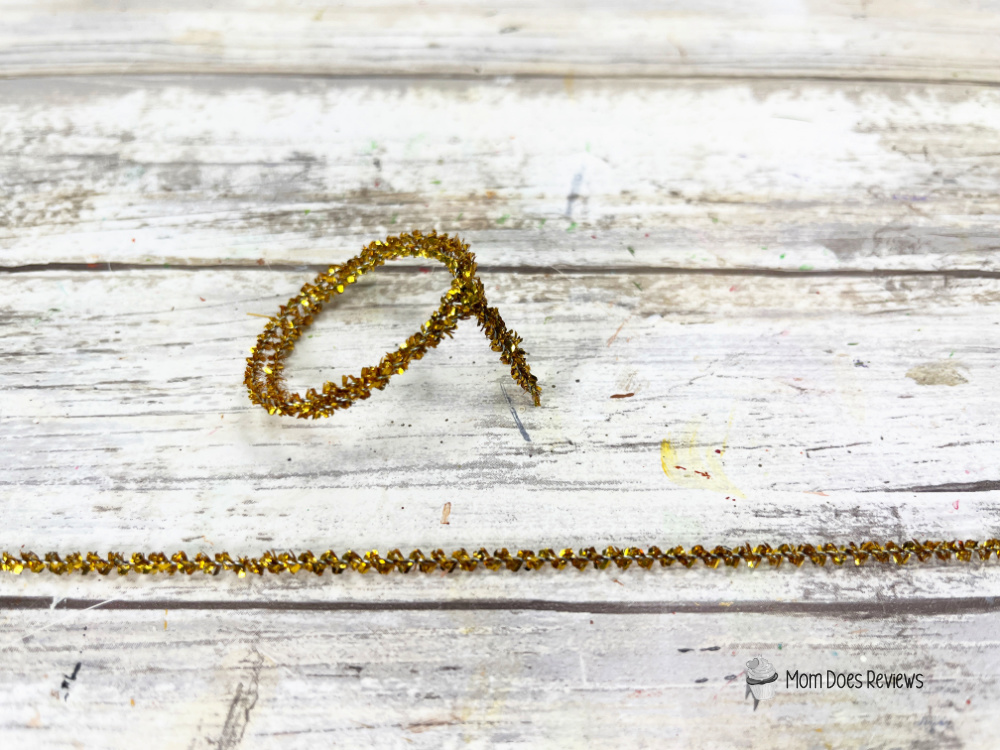
- To create the halo, bend a gold tinsel chenille stem in half. Form a circle with a one-inch tail at the bottom, then twist the ends to secure.
- Basecoat the star with yellow acrylic craft paint. Let dry, and apply a second coat, if necessary.
- Attach the head to the body, the arms to the body and the wings to either side of the back of the angel’s body with a glue gun and glue sticks. Glue the star to the hands, and the halo to the back of the head.
- Create feathers in the angel wings by drawing scalloped lines with gold glitter glue. Set aside to dry.

🎁 What to Do with Your Craft Stick Angels
Once your Craft Stick Angels are finished, the possibilities are endless!
- Christmas Tree Ornaments: Add a loop of ribbon or twine to the back and hang them proudly on your tree.
- Place Cards: Write each guest’s name on the angel’s dress or wing and use them as charming table decorations for your holiday dinner.
- Gift Tags: Attach them to wrapped presents for a personal, handmade touch.
- Keepsakes: Add the year or your child’s name to the back to create a memory you’ll cherish for years to come.
These little angels make wonderful handmade gifts too — perfect for teachers, grandparents, or anyone who appreciates something crafted with love.
Print the Tutorial:

DIY Craft Stick Angel
Using craft sticks from the Dollar Store, create this quick and easy Christmas Angel with the kiddos in just 30 minutes. Create this super cute Craft Stick Angel for your Christmas home decor. Add a name, and they would also make the perfect place cards.
Materials
- Craft Sticks, Jumbo – Dollar Store
- Chenille Stem, Gold Tinsel – Dollar Store
- Glitter Glue, Gold – Dollar Store
- Wooden Stars – Dollar Store
- Acrylic Craft Paint – Flesh tone color of choice, Pink, White, Yellow
- Cardstock – White, Gold, Flesh tone color of choice, Brown
Tools
- Glue Gun and Glue Sticks – Dollar Store
- Scissors
- Paintbrush
- Marker, Black – Dollar Store
- Pencil with new eraser
Instructions
STEP ONE
Gather all supplies. To create the angel body, create a triangle with three jumbo craft sticks on your work surface, and secure at the corners with a glue gun and glue sticks.
TIP: You can use liquid craft glue for this project, but you will have to wait for it to dry.
STEP TWO
Basecoat the angel with white acrylic craft paint. Let dry, and apply a second coat, if necessary.
STEP THREE
Download, print, and cut out the angel patterns. Trace the angel body pattern onto white cardstock with a pencil.
STEP FOUR
Cut out the angel body pattern with scissors, making sure to cut inside the traced lines for a clean, finished project.
STEP FIVE
Glue the white cardstock onto the back of the craft stick triangle.
STEP SIX
Cut a jumbo craft stick in half. Basecoat the angel arms with white acrylic craft paint, and the angel hands with flesh tone color of choice acrylic craft paint. Let dry, and apply a second coat, if necessary.
STEP SEVEN
If you do not have cardstock to match the flesh tone color of your choice, paint white cardstock with acrylic craft paint.
STEP EIGHT
Trace the angel head onto flesh tone color of choice cardstock, trace hair onto brown cardstock, and trace angel wings twice onto gold cardstock with a pencil.
TIP: Trace your child’s hand for the angel wings.
STEP NINE
Cut out all angel patterns with scissors, making sure to cut inside the traced lines for a clean, finished project.
STEP TEN
Attach the hair to the head with a glue gun and glue sticks. Draw half-circle-shaped closed eyes on the angel’s face with a black marker. Create cheeks by dipping a new pencil eraser into pink acrylic craft paint and stamping on either side of the face.
STEP ELEVEN
To create the halo, bend a gold tinsel chenille stem in half. Form a circle with a one-inch tail at the bottom, then twist the ends to secure.
STEP TWELVE
Basecoat the star with yellow acrylic craft paint. Let dry, and apply a second coat, if necessary.
STEP THIRTEEN
Attach the head to the body, the arms to the body and the wings to either side of the back of the angel’s body with a glue gun and glue sticks. Glue the star to the hands, and the halo to the back of the head.
STEP FOURTEEN
Create feathers in the angel wings by drawing scalloped lines with gold glitter glue. Set aside to dry.
Pin it for Later!