
Welcome to a creative adventure that’s both fun and budget-friendly! In this tutorial, we’ll show you how to craft a delightful Craft Stick Tractor using simple supplies you can find at your local Dollar Store. Grab the kiddos and get ready for a hands-on crafting experience that’s perfect for a cozy afternoon of family creativity. With just a few easy-to-find materials and 30 minutes of your time, you’ll have a charming little tractor that will spark imaginative play and creative joy.

Check out more of our Craft Stick Crafts:
Dollar Store Craft Stick Sunflower
Oh, get ready to unleash your creativity and bask in the sunny glory of crafting with jumbo craft sticks from the Dollar Store! With just a dash of imagination and a few simple materials, you’ll be amazed at how these humble sticks transform into a stunning sunflower, perfect to brighten up your home just in time for Summer.
Dollar Store Craft Stick Unicorn Craft
If you’re a parent, then you know that your kids love anything and everything unicorn-related. Unicorns are colorful, magical creatures that represent happiness and joy, which is why kids love them so much! If you’re looking for a fun way to keep your kiddos occupied, why not try this Unicorn Craft Stick Craft?
Dollar Store Craft Stick Narwhal Craft
If you are looking for a fun and simple craft, then look no further than this super cute Dollar Store Craft Stick Narwhal Craft! With this fun craft, simple jumbo craft sticks from the Dollar Store transform into the cutest Narwhal!
Dollar Store Craft Stick Llama Craft
Are you looking for a fun craft for the kids? If so, you just have to take a look at this adorable Dollar Store Craft Stick Llama Craft! It is not only super cute but also inexpensive and oh-so-easy to do!

Craft Stick Tractor Materials:
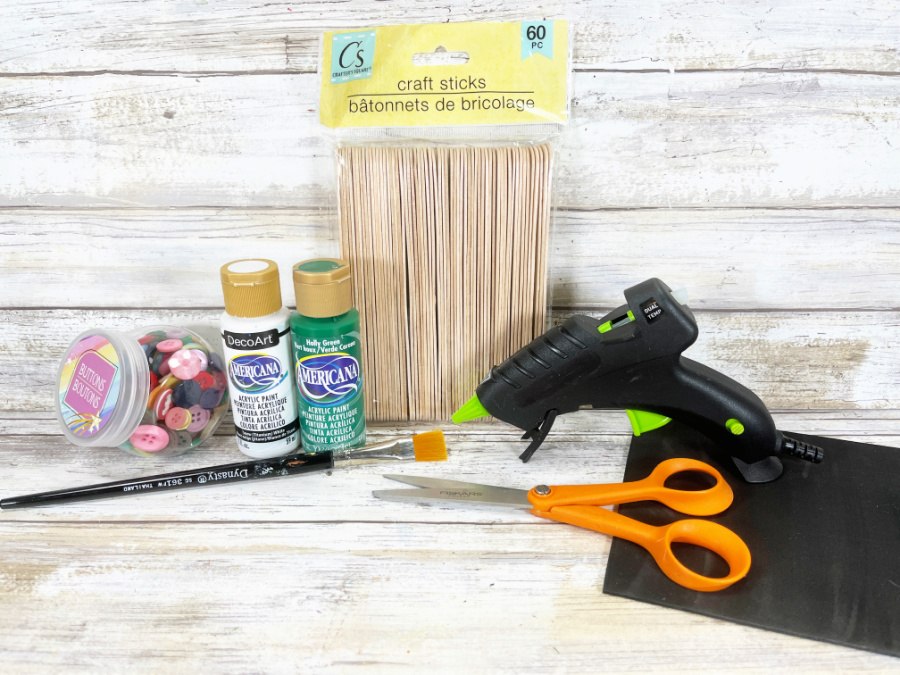
- Craft Sticks, Jumbo – Dollar Store
- Craft Foam, Black, Yellow – Dollar Store
- Glue Gun and Glue Sticks – Dollar Store
- Buttons, Black, White – Dollar Store
- Acrylic Craft Paint – Green
- Paintbrush
- Scissors
- Pencil
- PATTERNS CRAFT STICK TRACTOR
Instructions:
STEP ONE
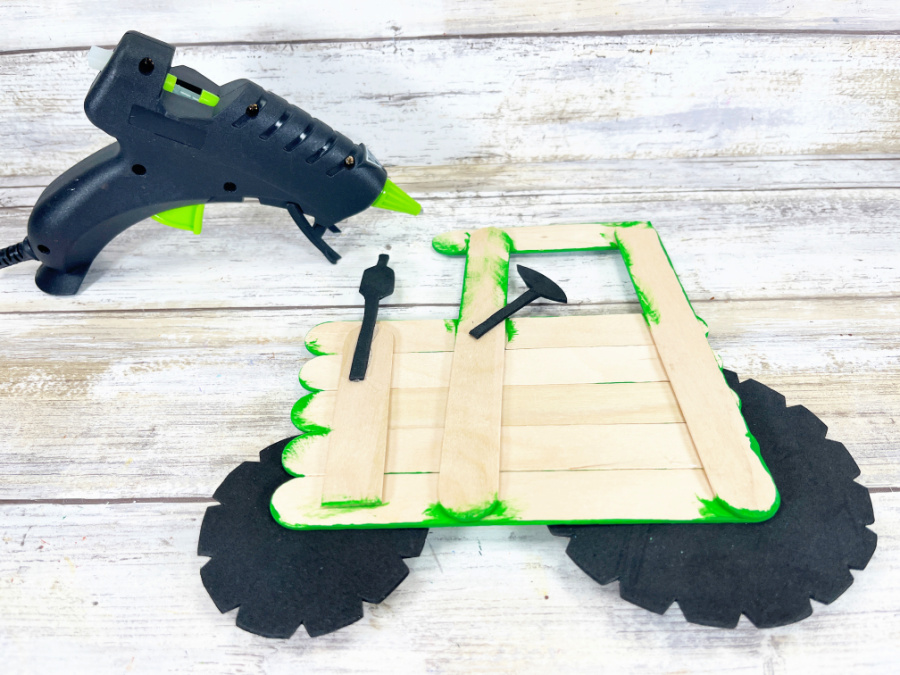
Gather all supplies. Line up five jumbo craft sticks horizontally on your work surface to create the tractor. Using scissors, trim additional jumbo craft stick to the width of the tractor and attach with a glue gun and glue sticks. Glue two jumbo craft sticks vertically, as pictured.
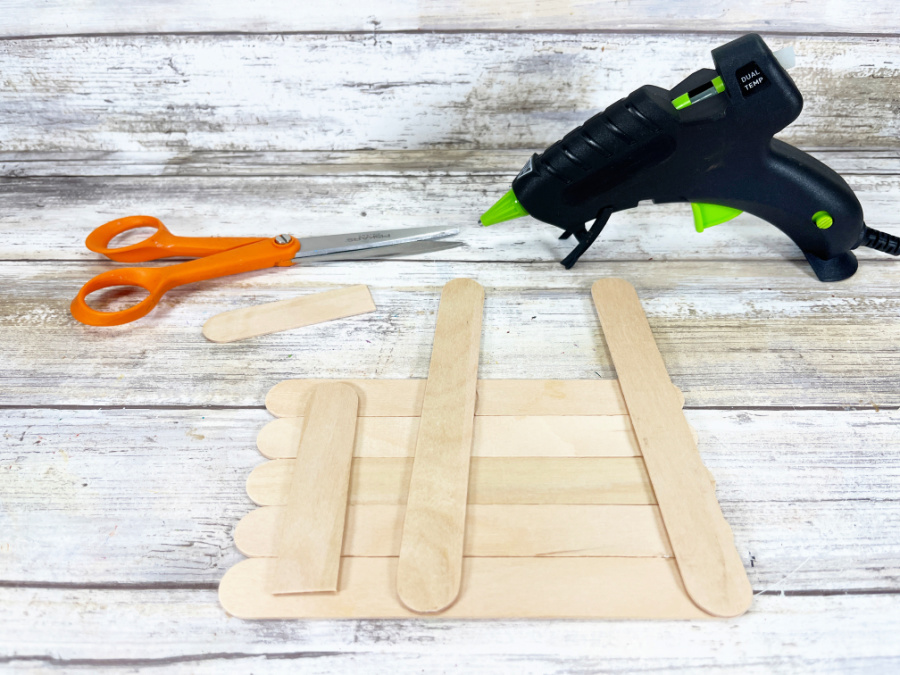
TIP: You can use liquid craft glue for this project, but you will have to wait for it to dry.
STEP TWO
Flip the tractor over and lay one jumbo craft stick across the top. Mark the back of the craft stick with a pencil.
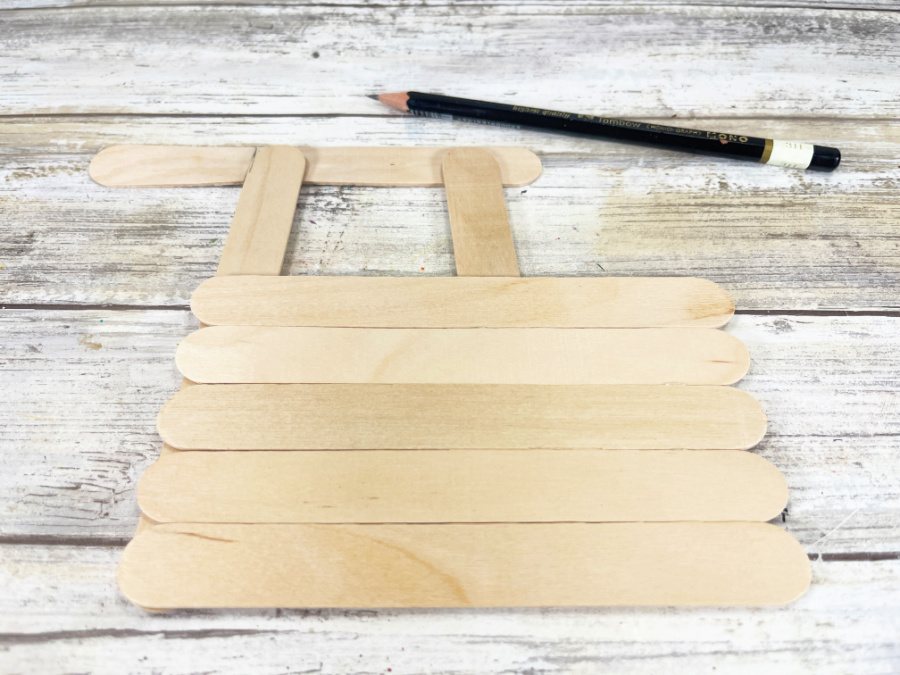
Trim with scissors and glue to the top of the vertical craft sticks to create the tractor’s cab (where the driver sits).

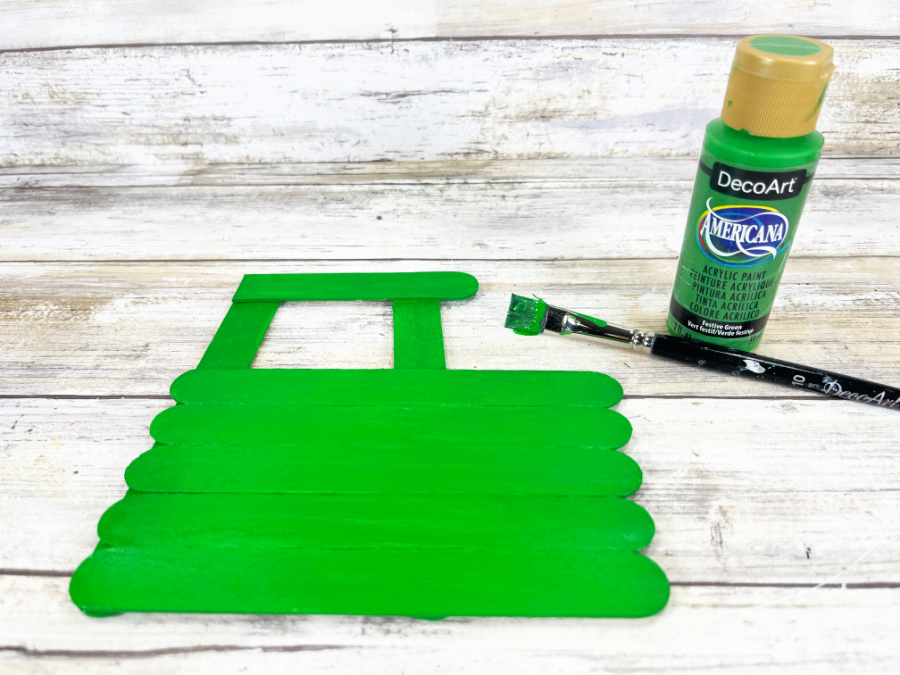
STEP THREE
Basecoat the craft stick tractor with green acrylic craft paint. Let dry, and apply a second coat, if necessary.
STEP FOUR
Download and print the TRACTOR PATTERNS. Cut out patterns with scissors. Trace the large and small wheels onto black craft foam with a pencil. Cut out with scissors.

STEP FIVE
Trace the smoke stack and steering wheel onto black craft foam with a pencil, and then cut out with scissors.
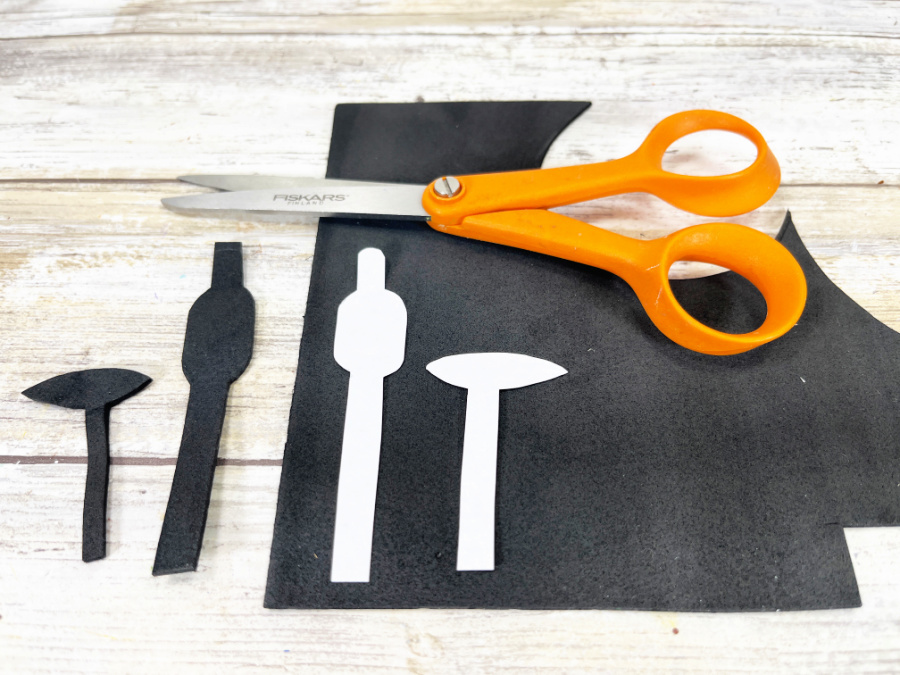
STEP SIX
Trace the large and small wheel inserts onto yellow craft foam with a pencil. Cut out with scissors.
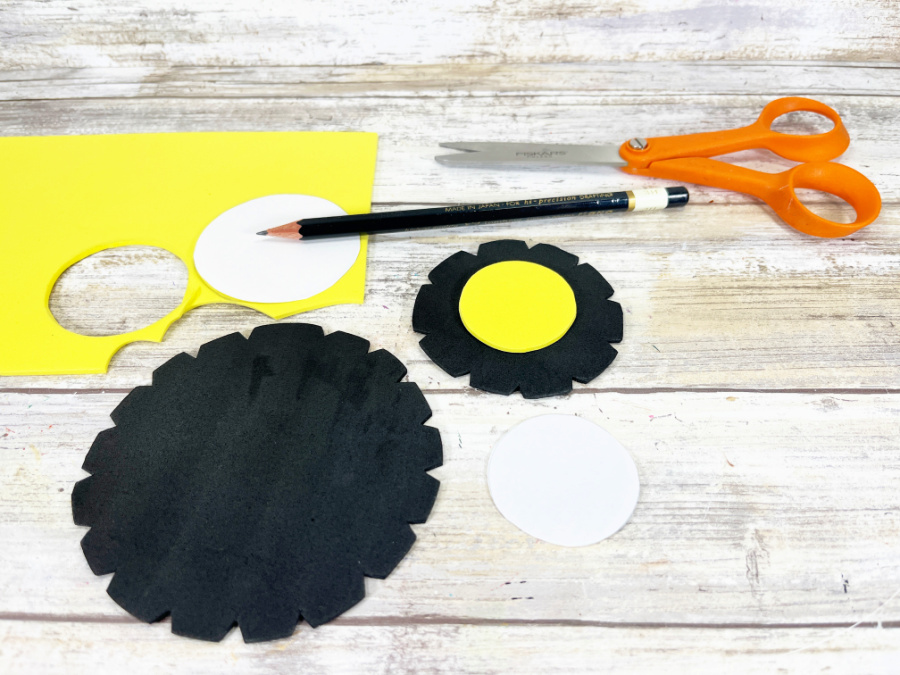
STEP SEVEN
Assemble the large and small wheels, glue the yellow inserts to the black tires, and topping off with black buttons. Attach the large wheel to the back and small wheel to the front with a glue gun and glue sticks.

STEP EIGHT
Flip the tractor over and glue on the smoke stack and the steering wheel, using the photo as a guide.
STEP NINE
To finish, attach a white button headlight to the front of the tractor with a glue gun and glue sticks.
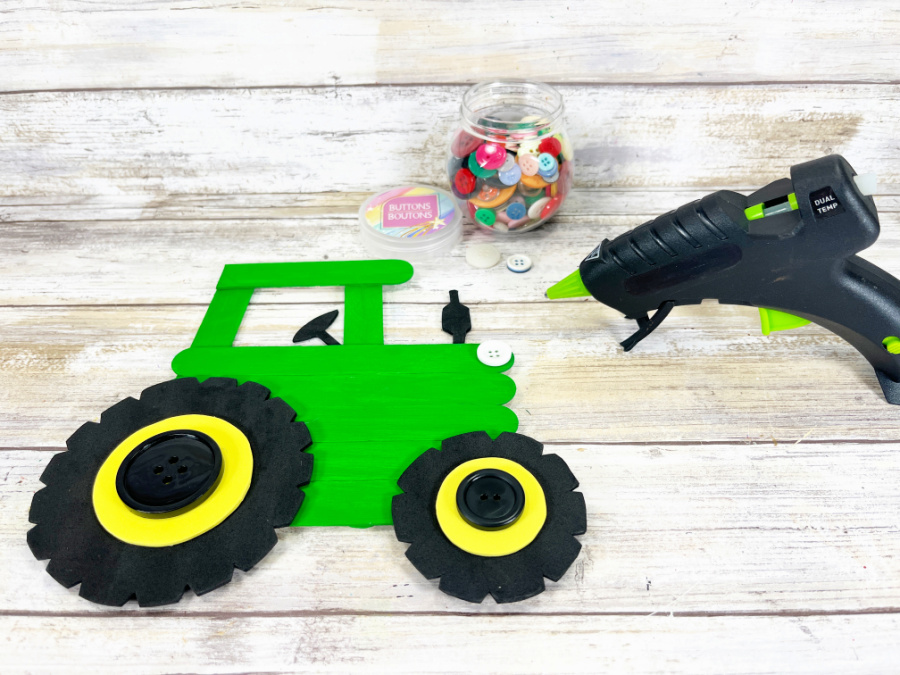
Work on counting, colors, and fine motor skills with the kiddos and this Craft Stick Tractor.
FAQs:
1. How can I customize my Craft Stick Tractor to make it unique?
Absolutely! That’s the beauty of this craft. You can personalize your tractor by choosing different colors of craft sticks, adding stickers, or even painting designs. Let your creativity run wild!
2. Are the supplies for this craft readily available at most Dollar Stores?
Yes, definitely! We’ve designed this craft with readily available, inexpensive supplies from the Dollar Store in mind, making it accessible and convenient for everyone.
3. Can younger kids join in on the crafting fun, or is this project better suited for older children?
This craft is suitable for a wide range of ages. Younger kids may need a bit of help with assembly, but they’ll enjoy picking colors and decorating. Older kids can handle the construction more independently and get creative with the details. It’s a wonderful activity for the whole family to enjoy together!

Print the Tutorial:

Dollar Store Craft Stick Tractor
Using simple supplies from the Dollar Store, create a quick and easy Craft Stick Tractor with the kiddos in just about 30 minutes.
Materials
- Craft Sticks, Jumbo – Dollar Store
- Craft Foam, Black, Yellow – Dollar Store
- Glue Gun and Glue Sticks – Dollar Store
- Buttons, Black, White – Dollar Store
- Acrylic Craft Paint – Green
Tools
- Paintbrush
- Scissors
- Pencil
- PATTERNS CRAFT STICK TRACTOR
Instructions
STEP ONE
Gather all supplies. Line up five jumbo craft sticks horizontally on your work surface to create the tractor. Using scissors, trim additional jumbo craft stick to the width of the tractor and attach with a glue gun and glue sticks. Glue two jumbo craft sticks vertically, as pictured.
TIP: You can use liquid craft glue for this project, but you will have to wait for it to dry.
STEP TWO
Flip the tractor over and lay one jumbo craft stick across the top. Mark the back of the craft stick with a pencil. Trim with scissors and glue to the top of the vertical craft sticks to create the tractor’s cab (where the driver sits).
STEP THREE
Basecoat the craft stick tractor with green acrylic craft paint. Let dry, and apply a second coat, if necessary.
STEP FOUR
Download and print the TRACTOR PATTERNS. Cut out patterns with scissors. Trace the large and small wheels onto black craft foam with a pencil. Cut out with scissors.
STEP FIVE
Trace the smoke stack and steering wheel onto black craft foam with a pencil, and then cut out with scissors.
STEP SIX
Trace the large and small wheel inserts onto yellow craft foam with a pencil. Cut out with scissors.
STEP SEVEN
Assemble the large and small wheels but gluing the yellow inserts to the black tires, and topping off with black buttons. Attach the large wheel to the back and small wheel to the front with a glue gun and glue sticks.
STEP EIGHT
Flip the tractor over and glue on the smoke stack and the steering wheel, using the photo as a guide.
STEP NINE
To finish, attach a white button headlight to the front of the tractor with a glue gun and glue sticks.
Notes
Print the Pattern for Craft stick Tractor
Pin for Later!
