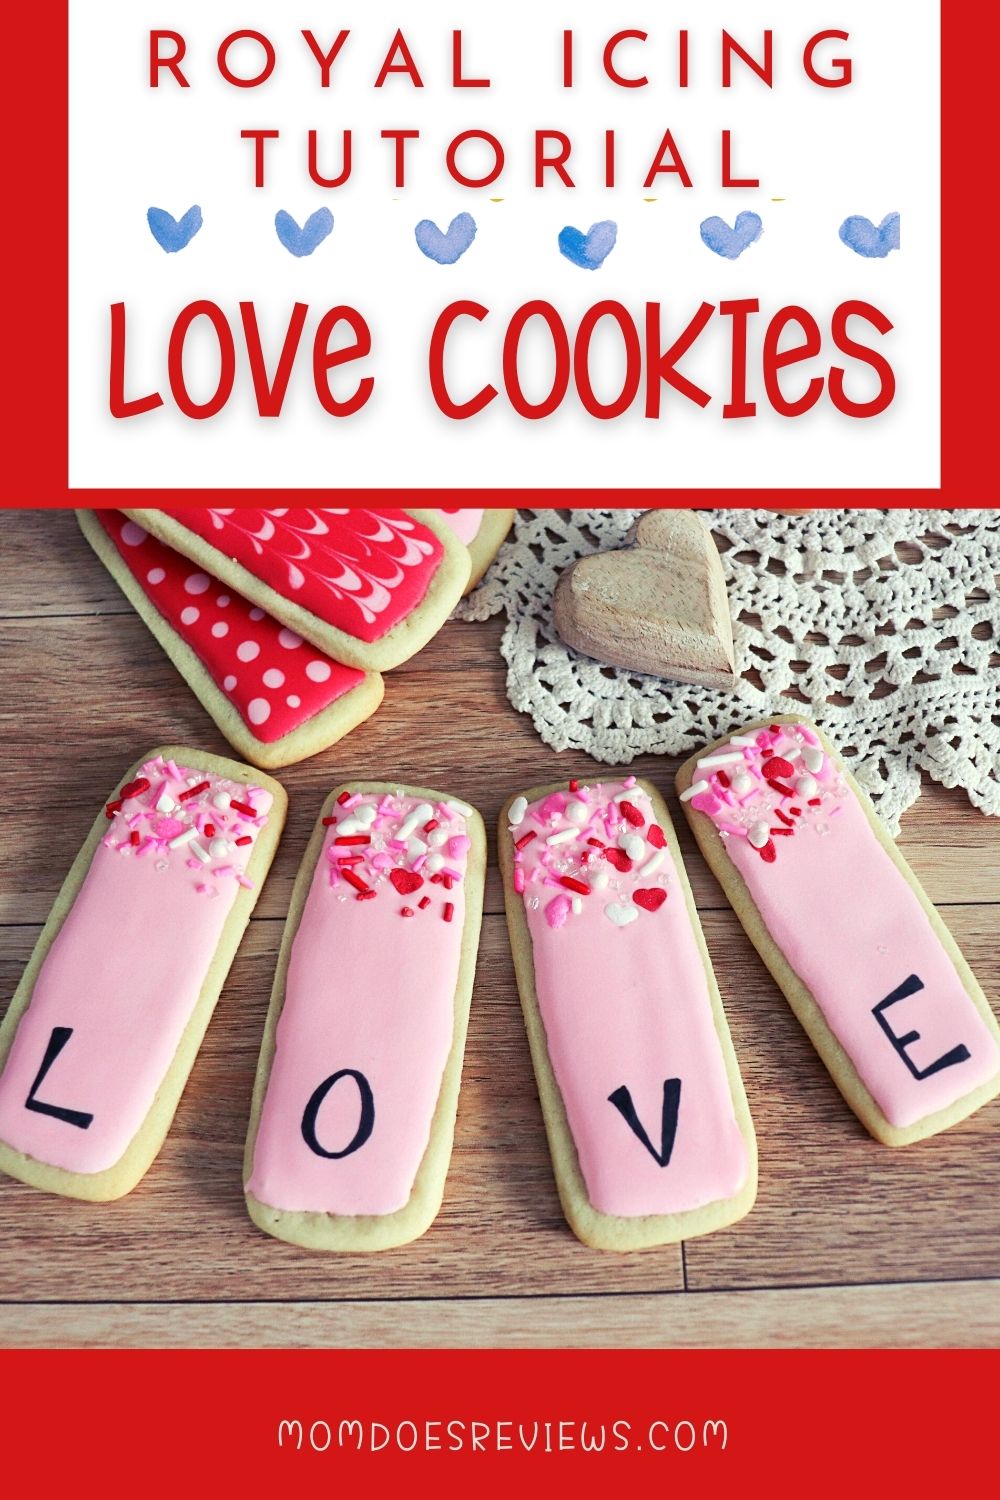
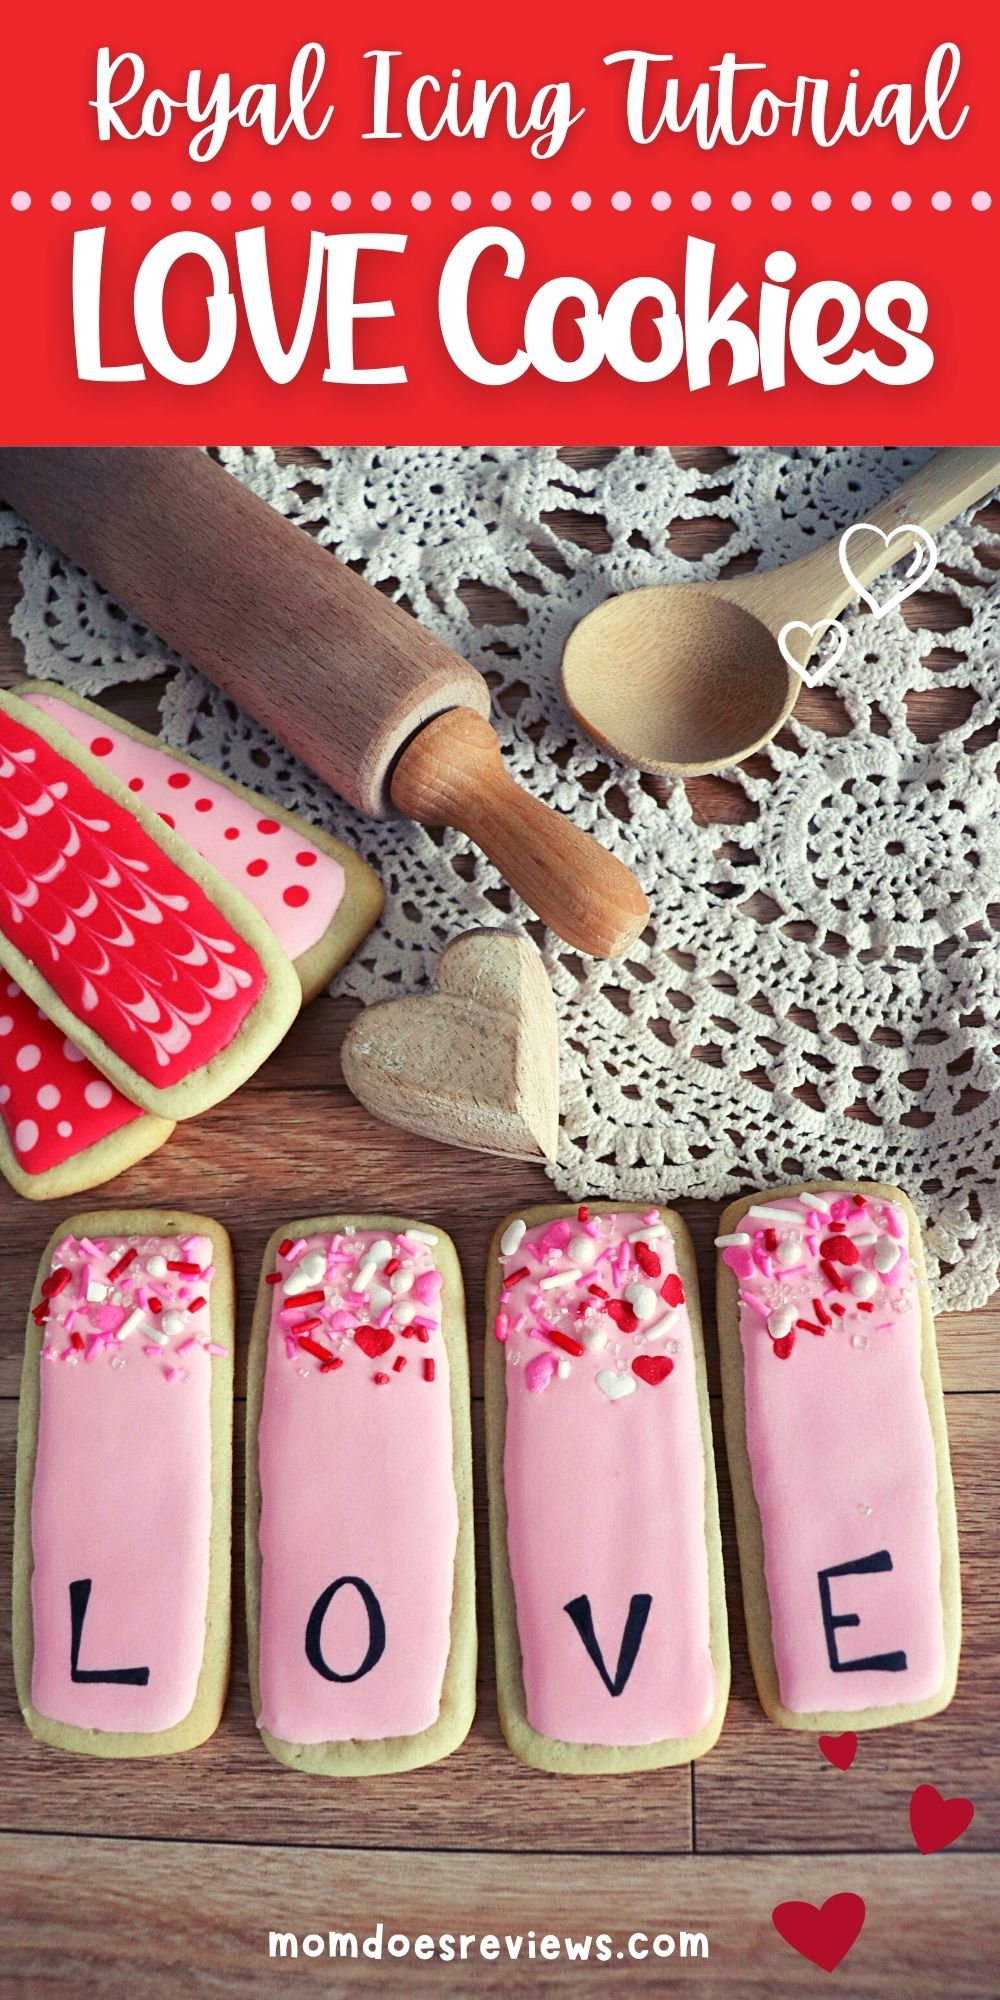
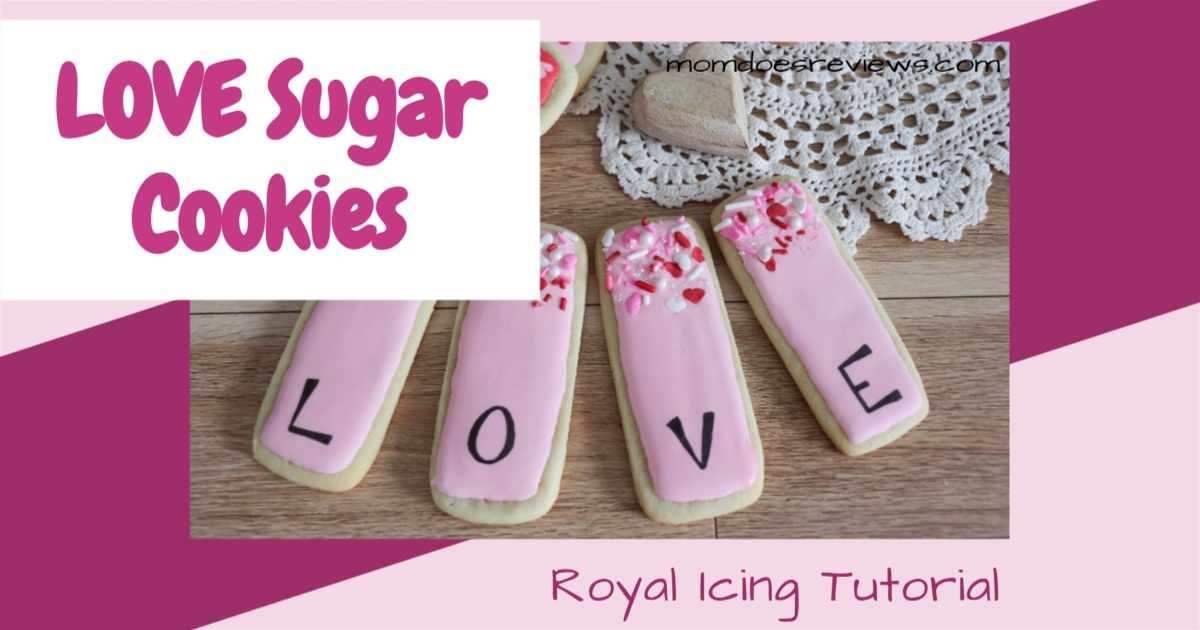
If you think you’ll never be able to decorate cookies like this, think again! This super easy tutorial takes you through the steps to make those beautifully decorated cookies you see on Facebook. If I can make them, you can too! These LOVE Sugar Cookies are perfect for Valentine’s Day or just anytime you want to let your family know you love them!
Want more Valentine’s Day Cookies?
With only 5 ingredients, these Fortune Cookies are easy to make and so fun to eat! Make your own cute fortune sayings for your kids or spouse. Everyone will love these Valentine’s Day Fortune Cookies. They are perfect for those classroom Valentine’s Day Parties!
Valentine’s Day is right around the corner and we are all thinking of fun sweet treats we can prepare. These fun Strawberry Chocolate Heart Cookies are just the thing! Not only are they delicious, but they are also super cute! Whip up a batch and share them with your sweetie as a special treat!
These Valentines Thumbprint Cookies are the perfect surprise for your Valentine! They feature yummy red dough, dipped in white chocolate and sprinkles, and embellished with white chocolate pink hearts. YUM!
Nothing says “be my Valentine” quite like cute and yummy cookies and we have the latest scoop on the very Best Valentine’s Day Cookie recipes! All of the cookies are easy to make and guaranteed to make your sweetheart swoon!
LOVE Sugar Cookie Ingredients:
- 1 package Pillsbury refrigerated sugar cookie dough
- ¼ cup all purpose flour
Royal Icing Ingredients:
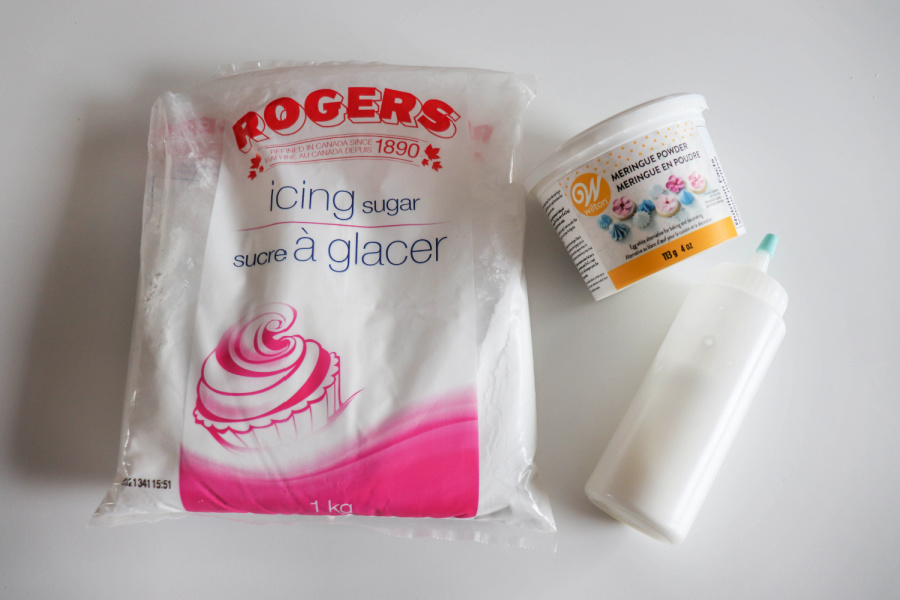
- 4 cups powdered sugar
- 3 tablespoons meringue powder
- 8-12 tablespoons room temperature water
- Gel food coloring
LOVE Sugar Cookie Directions:
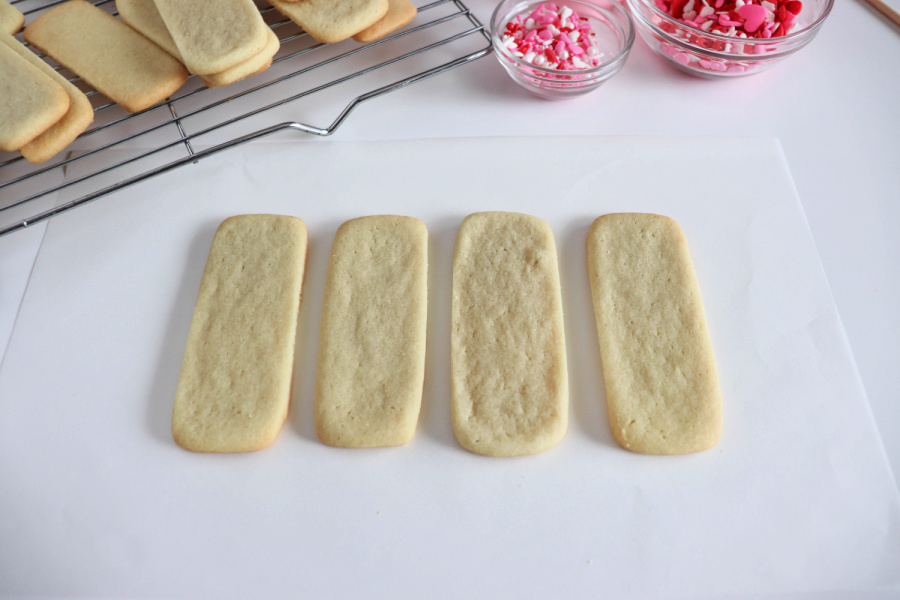
Combine dough and flour. Roll to ¼” thickness.
Cut out ½” x 3” rectangles. Find the Rectangle Cookie Cutter on Amazon.
Bake at 350 for 8 minutes or until the edges start to brown.

Royal Icing Directions:
In a stand mixer combine sugar and meringue powder.
Add 8 tablespoons of water, using the whisk attachment, beat for 1 minute on low.
Continue to add water one tablespoon at a time until the icing slowly drizzles from the whisk when lifted.
Once prepared – if the icing is too hard, add more water. Too runny, add more icing sugar.
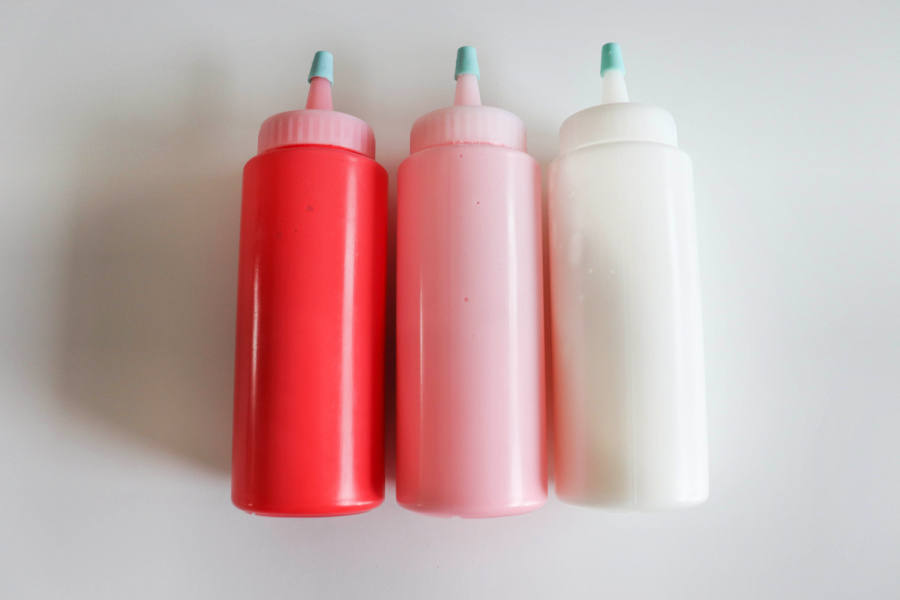
Separate the icing into small mixing bowls and add desired food coloring. Mix well. Scoop the icing into piping bags or icing bottles.
Decorating instructions:
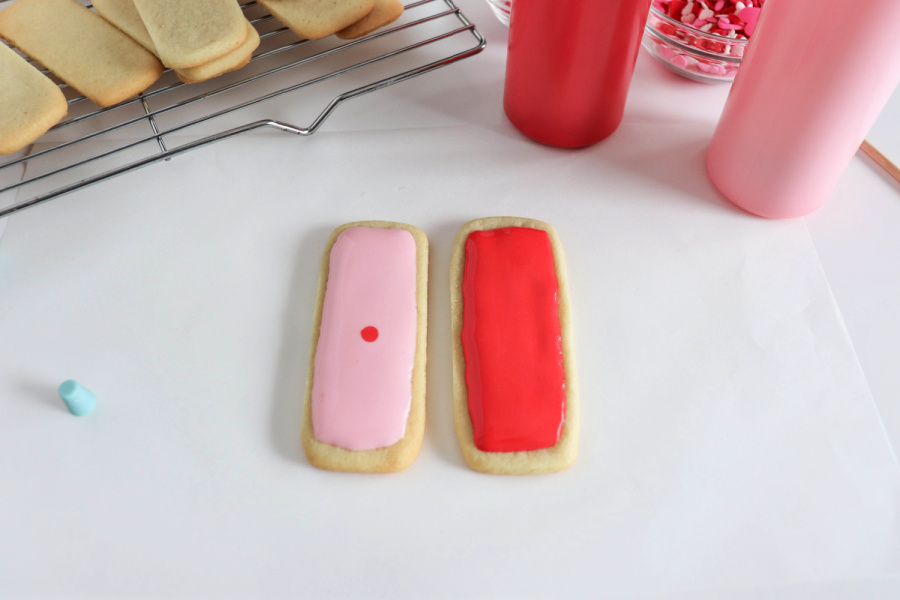
Line around the edge of the design with icing and fill the middle. Use a toothpick to poke bubbles or direct icing into holes.
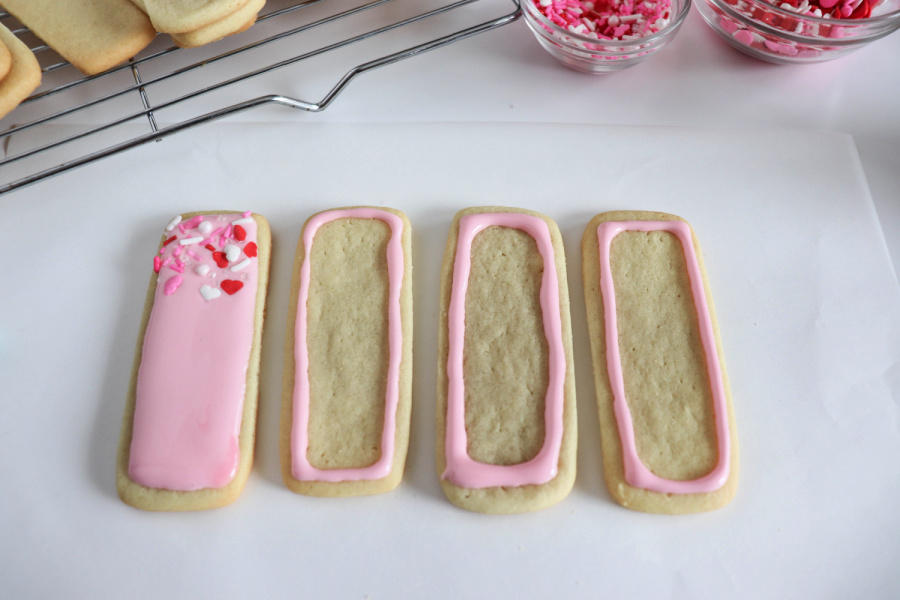
Allow each design area to dry before moving on.
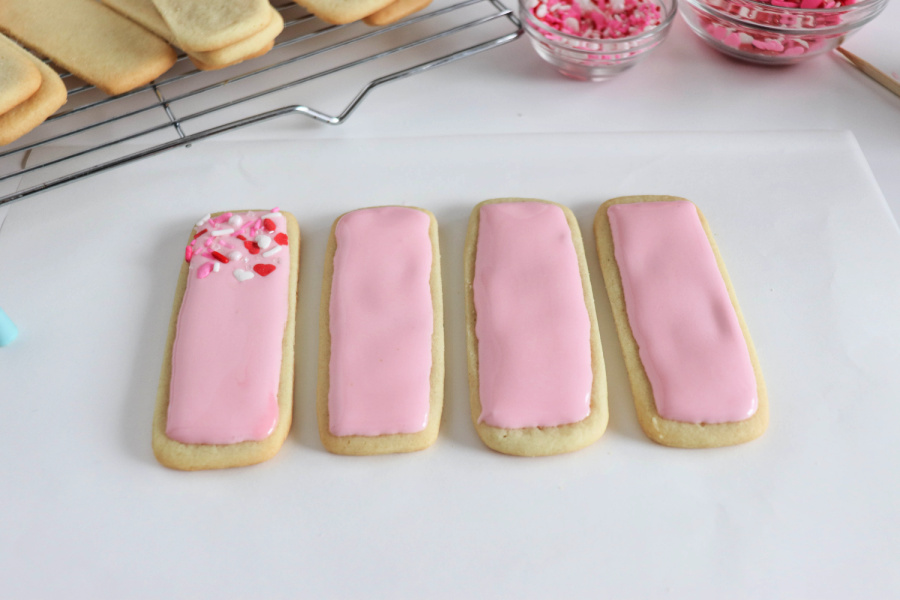
The icing should completely dry, at room temperature for at least four hours, before adding piping details to the top.
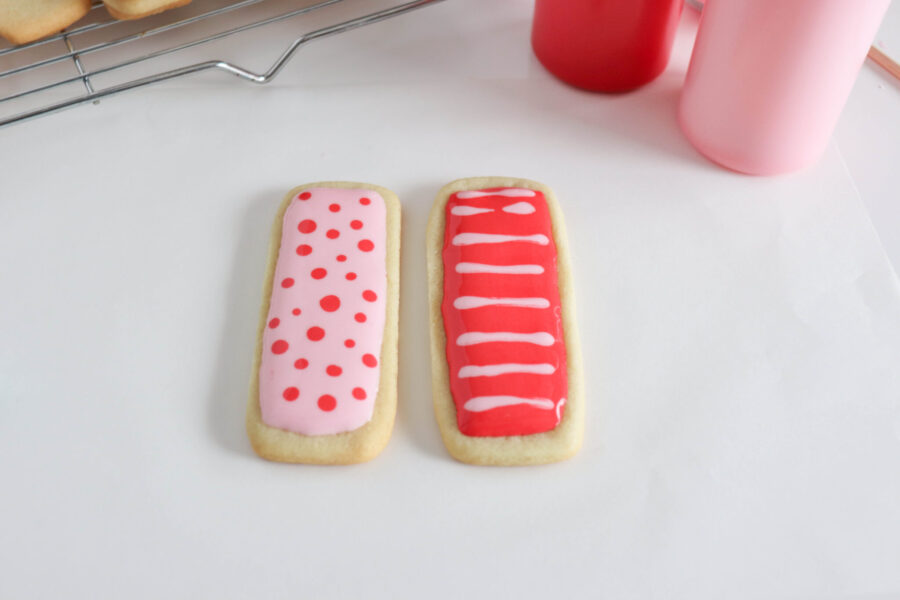
Polka Dots: before the flooded area dries, add dots of different colored icing.
Hearts: before the flooded area dries, add dots of different colored icing, drag a toothpick through each dot, creating a heart.
Zig zag design: before the flooded area dries, add stripes of different colored icing and then drag a toothpick through the stripes.
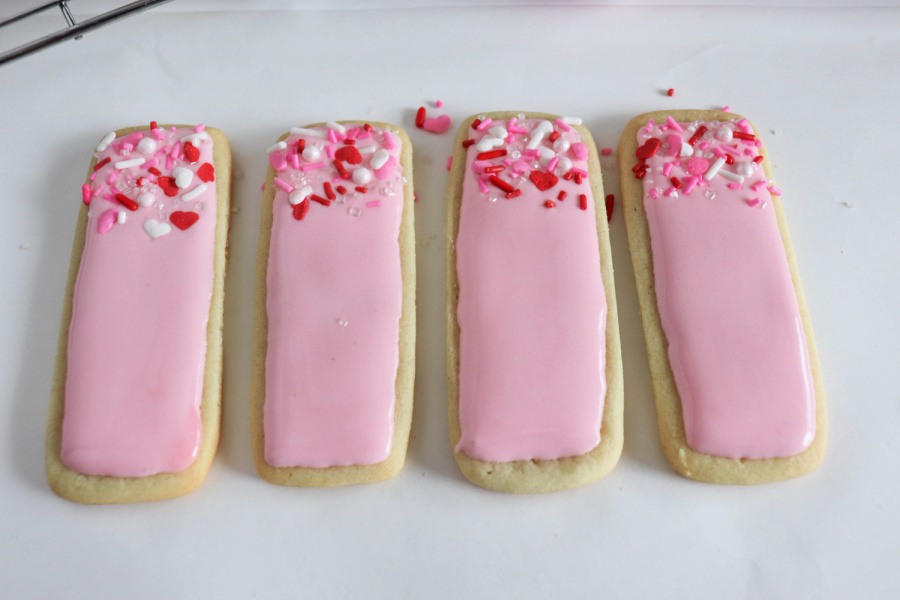
Sprinkles: before the flooded area dries, add sprinkles.
Candy: glue to the cookie with a drop of icing.
Edible marker: before using on the icing, allow the icing to completely harden for at least four hours.
Print the Sugar Cookie Decorating Tutorial:

LOVE Sugar Cookie Tutorial (with Royal Icing)
If you think you can't make beautiful iced cookies, think again. With this tutorial, you can make these LOVE Sugar Cookies in less than 30 minutes!
Ingredients
- For the cookies:
- 1 package Pillsbury refrigerated sugar cookie dough
- ¼ cup all purpose flour
- For the Royal Icing
- 4 cups powdered sugar
- 3 tablespoons meringue powder
- 8-12 tablespoons room temperature water
- Gel food coloring
Instructions
Cookie Instructions:
Combine dough and flour. Roll to ¼” thickness. Cut out ½” x 3” rectangles. Bake at 350 for 8 minutes or until the edges start to brown.
Icing Instructions:
In a stand mixer combine sugar and meringue powder. Add 8 tablespoons of water, using the whisk attachment, beat for 1 minute on low. Continue to add water one tablespoon at a time until the icing slowly drizzles from the whisk when lifted.
Once prepared - if the icing is too hard, add more water. Too runny, add more icing sugar.
Separate the icing into small mixing bowls and add desired food coloring. Mix well. Scoop the icing into piping bags or icing bottles.
Decorating instructions:
Line around the edge of the design with icing and fill the middle. Use a toothpick to poke bubbles or direct icing into holes. Allow each design area to dry before moving on. The icing should completely dry, at room temperature for at least four hours, before adding piping details to the top.
Polka Dots: before the flooded area dries, add dots of different colored icing.
Hearts: before the flooded area dries, add dots of different colored icing, drag a toothpick through each dot, creating a heart.
Zig zag design: before the flooded area dries, add stripes of different colored icing and then drag a toothpick through the stripes.
Sprinkles: before the flooded area dries, add sprinkles.
Candy: glue to the cookie with a drop of icing.
Edible marker: before using on the icing, allow the icing to completely harden for at least four hours.
Pin The Love Sugar Cookie Tutorial for Later!