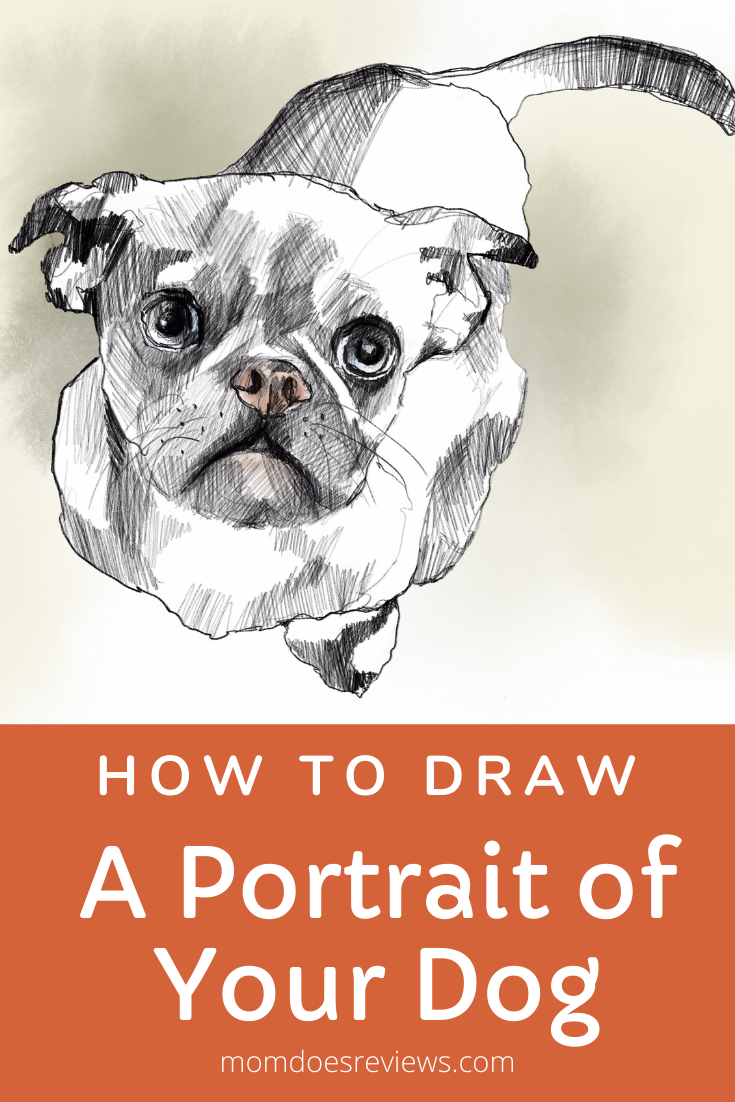
To draw a portrait of your dog, you need several drawing supplies and a quality photo. If you don’t have a lot of drawing experience, it may not be easy, but it is definitely doable. Even the best artists of custom dog portraits had to start somewhere.
Set things in motion by selecting an appropriate reference photo. It should be easy to see your dog’s face on it. You will also need a drawing pencil and sharpener, an eraser, and some sketch paper.
Step 1: Start Sketching the Dog’s Face
The first step is sketching your dog’s face. Start by drawing a reference line for the center of the face. This is what all drawings start with. The line should run right through the middle of the nose, between the eyes and ears. The trick is to match the angle of the drawing to the photo. In other words, if the photo shows the dog’s face from the side, that’s how you should be drawing it.
If you’re unsure about capturing the perfect pose, take inspiration from images captured by the best dog photographer in Minneapolis to guide your artistic direction. Their professional shots can highlight the unique angles and details that make your dog truly special.
Step 2: Draw the Details
Then, draw the mouth, chin, and the curve at the tip of the nose. Now that you’ve blocked in the basic lines of the face, you can go into more detail. Make sure to sketch lightly as you proceed so that you can erase the details you do not want to keep. Then, draw a curve where the head meets the back of the muzzle. To give your drawing some depth, you can draw two lines down the face. Add several random lines along the neck and shoulders to suggest the presence of fur.
Step 3: The Eyes
The dog’s eyes will be the focal point of the portrait, as is usually the case. When you draw them, take care to line up the pupils. Then, add the ears and nose. Consider any changes of plane in the area of the eyes as you sketch. You’ll see the portrait starting to take shape. To add hints of fur and folds of skin, add some faint lines near the neck, forehead, and eyes. Don’t worry about shading or where to place them too much. Instead, work on adding the lines confidently.
Step 4: The Shadows
You can add in shadows at this stage. Add some rough shades to hint at their presence. For instance, if the light is coming from the bottom right, make the top left side a little darker. There should be shadows under the ears as well. Be careful because it’s easy to go overboard with shading. Leave parts of your canvas without shading. This will suggest fur, nose, and eye highlights. As you shade, go from dark to light, creating texture by adding strokes.
You can now start working on the details after you’ve outlined facial highlights and shadows. To add subtle detail, tread lightly with the pencil. It’s more difficult to erase shadow than to add more of it. Build texture up gradually by working across the whole drawing surface, from dark to light.
Where fur is long, use harder pencil strokes; where it is short, use softer ones. To make white fur look softer and brighter, you can use the eraser to work back over it.
Step 5: Complete the Eyes
The eyes are the first element you worked on, but also the last one to complete. Shade them smoothly and carefully to make them shiny and bright. Use fine, sharp strokes to ensure a smooth texture. The pencil should be sharp at all times. Keep in mind this is a sketch and not a photorealist drawing. Don’t dwell on details too much.
Final Steps
To complete the drawing, you can soften overly intense or dark marks with your eraser. Finish the fur with hatched and balanced shading, especially on the side, with more shadows. For short fur, use fine marks and coarse ones for long fur. The more time you spend on fur texture and tone, the finer it will appear.