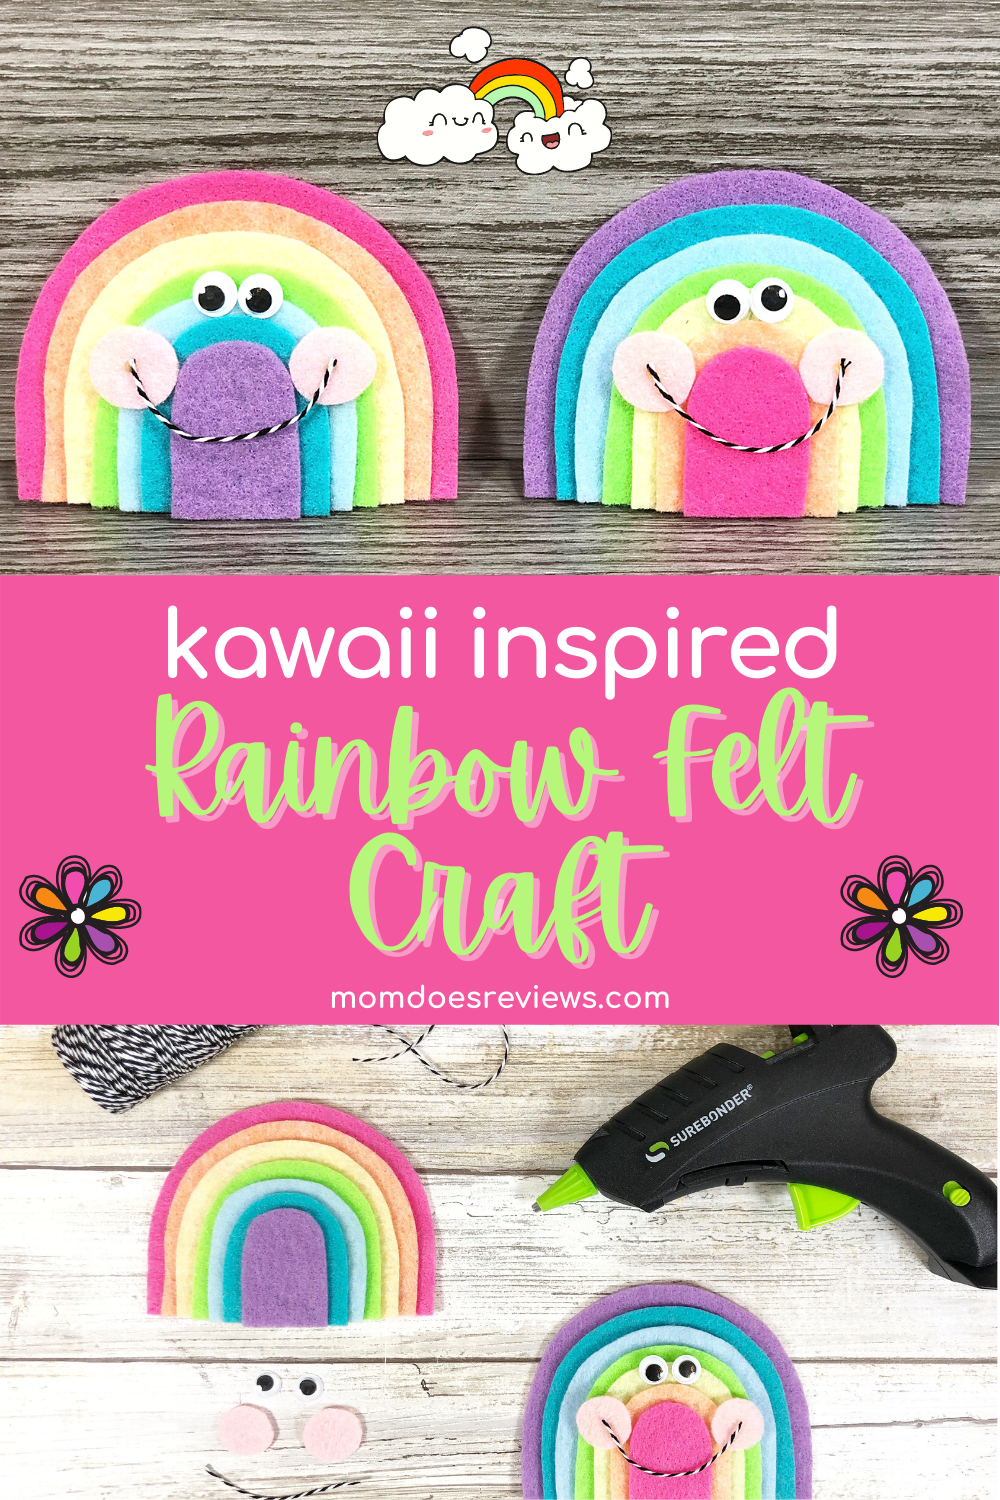
This super cute Kawaii Rainbow craft is a fun family activity to create in just about 30 minutes. Everyone needs a little sunshine and rainbows in their lives. This Rainbow felt craft is easy and fun!
Rainbows are perfect for St. Patrick’s Day! Add a name for the perfect place card for a Rainbow birthday party with the kiddos. The possibilities are endless with these cuties!

Why are rainbows a symbol of St. Patrick’s Day? Draper noted those traditions merged with Christian beliefs. He explained that Christians view the rainbow as a representation of God’s promise to never again destroy the earth with a flood. “Saint Patrick’s Day is really about a transition from paganism to Christianity,” he said.
Work on shapes, colors, cutting and counting with this simple craft created from felt. Add a pin back, magnets or a twine hanger to these super cute Rainbows!
Want more Rainbow Crafts?
- If you love unique and whimsical wall decor then you are going to love today’s fun craft! This DIY Rainbow Wall Decor is perfect to craft on a dreary rainy afternoon
- This quilled paper craft make your rainbows really pop off the page. Get the tutorial for the Quilled Paper Rainbow wall art.
- Here is a super fun Unicorn Rainbow Paper craft for a rainy day that is easy and pretty and magical!
Materials needed for the Kawaii Inspired Felt Rainbow:
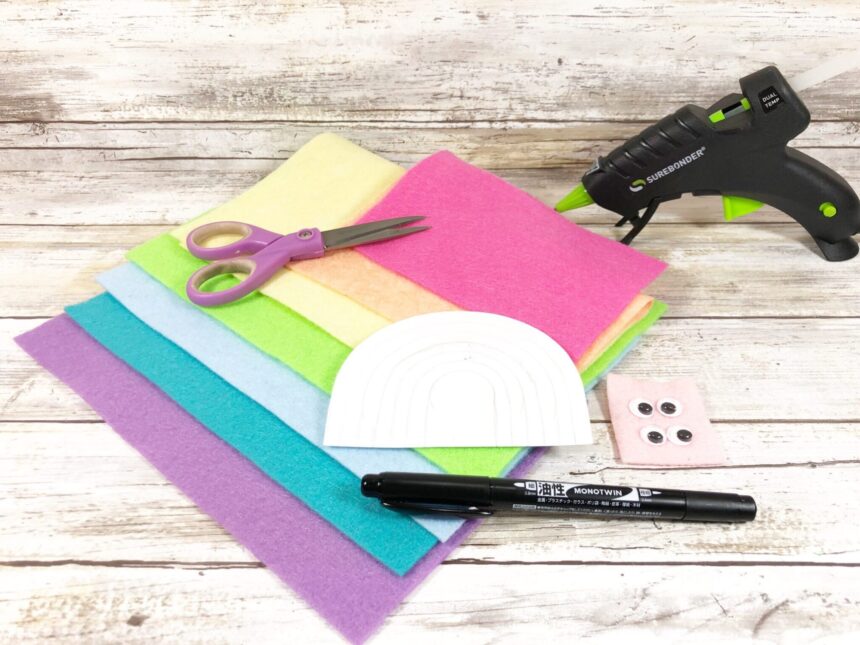
- Craft Felt – Rainbow Shades of Pastels
- Dollar Store Wiggle Eyes
- Pin Back; Magnets; Baker’s Twine
- Permanent Marker
- Glue Gun and Glue Sticks (low temp works best!)
- Scissors
- KAWAII INSPIRED RAINBOW PATTERN SHEET
Instructions to make a Kawaii Inspired Felt Rainbow:
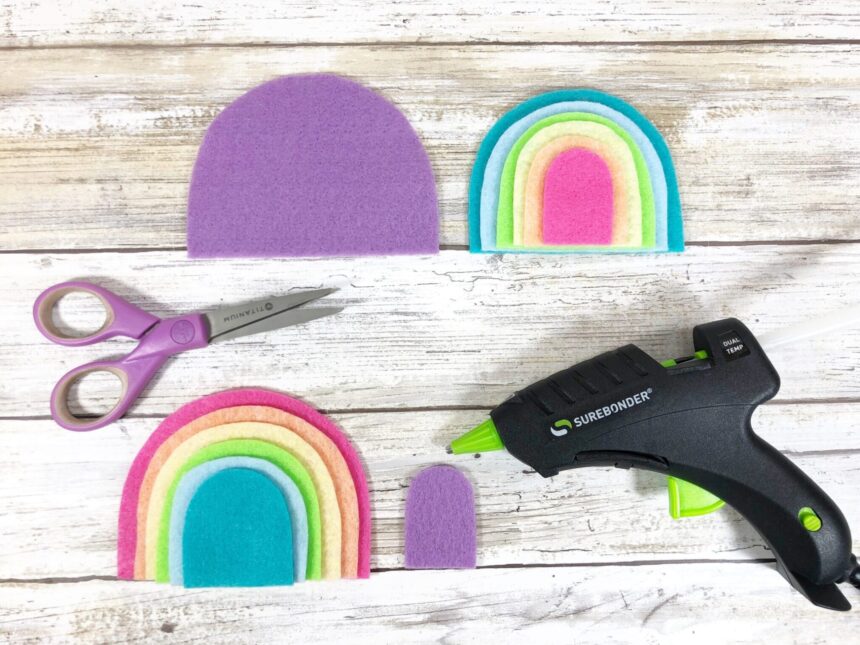
STEP ONE
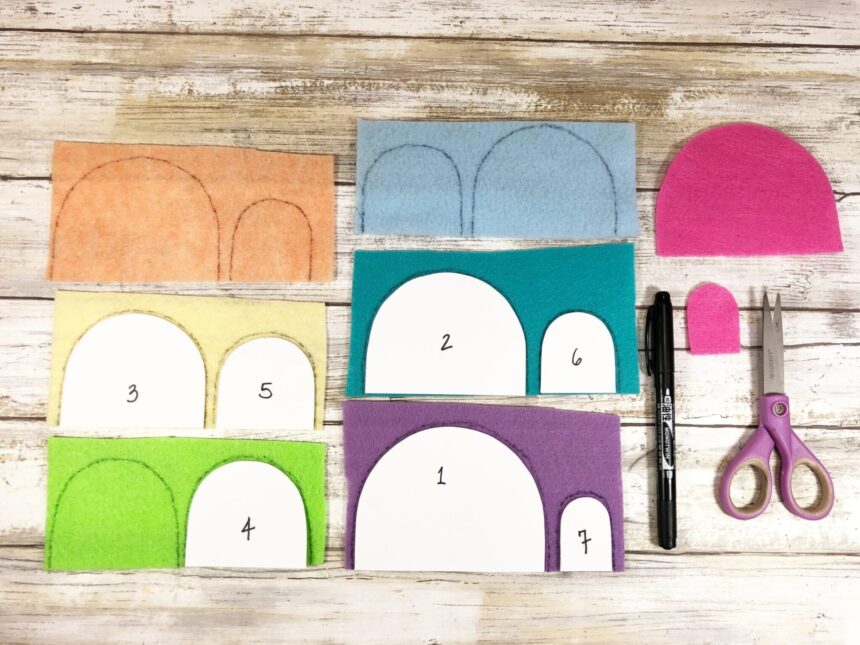
Download, print and cut out Rainbow shapes from the Pattern Sheet HERE. Trace onto colored craft felt with a permanent marker. Cut out with scissors, inside the lines, so you have a clean finished project. Experiment with colors and have fun.
STEP TWO
Layer Rainbow shapes from largest to smallest, using the glue gun and glue sticks.
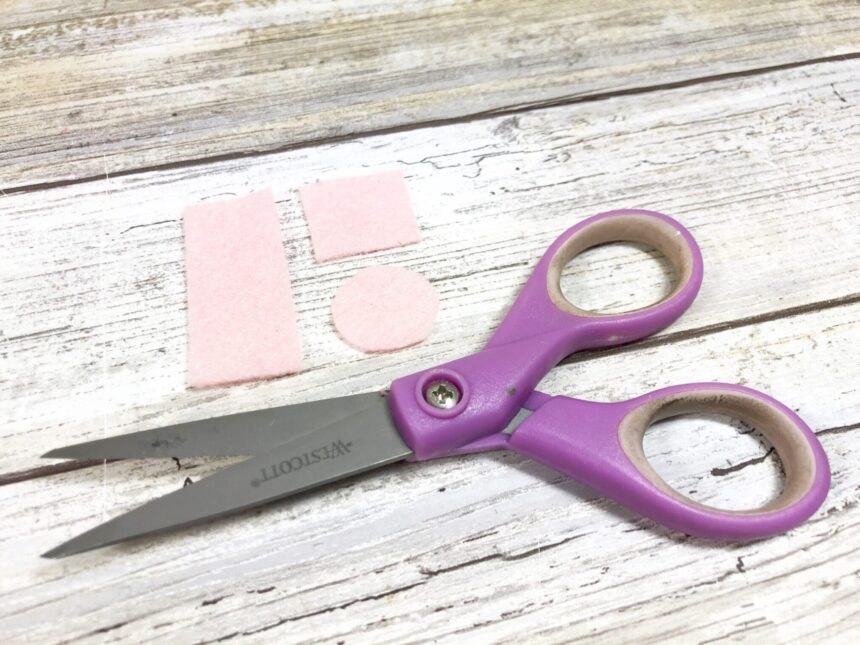
STEP THREE
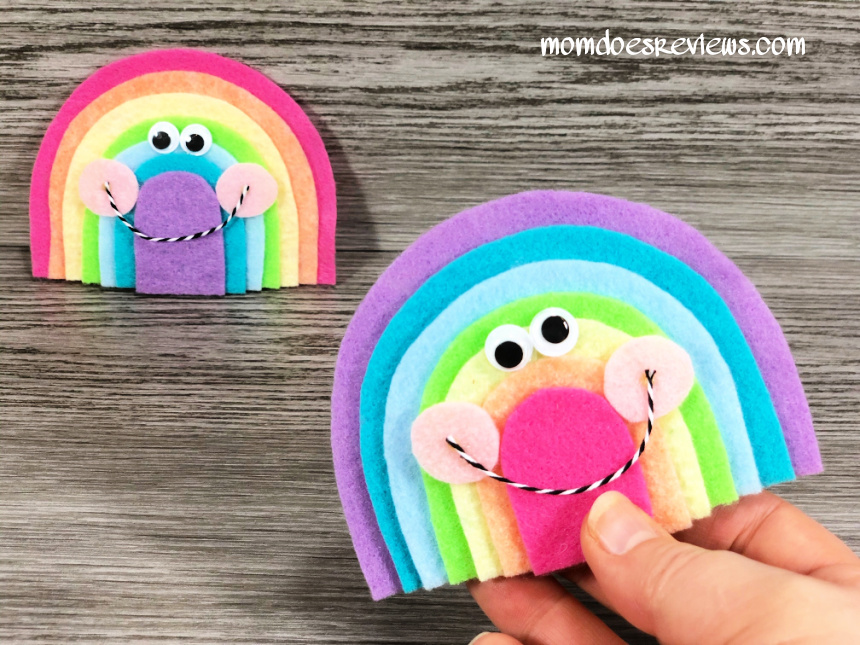
Cut small rectangles and then squares from light pink craft felt. Cut the squares into circles for the Rainbow’s cheeks and then attach with the glue gun.
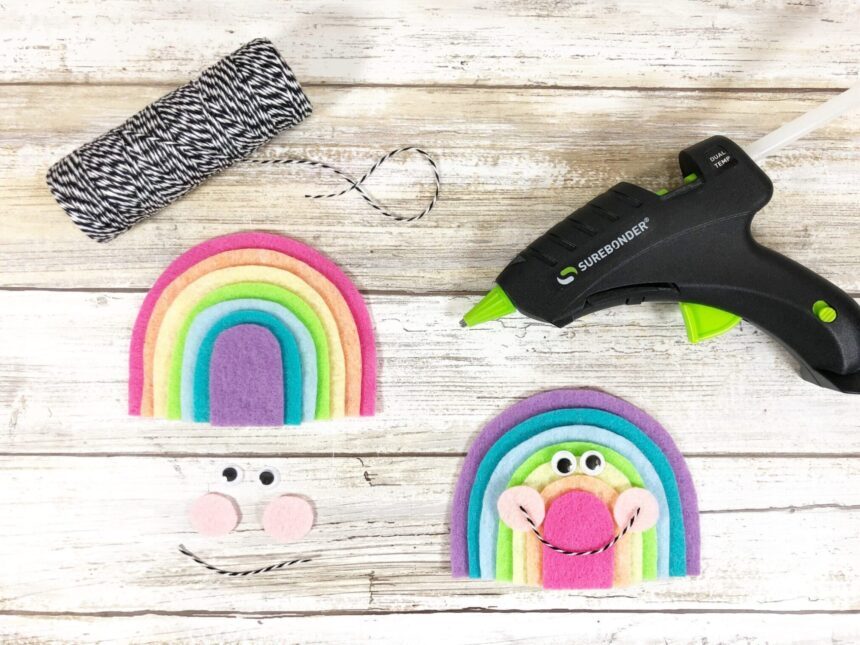
STEP FOUR
Attach wiggle eyes with the glue gun and glue sticks to the top center of the Rainbow, placing them right beside each other. Create a wide and shallow smile from cheek to cheek with a length of Baker’s Twine.
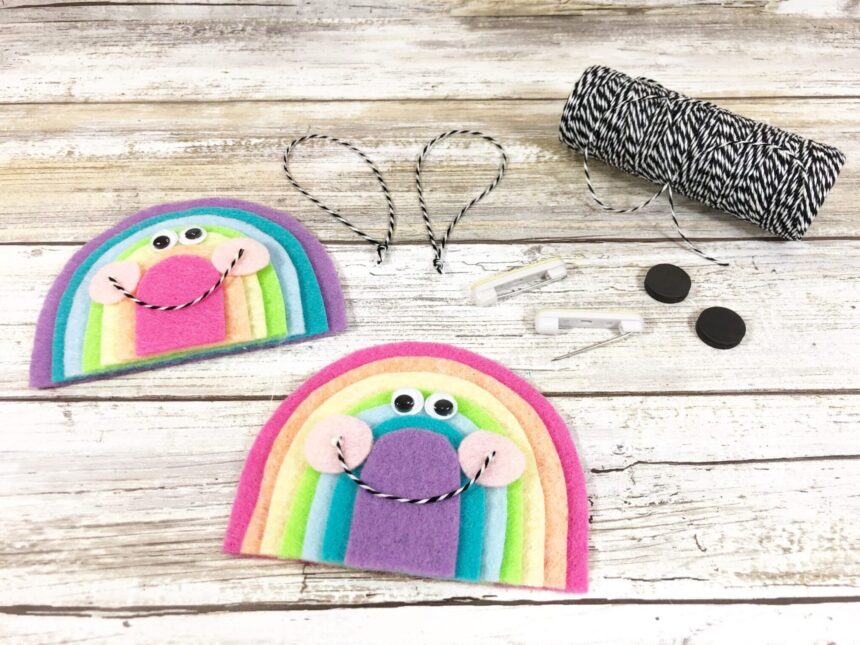
STEP FIVE
Flip Rainbows over and attach a pin back, magnet or Baker’s twine hanger to the back of each with the glue gun and glue sticks.
Print the Tutorial:

Kawaii Inspired Felt Rainbow Craft
A fun family activity to create in just about 30 minutes. Add a name for the perfect place card for a Rainbow birthday party with the kiddos. The possibilities are endless with these cuties!
Materials
- Craft Felt – Rainbow Shades of Pastels
- Dollar Store Wiggle Eyes
- Pin Back; Magnets; Baker’s Twine
- KAWAII INSPIRED RAINBOW PATTERN SHEET
Tools
- Permanent Marker
- Glue Gun and Glue Sticks (low temp works best!)
- Scissors
Instructions
STEP ONE
Download, print and cut out Rainbow shapes from the Pattern Sheet HERE. Trace onto colored craft felt with a permanent marker. Cut out with scissors, inside the lines, so you have a clean finished project. Experiment with colors and have fun.
STEP TWO
Layer Rainbow shapes from largest to smallest, using the glue gun and glue sticks.
STEP THREE
Cut small rectangles and then squares from light pink craft felt. Cut the squares into circles for the Rainbow’s cheeks and then attach with the glue gun.
STEP FOUR
Attach wiggle eyes with the glue gun and glue sticks to the top center of the Rainbow, placing them right beside each other. Create a wide and shallow smile from cheek to cheek with a length of Baker’s Twine.
STEP FIVE
Flip Rainbows over and attach a pin back, magnet or Baker’s twine hanger to the back of each with the glue gun and glue sticks.
Pin for Later!