
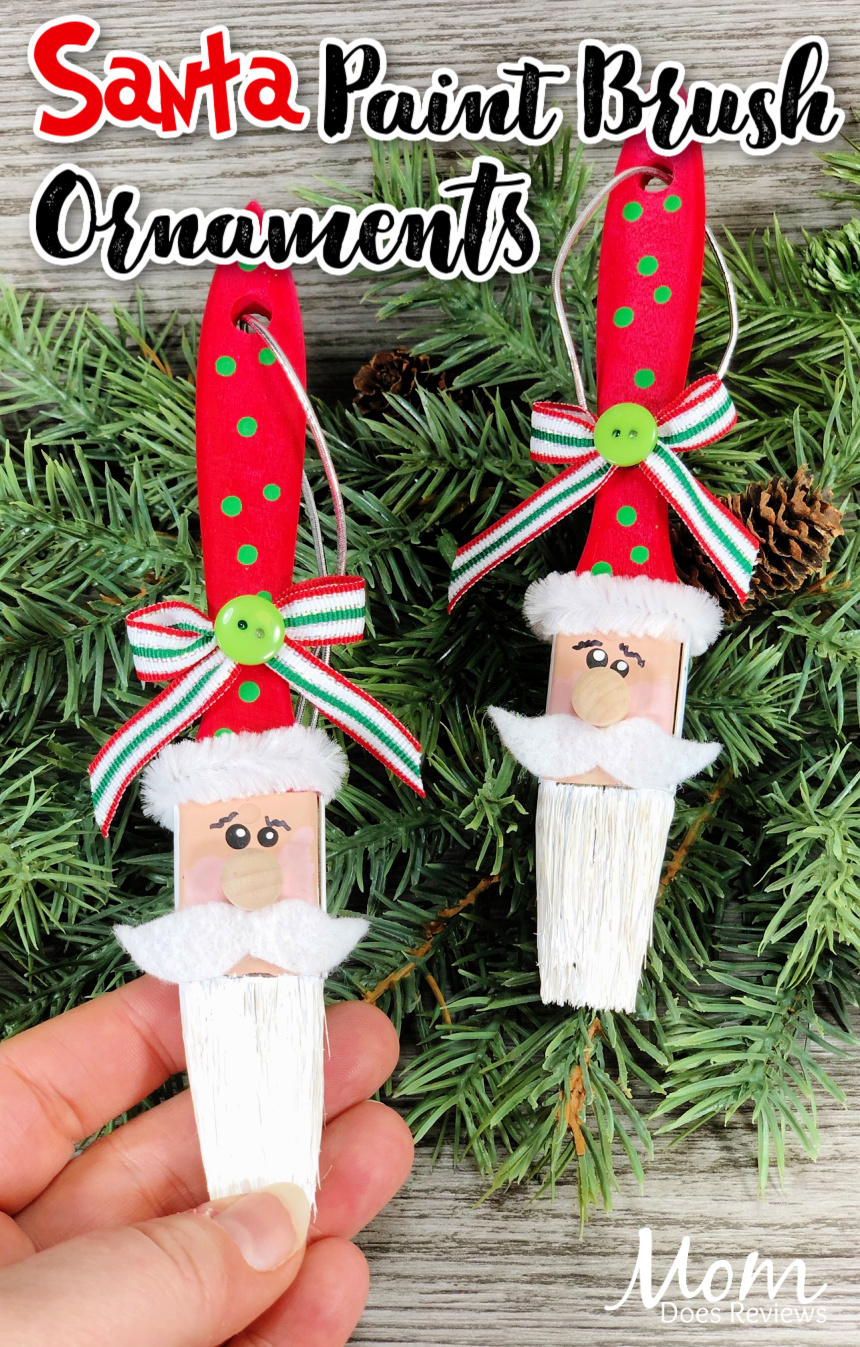
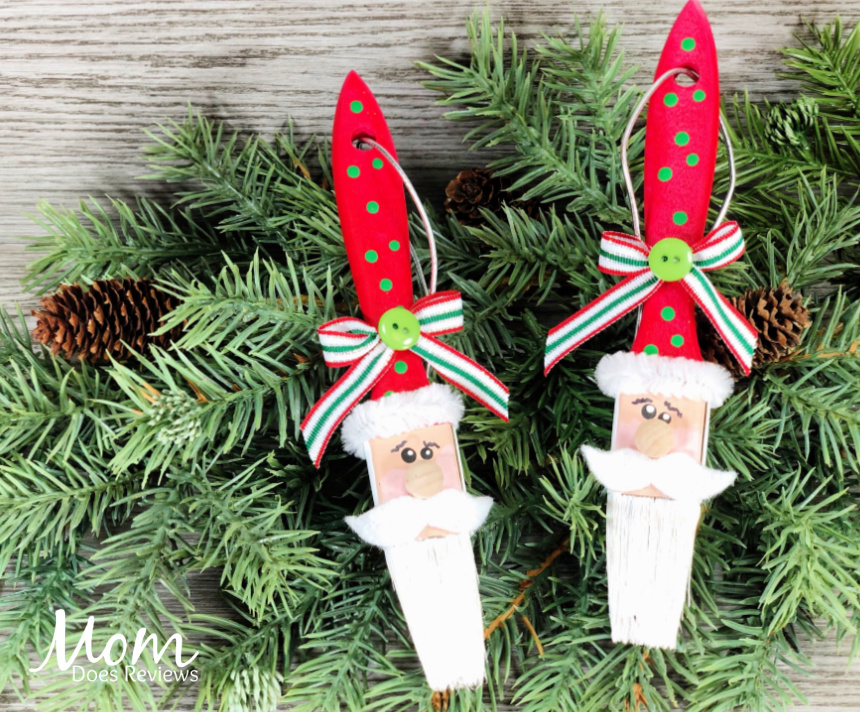
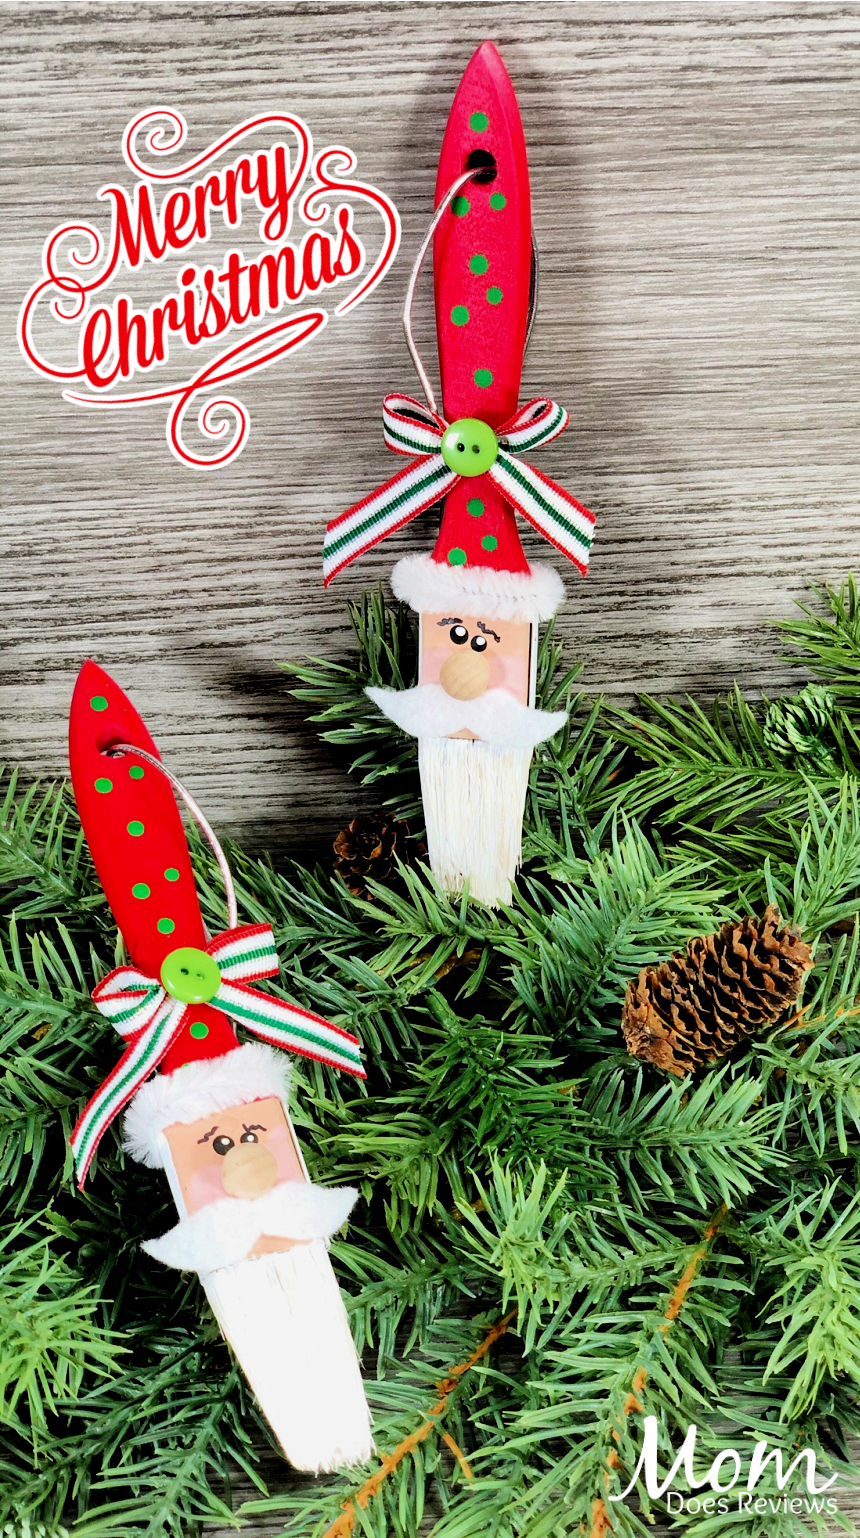
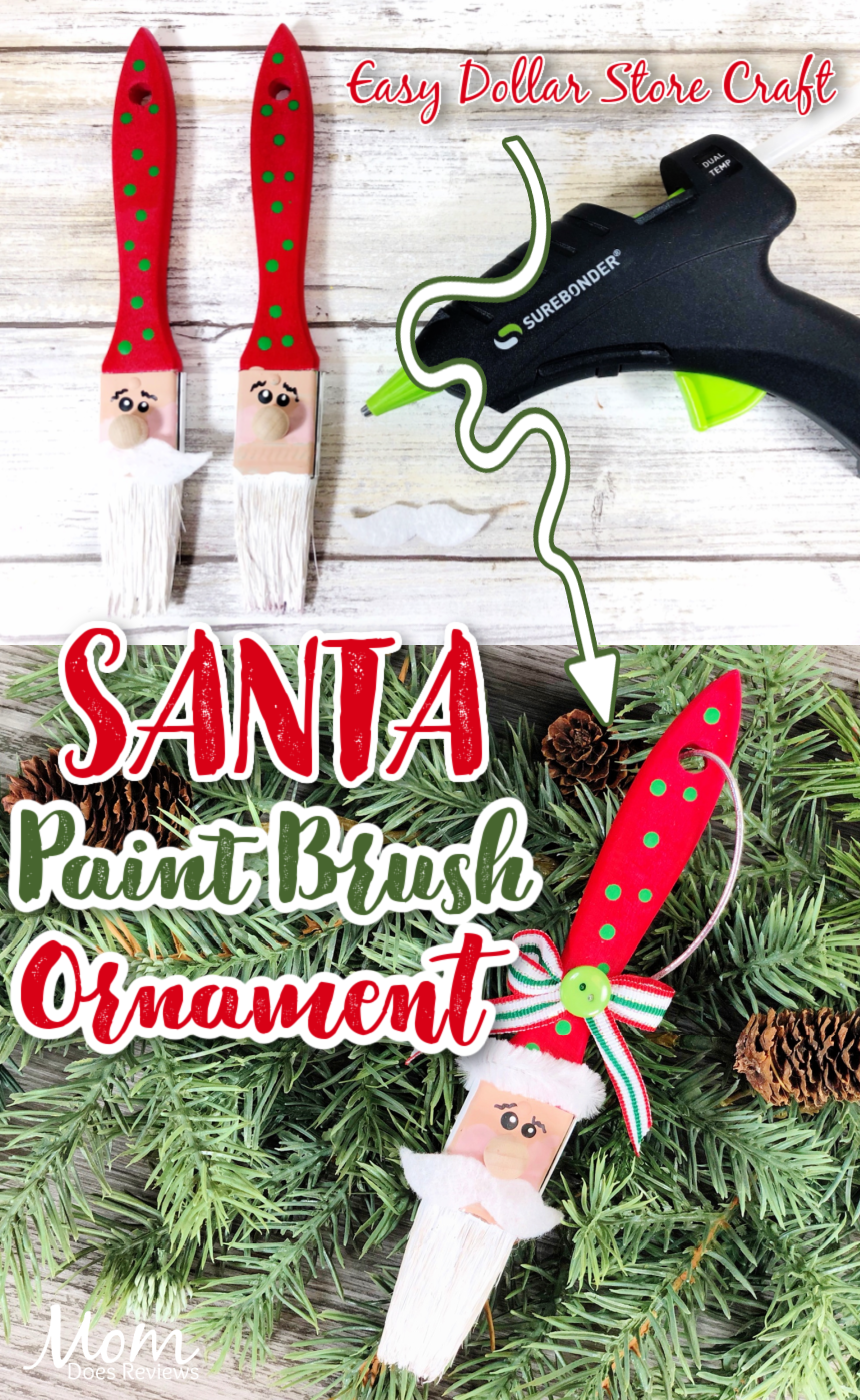
This Christmas, make the most of your family time together! Do some Christmas crafting, cooking, tradition-making! You can start by making this nostalgic Paint Brush Santa Ornament to decorate your tree! Grab a few items from the Dollar Store, grab a few kids and get creative!
Some simple supplies from the craft store make this a fun ornament for teens and tweens to craft on a budget. The perfect hostess, teacher, or neighbor gift for this holiday season.
Want more easy ornaments to make with your family? Here are some of my favorites:
- Christmas Cupcake Ornament– this one might not be edible, but they are cute enough, they should be!
- Scrapbook Paper Tree Ornament
- Mason Jar Ring Fabric Tie Ornament
- Candy Jar Ornament
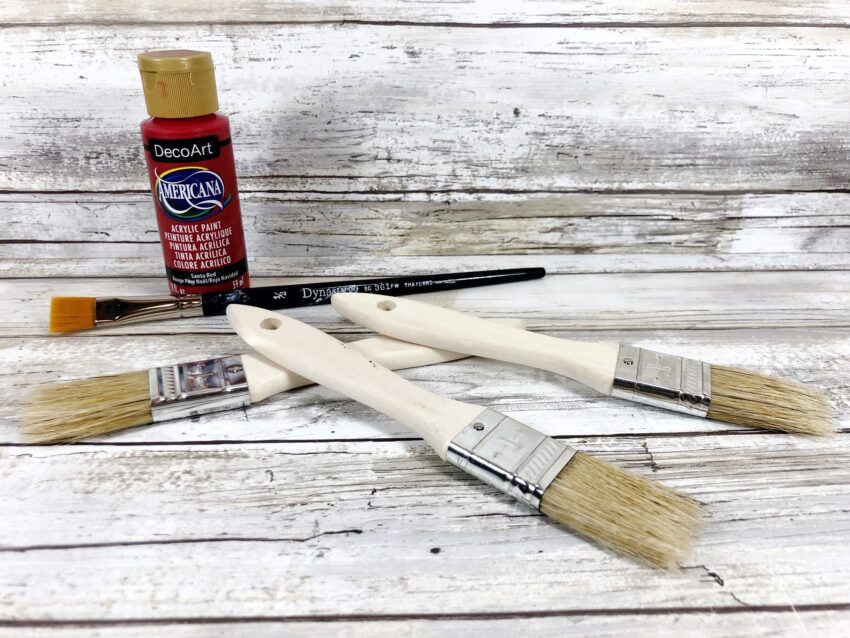
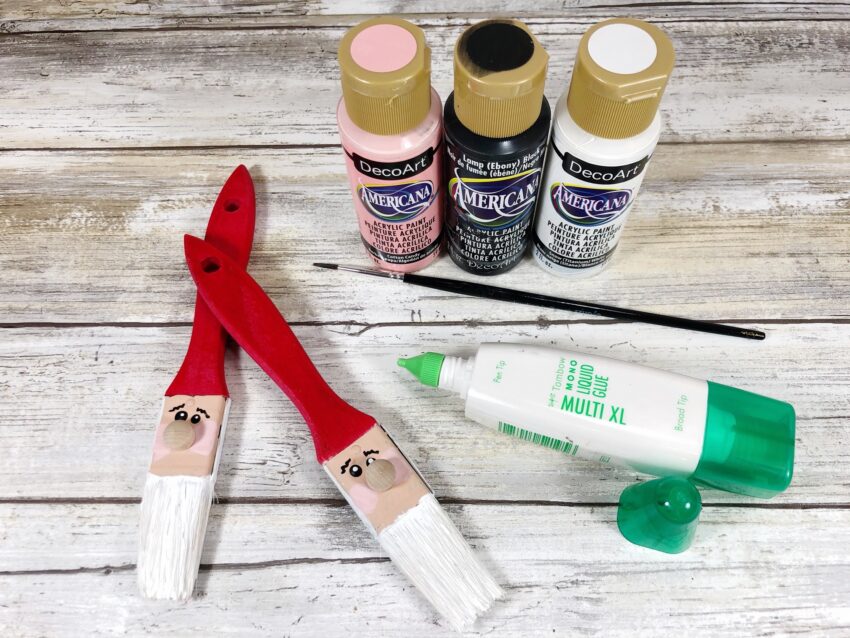
Materials needed for your Paint Brush Santa Ornament:
- Paintbrush, One-Inch Wide – four in a package at the Dollar Store
- Chenille Stems, White – Dollar Store
- Wooden Plug, Small
- Felt Craft Sheet, White
- Ribbon – Dollar Store
- Button – Dollar Store
- Silver Cord – Dollar Store
- Acrylic Craft Paint – Red, Green, Light Peach, White, Black
- Repositionable Adhesive Runner
Scroll down for the rest of the supplies needed.
Instructions to make your Santa Ornament:
STEP ONE
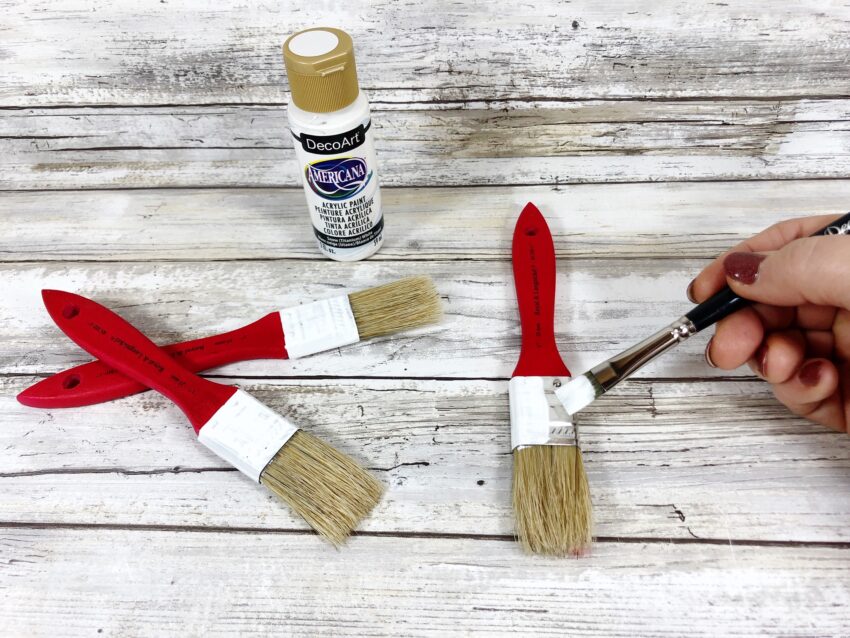
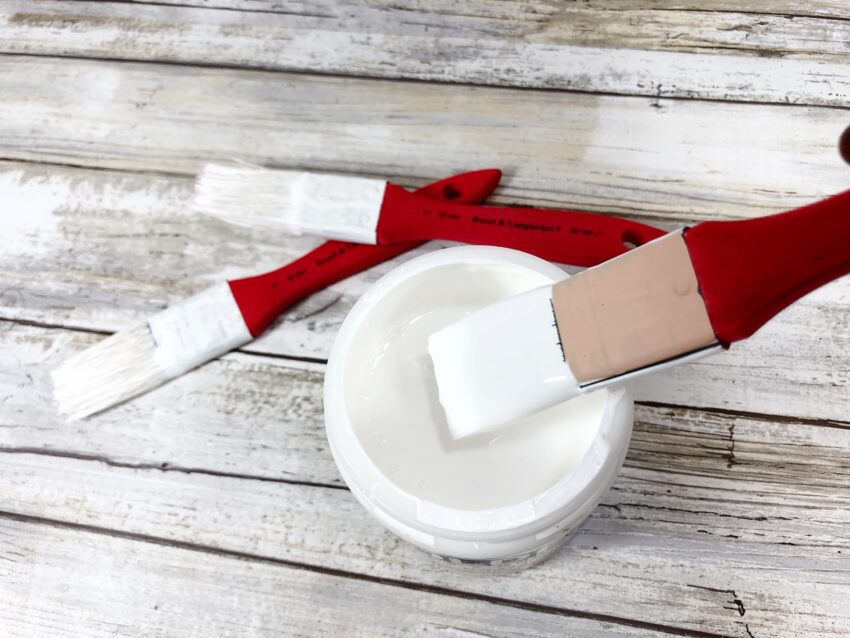
Gather all supplies. Paint the paintbrush handle with red acrylic craft paint which will be Santa’s hat. Apply a second coat, if necessary and then set aside to dry.
Basecoat the metal section of the paintbrush with white acrylic craft paint which will be Santa’s hair. Apply a second coat, if necessary and then set aside to dry.
Topcoat the front section of the paintbrush with a light peach or flesh tone color of your choice, which will be Santa’s face. Apply a second coat, if necessary and set aside to dry.
STEP TWO
Dip the bristles of the paintbrush into white acrylic craft paint, wipe off excess and then set aside to dry overnight. This will be Santa’s beard.
STEP THREE
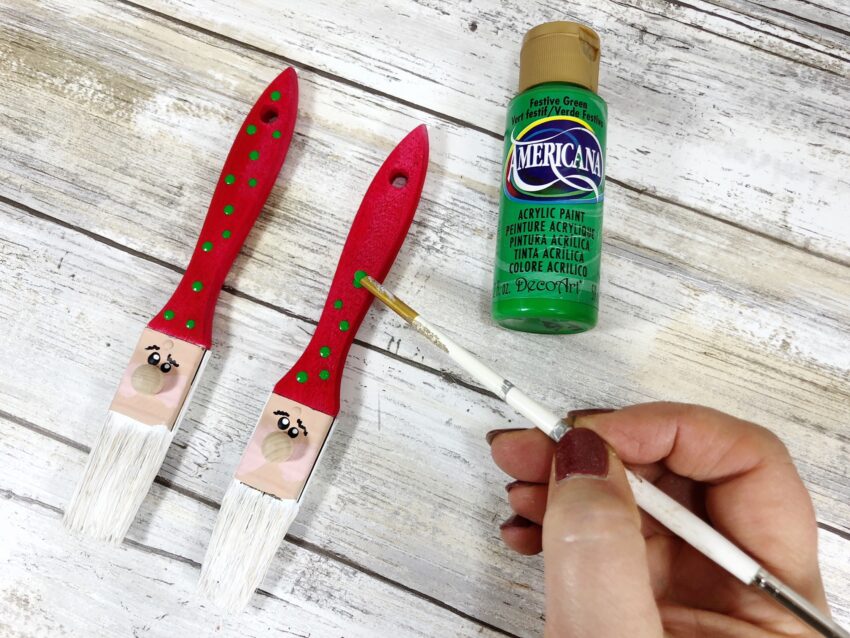
Using pink, black and white acrylic craft paint, add rosy cheeks, eyes and eyebrows to Santa’s face. Glue unfinished wooden plug as Santa’s nose. The wooden plug can be left unfinished or painted to match Santa’s face.
Dip the end of a working paintbrush handle into green acrylic craft paint and create a polka dot pattern on Santa’s hat.
STEP FOUR
Draw a mustache on plain paper and cut out with scissors. Apply removeable adhesive to the mustache pattern, apply to white craft felt and cut out with scissors. Attach mustache to Santa’s face under his nose with a glue gun and glue sticks. You could also use craft foam or white fabric if you don’t have felt.

STEP FIVE
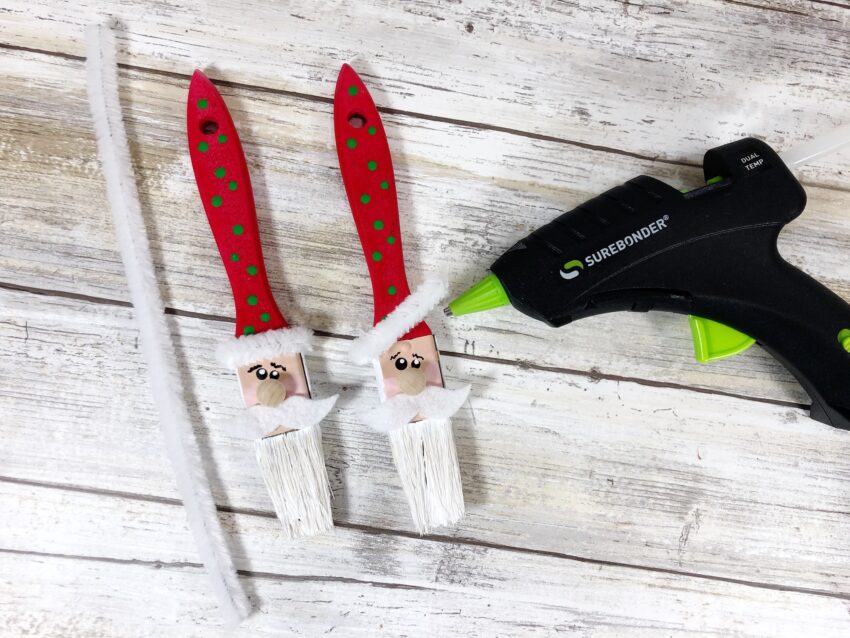
Wrap white chenille stem around paintbrush to be the fur trim on Santa’s hat. Trim chenille stem with scissors and glue in place.
STEP SIX
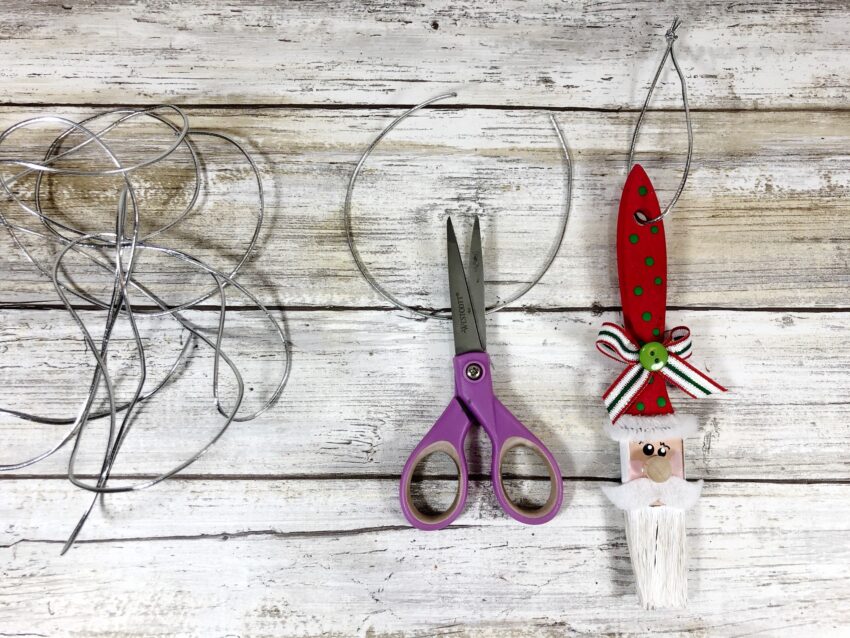
Tie a bow from plaid ribbon and attach to Santa’s hat with a glue gun and glue sticks.
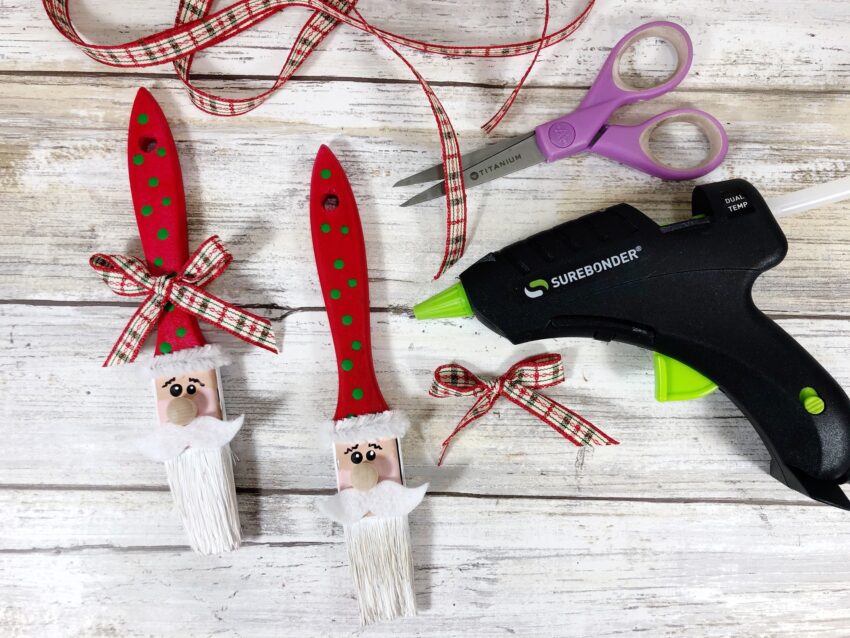
Accent the ribbon bow with a colorful button, glued to the center.

Measure and cut an eight-inch length of silver cord, thread through the hole at the top of the paintbrush. and then tie the ends in a knot to create a loop for hanging.
Change up the width of the paintbrush base to create a variety of ornaments to share with family and friends. A great craft project for tweens and teens to create on their own or with younger kids.
Print the Directions:

DIY Paintbrush Santa Ornament
Some simple supplies from the craft store make this a fun ornament for teens and tweens to craft on a budget. The perfect hostess, teacher, or neighbor gift for this holiday season.
Materials
- Paintbrush, One-Inch Wide – four in a package at the Dollar Store
- Chenille Stems, White – Dollar Store
- Wooden Plug, Small
- Felt Craft Sheet, White
- Ribbon – Dollar Store
- Button – Dollar Store
- Silver Cord – Dollar Store
- Acrylic Craft Paint – Red, Green, Light Peach, White, Black
- Repositionable Adhesive Runner
- Plain Paper
Tools
- Scissors
- Ruler
- Pencil
- Paintbrush
- Glue Gun and Glue Sticks
Instructions
STEP ONE
Gather all supplies. Paint the paintbrush handle with red acrylic craft paint which will be Santa’s hat. Apply a second coat, if necessary and then set aside to dry.
Basecoat the metal section of the paintbrush with white acrylic craft paint which will be Santa’s hair. Apply a second coat, if necessary and then set aside to dry.
Topcoat the front section of the paintbrush with a light peach or flesh tone color of your choice, which will be Santa’s face. Apply a second coat, if necessary and set aside to dry.
STEP TWO
Dip the bristles of the paintbrush into white acrylic craft paint, wipe off excess and then set aside to dry overnight. This will be Santa’s beard.
STEP THREE
Using pink, black and white acrylic craft paint, add rosy cheeks, eyes and eyebrows to Santa’s face. Glue unfinished wooden plug as Santa’s nose. The wooden plug can be left unfinished or painted to match Santa’s face.
Dip the end of a working paintbrush handle into green acrylic craft paint and create a polka dot pattern on Santa’s hat.
STEP FOUR
Draw a mustache on plain paper and cut out with scissors. Apply removeable adhesive to the mustache pattern, apply to white craft felt and cut out with scissors. Attach mustache to Santa’s face under his nose with a glue gun and glue sticks. You could also use craft foam or white fabric if you don’t have felt.
STEP FIVE
Wrap white chenille stem around paintbrush to be the fur trim on Santa’s hat. Trim chenille stem with scissors and glue in place.
STEP SIX
Tie a bow from plaid ribbon and attach to Santa’s hat with a glue gun and glue sticks.
Accent the ribbon bow with a colorful button, glued to the center.
Measure and cut an eight-inch length of silver cord, thread through the hole at the top of the paintbrush. and then tie the ends in a knot to create a loop for hanging.
Notes
Change up the width of the paintbrush base to create a variety of ornaments to share with family and friends. A great craft project for tweens and teens to create on their own or with younger kids.
Pin for Later!
Do you make your own Christmas ornaments?