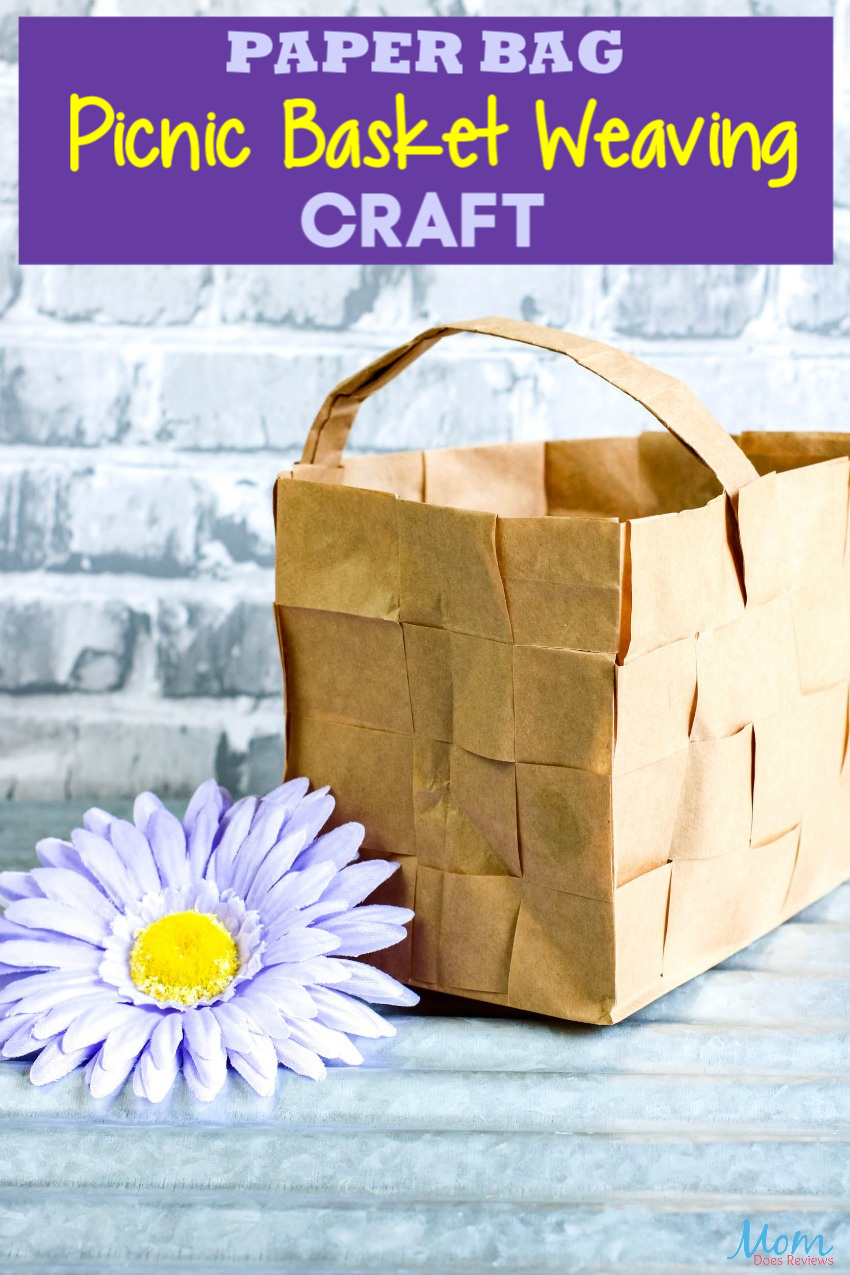
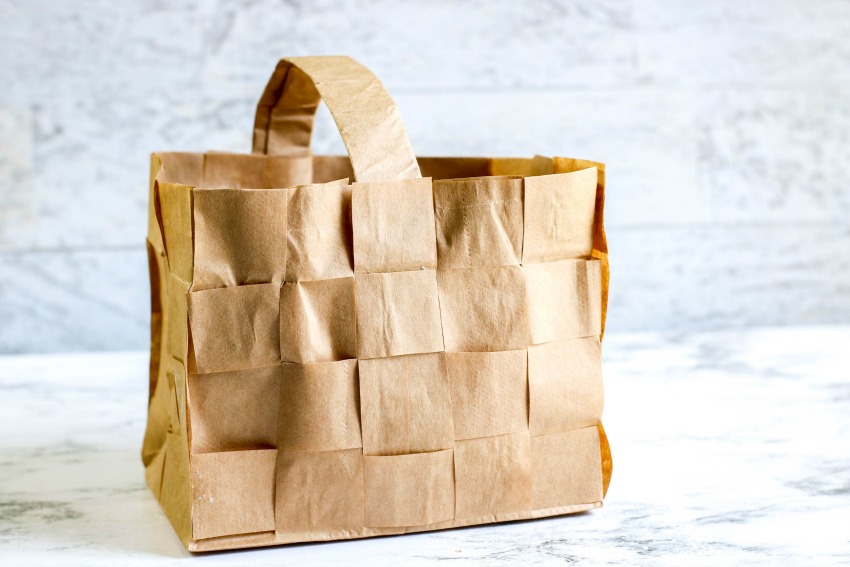
This Paper Bag Picnic Basket Weaving Craft is so cute! It is easy to change up the flower and/or embellishments for different holidays or decor but the best part is it uses materials that you probably already have at home.
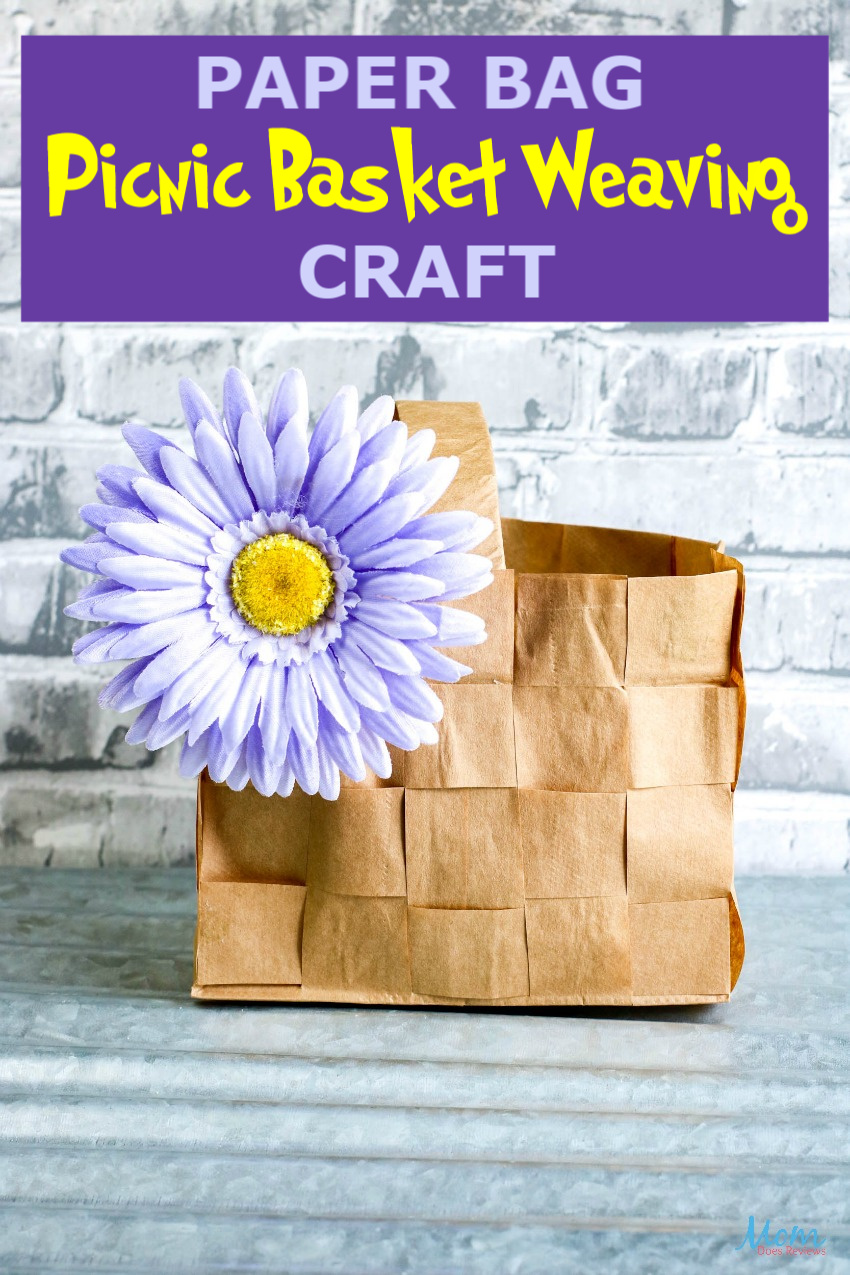
This cute Paper Bag Picnic Basket Weaving Craft is a fun craft to do. You can recycle those empty paper bags into cute baskets. I also think this is a cute craft for holiday decor. Just change out the flower color or add other embellishments for different holidays.
This craft is perfect for tweens and teens and adults! Just follow the instructions to complete. If your little ones want to make their own, they will need lots of help! Maybe make it a family project- your big kids can help the little kids.
To make your Picnic Basket even more fun and for a completely handcrafted basket, why not try your hand at this fun Origami Tulips craft? They would make the perfect handmade embellishment.

Paper Bag Picnic Basket Weaving Craft
Supplies Needed:

3 paper bags, all the same size but any size/color can be used
Scissors
Strong tape
Glue stick
How to make this cute Paper Bag Picnic Basket Weaving Craft:
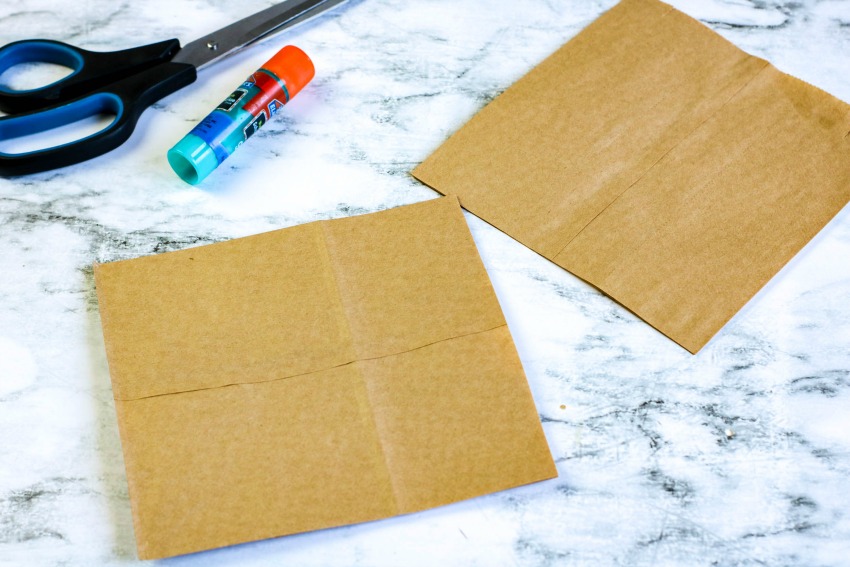
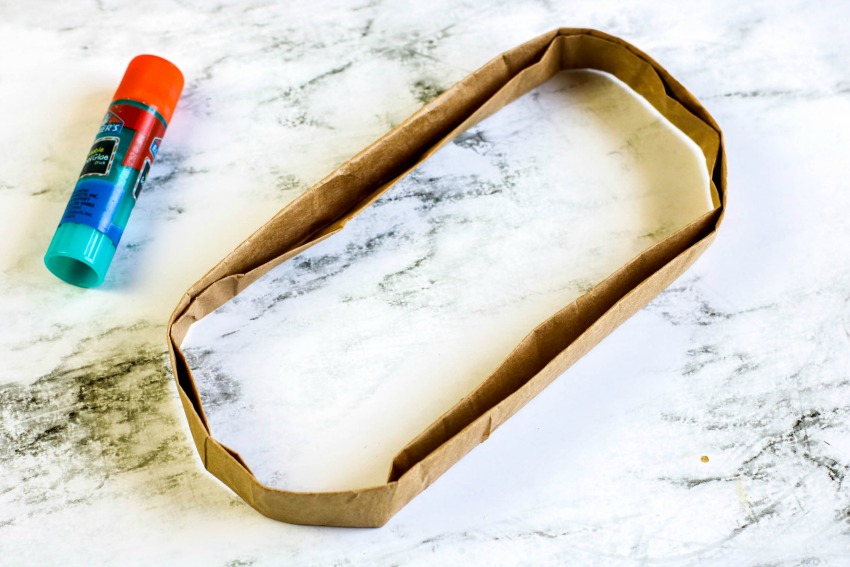
1. Bag One – the handle: With the first bag, cut it in half through the width. Discard the bottom of the bag. With the top, roll the bag down 1 inch at a time, pressing flat with each roll, until the bag is completely rolled into a handle. Run glue along the seam where the final fold overlaps and press to seal.
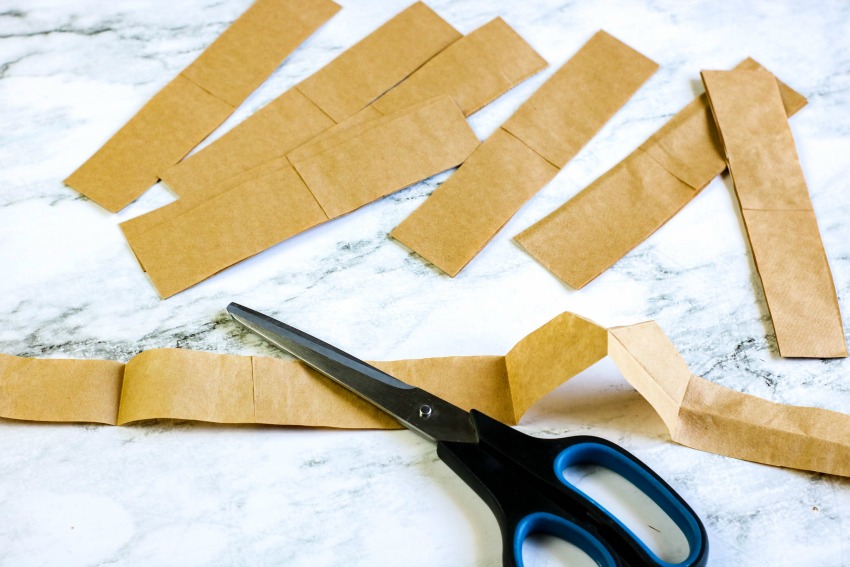
2. Bag Two – the weaving strips: With the second bag, cut in 1 inch strips across the width of the bag, discarding the very bottom. When you unfold the strips, this creates paper loops. After opening each loop, cut each strip along one of the folded seams to create a long strip instead of a paper loop.
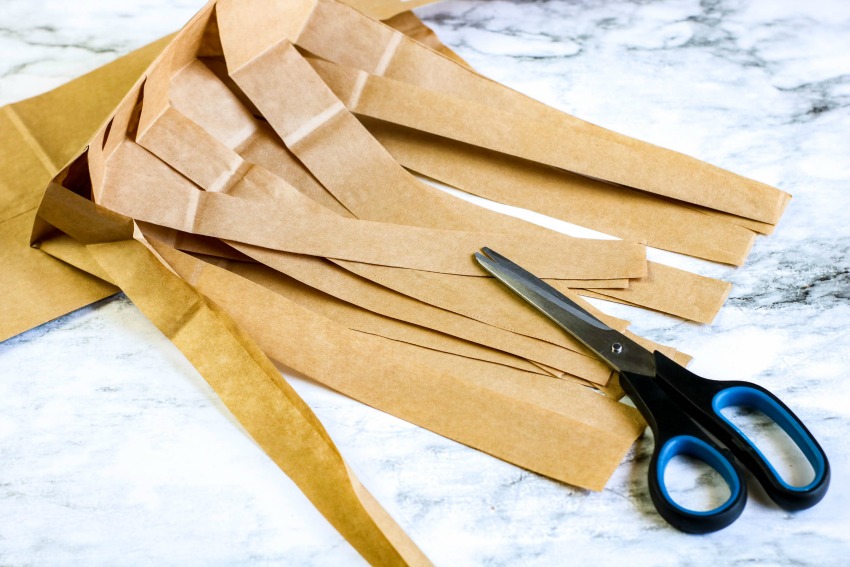
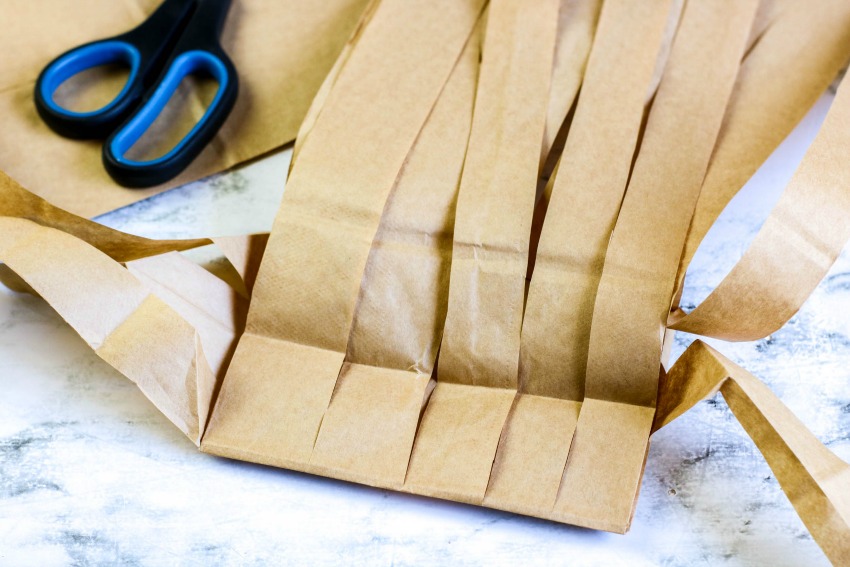
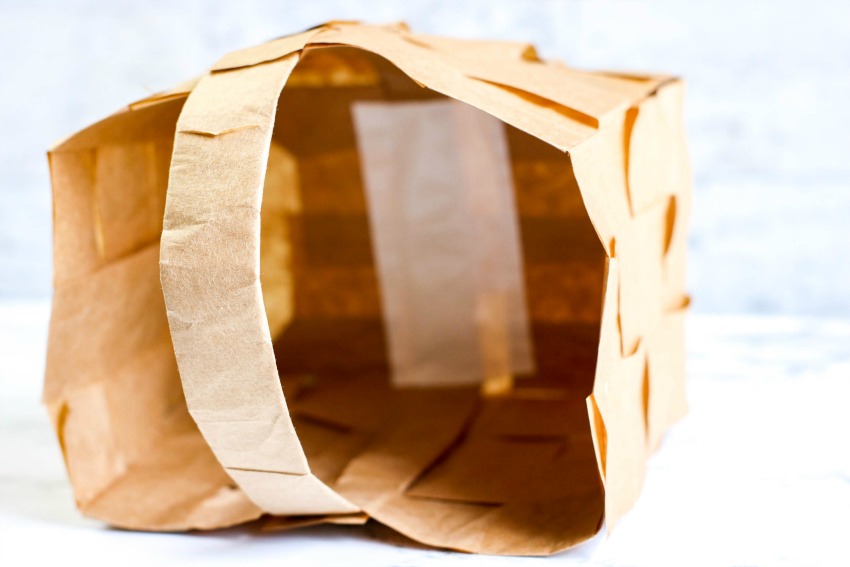
3. Bag Three – the basket body: With the final bag, open the bag completely and cut 1 inch lines from the opening of the bag straight to the bottom. Do not cut the bottom of the bag where it will rest. Open all of the cut pieces to lay flat on your work surface.
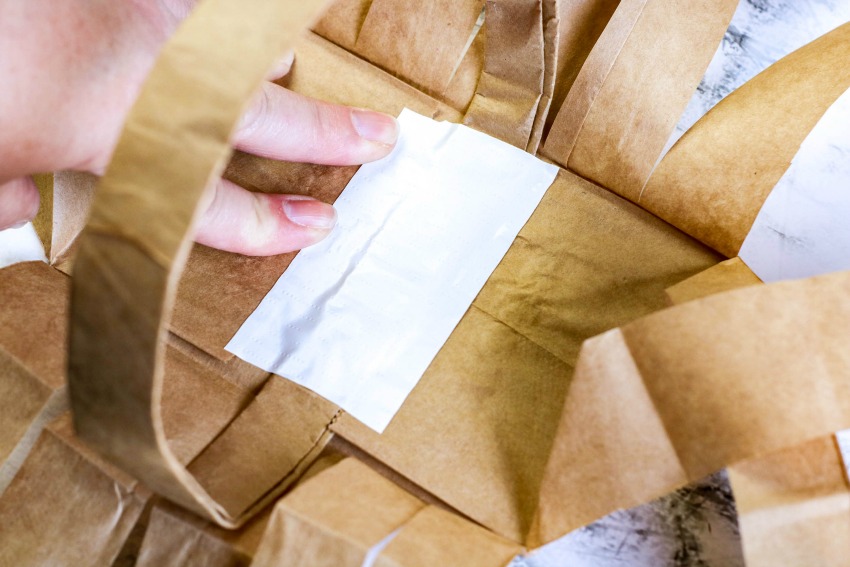
4. Line the handle (from bag one) across the bottom of the open bag (bag three – the basket body) aligning the handle with the strips along the side so that when the weaving begins, the handle can be included in the weave. Tape the handle to the inside of the bottom.
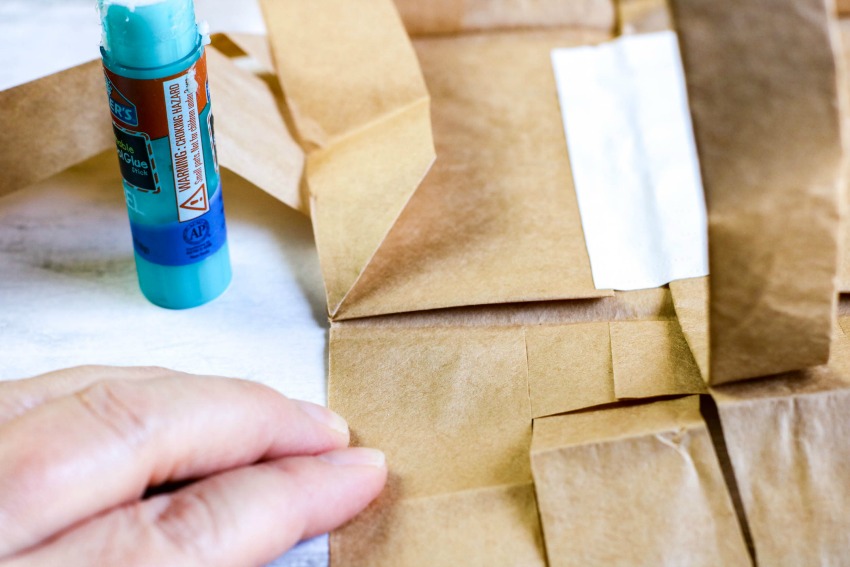
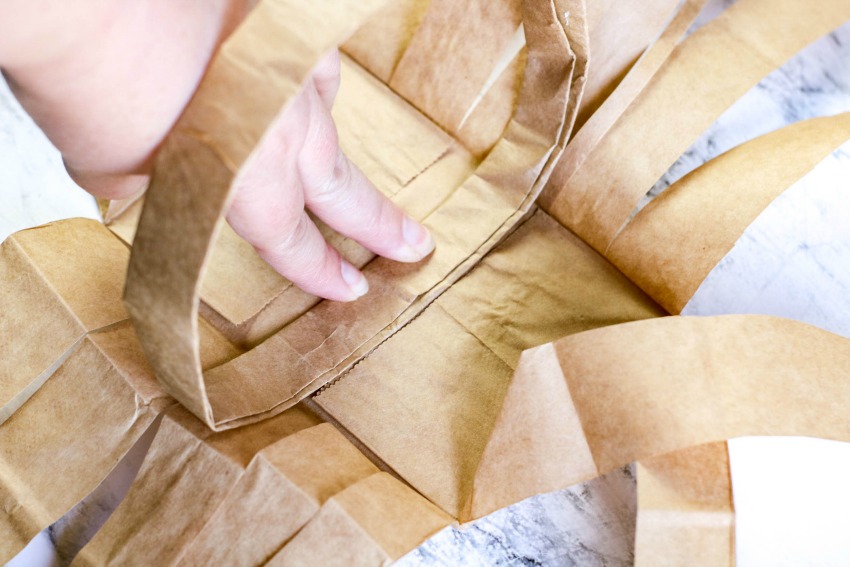
5. With the paper strips from bag two, begin weaving the strips in and out of the cut strips on bag three. It is best to start at a corner. Try to align the folded edges of the strips (where the bag was folded before being cut) with the folded edges on the basket body to help hold the shape. Using glue, attach the starting and ending edges of the strips to the basket body.
6. Tip: To add stability to the basket, start each weave in a different corner.
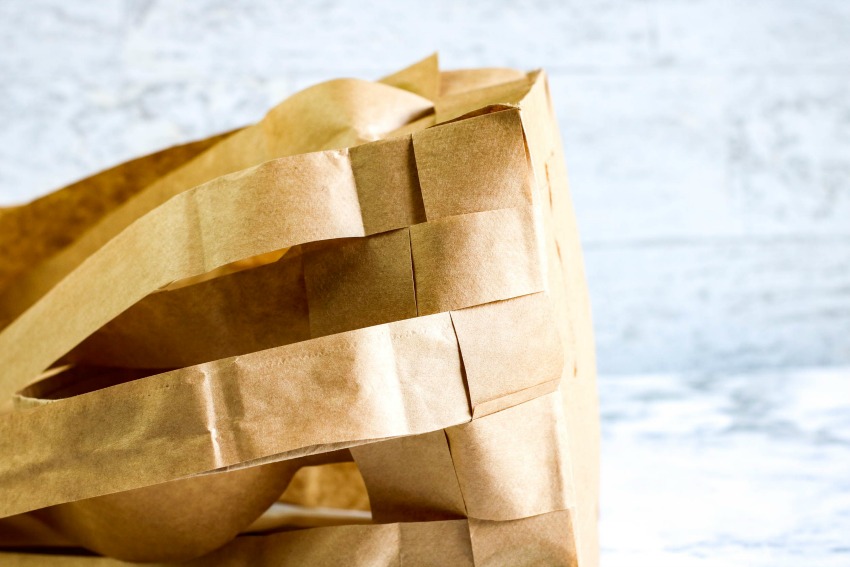
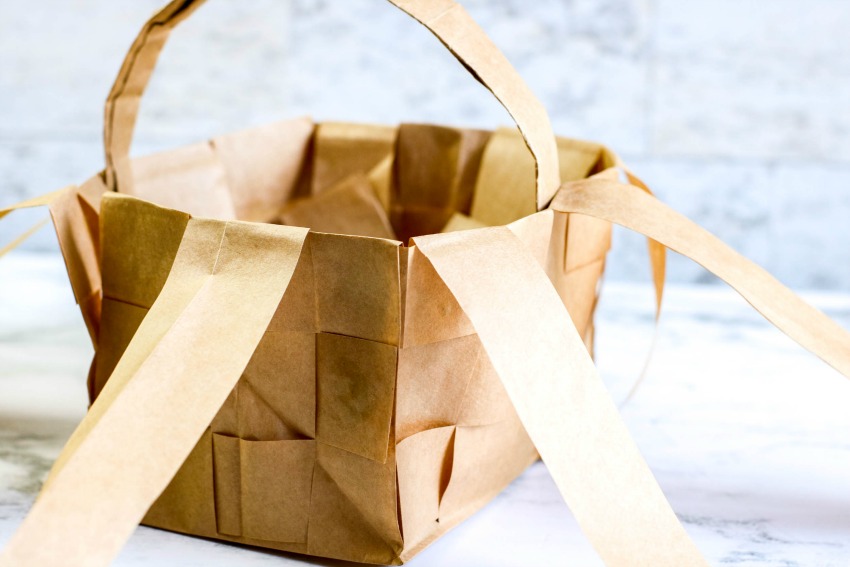
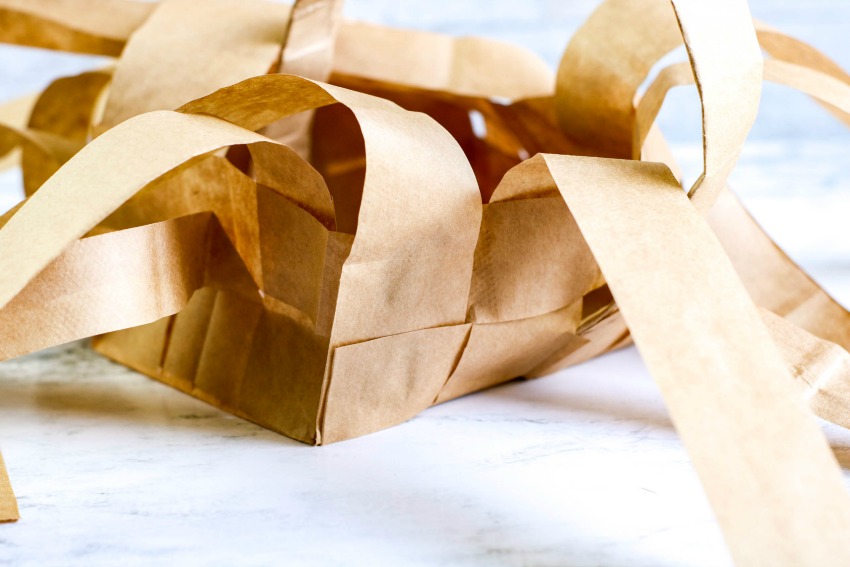
7. Continue weaving, alternating each row and including the basket handle in the weave. Have three to four rows for your basket.
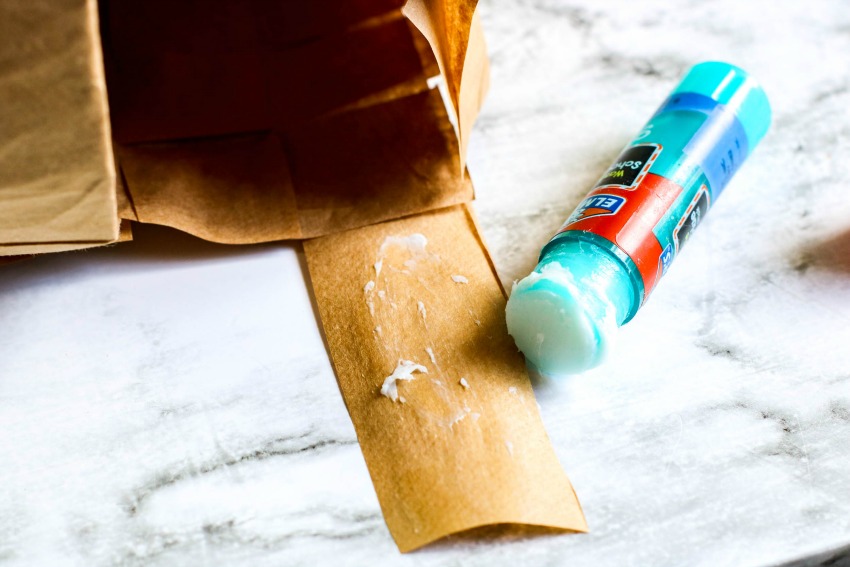
8. To finish the basket, fold the final strips of the basket body facing the outside of the weave to the inside, over the edge of the basket walls. Cut as needed to fit the length into the basket and use glue on the inside to attach the loose ends to the basket’s walls. For the strips of the basket body that are on the inside of the weave, trim them to match the height of the basket walls.
9. Allow glue to dry before playing or displaying.
Print this cute Paper Bag Picnic Basket Weaving Craft!

Paper Bag Picnic Basket Weaving Craft
This Paper Bag Picnic Basket Weaving Craft is so cute! It is easy to change up the flower and/or embellishments for different holidays or decor but the best part is it uses materials that you probably already have at home.
Materials
- 3 paper bags, all the same size but any size/color can be used
- Scissors
- Strong tape
- Glue stick
Instructions
1. Bag One - the handle: With the first bag, cut it in half through the width. Discard the bottom of the bag. With the top, roll the bag down 1 inch at a time, pressing flat with each roll, until the bag is completely rolled into a handle. Run glue along the seam where the final fold overlaps and press to seal.
2. Bag Two - the weaving strips: With the second bag, cut in 1 inch strips across the width of the bag, discarding the very bottom. When you unfold the strips, this creates paper loops. After opening each loop, cut each strip along one of the folded seams to create a long strip instead of a paper loop.
3. Bag Three - the basket body: With the final bag, open the bag completely and cut 1 inch lines from the opening of the bag straight to the bottom. Do not cut the bottom of the bag where it will rest. Open all of the cut pieces to lay flat on your work surface.
4. Line the handle (from bag one) across the bottom of the open bag (bag three - the basket body) aligning the handle with the strips along the side so that when the weaving begins, the handle can be included in the weave. Tape the handle to the inside of the bottom.
5. With the paper strips from bag two, begin weaving the strips in and out of the cut strips on bag three. It is best to start at a corner. Try to align the folded edges of the strips (where the bag was folded before being cut) with the folded edges on the basket body to help hold the shape. Using glue, attach the starting and ending edges of the strips to the basket body.
6. Tip: To add stability to the basket, start each weave in a different corner.
7. Continue weaving, alternating each row and including the basket handle in the weave. Have three to four rows for your basket.
8. To finish the basket, fold the final strips of the basket body facing the outside of the weave to the inside, over the edge of the basket walls. Cut as needed to fit the length into the basket and use glue on the inside to attach the loose ends to the basket’s walls. For the strips of the basket body that are on the inside of the weave, trim them to match the height of the basket walls.
9. Allow glue to dry before playing or displaying.
Pin it for later!