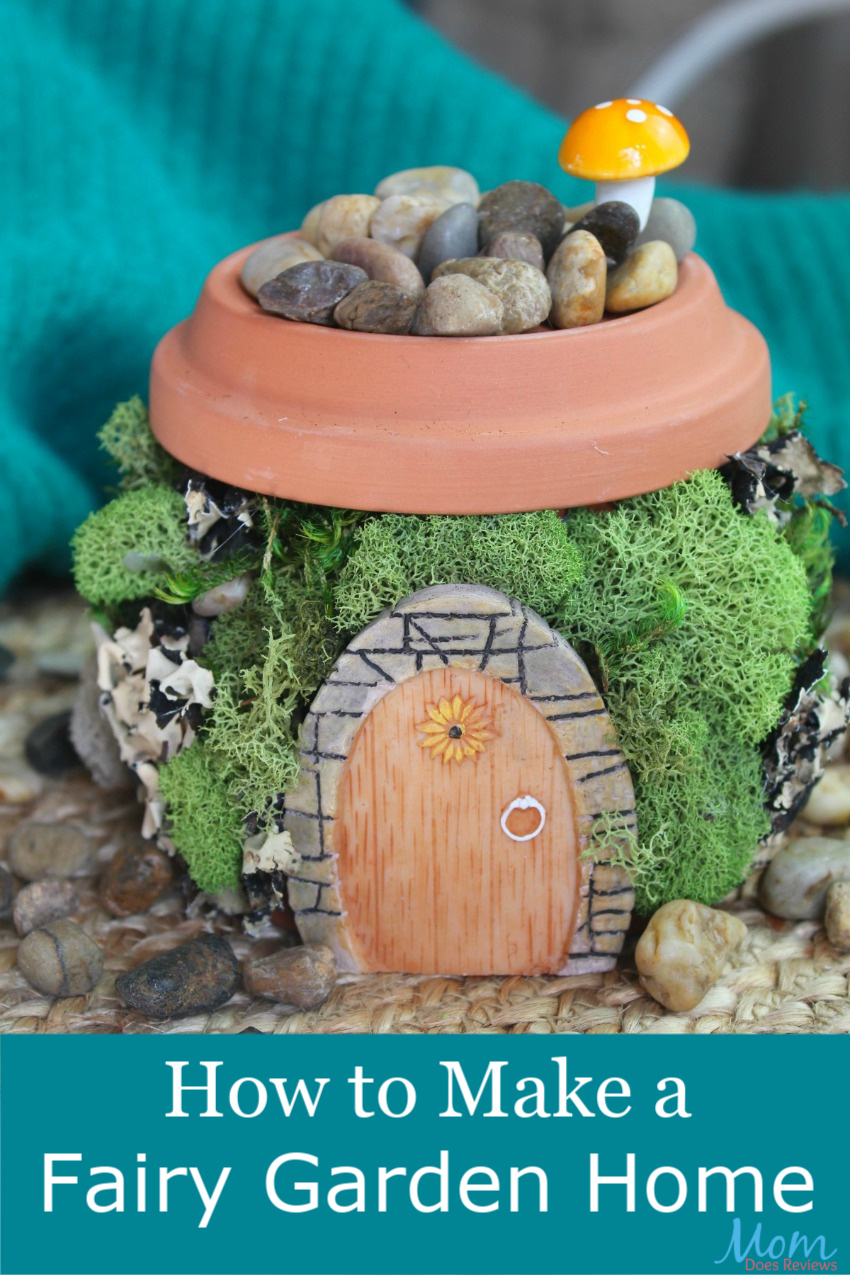
If you have ever wondered where to begin on how to make a Fairy Garden Home, then you are in the right place. We have one of THE MOST adorable Fairy Homes around! This super cute fairy home is easy to make starting with a base of a terra cotta pot and then a few simple supplies. Just follow the step-by-step instructions and throw in a little imagination to make your own beautiful fairy home!

All fairies need a place to sleep at night, right? Well, why not create a fun a magical home for your fairies?! Your little fairies will think they hit the lottery with this beautiful Fairy Garden Home!
This adorable fairy home is easy to make starting with a base of a terra cotta pot and then a few simple supplies. Just follow the step-by-step instructions and throw in a little imagination to make your own beautiful fairy home!
While this fairy house is made with a terra cotta pot, did you know you can make one using a mason jar? Check out this post on Mason Jar Crafts. It includes the instructions for making a Mason Jar Fairy House. It is super cute and easy!
How to Make a Fairy Garden Home
Supplies needed:

terra cotta flower pot
matching terra cotta flower pot saucer
super adhesive
hot glue, glue gun
decorative crafting moss
decorative crafting pebbles
fairy garden door
fairy garden mushrooms
We found all of the supplies we used here at our local Michael’s craft store. You can also found find variations of these items at your local dollar store and even Amazon.
How to make your Fairy Garden Home:
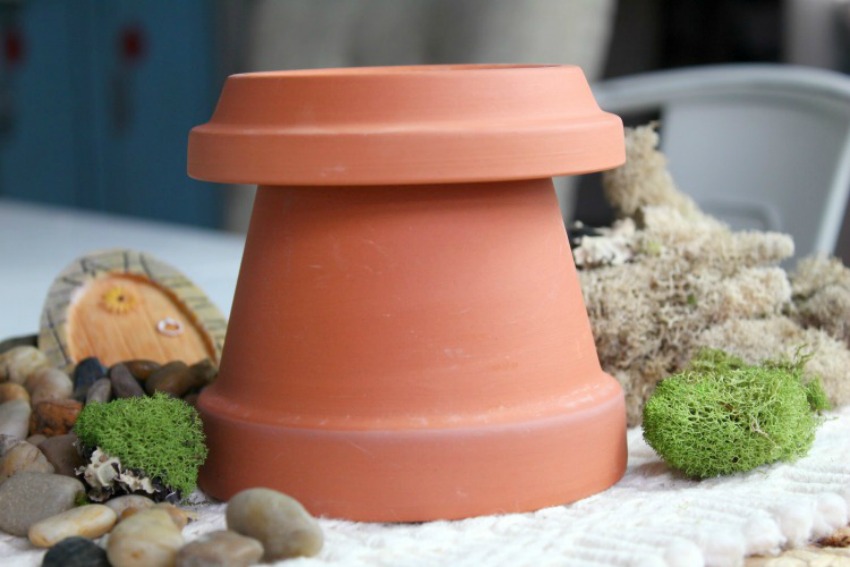
1. Begin by turning the flower pot over. Add a generous amount of adhesive to the top of the pot. Press the saucer to the adhesive so it is facing downward as shown.
2. Hold the saucer in place for a few minutes. It might take up to several hours to cure. During this time you can place a book or heavy object on top of the saucer to help it stick.


3. Once the roof of your fairy house is in place, you can add the door. Add the same super adhesive on the back of the door and press it to the front of the flower pot. Make sure you hold it in place for a few minutes.
4. As soon as the fairy garden door is dry, you can start adding embellishments. This includes the moss, the mushrooms, all of that good stuff that makes it look fairy ready.
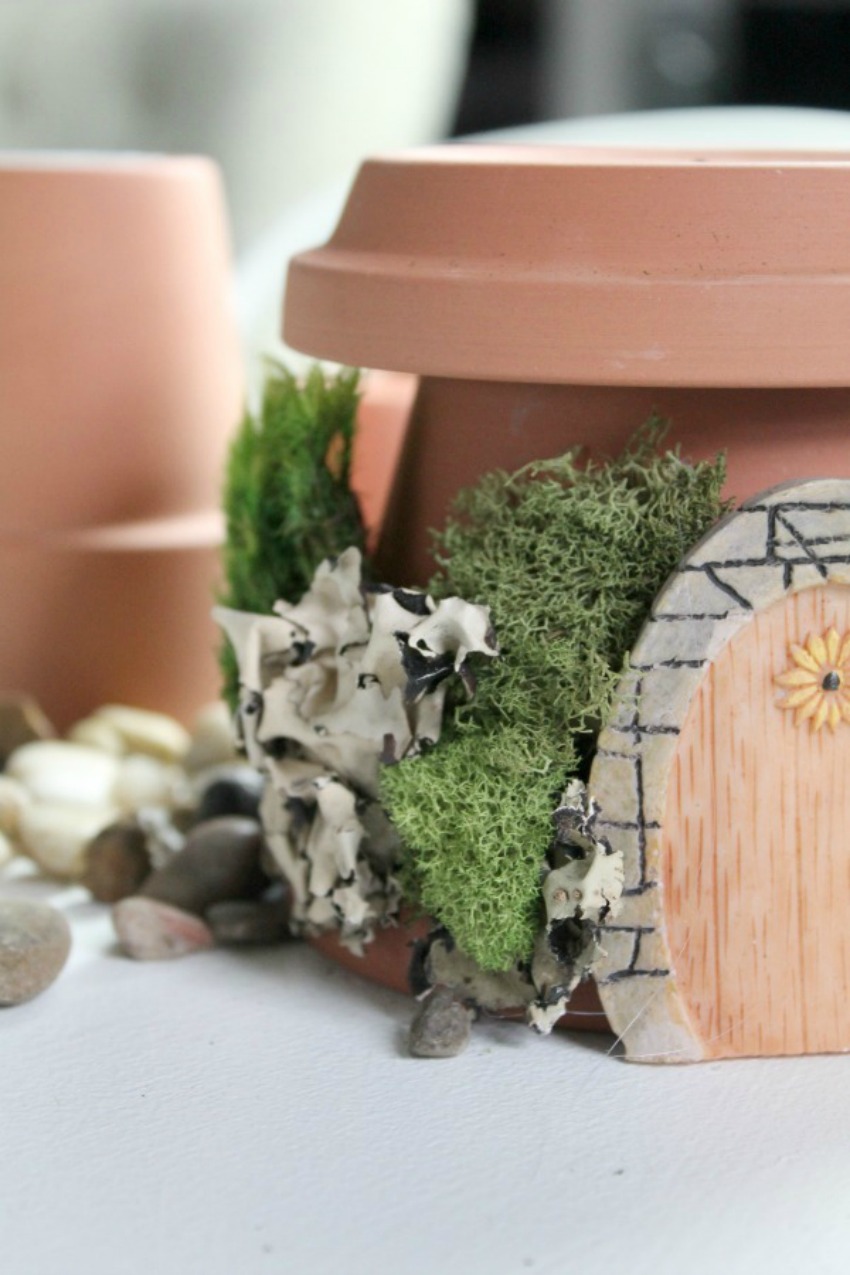
5. Using your hot glue, begin gluing the moss to the flower pot. Use a variety of moss types so you have various colors and textures. Before you glue the moss you might want to gently pull it and spread it thin.
6. Start by building the moss up around the door and continue to work your way around the rest of the pot. Just add some glue, press, and hold the moss in place until secure.

7. As we continue to glue the moss in place, we added in a rock or two for detail. You can use your hot glue for this as it seems to work well.
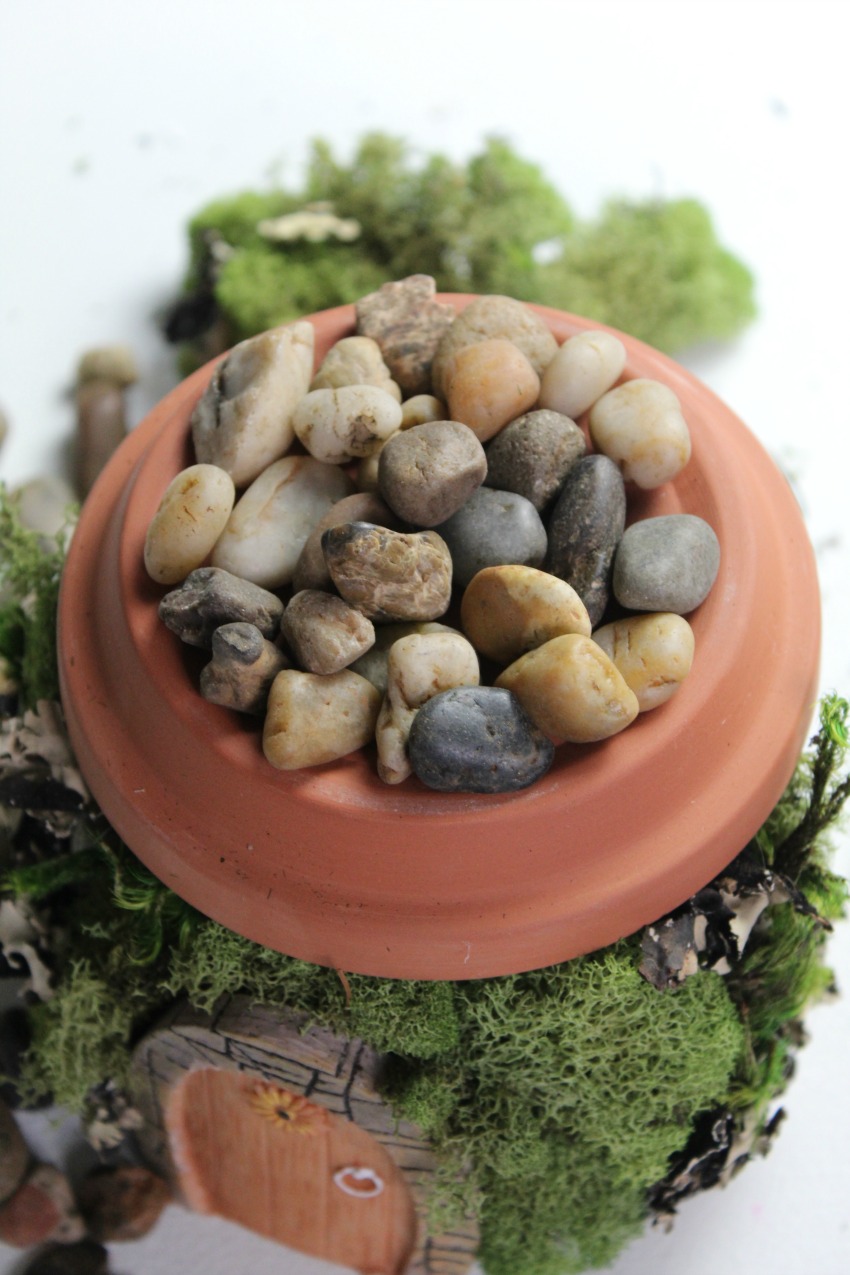
8. Add some glue to the top of the roof. Layer some rocks over the glue. This will create a pebble roof for the house.
9. Continue layering the stones on the top of the roof until it is covered. Add a little moss in the mix if you wish.
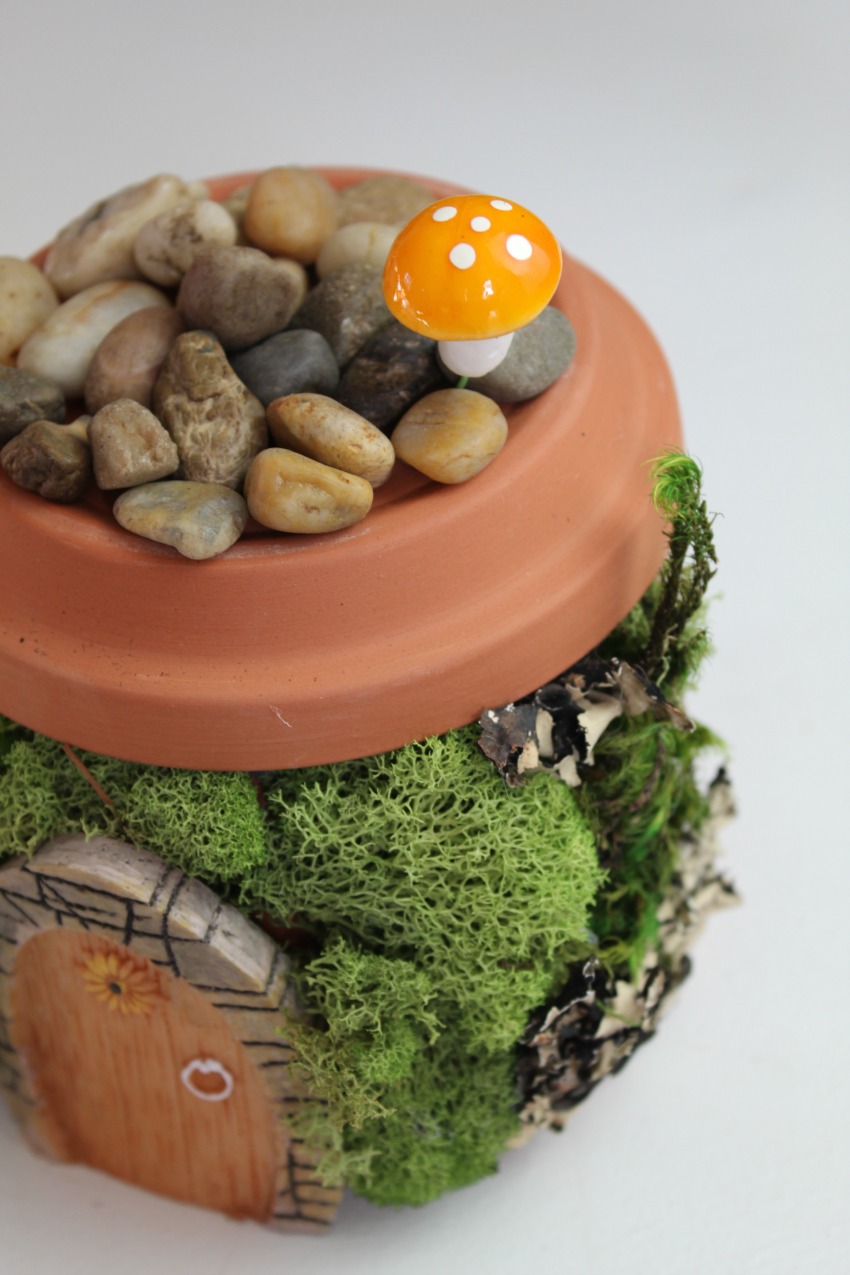
10. Finally, we added a cotton mushroom to the top of the roof to look like a chimney. Just add some glue and press it to the rocks.

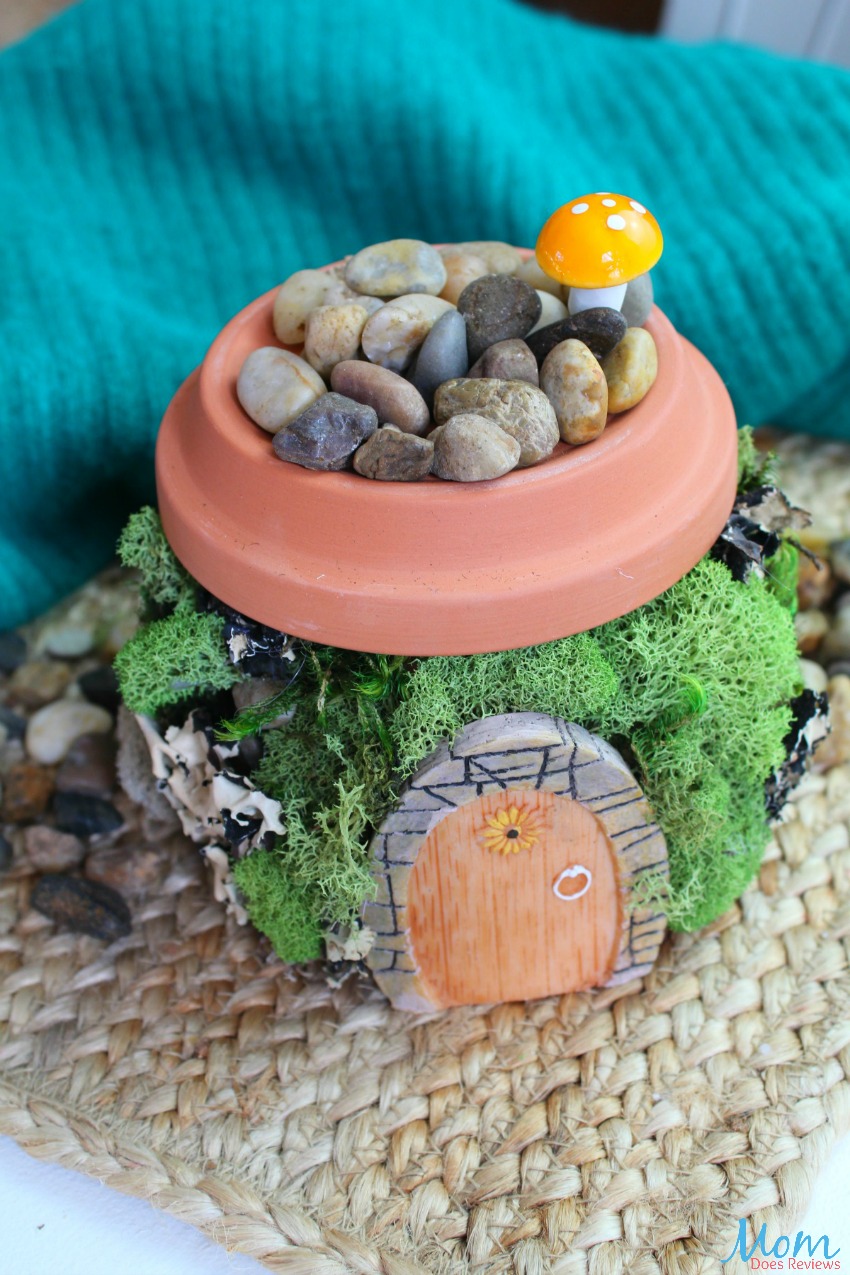
Your fairy garden house is now ready to be displayed.
Print this fun Fairy Garden Home tutorial!

How to Make a Fairy Garden Home
If you have ever wondered where to begin on how to make a Fairy Garden Home, then you are in the right place. We have one of THE MOST adorable Fairy Homes around! This super cute fairy home is easy to make starting with a base of a terra cotta pot and then a few simple supplies. Just follow the step-by-step instructions and throw in a little imagination to make your own beautiful fairy home!
Materials
- terra cotta flower pot
- matching terra cotta flower pot saucer
- super adhesive
- hot glue, glue gun
- decorative crafting moss
- decorative crafting pebbles
- fairy garden door
- fairy garden mushrooms
Instructions
1. Begin by turning the flower pot over. Add a generous amount of adhesive to the top of the pot. Press the saucer to the adhesive so it is facing downward as shown.
2. Hold the saucer in place for a few minutes. It might take up to several hours to cure. During this time you can place a book or heavy object on top of the saucer to help it stick.
3. Once the roof of your fairy house is in place, you can add the door. Add the same super adhesive on the back of the door and press it to the front of the flower pot. Make sure you hold it in place for a few minutes.
4. As soon as the fairy garden door is dry, you can start adding embellishments. This includes the moss, the mushrooms, all of that good stuff that makes it look fairy ready.
5. Using your hot glue, begin gluing the moss to the flower pot. Use a variety of moss types so you have various colors and textures. Before you glue the moss you might want to gently pull it and spread it thin.
6. Start by building the moss up around the door and continue to work your way around the rest of the pot. Just add some glue, press, and hold the moss in place until secure.
7. As we continue to glue the moss in place, we added in a rock or two for detail. You can use your hot glue for this as it seems to work well.
8. Add some glue to the top of the roof. Layer some rocks over the glue. This will create a pebble roof for the house.
9. Continue layering the stones on the top of the roof until it is covered. Add a little moss in the mix if you wish.
10. Finally, we added a cotton mushroom to the top of the roof to look like a chimney. Just add some glue and press it to the rocks.
Your fairy garden house is now ready to be displayed.
Notes
We found all of the supplies we used here at our local Michael's craft store. You can also found find variations of these items at your local dollar store and even Amazon.
Pin it for later!