
This Winged Heart Bookmark craft is perfect for the kids this Valentine’s Day! The bookmarks are easy to make using the step-by-step instructions and make for a fun way for them to keep their place in a book.

With Valentine’s Day around the corner, this Winged Heart Bookmark craft would be fun for the kids. These fun bookmarks are easy to make following the step-by-step instructions and will be a fun addition for their books. This craft would be great for the kids at home or for a classroom activity!
While not Valentine-y, you may also like our DIY Minion Hug Bookmarks or our Dollar Store Monster Bookmark Craft.

Winged Heart Bookmark Craft
Supplies:
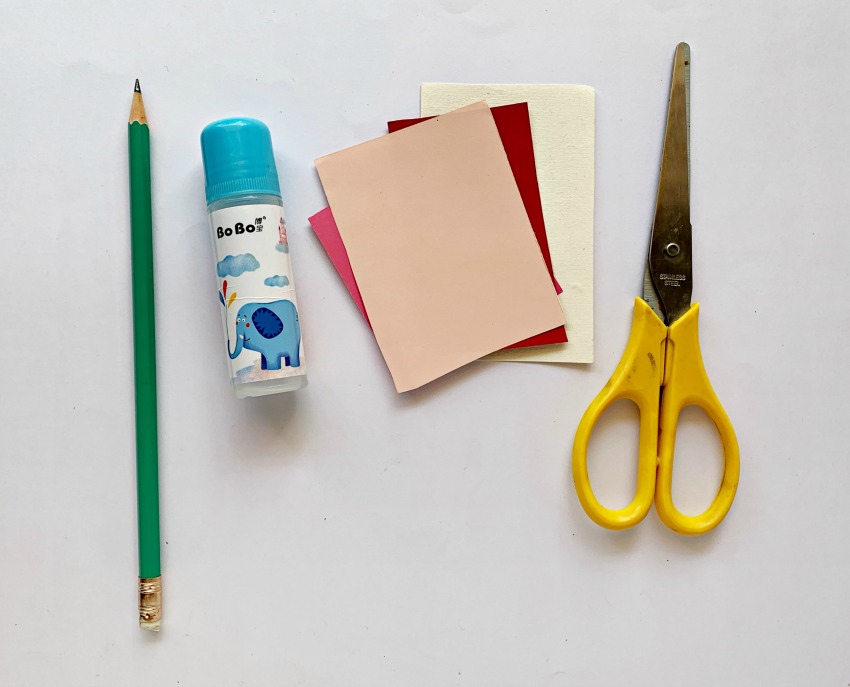
Origami Craft Paper
Colorful craft Paper
Scissors
Paper Glue
Colorful Marker Pens
Ruler
Pencil

Print the Winged Heart Bookmarks template.
How to make these fun Winged Heart Bookmarks:

Step 1:
To make the origami bookmark, first, you need to select an origami paper for your bookmark.
This origami square craft paper is 5 x 5 inches.
Place the paper diagonally.
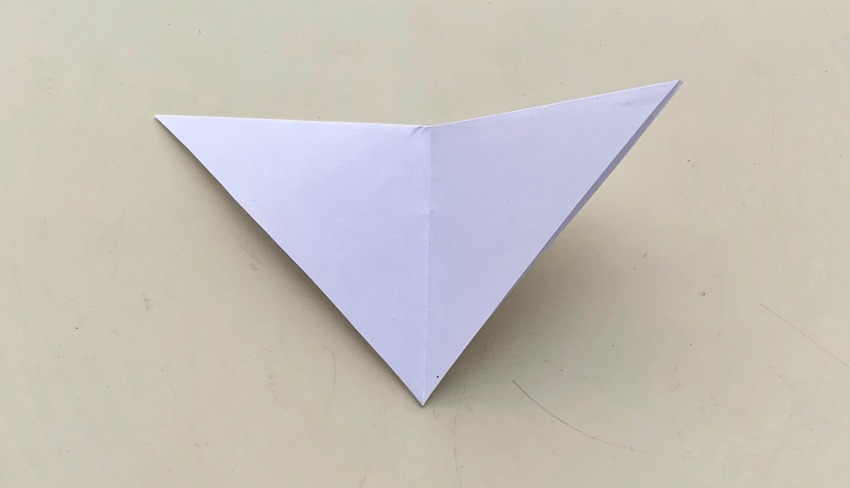
Step 2:
To fold the paper into a triangle, bring the top pointed corner downwards to the bottom pointed corner. Fold it there.
Then fold the triangle in half vertically. This will create a crease on the middle of the triangular piece.

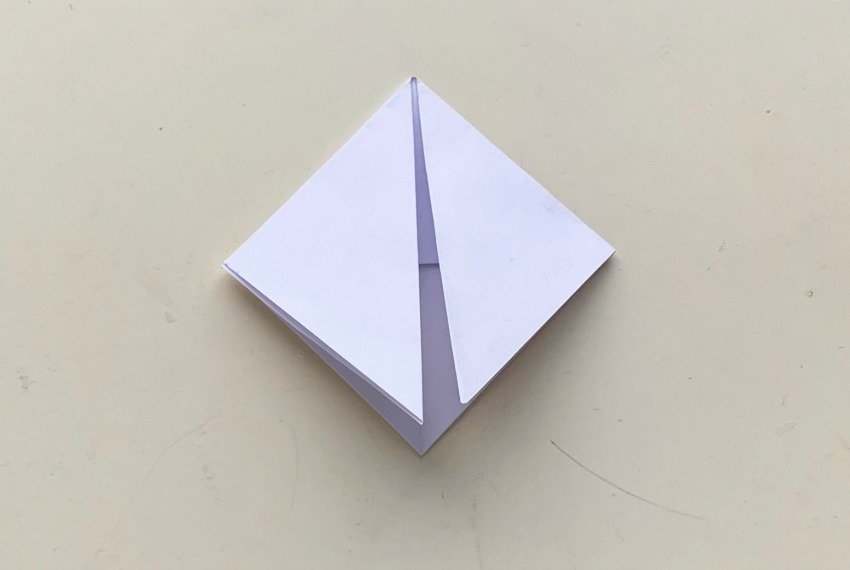
Step 3:
Now bring both left and right corner downwards to the point.

Step 4:
Open up the fold.

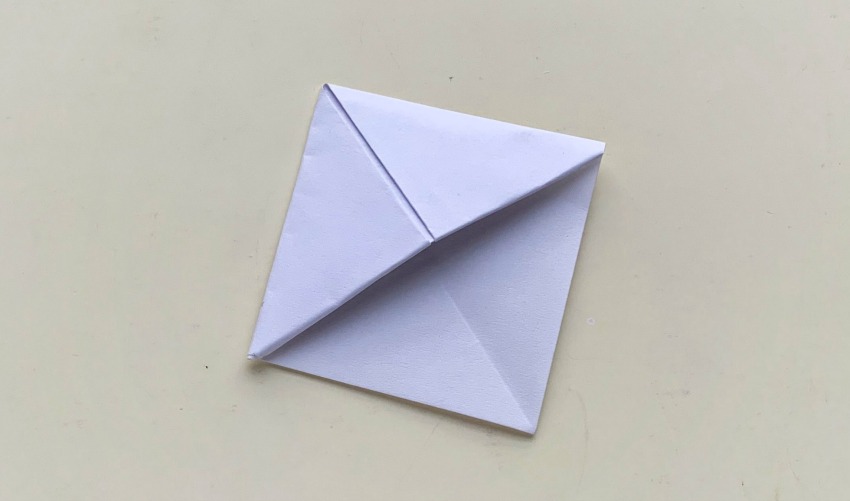
Step 5:
Bring the bottom pointed flap upwards and fold it along the triangle crease we made.
Step 6:
Then once again, fold both left and right corners downwards to the bottom point of the triangle.
Step 7:
Tuck in the left and right corners into the pocket upwards.

Step 8:
Now use the templates to cut out the heart and the wings for the bookmark.

Step 9:
Use a colorful pen to draw little details on the wings for the bookmark.

Step 10:
Then glue the wings on the back of the heart to finish it off.

Step 11:
Now for the final step, glue the winged heart on the origami bookmark and allow it to dry.

Print this fun Winged Heart Bookmarks craft!

Winged Heart Bookmark Craft
This Winged Heart Bookmark craft is perfect for the kids this Valentine's Day! The bookmarks are easy to make using the step-by-step instructions and make for a fun way for them to keep their place in a book.
Materials
- Origami Craft Paper
- Colorful craft Paper
- Scissors
- Paper Glue
- Colorful Marker Pens
- Ruler
- Pencil
Instructions
Step 1:
To make the origami bookmark, first, you need to select an origami paper for your bookmark.
This origami square craft paper is 5 x 5 inches.
Place the paper diagonally.
Step 2:
To fold the paper into a triangle, bring the top pointed corner downwards to the bottom pointed corner. Fold it there.
Then fold the triangle in half vertically. This will create a crease on the middle of the triangular piece.
Step 3:
Now bring both left and right corner downwards to the point.
Step 4:
Open up the fold.
Step 5:
Bring the bottom pointed flap upwards and fold it along the triangle crease we made.
Step 6:
Then once again, fold both left and right corners downwards to the bottom point of the triangle.
Step 7:
Tuck in the left and right corners into the pocket upwards.
Step 8:
Now use the templates to cut out the heart and the wings for the bookmark.
Step 9:
Use a colorful pen to draw little details on the wings for the bookmark.
Step 10:
Then glue the wings on the back of the heart to finish it off.
Step 11:
Now for the final step, glue the winged heart on the origami bookmark and allow it to dry.
Pin it for later!
