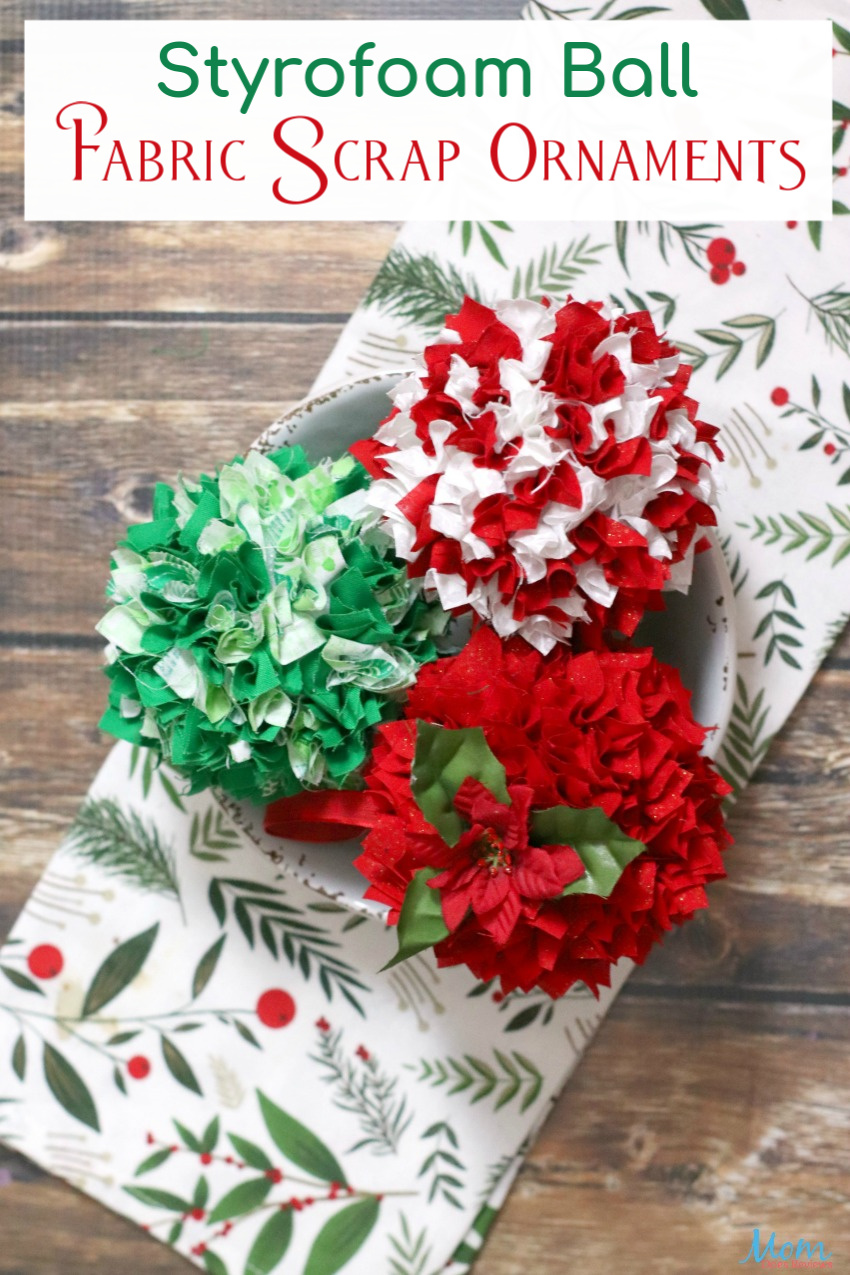
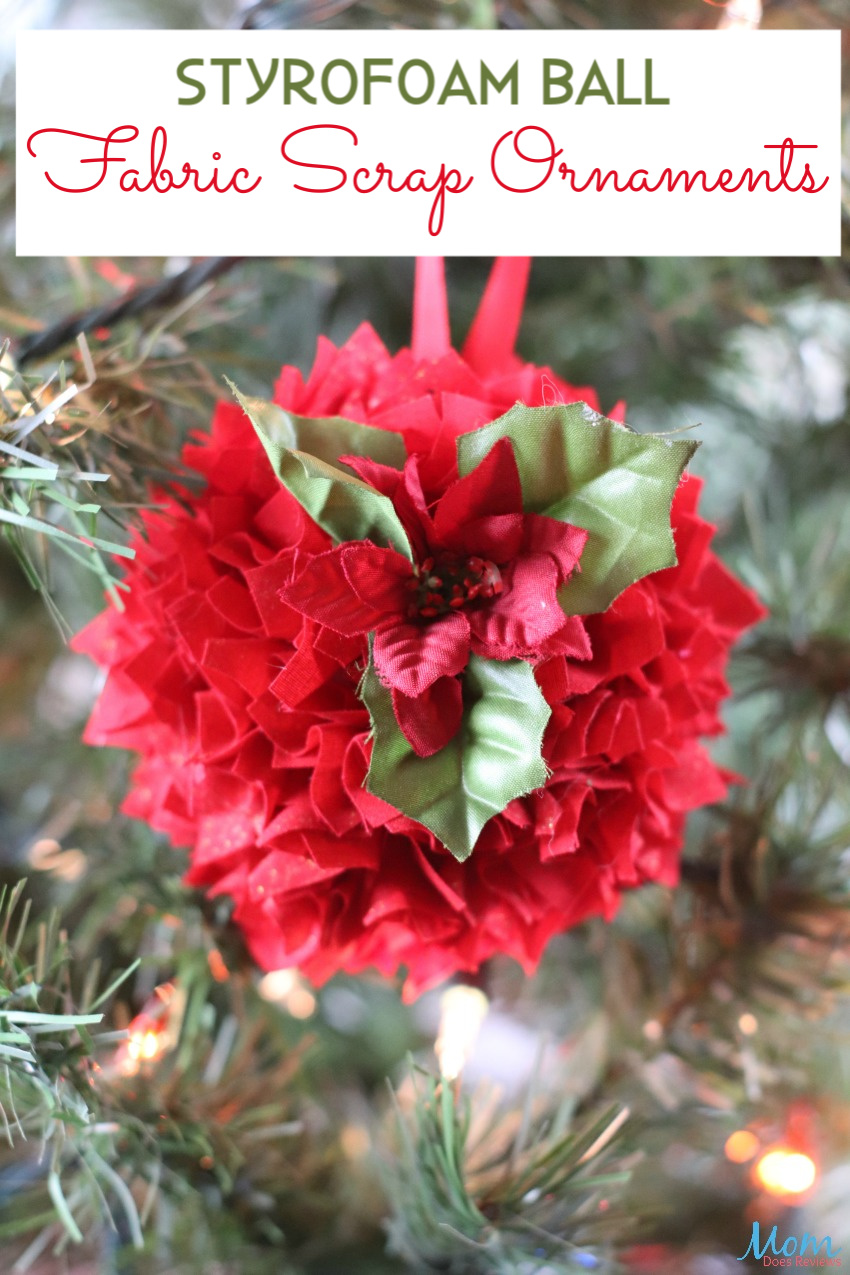
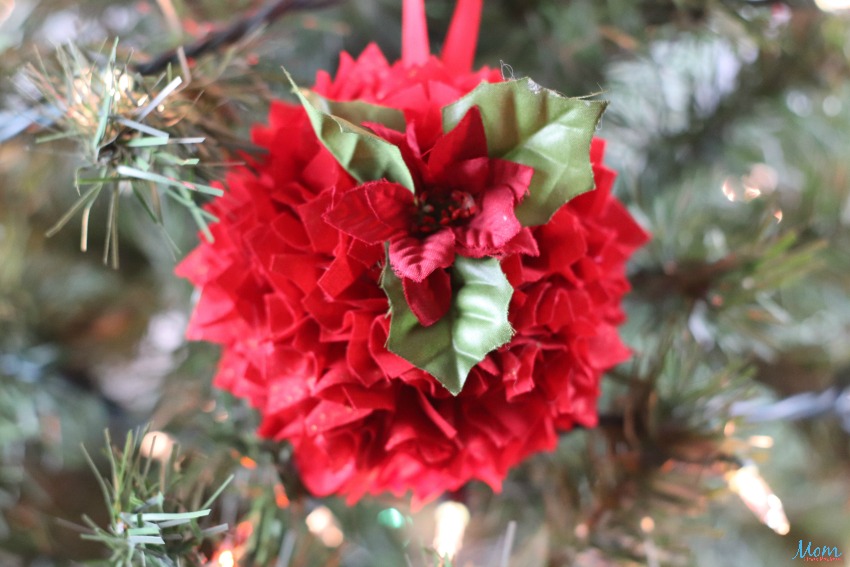
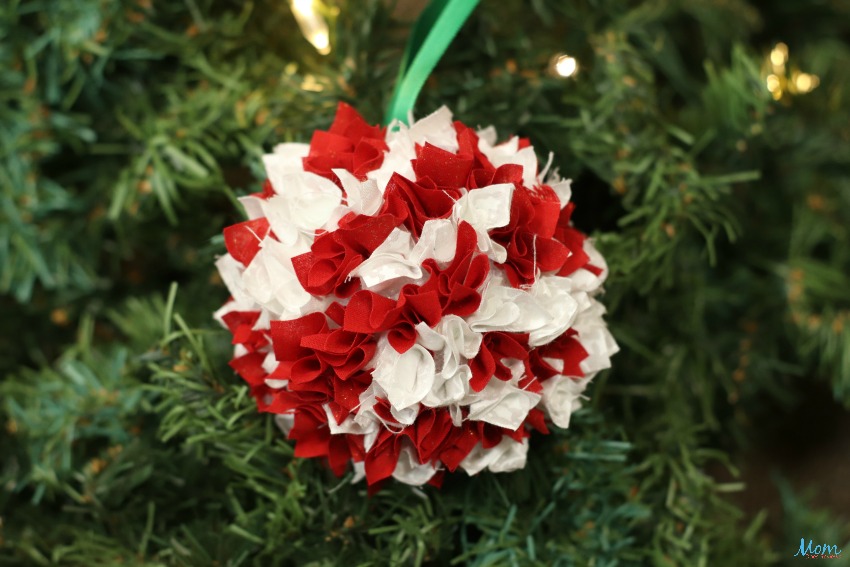
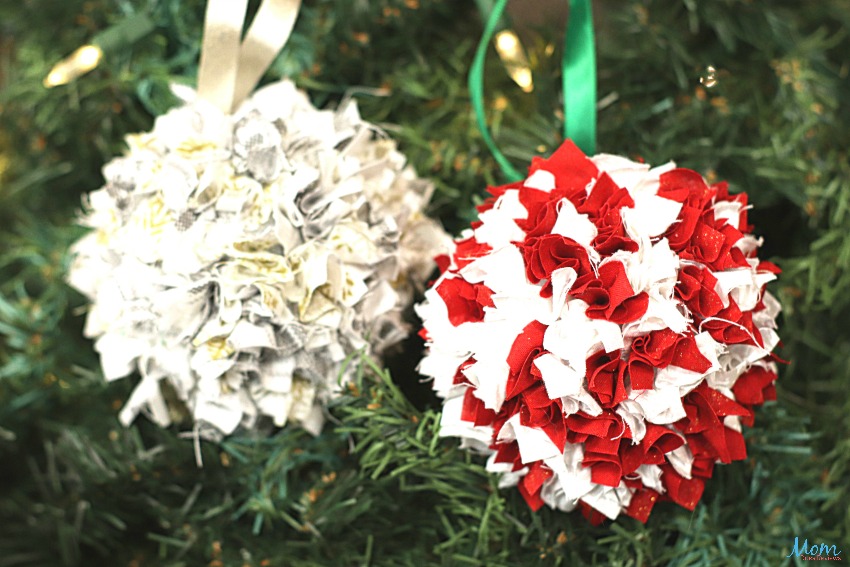
If you love having homemade Christmas ornaments for the tree then you are in for a real treat today. These beautiful Styrofoam Ball Fabric Scrap Ornaments will look amazing on your tree! They require very few materials and are easy to make following the step-by-step instructions. We even have a video if you are a visual person like I am 🙂
You may also like these Simple Patchwork Christmas Ornaments. These fun ornaments also begin with a styrofoam ball and turn out adorable! They look somewhat vintage, which gives them even more appeal! And to add the “smell” of Christmas, you simply must make a few of these DIY Cinnamon Ornaments!
Supplies Needed:
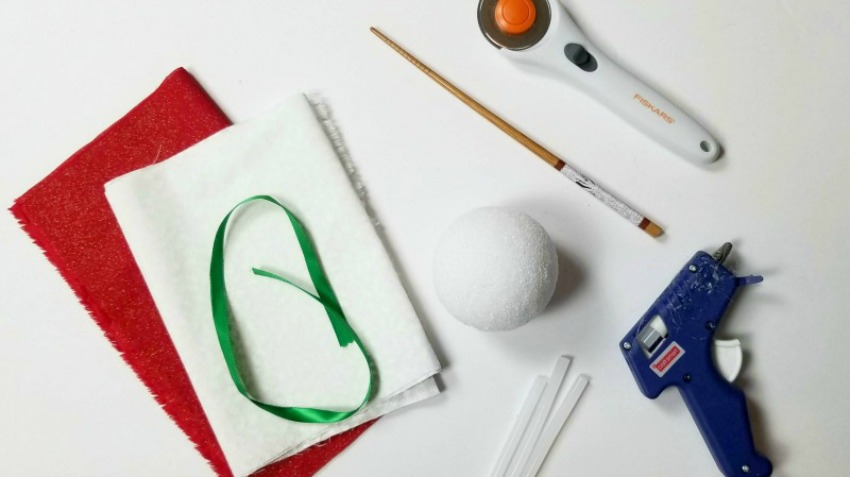
1/8 yard of cotton fabric
2 – 6” Styrofoam balls
Scissors or rotary cutter
Glue Gun or Floral pins
Ribbon
Wooden chopstick or similar item to poke the fabric into the Styrofoam
Each 1/8 yard of fabric will cover two 6” balls.
Instructions:
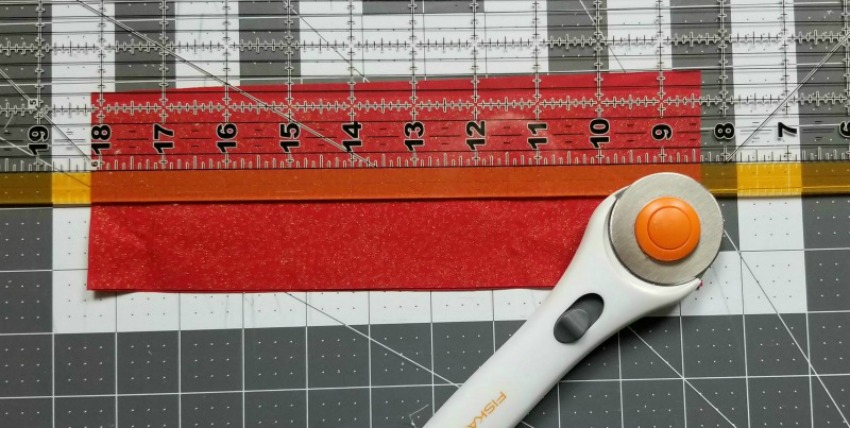
Step 1: Cut your fabric into 2” squares. I used a variety of color combinations. If you do this, choose 1/8 yard of each color you want.
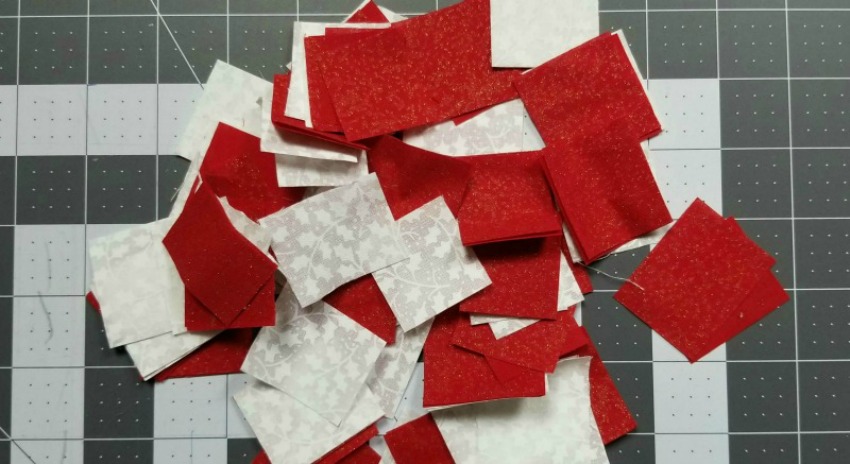
Step 2: Make a pile of your squares.
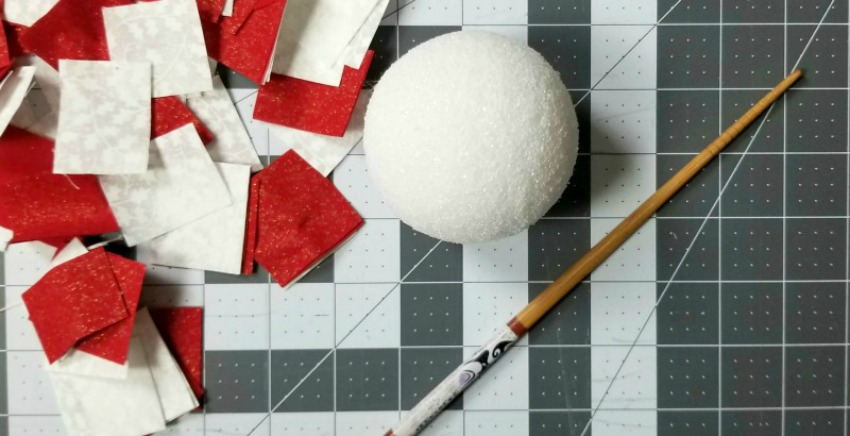
Step 3: Grab your fabric squares, Styrofoam balls and chopstick. If you are using the floral pins, grab one of those too!
Step 4: If you are using the floral pin to hold down your ribbon, add that into the top of the ball, but don’t push it all the way in. If you are using a glue gun, you can wait until the end for that step.
Check out the Video!

Step 5: Once the ball is filled, you want to attach your ribbon. If you are using the floral pin, loop a length of the ribbon through and tie off. If you are using the glue gun, tie off the ribbon and glue onto the ball.
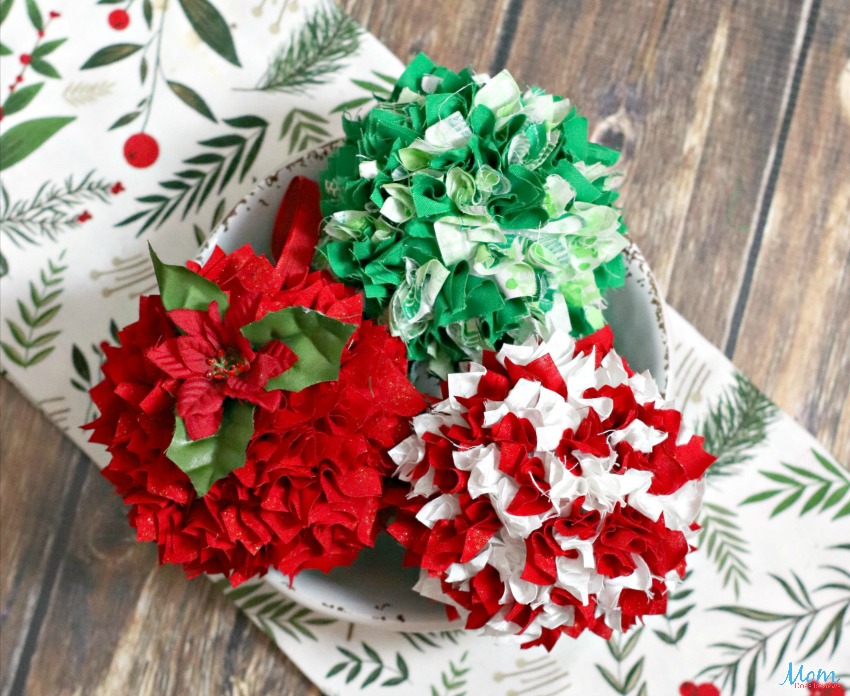
We made about 6 balls in less than an hour. We watched TV and just made the balls! It was super easy and a bit relaxing!
Print this fun Styrofoam Ball Fabric Scrap Ornaments Craft!

Styrofoam Ball Fabric Scrap Ornaments Craft
These beautiful Styrofoam Ball Fabric Scrap Ornaments will look amazing on your tree! They require very few materials and are easy to make following the step-by-step instructions.
Materials
- 1/8 yard of cotton fabric
- 2 – 6” Styrofoam balls
- Scissors or rotary cutter
- Glue Gun or Floral pins
- Ribbon
- Wooden chopstick or similar item to poke the fabric into the Styrofoam
- Each 1/8 yard of fabric will cover two 6” balls.
Instructions
Step 1: Cut your fabric into 2” squares. I used a variety of color combinations. If you do this, choose 1/8 yard of each color you want.
Step 2: Make a pile of your squares.
Step 3: Grab your fabric squares, Styrofoam balls and chopstick. If you are using the floral pins, grab one of those too!
Step 4: If you are using the floral pin to hold down your ribbon, add that into the top of the ball, but don’t push it all the way in. If you are using a glue gun, you can wait until the end for that step.
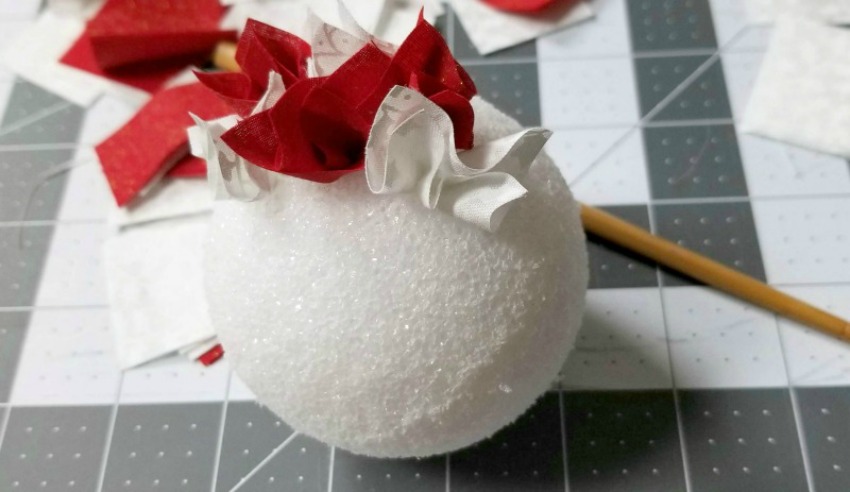
Take a square of fabric and using the pointed end of the chopstick, aim it into the middle of the square of fabric and push into the foam ball. You will push it in about 1/3 of the way in. If you push it in too far, you won’t get the fullness you want, but if you don’t push it in enough, the pieces will fall out. You will quickly get into the rhythm and will be able to “feel” the right depth to push the fabric in.
Step 5: Once the ball is filled, you want to attach your ribbon. If you are using the floral pin, loop a length of the ribbon through and tie off. If you are using the glue gun, tie off the ribbon and glue onto the ball.
Notes
We made about 6 balls in less than an hour. We watched TV and just made the balls! It was super easy and a bit relaxing!
Pin it for later!