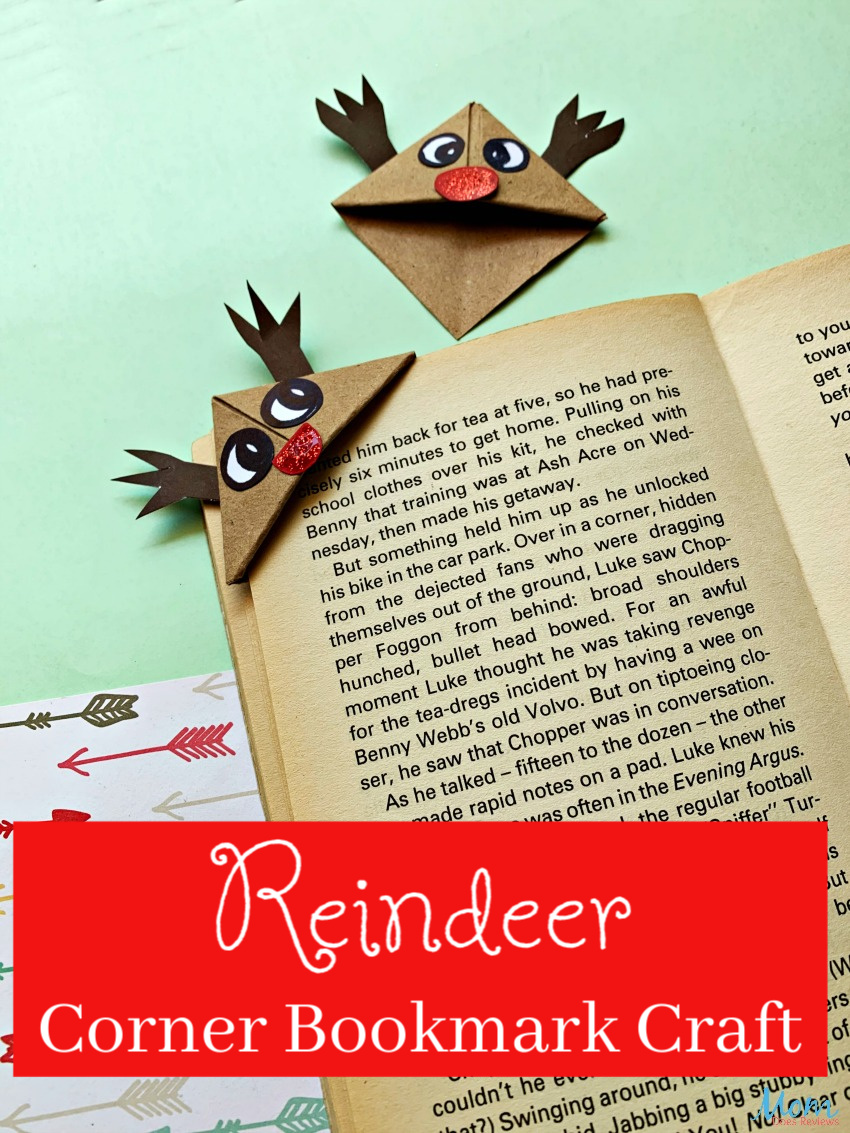
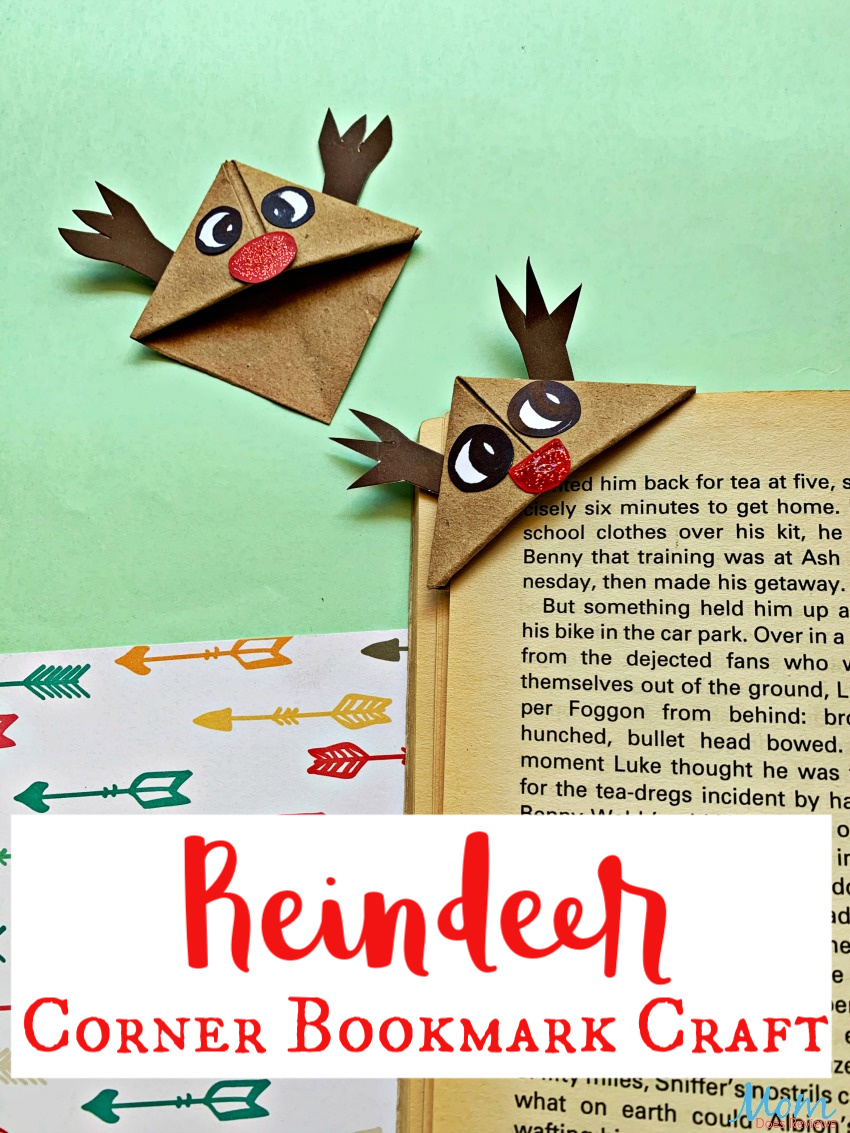
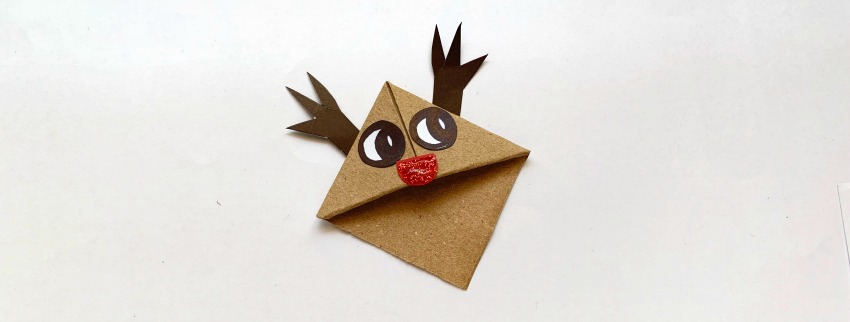
With Christmas right around the corner and Rudolf on their minds, the kids will have fun making this easy Reindeer Corner Bookmark craft. It is a great craft for a snowy afternoon or for a classroom activity. This easy craft has easy step-by-step instructions that are super easy to follow and turns out so darn cute! It is another great craft for encouraging kids to read!
If you want another fun bookmark craft, be sure and check out these fun DIY Minion Hug Bookmarks. While not holiday-related, the kids will love them just as much!
Supplies:
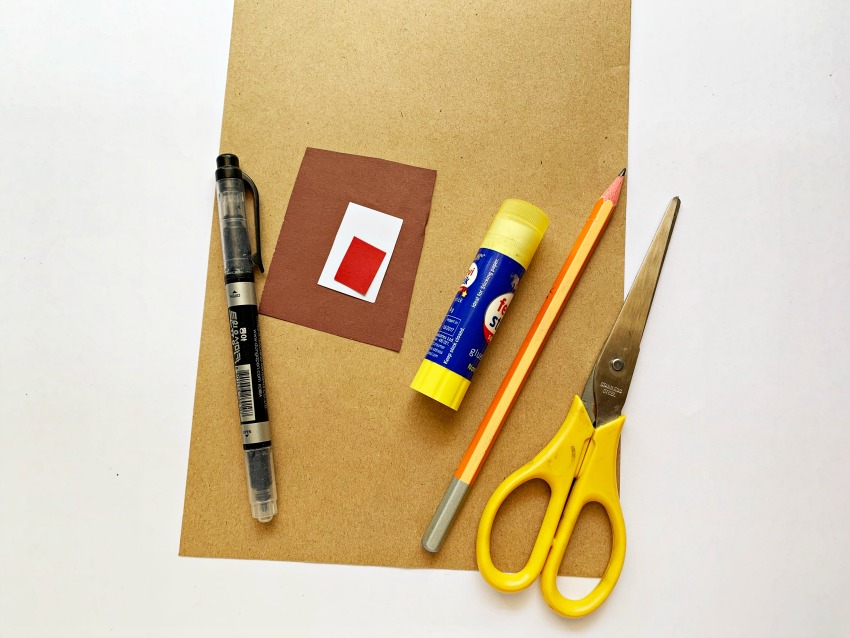
Brown paper (dark and light shades)
White Paper and Red paper
Black Marker Pen
Scissors
Paper Glue
Glitter
Pencil
Ruler
Print the Reindeer Corner Bookmark Template HERE
Instructions:
Step 1:
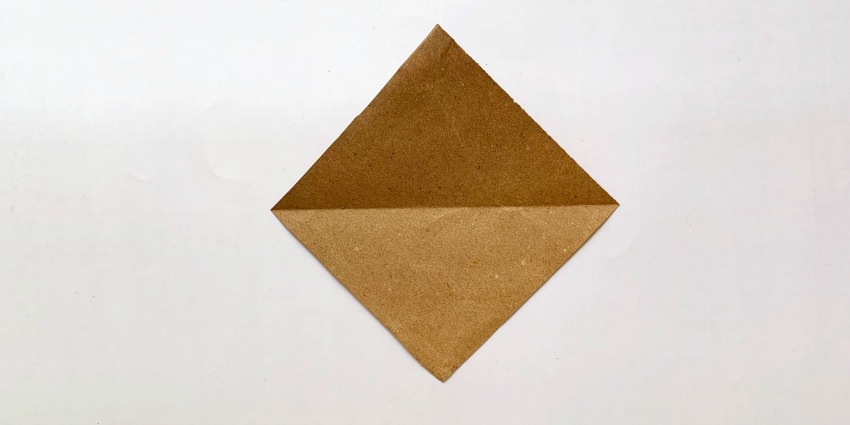
Take a square piece of brown paper and place it diagonally.
Step 2:
Then bring the top corner of the square brown paper and bring it towards the opposite corner. Now fold it there.
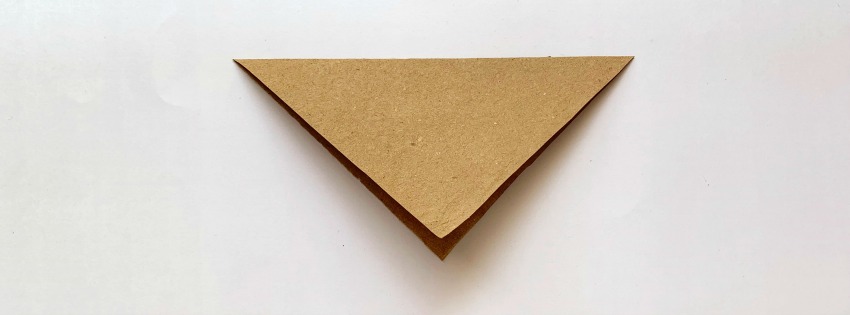
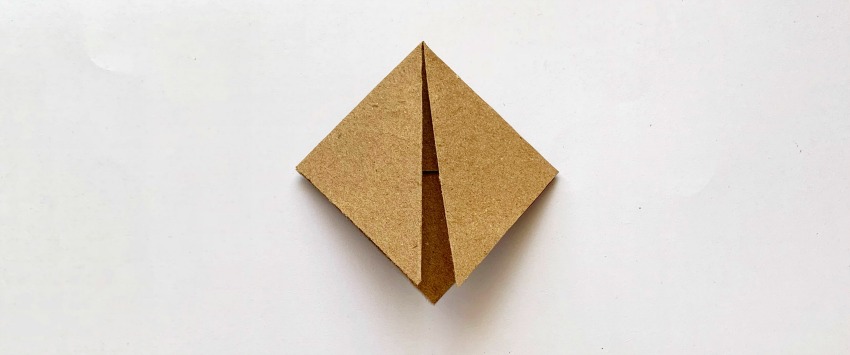
Step 3:
Now fold the triangle in half, then open up the fold.
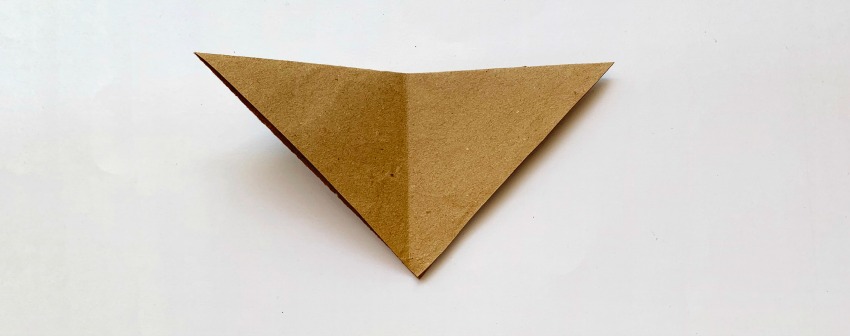
Step 4:
Bring the upper flap from the triangle upwards, and place the point on the middle crease we created earlier.
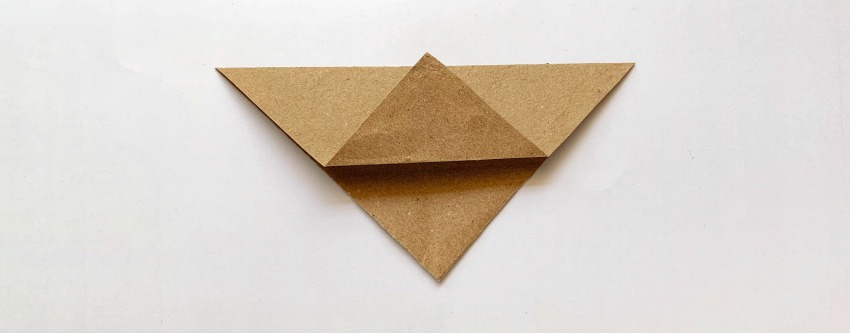
Step 5:
Now bring both left and right points towards the bottom point, and fold them there.
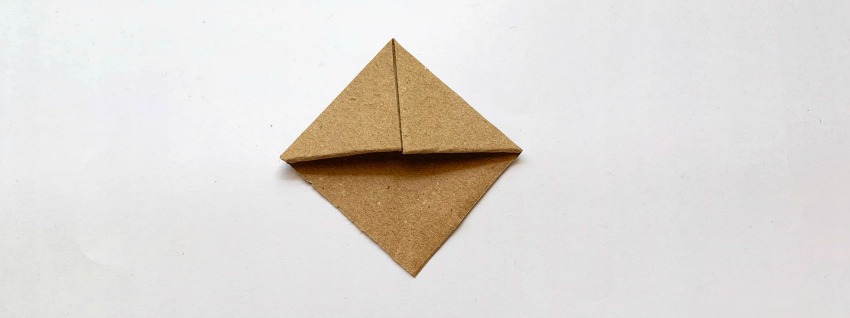
Step 6:
Tuck in the flaps inside the pocket on top.
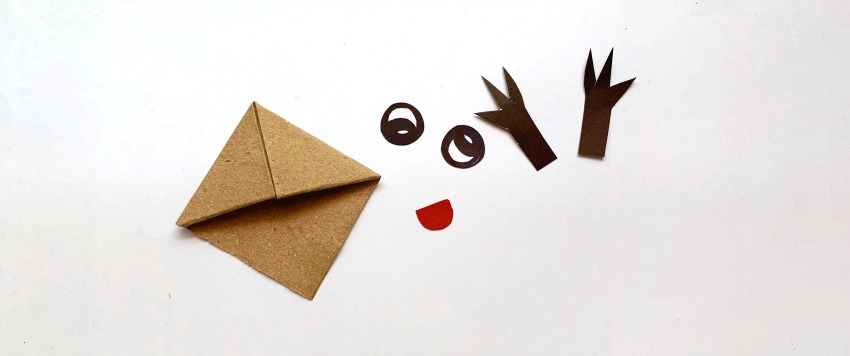
Step 7:
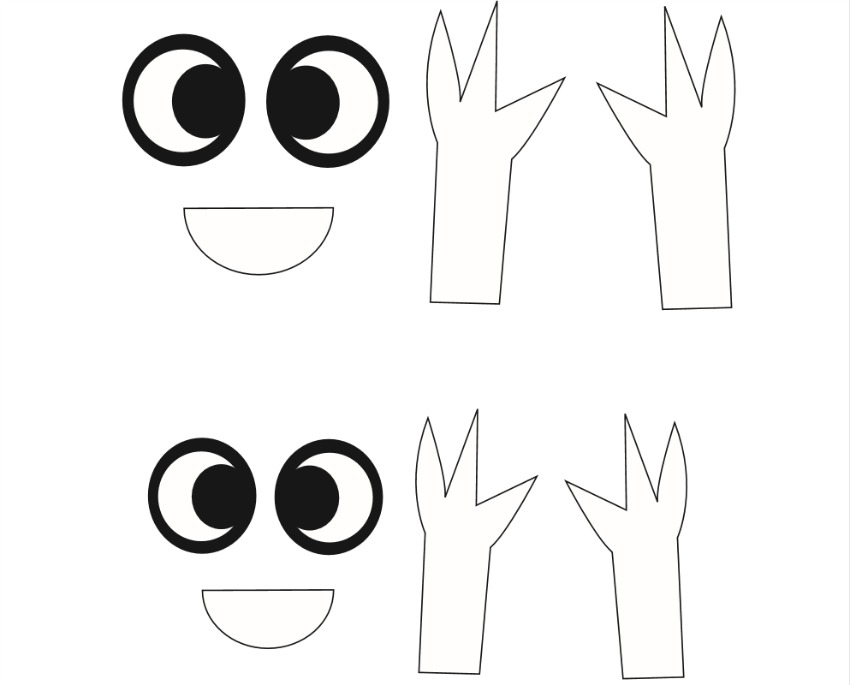
Use the templatestemplates to cut out the pieces for the reindeer’s face.
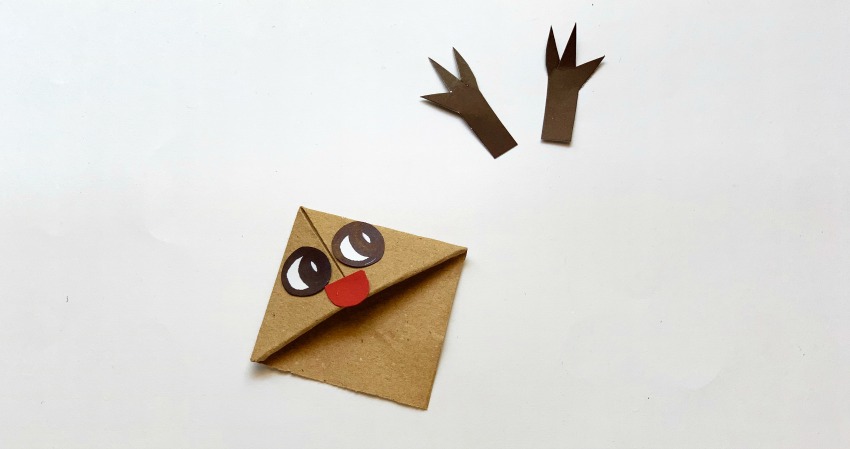
Step 8:
First, glue the eyes and nose to the bookmark we made.
Step 9:
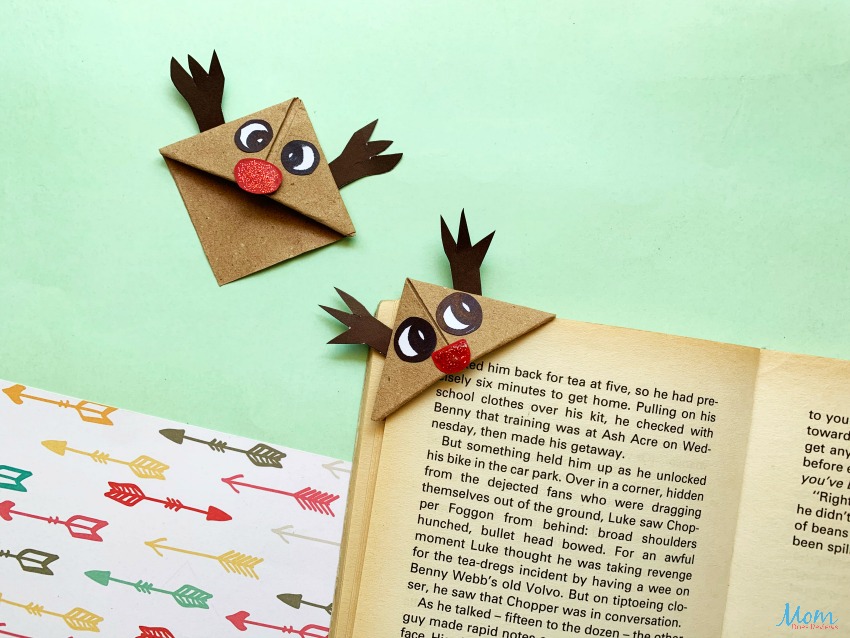
Now finish it off by glueing the reindeer’s horn on the top.
Print this fun Reindeer Corner Bookmark Craft!

Reindeer Corner Bookmark Craft
This fun Reindeer Corner Bookmark craft is fun AND easy! It comes with step-by-step instructions and turns out so darn cute!
Materials
- Brown paper (dark and light shades)
- White Paper and Red paper
- Black Marker Pen
- Scissors
- Paper Glue
- Glitter
- Pencil
- Ruler
Instructions
Step 1:
Take a square piece of brown paper and place it diagonally.
Step 2:
Then bring the top corner of the square brown paper and bring it towards the opposite corner. Now fold it there.
Step 3:
Now fold the triangle in half, then open up the fold.
Step 4:
Bring the upper flap from the triangle upwards, and place the point on the middle crease we created earlier.
Step 5:
Now bring both left and right points towards the bottom point, and fold them there.
Step 6:
Tuck in the flaps inside the pocket on top.
Step 7:
Use the templates to cut out the pieces for the reindeer's face.
Step 8:
First, glue the eyes and nose to the bookmark we made.
Step 9:
Now finish it off by glueing the reindeer’s horn on the top.
Pin it for later!