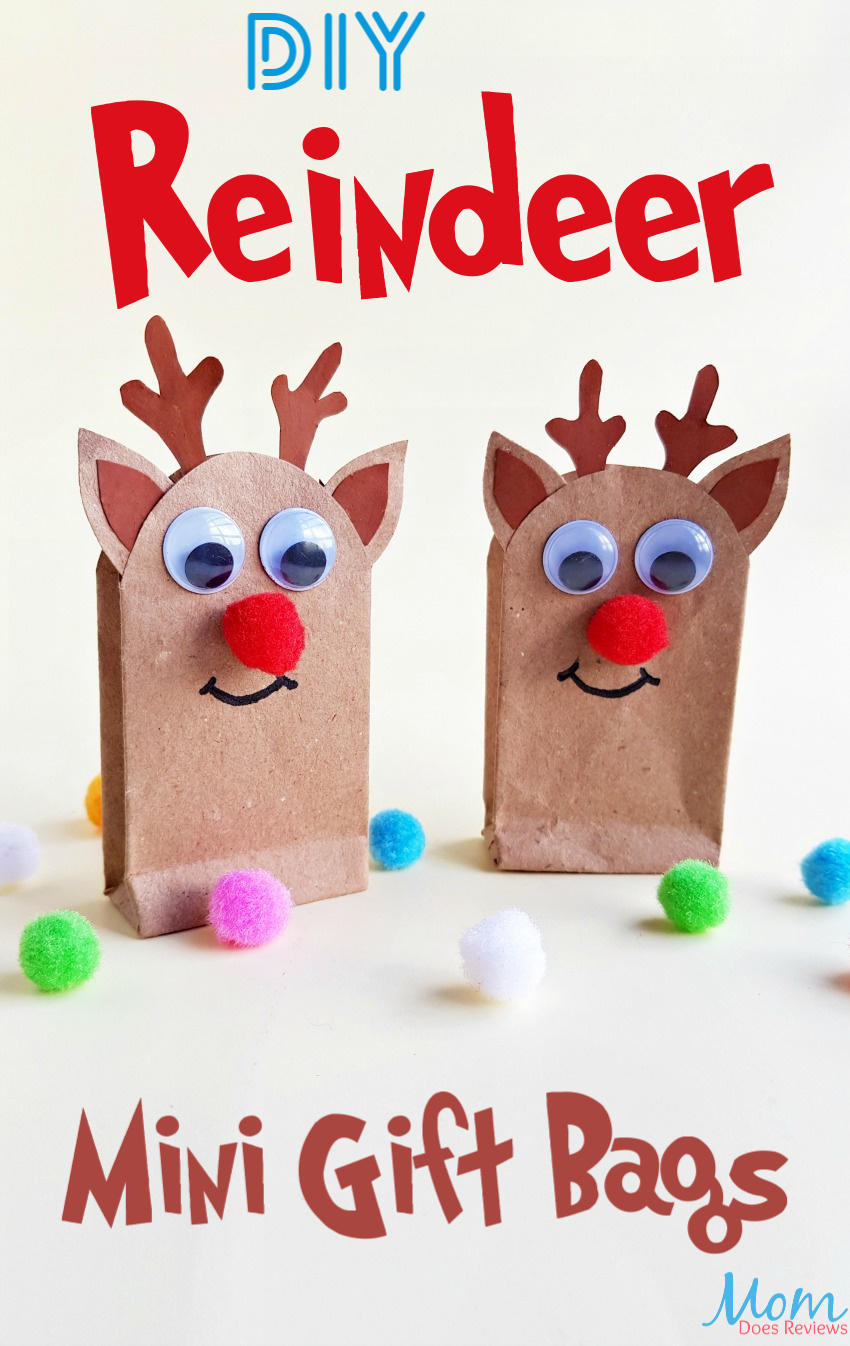
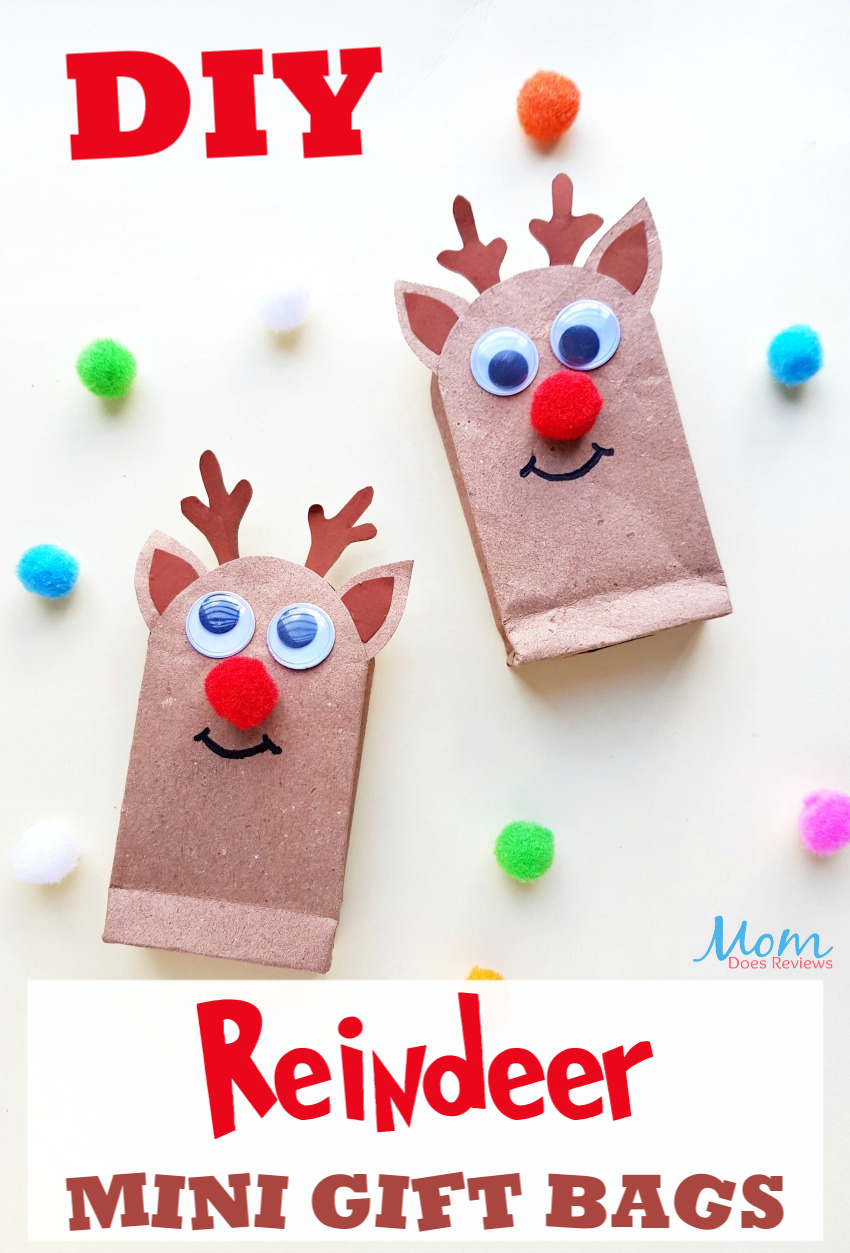
All kids love doing fun Christmas crafts and boy do we have a fun one for you today! These adorable DIY Reindeer Gift Bags are the perfect snowy afternoon or classroom craft! This fun craft requires very few materials and can be completed in one sitting, making it the perfect Christmas craft for kids!
If you love quick and easy crafts, then be sure and check out our Candy Jar Ornaments! The kids will love the idea of making ornaments for the tree!
List of Supplies:

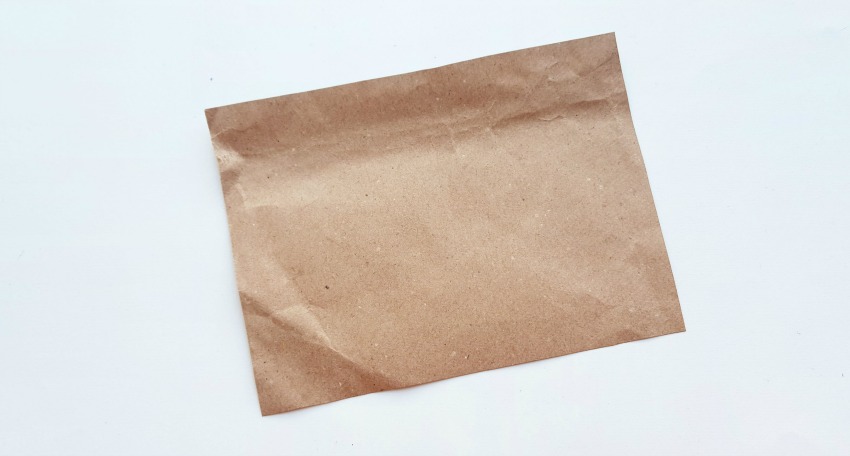
Brown paper
Dark brown craft paper
Red-colored pompom
Googly eyes
Pencil
Scissors
Craft glue
Instructions:
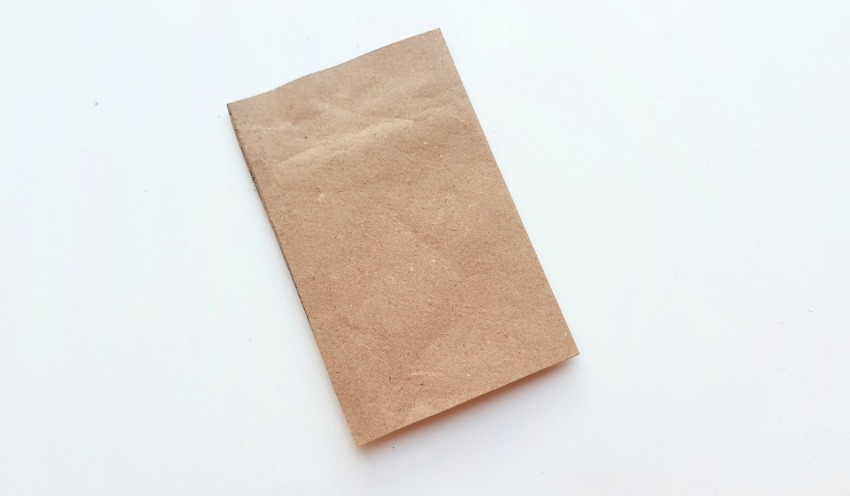
Step -1:
I’ve cut a brown paper of 8.5 inches X 5 inches to make the reindeer gift bags, but you can choose any size you want but make sure the ratio is similar to mine.
Step -2:
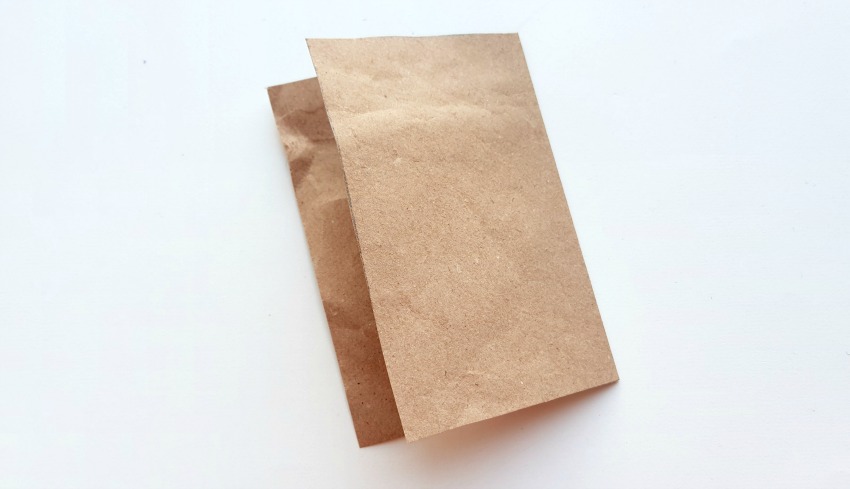
Leaving the 0.5 inches along the longer side, fold the 8 inches part into half.
Step – 3:
Apply glue along the extra 0.5 inches part and fold the glued part to attach it with the other open end of the folded brown paper.
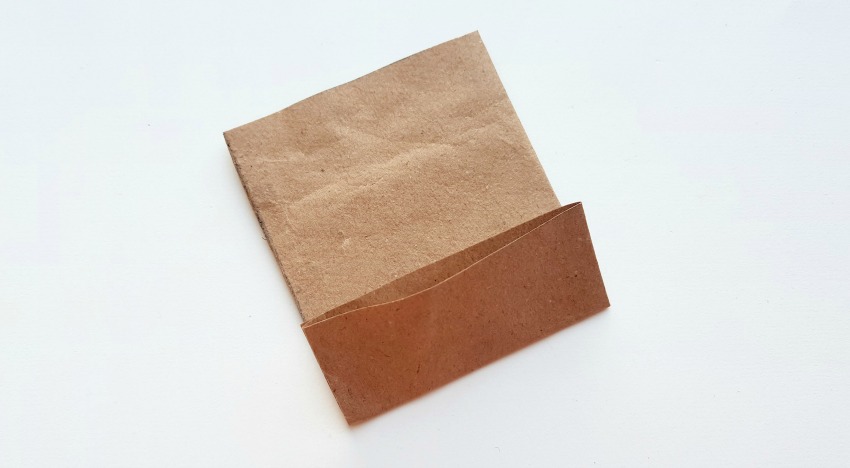
Step – 4:
Fold up 2 inches (of the 5 inches side) from any 1 open ends of the paper.
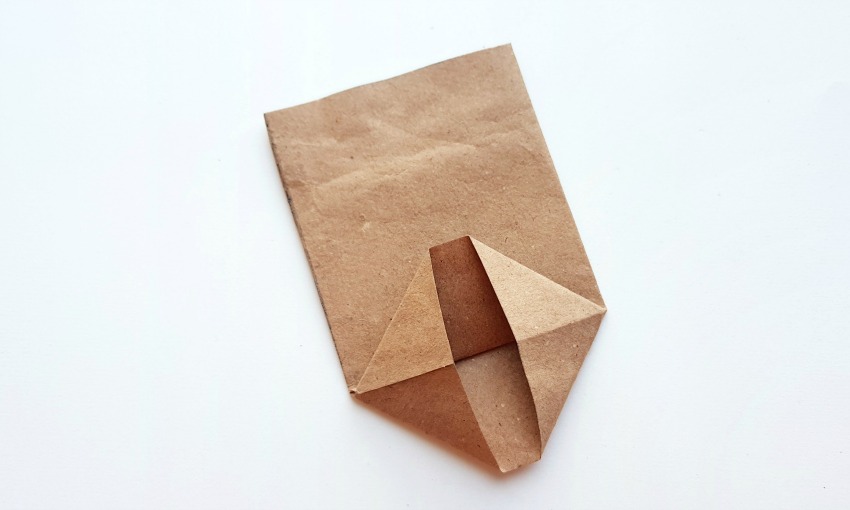
Step – 5:
Open up the folded-up part and nicely flatten the 2 sides evenly. This will form 2 open sides, 1 on the top and 1 on the bottom. Also, notice the line along the middle.
Step – 6:
Fold down the top open end towards the middle line and overlapping the middle line by a cm.
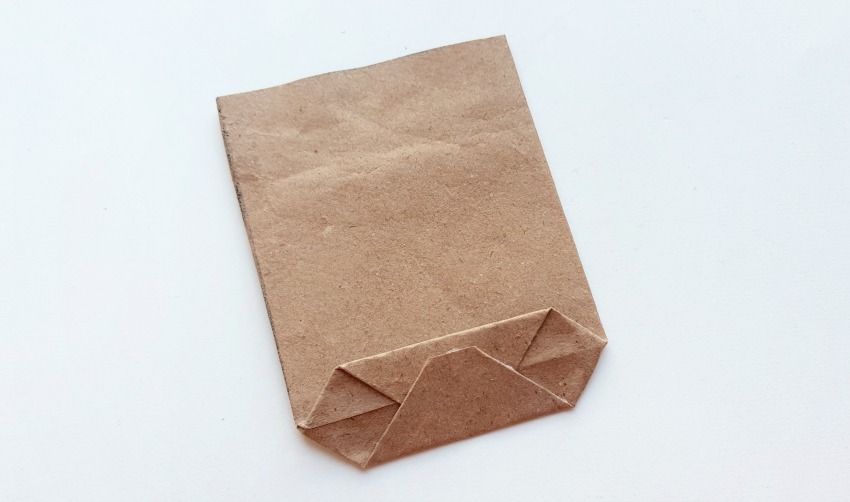
Step – 7:
Now, fold up the bottom side of the open end and overlap the middle line by a cm again. Both sides will overlap each other. Apply glue on the overlapped parts to attach them. This will secure the bottom side of the paper bag.
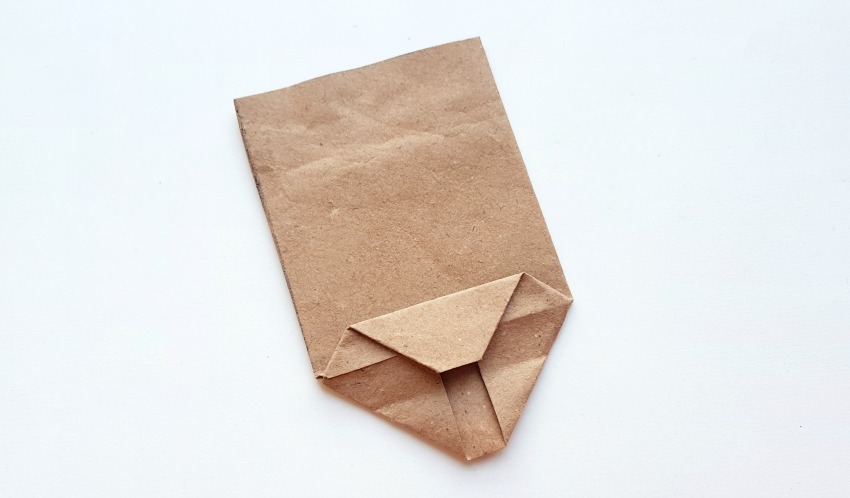
Step – 8:
Notice the 2 square parts on both sides of the bottom. Create folds on both sides of the paper bag by using the opposite corners of the squares as a guide.
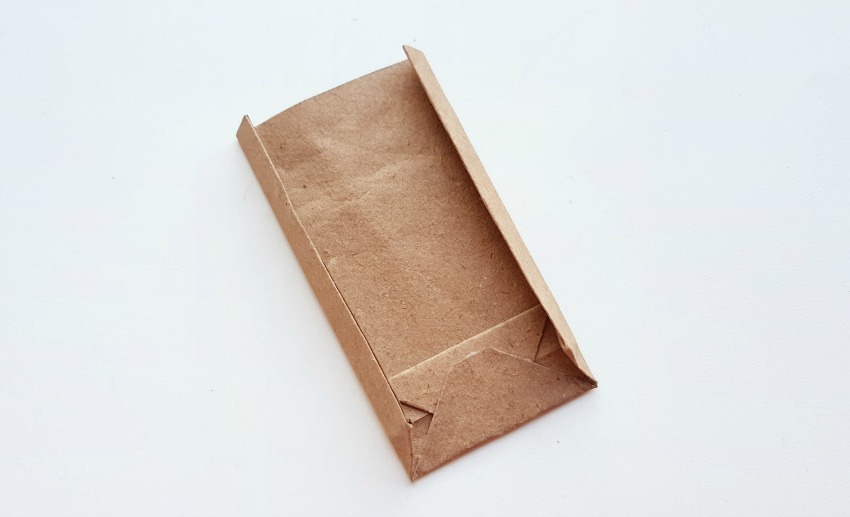
Step – 9:
Now open up the paper bag from its flattened position.
Step – 10:
Fold in the side middle lines of the paper bag and flatten the bottom side of the bag.
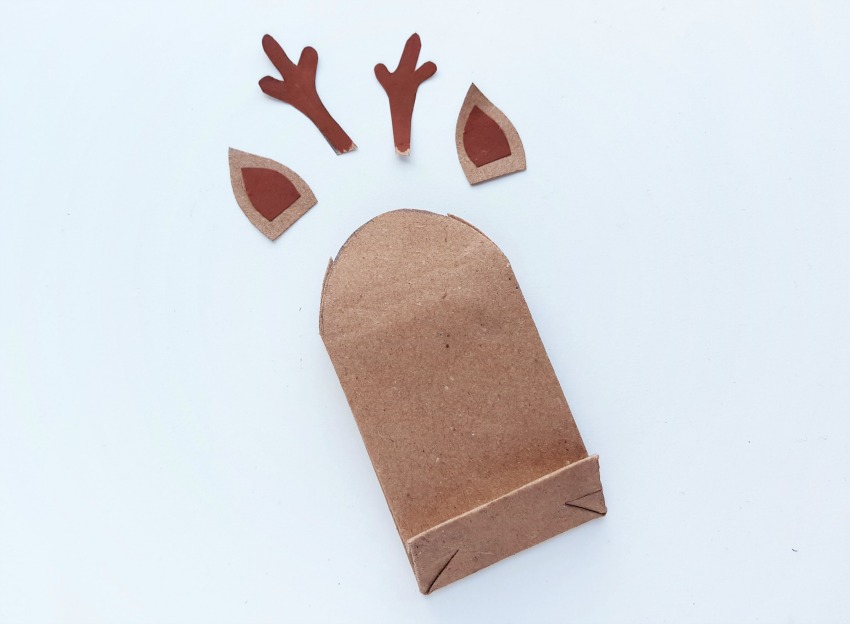
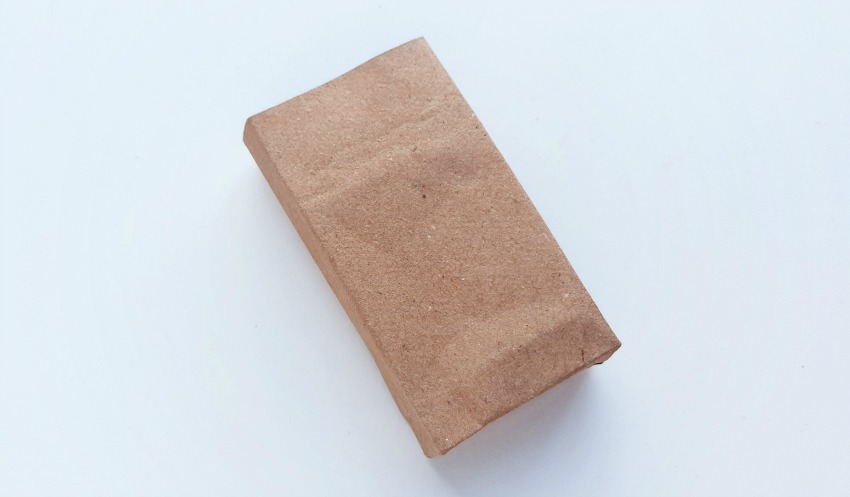
Step – 11:
Use scissors to cut a semi-circular shape on the top side of the paper bag. Cut out ear patterns (2 inner ear parts from dark brown paper and 2 outer ear parts from light brown parts), and 2 horn patterns from dark brown paper.
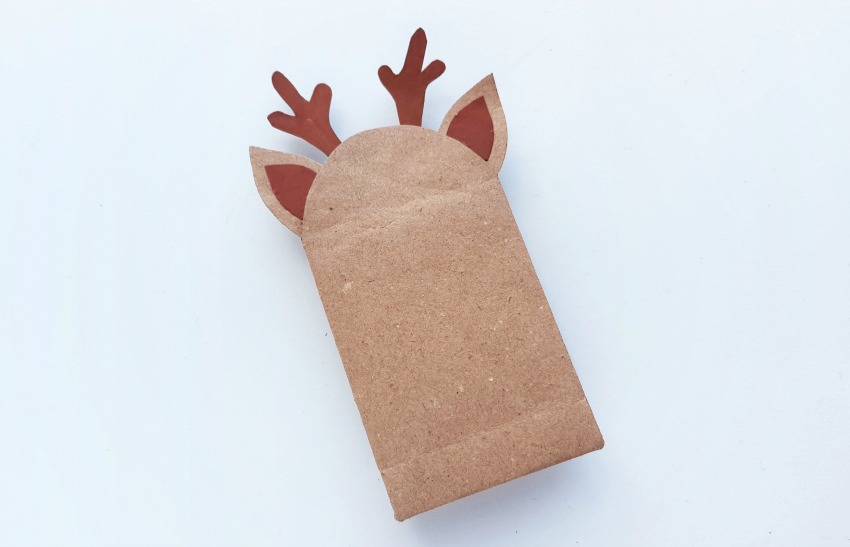
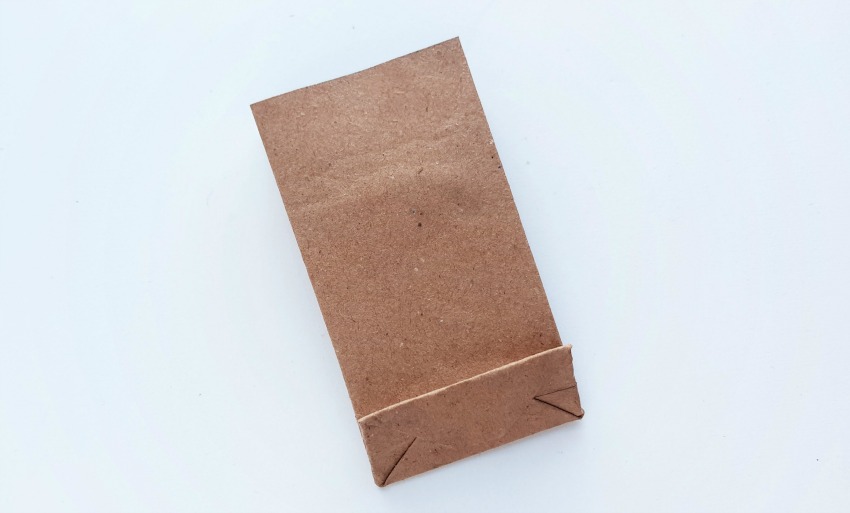
Step – 12:
Attach the horns and ears along the top end (front side) of the paper bag.
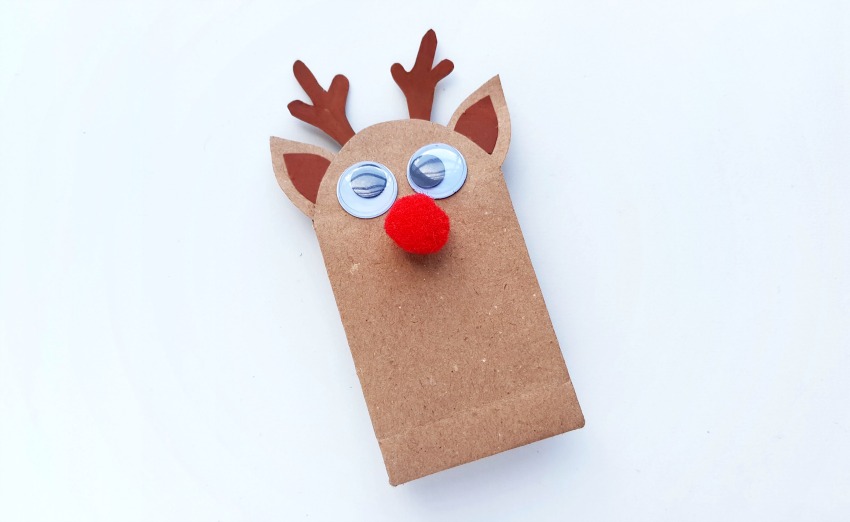
Step – 13:
Attach the googly eyes and pompom nose to complete the reindeer bag.
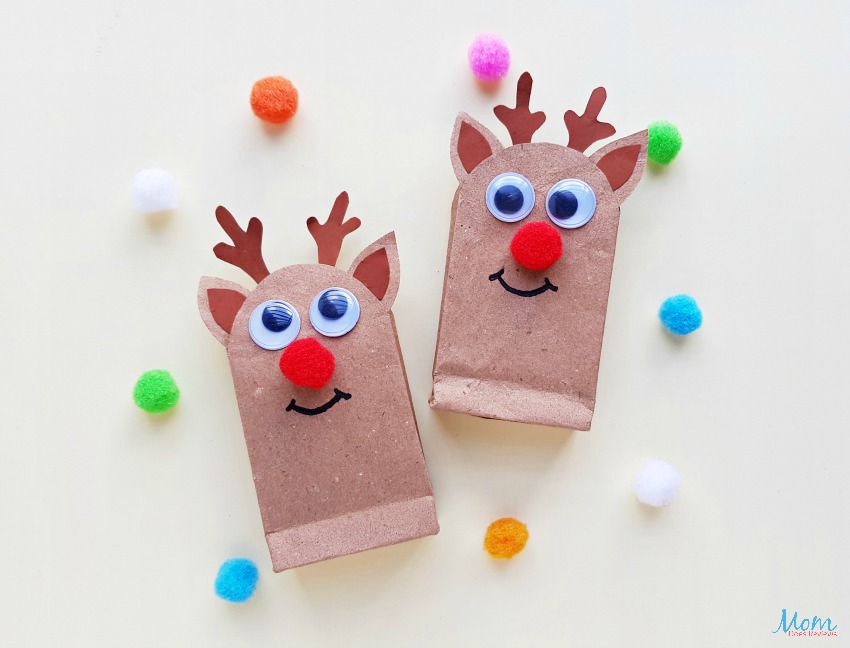
You can use a black sharpie to draw a smiley face…
Print the instructions for these fun DIY Reindeer Gift Bags!

DIY Reindeer Gift Bags
Materials
- Brown paper
- Dark brown craft paper
- Red-colored pompom
- Googly eyes
- Pencil
- Scissors
- Craft glue
Instructions
Step -1:
I’ve cut a brown paper of 8.5 inches X 5 inches to make the reindeer gift bags, but you can choose any size you want but make sure the ratio is similar to mine.
Step -2:
Leaving the 0.5 inches along the longer side, fold the 8 inches part into half.
Step - 3:
Apply glue along the extra 0.5 inches part and fold the glued part to attach it with the other open end of the folded brown paper.
Step - 4:
Fold up 2 inches (of the 5 inches side) from any 1 open ends of the paper.
Step - 5:
Open up the folded-up part and nicely flatten the 2 sides evenly. This will form 2 open sides, 1 on the top and 1 on the bottom. Also, notice the line along the middle.
Step - 6:
Fold down the top open end towards the middle line and overlapping the middle line by a cm.
Step - 7:
Now, fold up the bottom side of the open end and overlap the middle line by a cm again. Both sides will overlap each other. Apply glue on the overlapped parts to attach them. This will secure the bottom side of the paper bag.
Step - 8:
Notice the 2 square parts on both sides of the bottom. Create folds on both sides of the paper bag by using the opposite corners of the squares as a guide.
Step - 9:
Now open up the paper bag from its flattened position.
Step - 10:
Fold in the side middle lines of the paper bag and flatten the bottom side of the bag.
Step - 11:
Use scissors to cut a semi-circular shape on the top side of the paper bag. Cut out ear patterns (2 inner ear parts from dark brown paper and 2 outer ear parts from light brown parts), and 2 horn patterns from dark brown paper.
Step - 12:
Attach the horns and ears along the top end (front side) of the paper bag.
Step - 13:
Attach the googly eyes and pompom nose to complete the reindeer bag.
You can use a black sharpie to draw a smiley face…
Pin it for later!