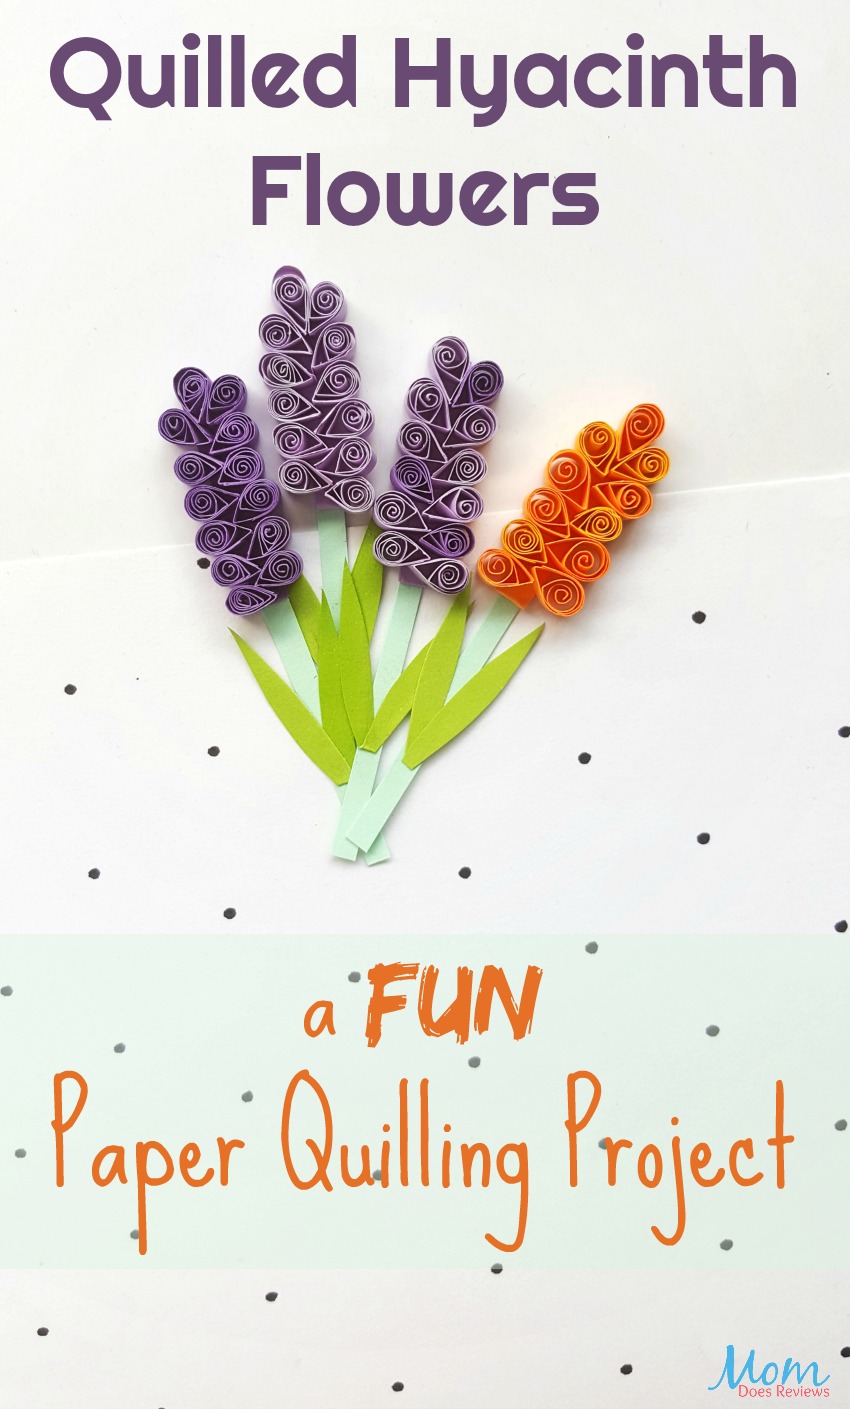
Paper quilling is a favorite past time for many and it’s no wonder! It produces such fun and amazing designs like these Quilled Hyacinth Flowers! If you have never tried it, now is the time! We have a super easy tutorial that shows you step-by-step how to make these gorgeous flowers!
Do your kids love crafting too? Get them involved in paper quilling with this fun Quilled Rainbow Art Craft! They may just discover it is their favorite past time too!

Supplies Needed:
Paper quilling strips
Scissors
Slotted quilling tool
Craft glue
Instructions:
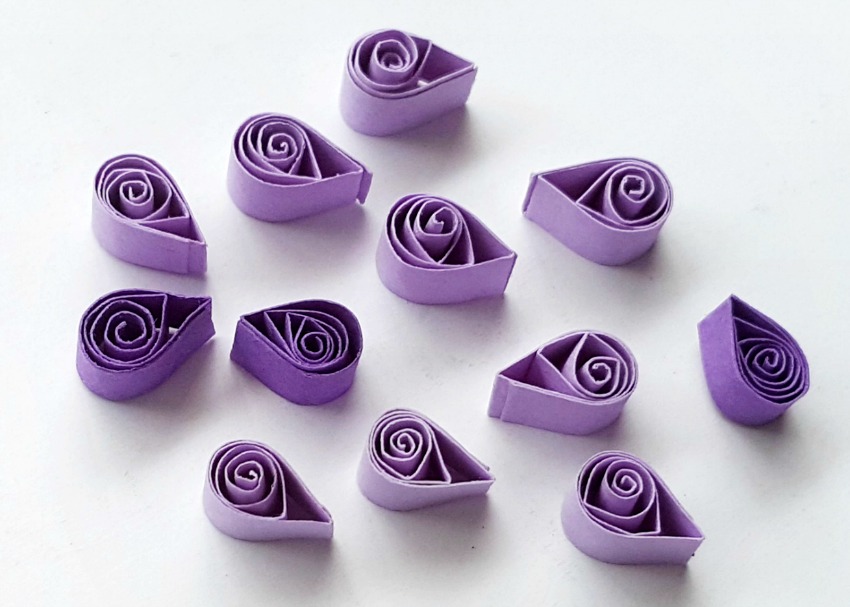
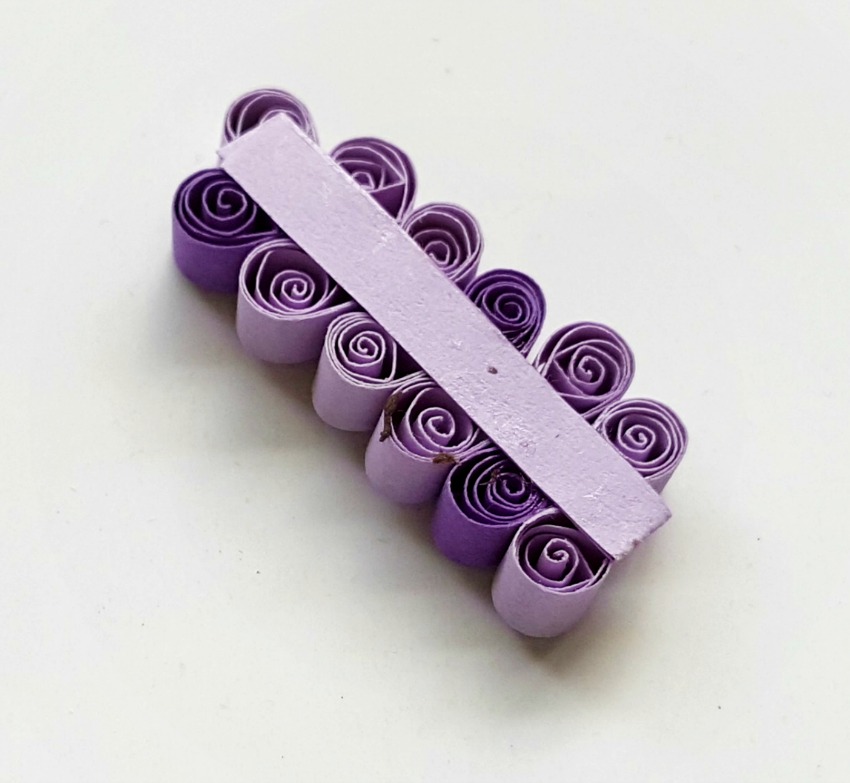
Select quilling strips (any color you want). For each flower you can use different shades of the same color and then mix-match the teardrop shapes while making the flower. Prepare 6 inches long quilling strips, or you can use strips of any length, it’s totally up to you. Make around 12 to 14 quilled teardrop shapes with the selected quilling strips.
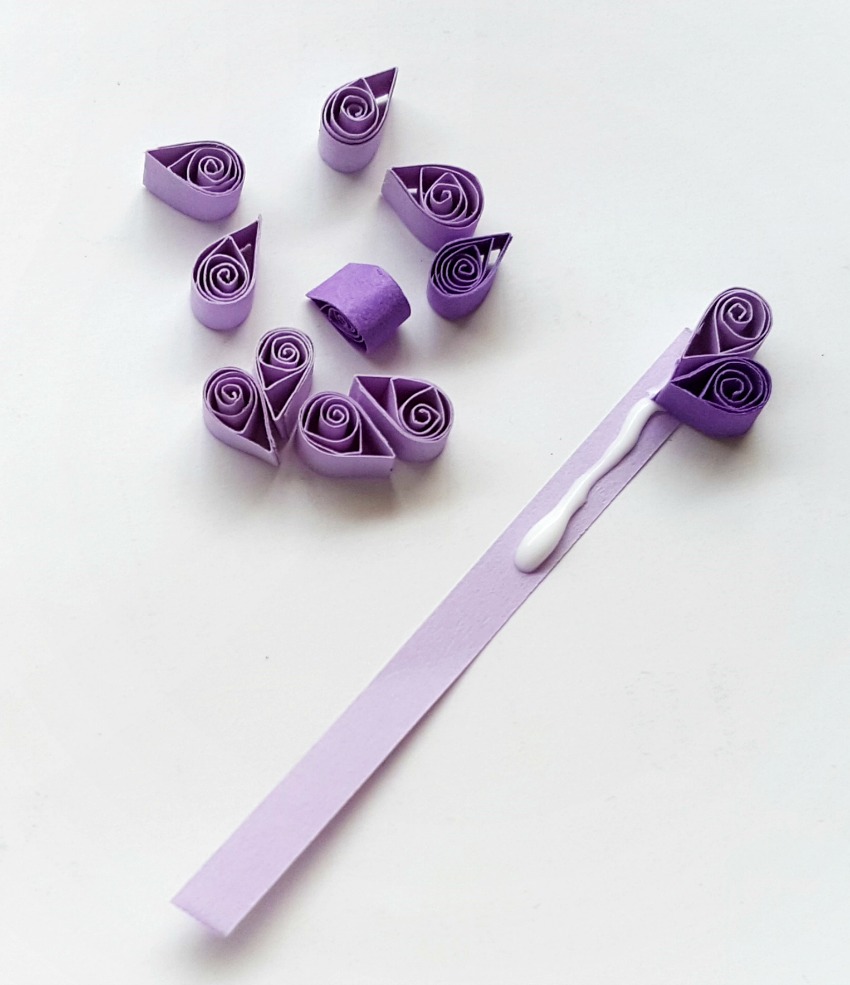
Take another piece of quilling strip or you can also cut out a strip from craft paper or cardstock paper. Apply glue along 4 to 5 cm part of the strip. Take a teardrop shape and place its pointy side on the glued part of the strip and keeping the curved side facing outwards the strip.

One by one attach more teardrop shapes on the glued strip in the same way.
Keep adding teardrop shapes on the strip until you are satisfied with the hyacinth flower pattern.
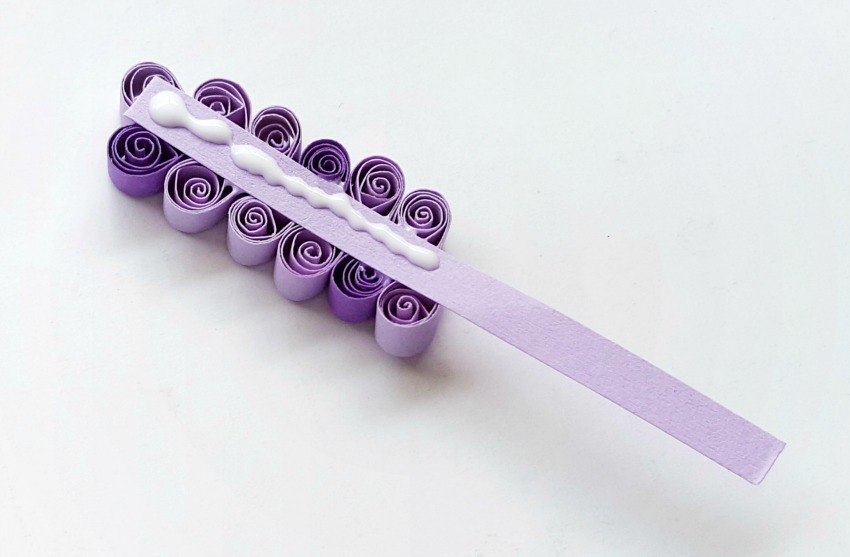
Once you are done adding the teardrop shapes, turn the flower to the other side and apply glue along the middle strip on the back side.
Fold the remaining (outside the teardrop area) part of strip and place it over the glued part. Press to make that the fold is securely glued.
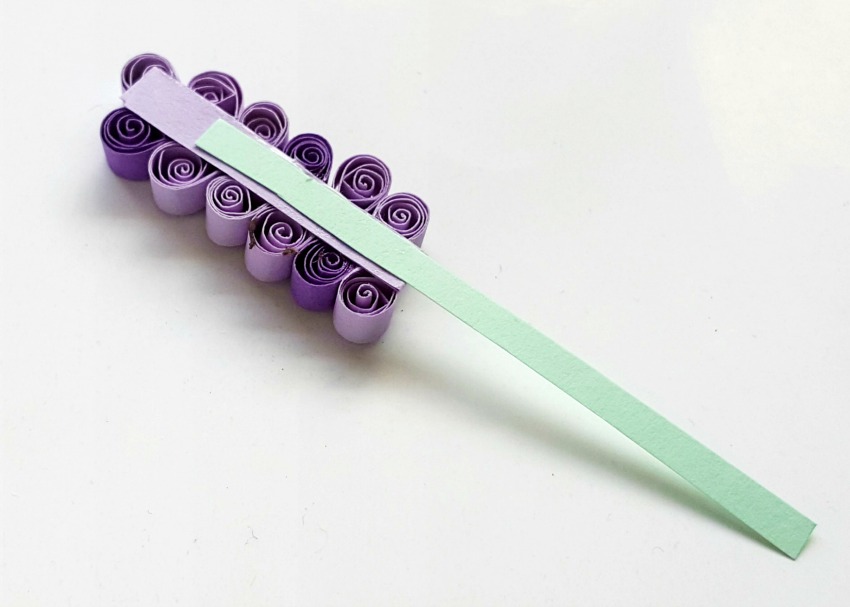
Cut out another strip from green colored craft paper or cardstock paper and glue it on the back side of the hyacinth (this will be the stem of the flower).

Cut out long and thin leaf patterns from green colored craft papers and attach them on the stem part, on the front side.
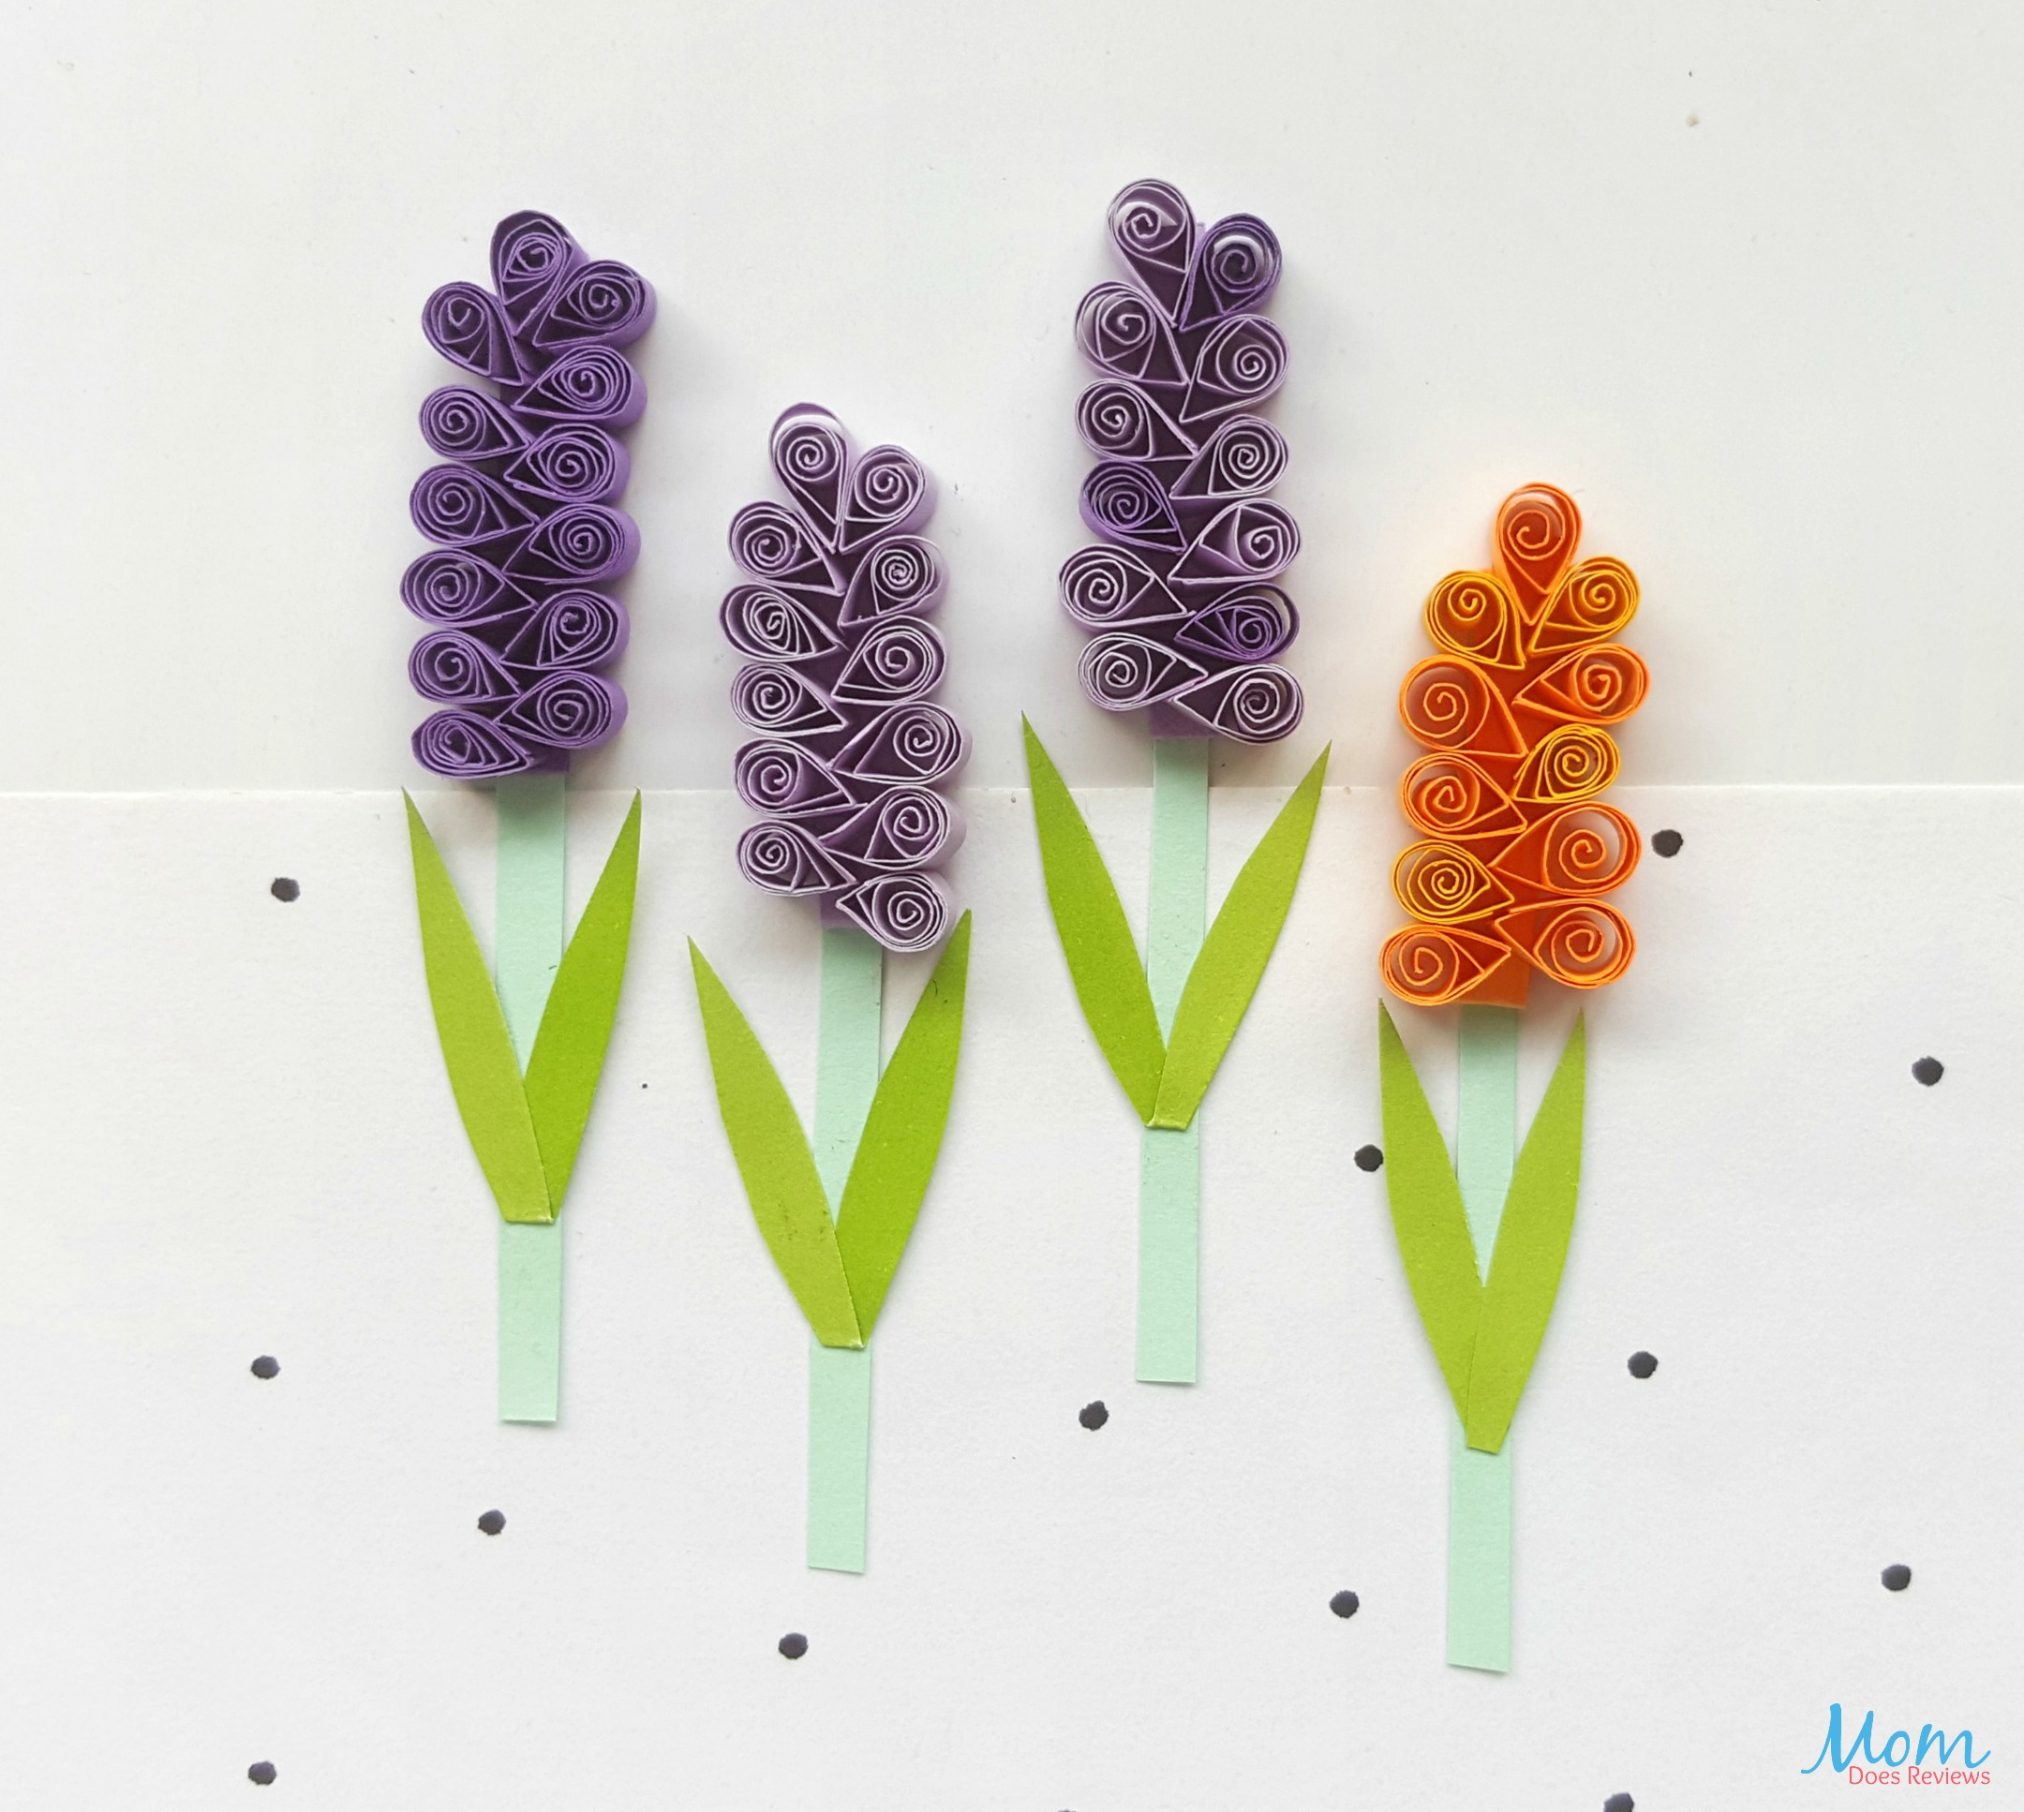
Done!