
Scarily Fun Halloween Stained Glass Mason Jars
Halloween can be so much fun to decorate for. There are just so many great ways to embrace it, from super scary, to gory, to in between, and even cute. I have three children and although one tends to gravitate to the gory, I try to reign him in, and stay with the cute, verging on a little spooky. This craft is making cute DIY Halloween Stained Glass Mason Jars. They are fun and easy, and not scary.

What you need to make Halloween Stained Glass Mason Jars
- Mason Jars (However many you want to do.)
- sharpies in multiple colors
- glue
- Paintbrush
- googly eyes (a lot)
- hot glue gun
- Black glitter
- led tealights
The How To:
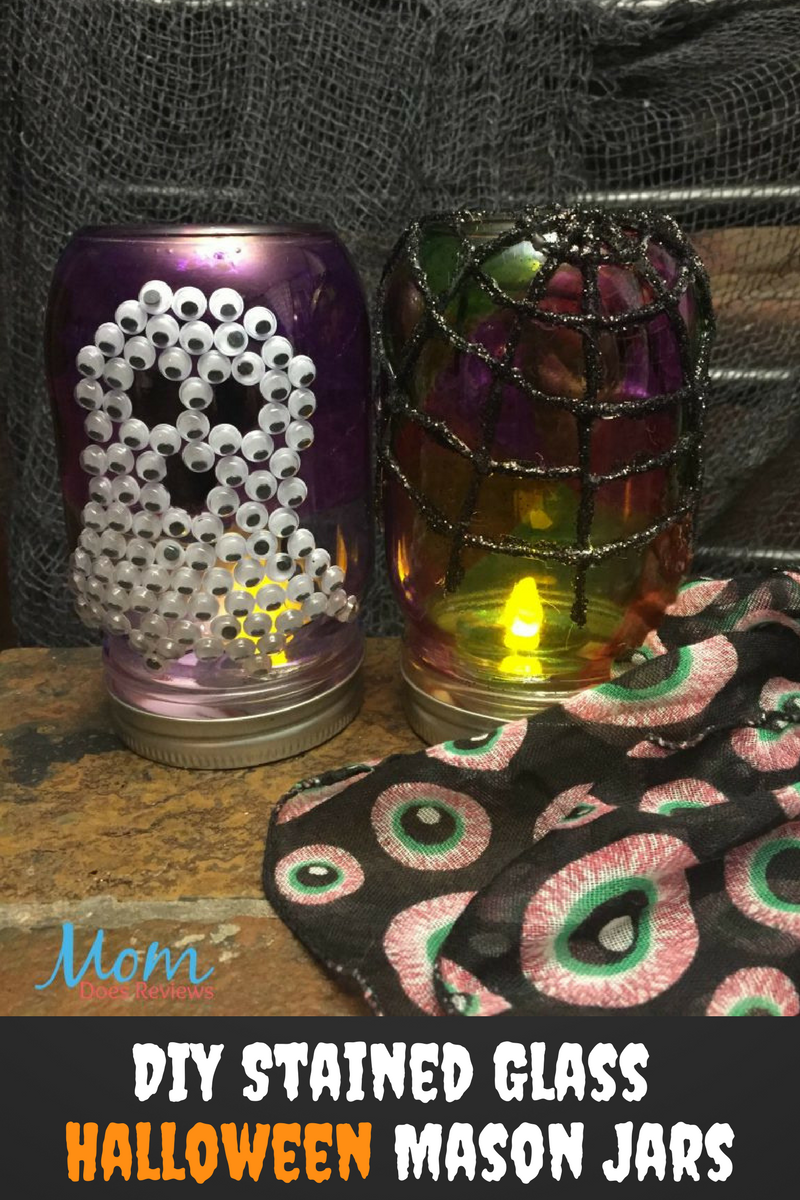
First I choose my colors for each jar. For the Spiderweb Jar I choose neon green, orange, and purple. Then I outlined a design in the green, and proceeded to color the entire jar in. For My Googly Ghost Jar I wanted an ombre look so I used three different purple color sharpies with the lightest at the bottom and the middle the next darker, and the top the darkest. The best part of sharpies is there is no dry time.

On the Googly Ghost I drew a ghost in black sharpie. Then I carefully put glue on the ghost making sure not to cover his eyes or mouth. Once he had glue on him, I began placing googly eyes all over him until he was completely made up of googly eyes. I also wrote BOO in black sharpie beside the ghost.

On the Spiderweb Jar I drew a spiderweb in black sharpie. Next I went over the whole design in hot glue so it would be 3D. After the glue was dry, I did go and hand pick off the glue strings that did not belong. Then I painted white glue onto the web, section by section. Then I poured black glitter over the glue on the web. I put a paper plate under it to catch the extra glitter, so I could reuse it. Then the web had to dry. Once it was totally dry, I was able to get off the extra glitter.
Here are my Halloween Stained Glass Mason Jars at night with the led lights in them. I think they came out real cute, and they were fun to make. After you color in the jar with the colors you like, you can really make any Halloween design work. Imagine a glittery eyeball or a googly bat or skull. You could make a bunch of these jars and line them down your walkway on Halloween night, or by your door. The trick-or-treaters will love to see them. They also make great party decorations or center pieces on the table.
Which Halloween Stained Glass Mason Jar will you make first?
Find Supplies for them here:
Mason jars / Sharpies / Googly eyes / Black glitter / LED tea lights