Minion Crafts to Make with Your Little Minions
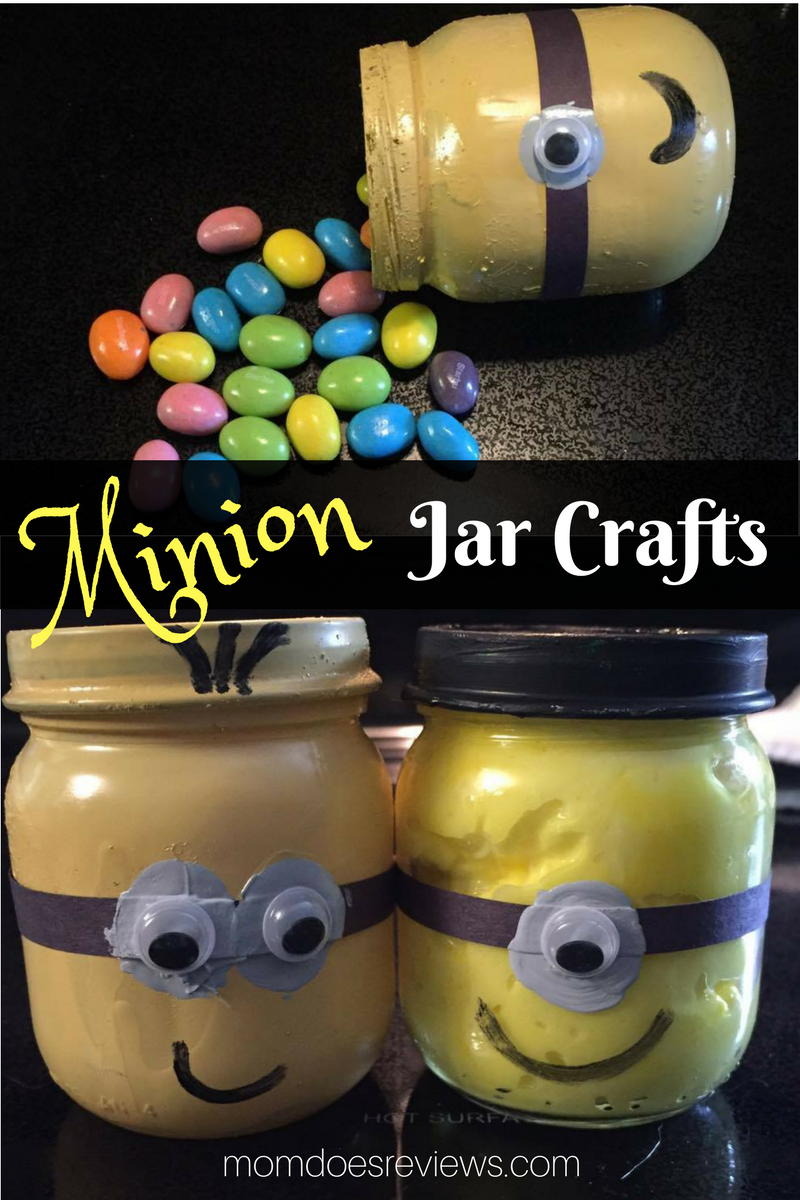
Minion Jars
Do you have baby food jars sitting around? If so put those cute little jars to some good re-purposing uses. I made two different Minion crafts with a few baby food jars that would be perfect for a fun craft with your kids. Maybe even a good craft for summer camp, or a pre-school class. Whether you use these jars as a craft, or even as adorable party favors, here is how to make them.

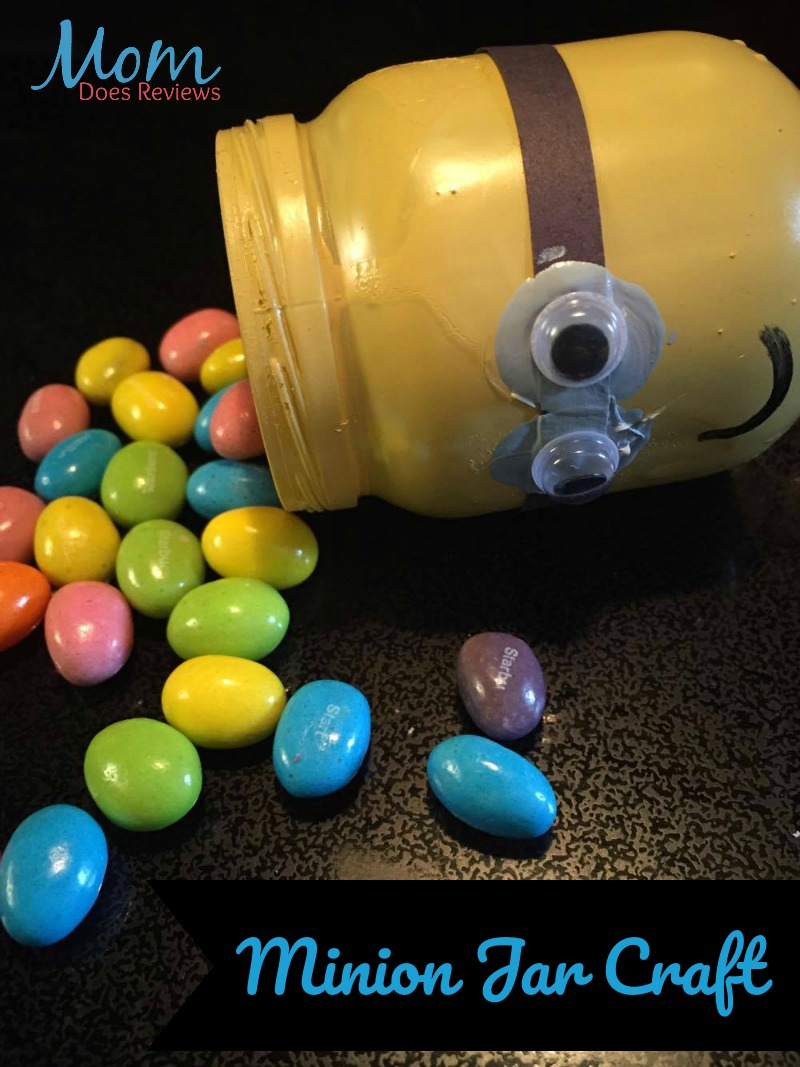
Minion Favor Jars
- Baby Food Jars
- Yellow Spray Paint
- Black Paint Marker
- Googly Eyes
- Gray Paint
- Hot Glue
- Black Construction Paper
First I spray painted the jar, lid and all, with yellow spray paint. Once it was dry I hot glued a strip of black construction paper around the middle. Next I painted a gray circle where I wanted the eye or eyes to be. When the paint was dry I hot glued the googly eyes in place. Lastly I used the paint marker to paint on the mouth and hair on the lids. These jars are empty so you could put an led light in and light them up, or fill them with candy for party favors.

Minion Slime Jar
Jar
- Baby Food Jars
- Black Paint
- Black Construction Paper
- Googly Eyes
- Gray Paint
- Hot Glue
These are made much like the Favor jars except I left them unpainted. I did paint the jar lid black. Then I added the construction paper strips and glued them to the jar midway up. Then I painted the gray circle using a circle magnet I had as a stamp. I think it would be neater to just paint them on or use a circle cut out of gray paper. Oh well you live you learn! When the paint dried I glued on the eyes. Now I just needed to add the slime.
Slime
- 1 Teaspoon Borax
- Elmer’s Glue
- 1 cup water
- 1 Tablespoon Water
- Wilton Yellow Food Color Gel
First I mixed my water and borax in a measuring cup. Once that was well stirred I emptied the glue into a large bowl, and added the Tablespoon of water, and some of the yellow gel until it was a bright yellow. Then I poured the Borax solution into the bowl with the glue. Immediately it started looking like slime. The longer you mix it around in the water the harder it gets. I left mine till I liked the consistency, then I removed it and put it in the Minion Jar. The jar keeps the slime from drying out when it is not being used.

Minion Magnets
- Clear Floral Gems
- Black Construction Paper Strips
- Googly Eyes
- Yellow Foam Paper
- Black Paint Marker
- E6000 Adhesive
For the magnets I used some E6000 Adhesive and added glue to the flat part of my clear gems. Then I pushed them down hard onto the yellow foam to move the glue around. I used pre-cut yellow foam stars since they cost the same as one sheet of the yellow paper at the store I was at. Before the adhesive dried I stuck one end of the paper strip under the gem and over the foam so it was sandwiched. Then wrapped it over the top and put the other end between the gem and foam on the other side.

I let that dry a while, and then I cut around the gem so it was just a circle rather than a star. After it dried I glued eyes on the black strip, making sure the glue stuck some to the gem as well to make it more stable. Hot glue would dry quicker, but I used the E6000 again. Lastly I glued the magnets on the back of my Minions and once dry, I stuck them on my fridge. I looked at them and decided they needed smiles, so I used the paint marker to add one on them.

These Minion Magnets are really adorable and they don’t take long at all to make. It would be very easy to make a whole bunch of these again for party favors, or party decorations.

Now you can make these fun and easy Minion crafts and have some cute art projects that are One in a Minion!
Make your own today with these supplies:
Gems/magnets/ googly eyes/ Yellow foam paper/ Black Paint Marker