
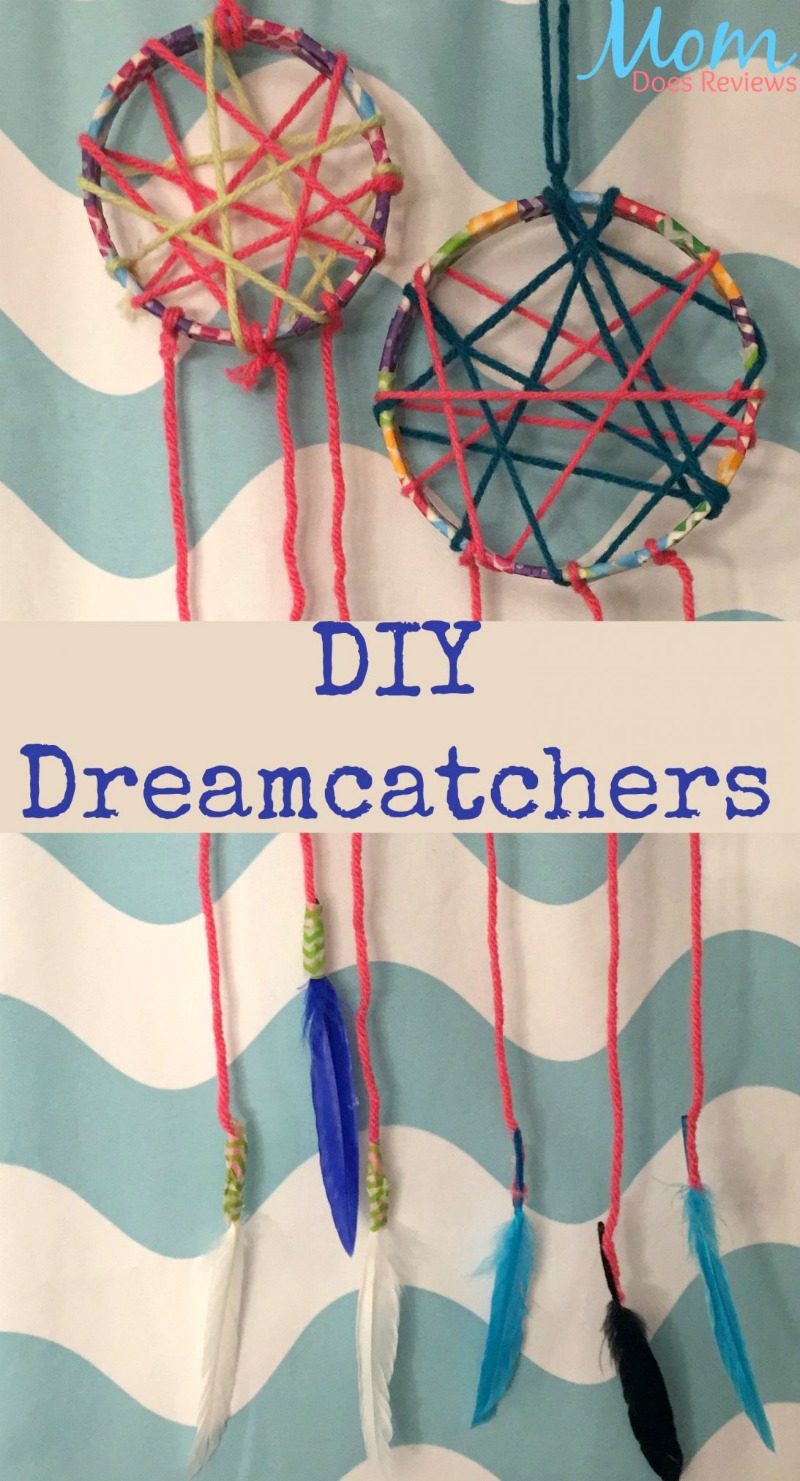
Easy and Fun DIY Dream Catchers
I lead a troop of American Heritage Girls and I wanted to do a craft with them. They are usually all around the age of ten, but this time I was getting some younger girls in my room. Some third graders who would be moving up next year were coming to get a feel for my class. Therefore the craft needed to be easy enough for an eight year old, and only take about an hour to complete. Since I love Dream Catchers and the way they look, I figured it would be a great choice.
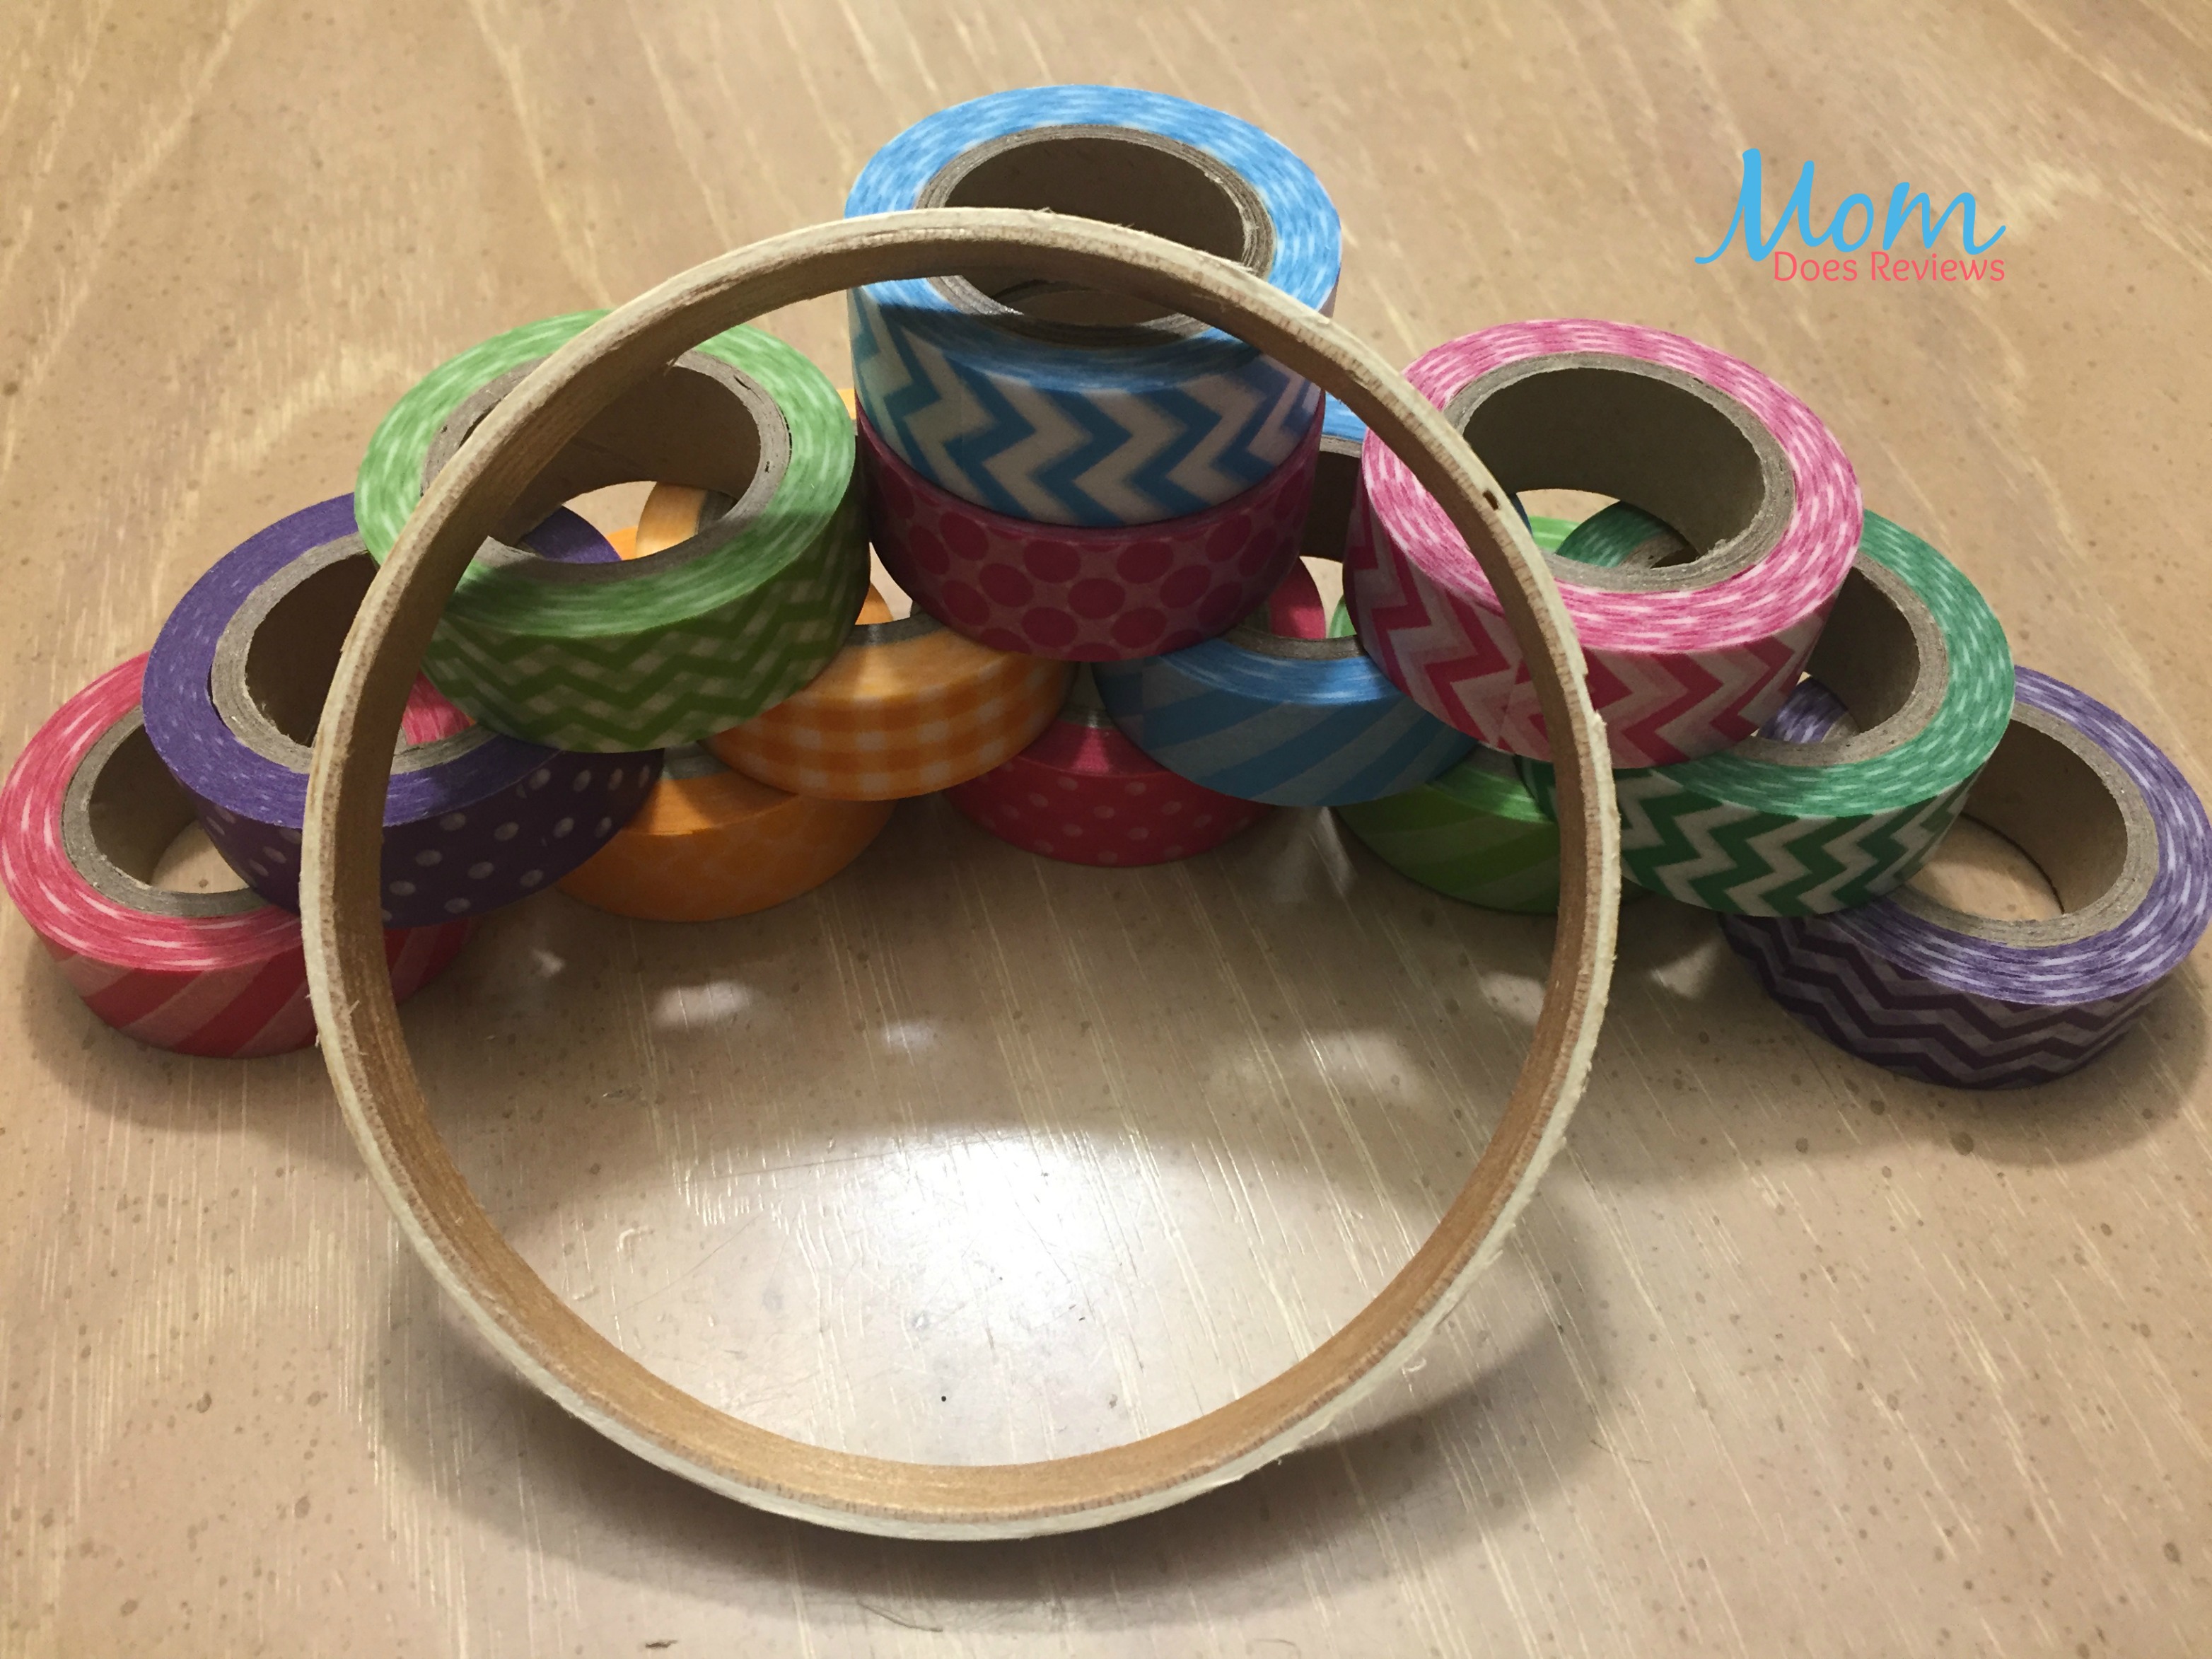
These DIY Dream Catchers only take a few supplies which are:
- Wooden embroidery hoop (3-4 inch)
- Washi tape
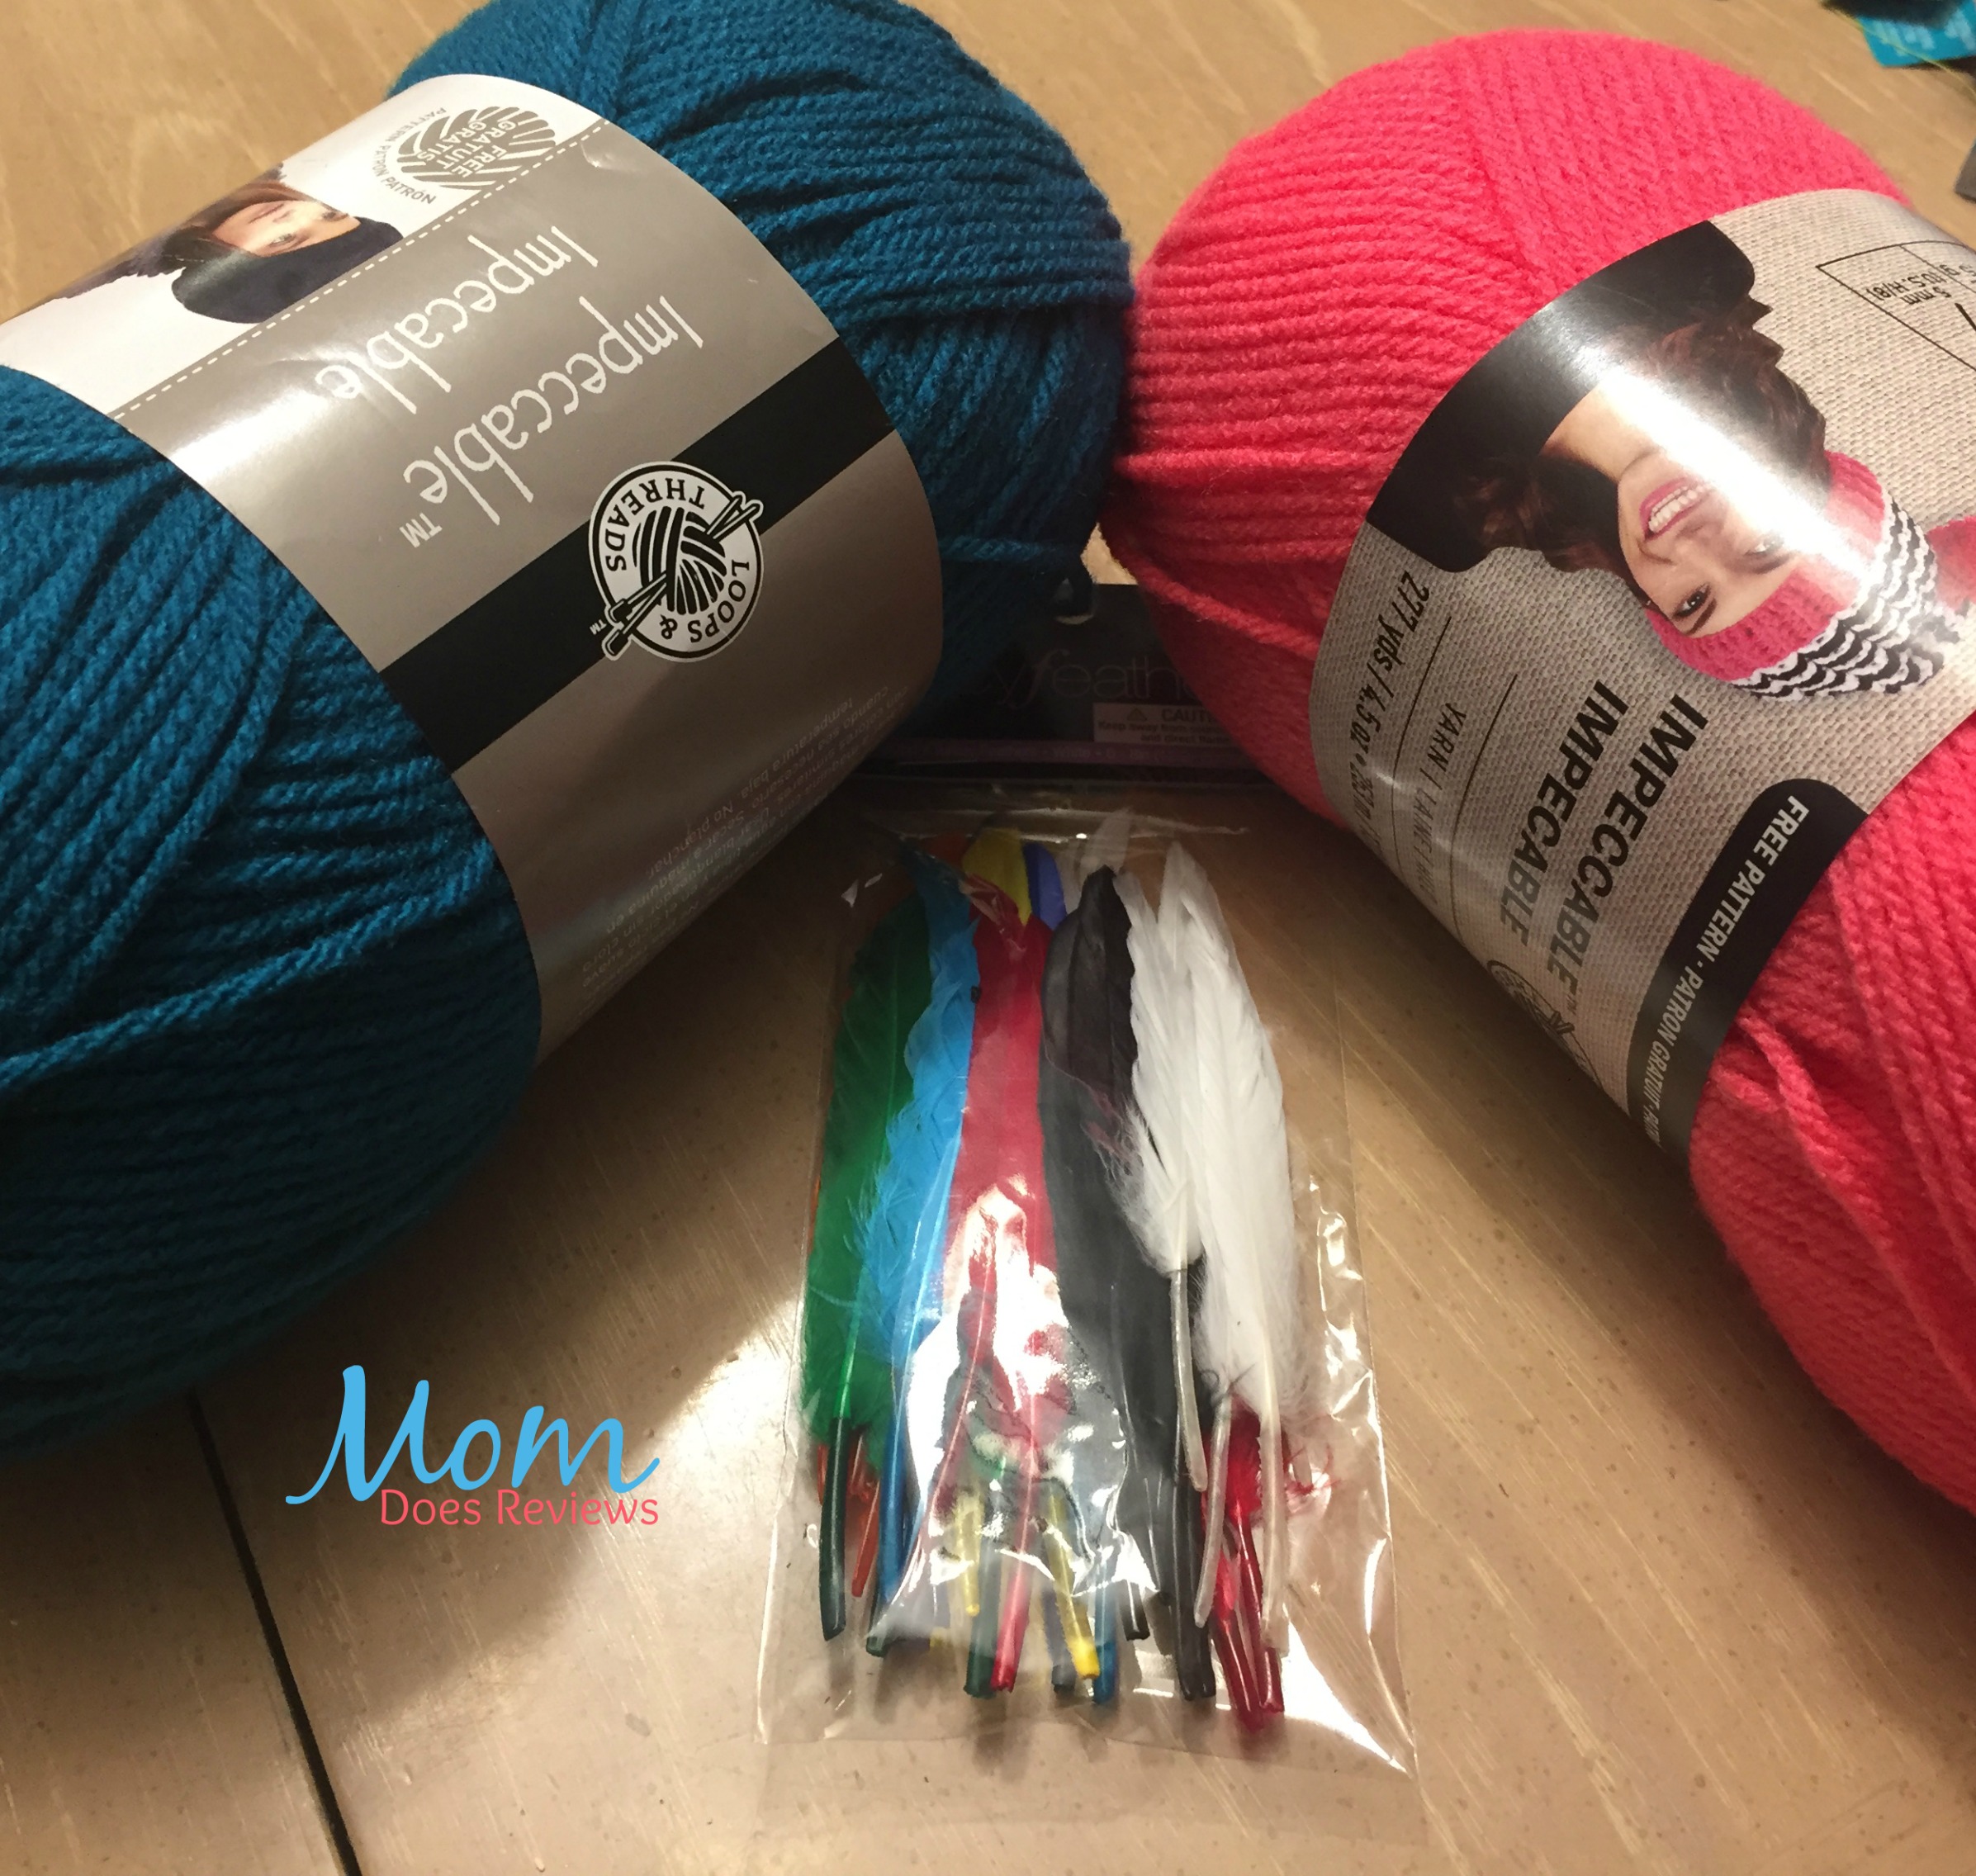
- Yarn in at least two colors
- Feathers
- Hotglue
- Scissors
How to make your DIY Dream Catcher
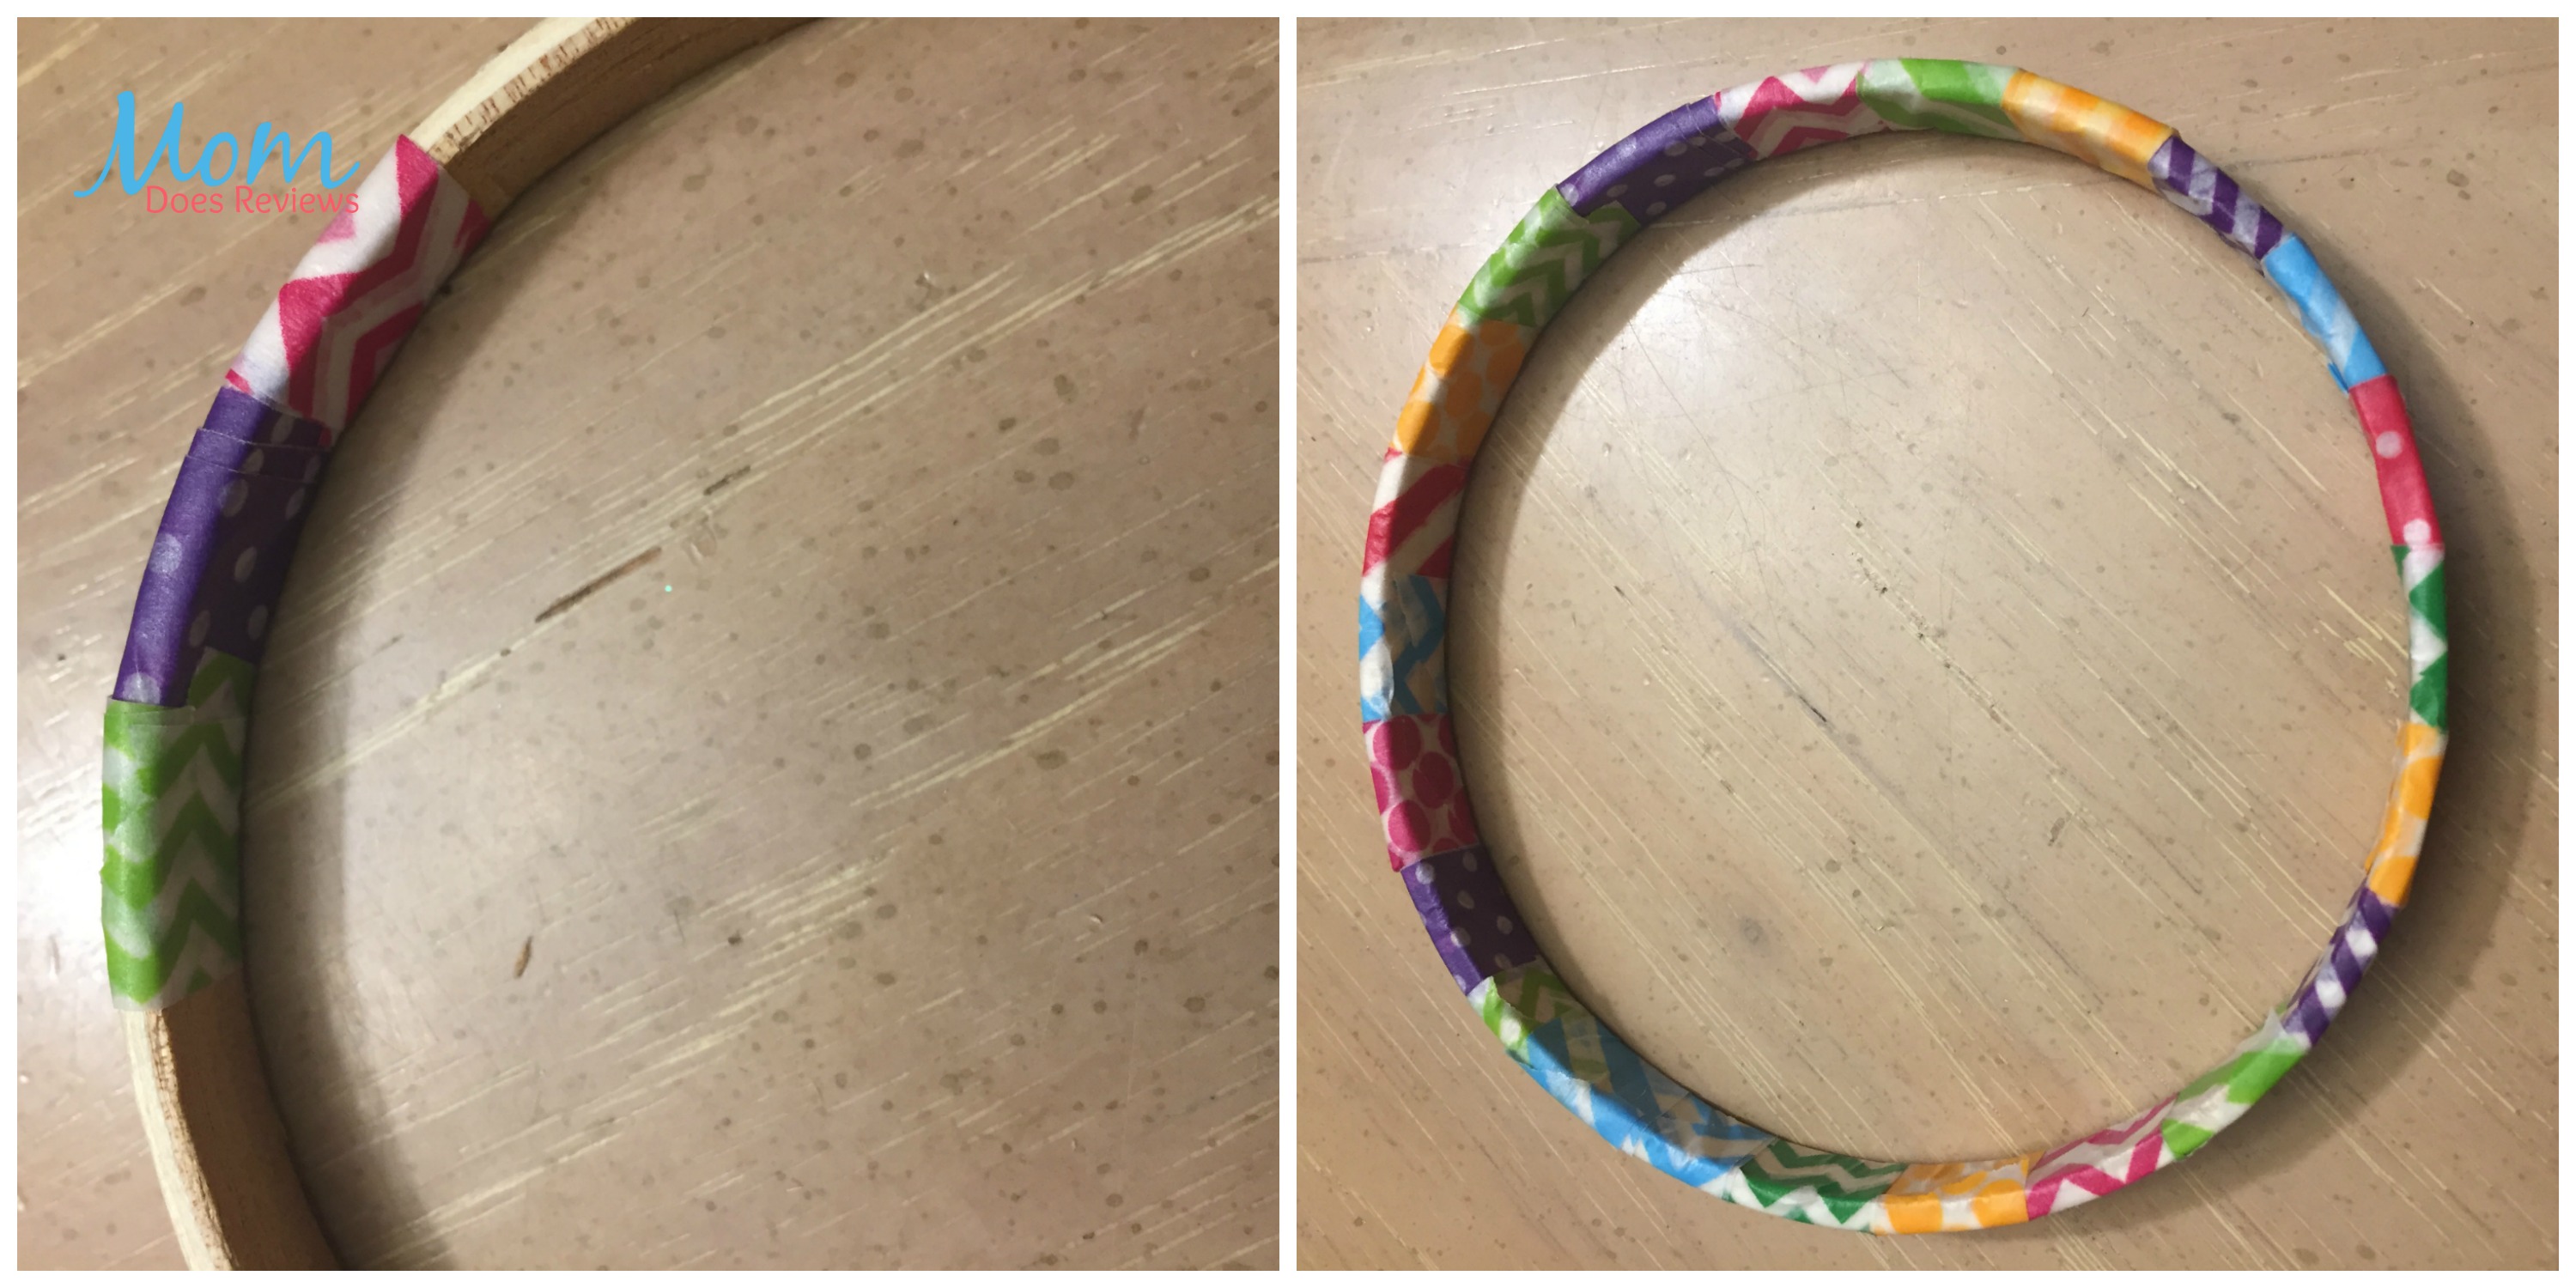
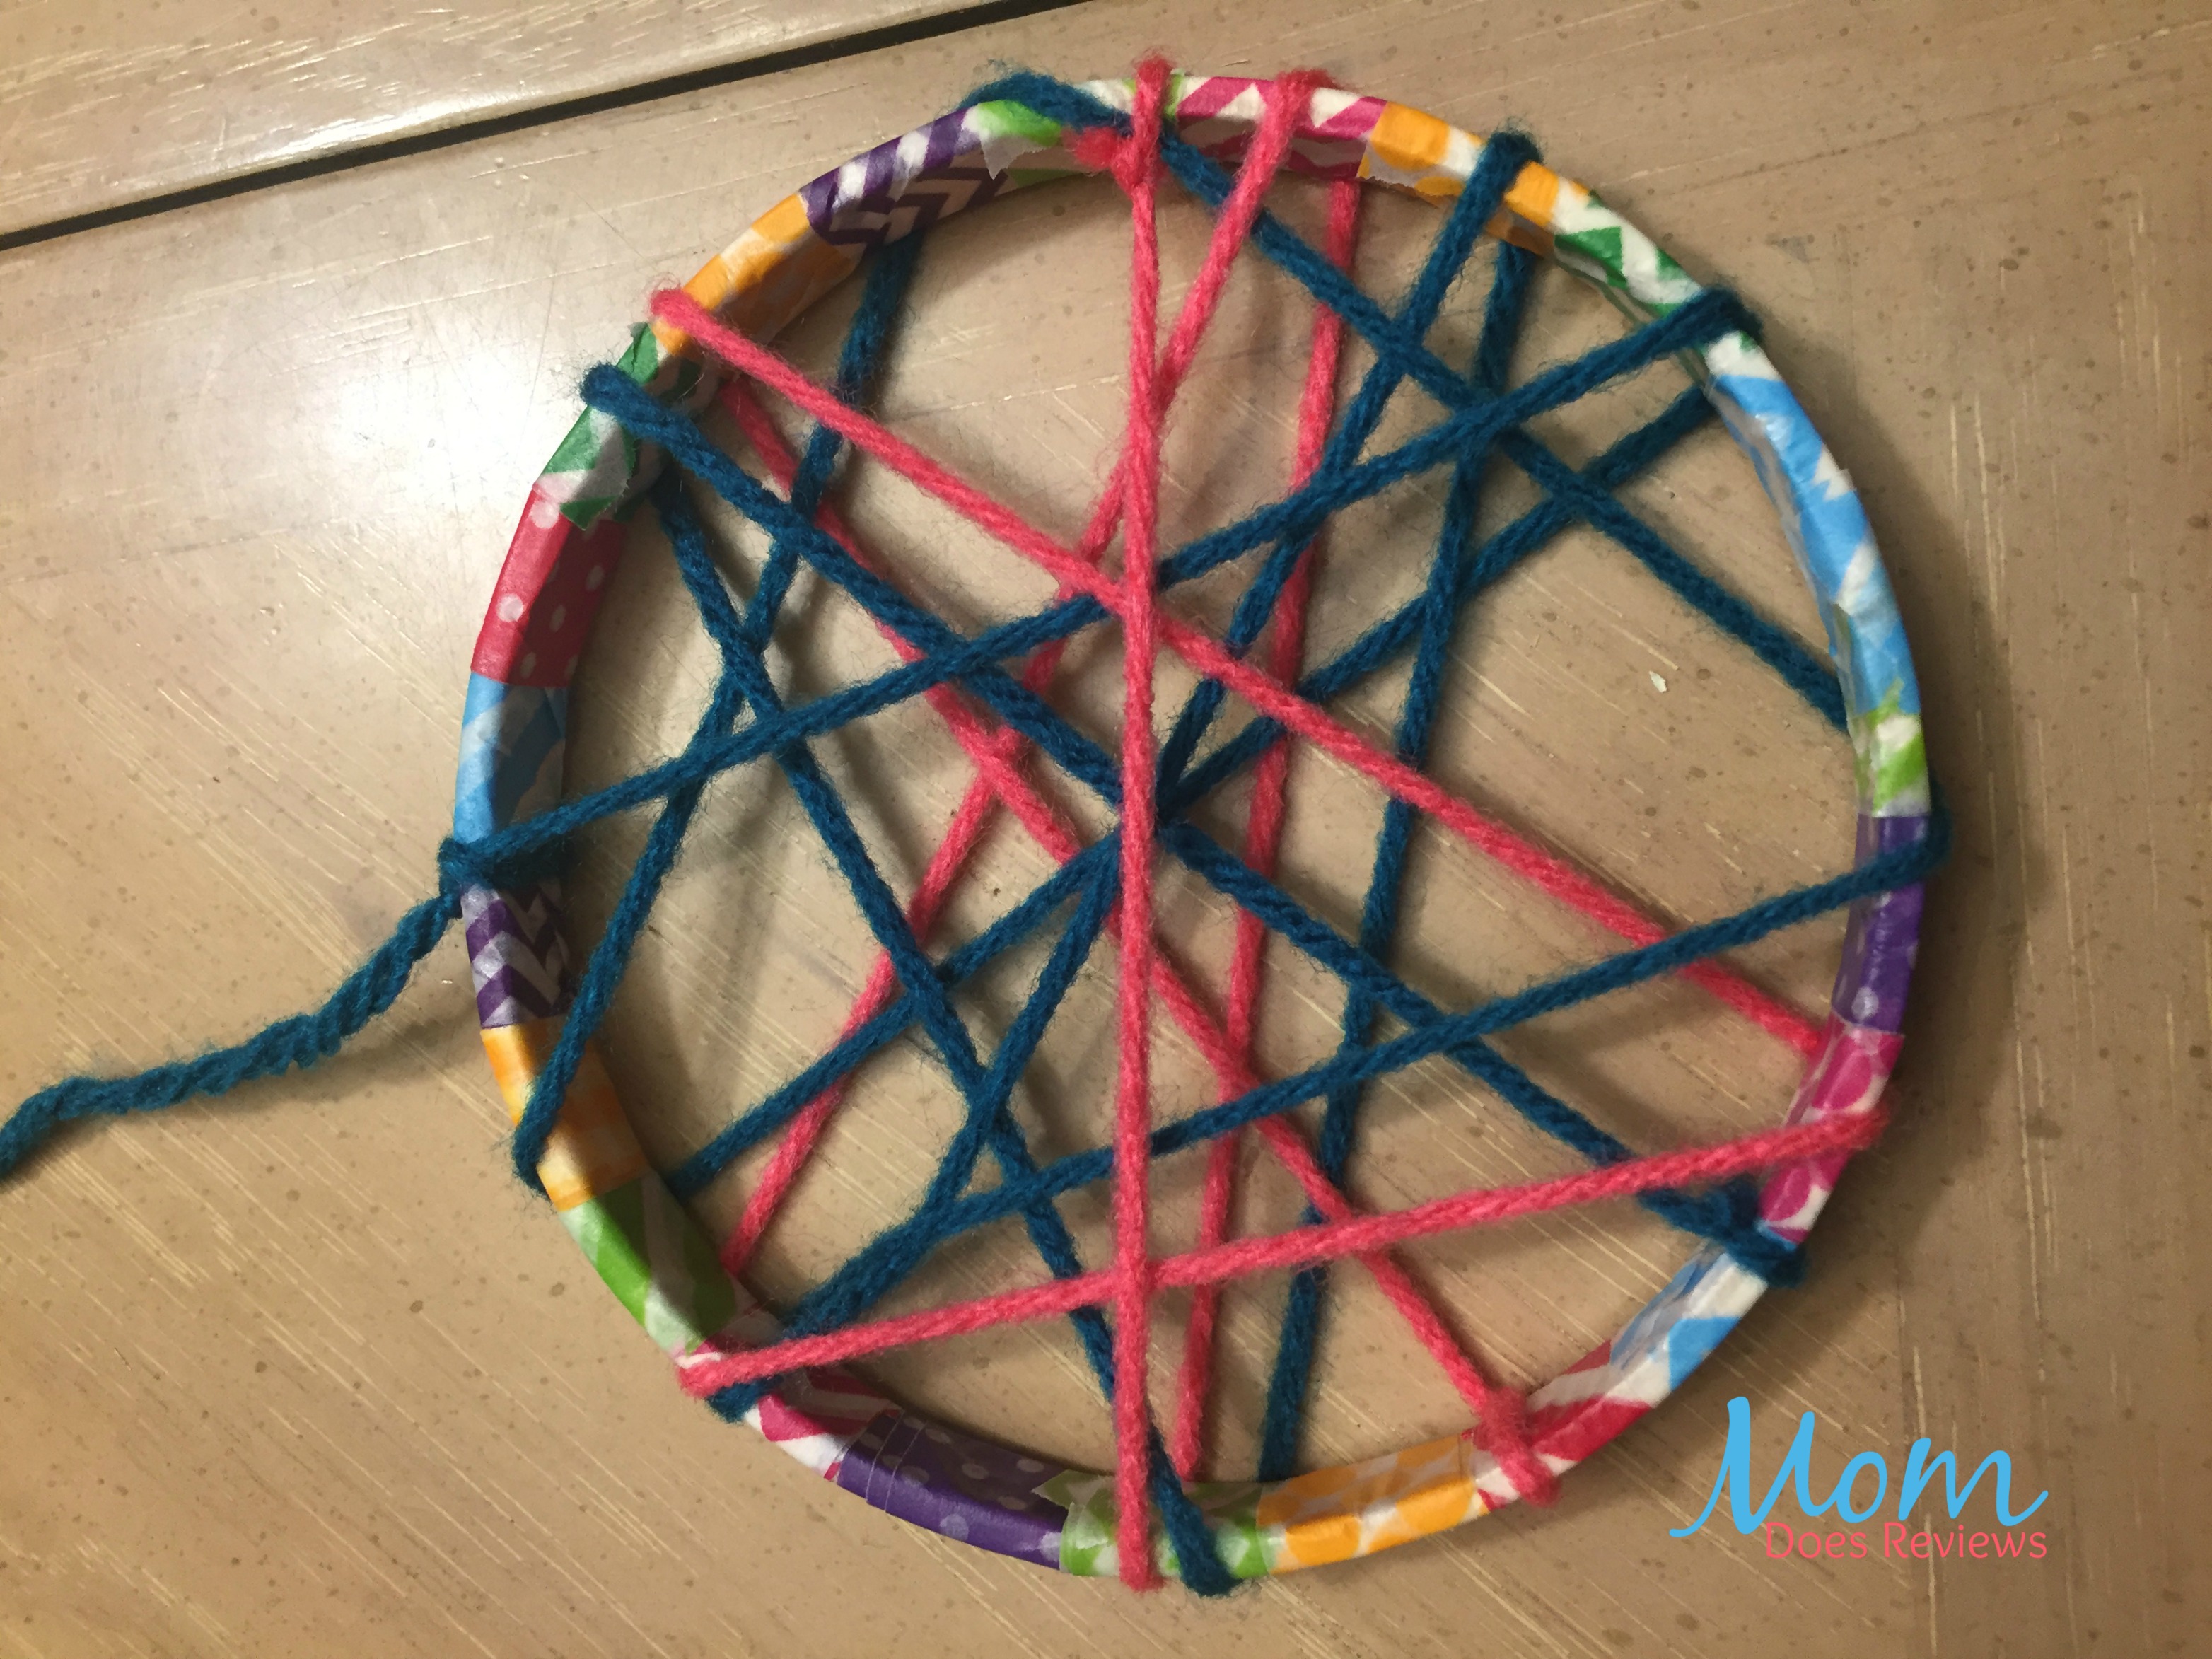
First you take your embroidery hoop and begin to wrap it with Washi tape. I changed my color every time all the way around the hoop. You could do it a solid color, or alternate two or three colors. This part is up to the artist doing it, be creative. After my hoop was fully covered with tape, I looked over it to make sure it was smooth and completely covered.
Next I choose the yarn colors I would use to create my webbing and my hanging strands. I decided the two colors, teal and pink, would be pretty on this project. Then I cut about two feet of each color yarn to get ready to wrap my hoop.
Then I tied the teal yarn to my hoop. After it was tied I began to wrap the yarn back and forth across the hoop making a webbed pattern. I went in and out of the hoop to add stability. When I had only a little yarn left I tied the end to the hoop as well. I repeated this process with my pink yarn. Lastly I cut the ends off and the tails of the knots so they were not so visible.
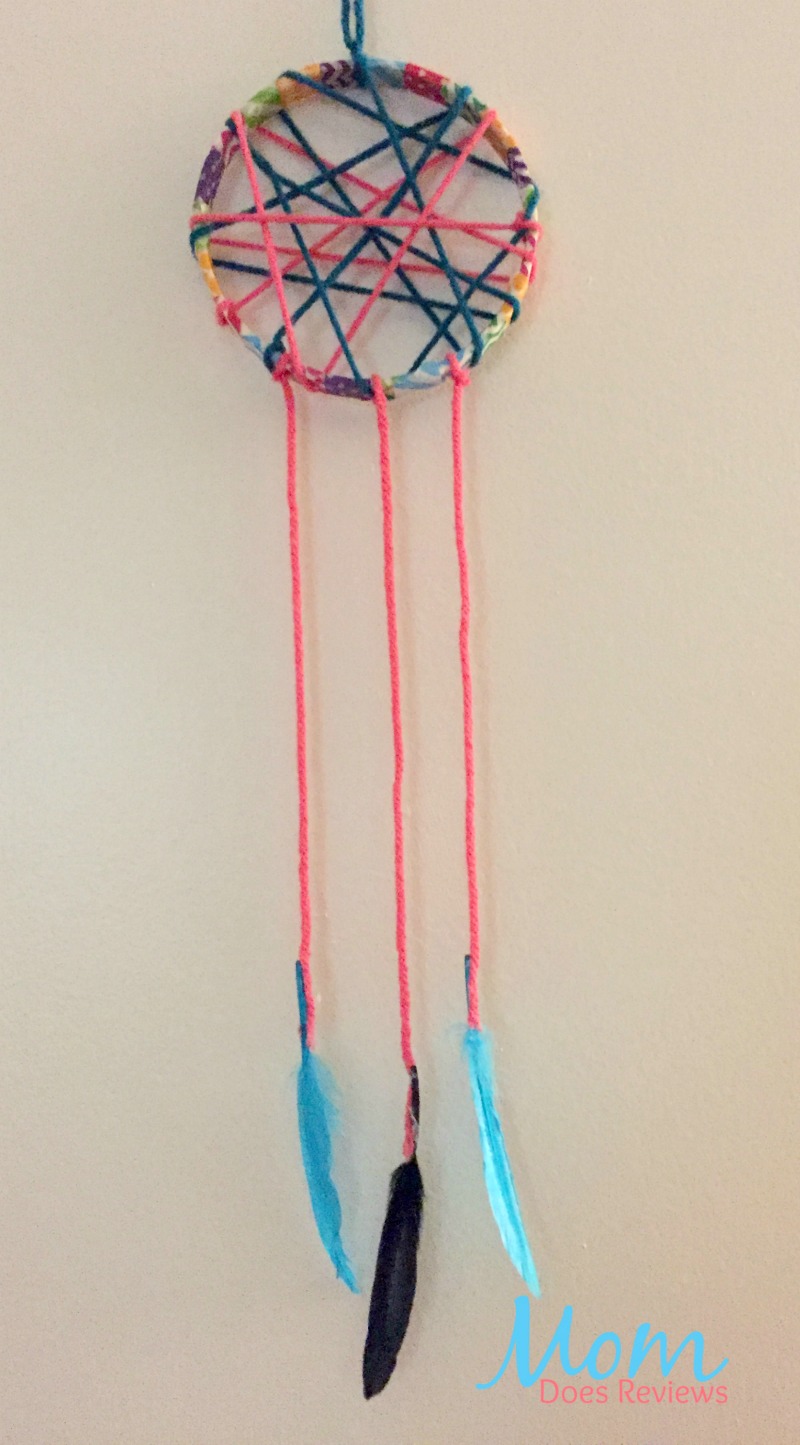
Next it was time to add a hoop to hang my Dream Catcher, as well as the three hanging strands with feathers. I tied some teal yarn to the top of my hoop and then tied it again at the ends of the yarn to make a loop to hang the Dream Catcher from. Then I took three pieces of pink yarn and I tied them on the bottom of the hoop, trying to space them evenly. I cut the two outer strands to the same length, and left the middle longer. Lastly I hot glued three feathers to the ends of the yarn. You can wrap these with Washi tape to hide the glue or just leave them.
This project was really fun to do. It was also a huge hit for my troop. Since they were so enthralled, time flew and they were all so quiet. In addition to their first Dream Catcher they begged to make a second, but we didn’t have enough time. Anytime my girls are quiet and attentive, it is a true success!
Make your very own DIY Dream Catcher today.
Check out these supplies on Amazon :
Washi tape, embroidery hoop, yarn, and feathers