
I’ve been doing some research on St. Patrick’s Day and what would be an appropriate way to celebrate besides wearing green (and hoping my kids don’t bruise me again this year with their pinches). Fun Fact: The shamrock is a symbol that St. Patrick used to explain Christianity to non-believers. The three leaves on the shamrock symbolize The Father, The Son and the Holy Ghost. The four-leaf variety is said to be lucky to the finder, especially if it is found on accident. Each of these four leaves stand for something as well: Faith, Hope, Love & Luck.
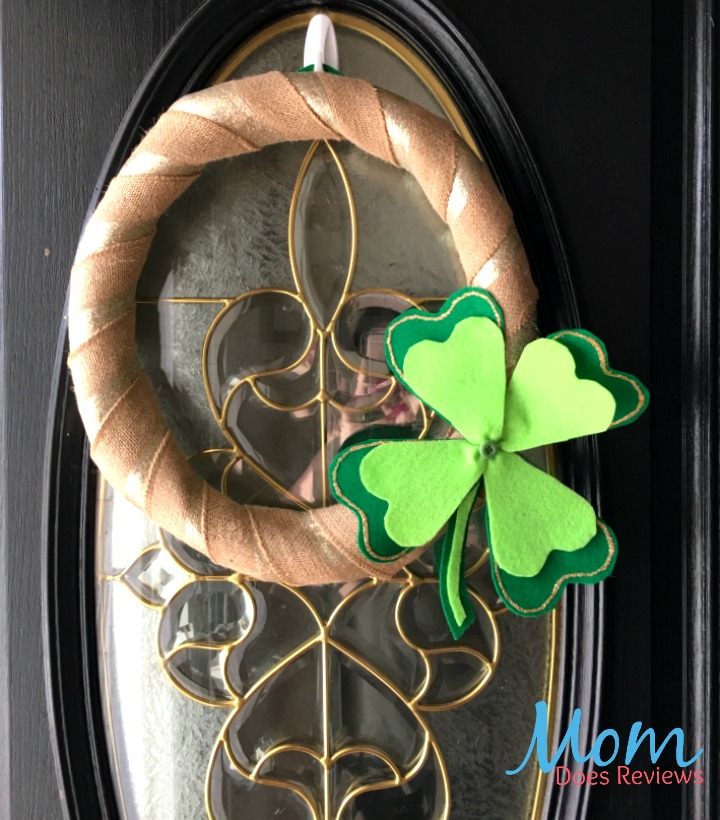
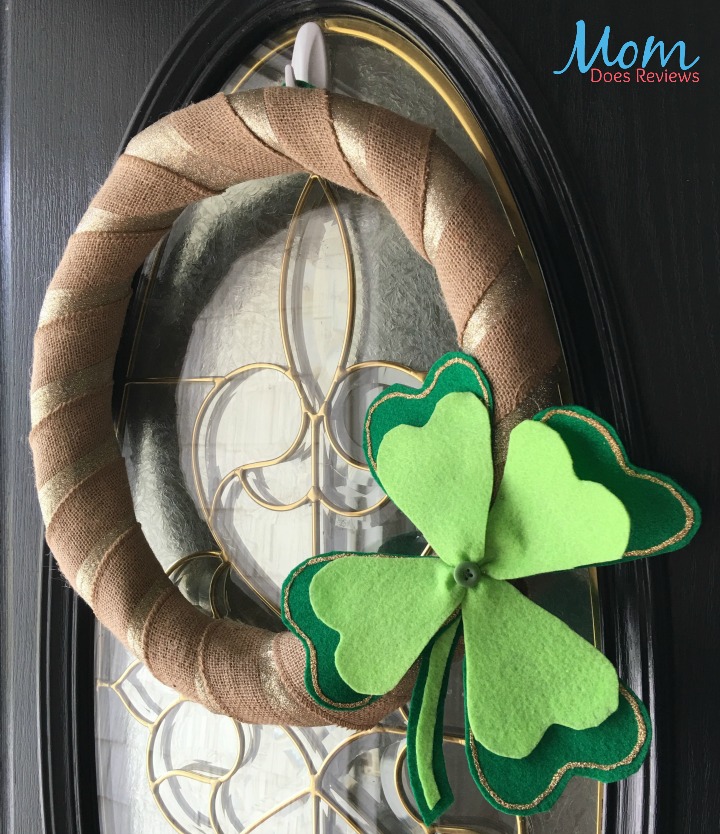
Decorating my front door, I decided to make everyone who walks up to my house lucky, because with my Sweet Shamrock Wreath, it’s as cute as it is surprising. Using a burlap with a ribbon of gold gives the wreath a little more personality. It is simple and pays homage to St. Patrick and the legends of the four-leaf clover.

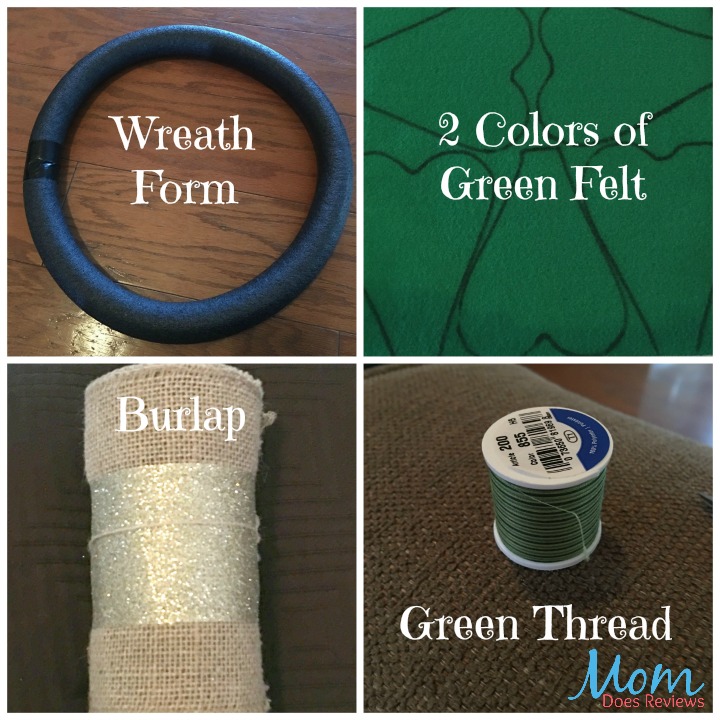
Using a piece of pipe insulation, I made to the wreath form. This is an easy way to make wreath forms. Go to your closest hardware or home improvement store and get the 7 or 8 foot piece and just cut it to the size you want it. Then, using a heavy duty tape, such as Gorilla Tape (I’m obsessed with this stuff) or Duck Tape, attach your two ends together securely.
Shamrock Wreath Tutorial
Making the Shamrock:
Using two shades of green felt, I cut out my leaves. The leaves are such a simple cut out. I just drew a heart shape without a pointy end, on a small piece of cardboard. For the smaller leaves, after you make the dark green leaves, trim the original stencil down about an inch. Then using a black Sharpie marker, traced it onto the felt. The felt doesn’t bleed and the color can’t be seen if you turn it over. Cut out 4 dark leaves and 4 lighter green leaves.
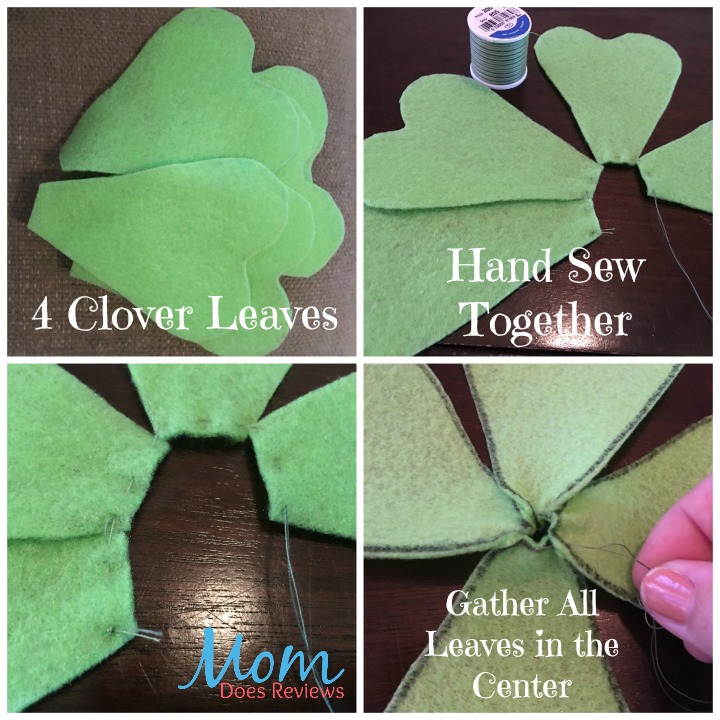
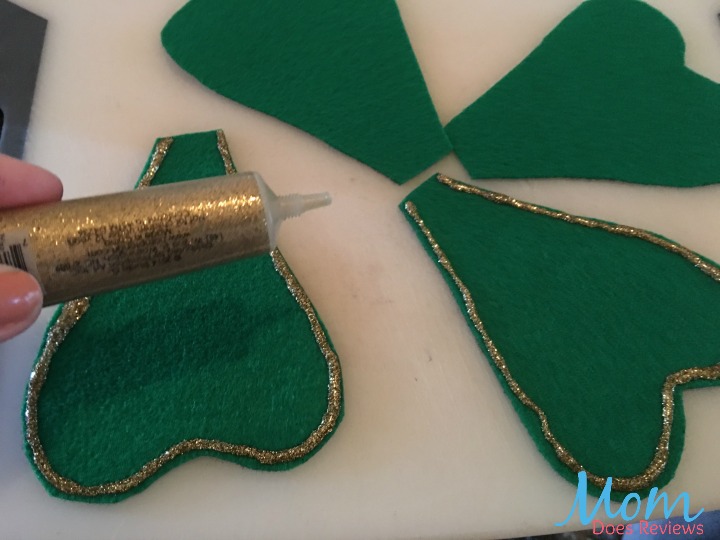
Then, on the darker felt, I traced the edges with gold glitter glue. This just gives it a little something that meshes well with the gold in the burlap. Using my sewing needle, I used a green thread and sewed the leaves together. Use a running stitch on the flat end of the leaves. Do NOT cut the thread until you have all dark (or light) leaves have been sewn and gathered so that they all come together in the middle. Take the smaller clover and place it on top of the bigger clover, gluing it in place with fabric glue. I took a small green button and sewed it in the center in order to complete the four-leaf clover.
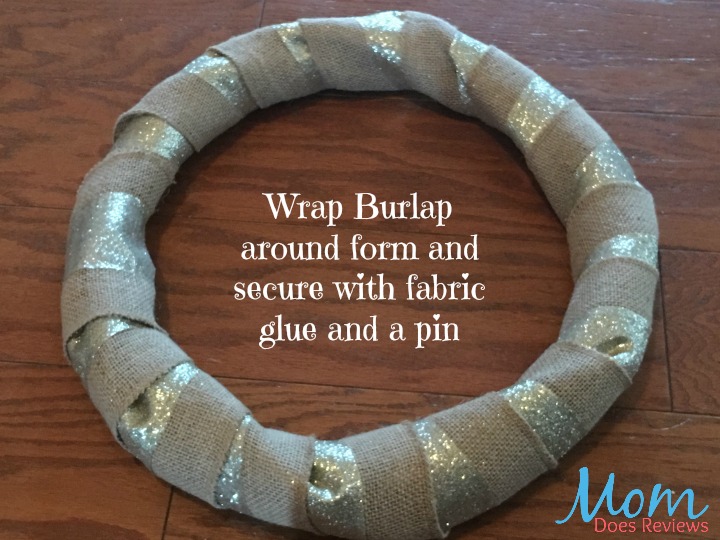
With this wreath, I used a lot of straight pins, like you would use for sewing. Because I was only born with two hands (I’m always saying I need more), I couldn’t hold the burlap down and wrap it around the form. So, I used a couple straight pins to hold the first end down and BOOM, it was easy to wrap from there. I also made sure that the gold stripe was showing with each circle of the burlap.
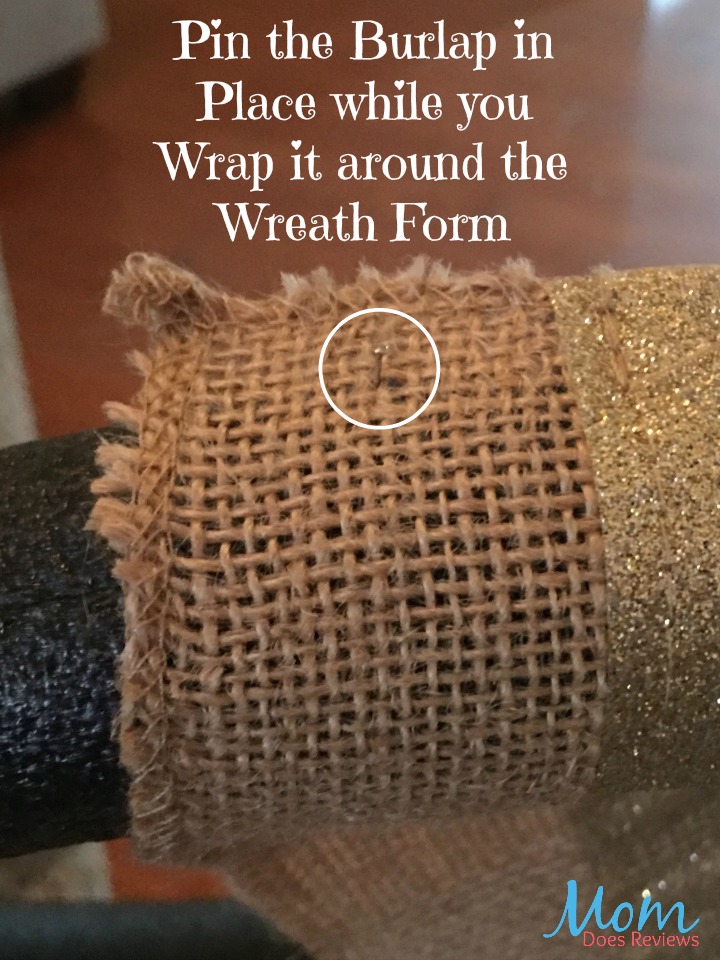
When the wrapping was completed, I secured the final end with fabric glue. I also used straight pins to hold the burlap down while the glue was drying. Hot glue should work as well.
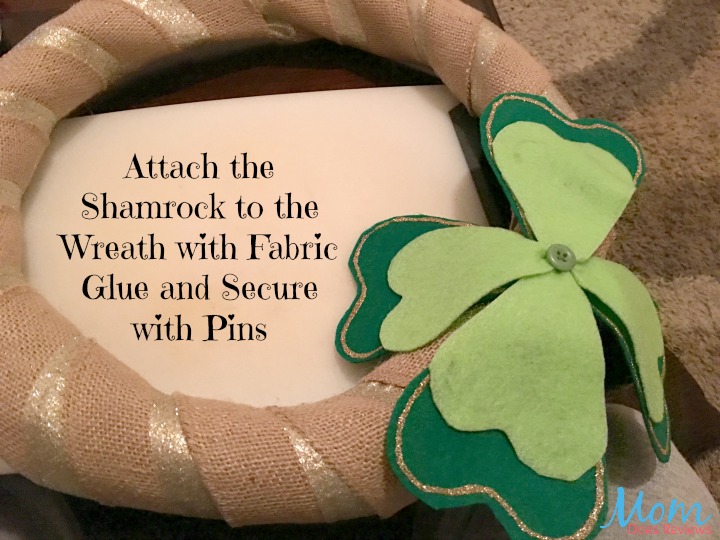
Using the glue again, I attached the clover to the burlap, pinning it in place while the glue dried. The smaller clover is going to be floppy (and possibly the large one). To counteract this floppiness, glue it down to the burlap. Use straight pins to secure it temporarily.
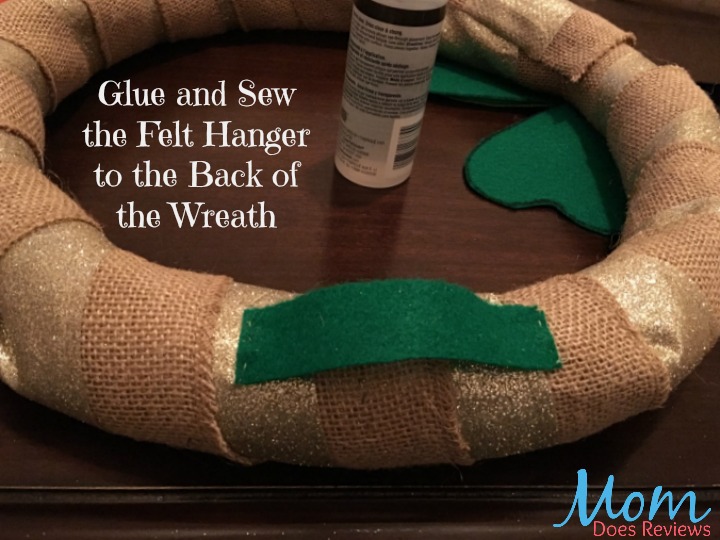
Using a little piece of felt, I cut out a strip to use on the back of the wreath as a hanger. I sewed it into place, also gluing for extra security.
I hung it on my door and earned a HUGE smile from my family. It brightens up our house’s entryway and will be bringing us some luck this year!